Configuring a Default Systems Administrator for Workload XM
Pre-tasks that are required before you can start enabling role based access in Workload XM.
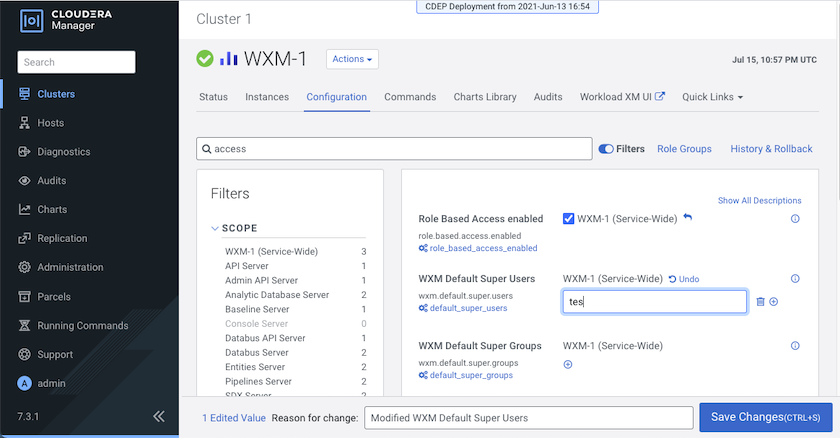
Before you can assign access roles in Workload XM you must first enable role based access and configure a default systems administrator. Both tasks are completed in Cloudera Manager. Once configured, the default administrator (also known as a superuser) can log into the Workload XM UI and assign the System Admin access policy role to one or more users.
-
According to your requirements, do one of the following:
- In the WXM (Service Wide) field of the WXM Default Super Users property, enter either the user name or the account name of a system administrator who is to be granted access to perform administration tasks in Workload XM. By default, admin.
- In the WXM (Service Wide) field of the WXM Default Super Groups property, enter the group account name of your LDAP admin group. For example, admin_grp.