Activating the Telemetry Publisher service for Workload XM.
Describes how to enable the Telemetry Publisher service for Workload XM.
Verify that you have the following values before enabling the Telemetry Publisher
service, as you will be required to supply their values during this task.
The Telemetry Publisher access credentials, which are required to register
the Telemetry Publisher account.
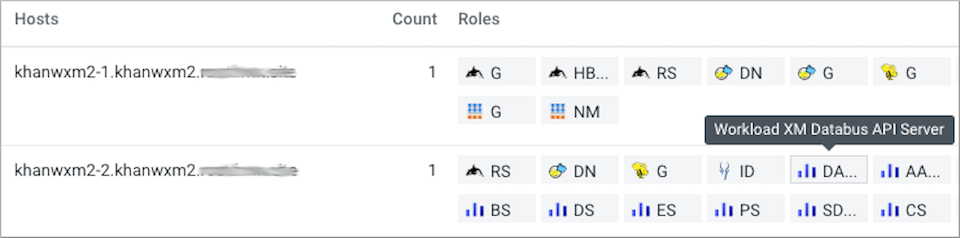
The name of the node that contains the Workload XM Databus API
Server role, by doing the following:
In Cloudera Manager, select Hosts and then
Roles.
Search for the Workload XM Databus API Server
role and record its host name. For example:Figure 1. Roles on the Workload XM On-Premises Cluster
In a supported web browser on a Workload cluster, log in to Cloudera
Manager.
In Cloudera Manager, select Clusters, locate and select
Cloudera Management Service, and then select the
Configuration tab.
Search for the Telemetry Publisher Advanced Configuration Snippet
(Safety Valve) for telemetrypublisher.conf property and in its
text field enter the following using the Workload XM Database API
Server host name that you recorded as a prerequisite for these steps:
If you have enabled TLS/SSL for the Databus API Server (ssl.enabled),
enter https.
If you have not enabled TLS/SSL for the Databus API Server, enter
http.
Click Save.
Back in the Cloudera Manager Home page, from the navigation panel, select
Administration and then External
Accounts.
In the External Accounts page, click the Altus
Credentials tab, which displays your resource access account
certificates.
Add a new Telemetry Publisher access account certificate by clicking
Add Access Key Authentication and then in the Add
Access Key Authentication dialog box do the following:
In the Name field, enter an identifiable name
for the Telemetry Publisher access key account.
In the Altus Access Key ID field, enter the
Telemetry Publisher Altus access key text exactly as provided.
From the Altus Private Key list, select
Choose File and then browse and select your
Telemetry Publisher Altus private key file.
Click Add, which saves the credentials as an
Altus account certificate using the account name you provided and adds
it on the Altus Credentials External Accounts page.
Back in the Cloudera Manager Home page, from the navigation panel, select
Administration and then
Settings.
Under the Filter CATEGORY section, select Altus.
Which populates the Settings page with your Telemetry Publisher access key
accounts.
From the Altus options, select the Telemetry Publisher Altus account
certificate option that you require for this Workload Cluster. In this case, the
name you provided in step 7a.
Click Save Changes.
Back in the Cloudera Manager Home page, in the Cloudera Management Service
section at the bottom of the Status page, select Cloudera Management
Service.
In the Health Tests section, select Telemetry Publisher.
From the Actions menu, select Start this
Telemetry Publisher.
In the Start message, confirm starting the Telemetry Publisher Service on your
cluster by clicking Start.
Monitor the start progress until the Successfully started
service message appears and then click
Close.