Managing your Auto Actions
Steps for updating, deleting, duplicating, and disabling an auto action.
The following Auto Actions management tasks are performed in the Auto Actions Management page, which is accessed by selecting Auto Actions in the Workload XM Navigation side-bar.
Updating your Auto Action
Deleting an Auto Action
Duplicating an Auto Action
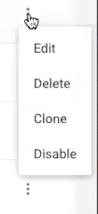
In the Auto Actions Management page, click the action’s vertical ellipsis, and select Clone. Replace the exisiting name with a new unique name for the cloned auto action, make any other changes, and then click Create. A new auto action is created and is displayed on the Auto Actions Management page.
Disabling an Auto Action
In the Auto Actions Management page, click the action’s vertical ellipsis, and select Disable. In the confirmation message, click OK to confirm. The action is no longer active and the Disabled state is displayed in the action’s Status column on the Auto Actions Management page.