Enabling Phoenix Operations in HBase
Sets the Phoenix service operations in HBase for your Workload XM environment. The properties are added in Cloudera Manager using safety valves, which safely enable the changes to the HBase service.
- Verify that the ZooKeeper maxClientCnxns property was set to 300.
- In a supported web browser on the Workload XM cluster, log in to Cloudera Manager.
- In Cloudera Manager, select Clusters, HBase, and then click the Configuration tab.
-
Search for the HBase Service Advanced Configuration Snippet (Safety
Valve) for hbase-site.xml property and do the following:
- Above the Name field of the HBase Service Advanced Configuration Snippet (Safety Valve) for hbase-site.xml property, click View as XML.
- In the XML field, add the following either before or after the existing XML:
<property> <name>hbase.regionserver.wal.codec</name> <value>org.apache.hadoop.hbase.regionserver.wal.IndexedWALEditCodec</value> <description>Set hbase.regionserver.wal.codec to enable custom Write Ahead Log ("WAL") edits to be written</description> </property> <property> <name>hbase.region.server.rpc.scheduler.factory.class</name> <value>org.apache.hadoop.hbase.ipc.PhoenixRpcSchedulerFactory</value> <description>Factory to create the Phoenix RPC Scheduler that uses separate queues for index and metadata updates</description> </property> <property> <name>hbase.rpc.controllerfactory.class</name> <value>org.apache.hadoop.hbase.ipc.controller.ServerRpcControllerFactory</value> <description>Factory to create the Phoenix RPC Scheduler that uses separate queues for index and metadata updates</description> </property> <property> <name>phoenix.functions.allowUserDefinedFunctions</name> <value>true</value> <description>enable UDF functions</description> </property> <property> <name>phoenix.queryserver.serialization</name> <value>JSON</value> <description>serialization format between client and query server</description> </property> <property><name>hbase.server.keyvalue.maxsize</name> <value>52428800</value> <description>limits max file size for blobs</description> </property> <property> <name>phoenix.schema.isNamespaceMappingEnabled</name><value>true</value> </property> <property> <name>hbase.ipc.server.max.callqueue.size</name> <value>2147483648</value> </property> -
Search for the HBase Client Advanced Configuration Snippet (Safety
Valve) for hbase-site.xml property and do the following:
- Click View as XML.
- In the XML field, add the following either before or after the existing
XML:
<property>
<name>phoenix.functions.allowUserDefinedFunctions</name>
<value>true</value>
</property>
<property>
<name>phoenix.schema.isNamespaceMappingEnabled</name>
<value>true</value>
</property>
-
Search for the Write-Ahead Log (WAL) Codec Class
property and verify that the property is set to the following value:
org.apache.hadoop.hbase.regionserver.wal.IndexedWALEditCodec -
Do the following:
- Search for the Maximum Size of HBase Client KeyValue property and set the value to 50 Mib.
- Search for the HBase RegionServer Handler Count property and set the value to 40.
- Search for the HStore Blocking Store Files property and set the value to 100.
- Optional: If you are installing Workload XM on a Kerberized environment, search for the HBase Superusers property and verify that the wxm user is added.
- Click, Save Changes.
-
Back in the Cloudera Manager Home page, select Clusters,
Phoenix, and then click the
Configuration tab.
-
Search for the Query Server Advanced Configuration Snippet (Safety
Valve) for phoenix-site.xml property by entering
snippet and do the following:
- Click View as XML.
- In the XML field, add the following either before or after the existing
XML:
<property>
   <name>phoenix.queryserver.serialization</name>
   <value>JSON</value>
   <description>serialization format between client and query server</description>
</property>
<property>
   <name>phoenix.schema.isNamespaceMappingEnabled</name>
   <value>true</value>
</property>
- Click, Save Changes.
-
Apply your changes and restart the HBase and Phoenix services, by doing the
following:
- Back in the Cloudera Manager Home page, select the Status tab and then from the Actions menu, denoted by the vertical ellipses icon, select Deploy Client Configuration.
- In the Deploy Client Configuration message, confirm deployment by clicking Deploy Client Configuration.
- Monitor the progress of the client's configuration deployment until you see the successfully deployed message.
- Click Close.
-
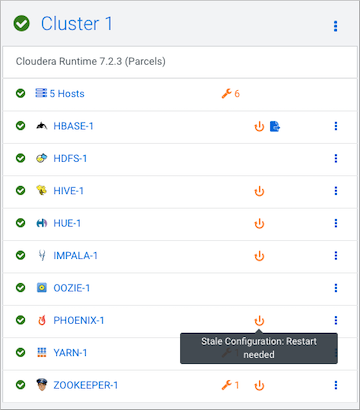
Back in the Cloudera Manager Home page, select the
Status tab.
Notice that the Stale Configuration: Restart needed indicator is displayed for both the HBase and Phoenix services.
-
Restart the HBase and Phoenix services by doing one of the following:
- Click the HBase or Phoenix vertical ellipses icon and then select Restart.
- Click the HBase or Phoenix Stale Configuration indicator.
- In the Stale Configurations page, click Restart Stale Services.
- In the Restart Stale Services page, select the Re-deploy client configuration check box and click Restart Now.
- Monitor the restart progress until the All requested services successfully restarted message appears and then click Finish.