Install, Configure, and Deploy a HDP Cluster with HCP
You can use the Ambari Install wizard running in your browser to install, configure, and deploy your cluster.
-
Enter the set up information for which the install wizard prompts you.
You need to supply the fully qualified domain name (FQDN) of each of your hosts. The wizard also needs to access the private key file you created in Set Up Password-less SSH. Using the host names and key file information, the wizard can locate, access, and interact securely with all hosts in the cluster.
-
Use the Target Hosts text box to enter your list of
host names, one per line.
You can use ranges inside brackets to indicate larger sets of hosts. For example, for host01.domain through host10.domain use host[01-10].domain
 NoteIf you are deploying on EC2, use the internal Private DNS host names.
 -
If you want to let Ambari automatically install the Ambari Agent on all your
hosts using SSH, select Provide your SSH Private Key and
either use the Choose File button in the Host
Registration Information section to find the private key file
that matches the public key you installed earlier on all your hosts or cut and
paste the key into the text box manually.
NoteIf you are using Internet Explorer 9, the
Choose Filebutton might not appear. Use the text box to cut and paste your private key manually. Fill in the user name for the SSH key you have selected. If you do not want to use root , you must provide the user name for an account that can execute sudo without entering a password.
-
Use the Target Hosts text box to enter your list of
host names, one per line.
-
Choose the services to install onto the cluster, and then click
Next.
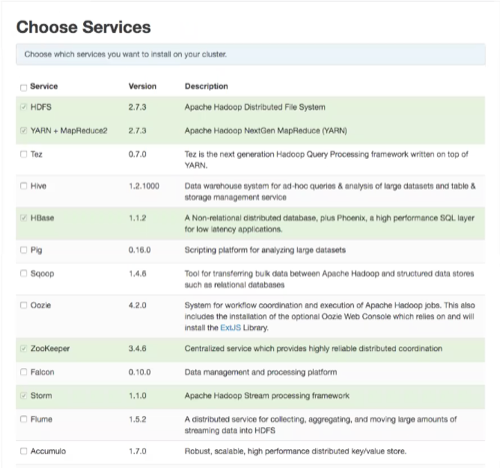
HCP requires the following services:- HDFS
- HBase
- ZooKeeper
- Storm
- Kafka
- Ambari Metric Service
- Metron
- Elasticsearch (Can be installed either manually or by Ambari. Hortonworks recommends installing Elasticsearch by Ambari.)
- Kibana (Can be installed either manually or by Ambari. Hortonworks recommends installing Kibana by Ambari.)
- Zeppelin Notebook
- Spark
- Hive
- Tez
- Yarn
Ambari displays the Assign Masters window. -
Use the Assign Masters window to assign the Master
components to the appropriate hosts in your cluster.
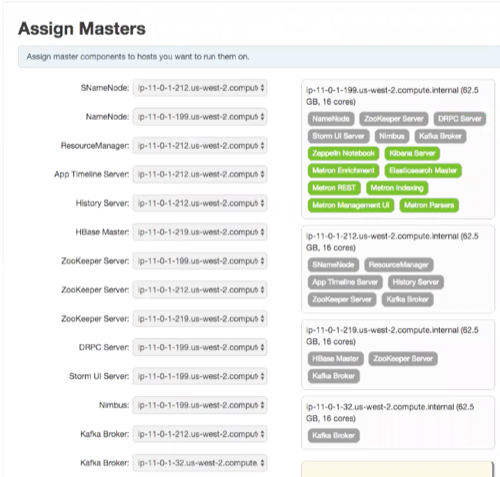
If Ambari detects any errors in your master component assignments, it will indicate the error in red. -
Use the Assign Slaves and Clients window to assign cluster
nodes (DataNodes, NodeManagers, and RegionServers) to run with worker processes such
as Elasticsearch.
-
Check the Client checkbox for any components that have
the Supervisor checkbox checked.

-
Check the Client checkbox for any components that have
the Supervisor checkbox checked.
-
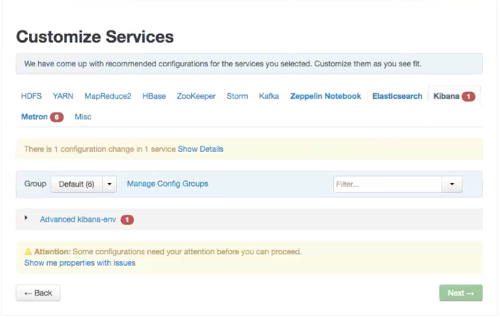
Use the Customize Services window to configure or customize
cluster service property settings.
-
Browse through each service tab.
Any tab that requires input displays a red badge with the number of properties that need attention. Select each service tab that displays a red badge number and enter the appropriate information.By hovering your cursor over each of the properties, you can see a brief description of what the property does. The number of service tabs shown depends on the services you decided to install in your cluster.The following is a list of service tabs for which you need to provide information:
- Kibana
- kibana_es_url
- Metron
-
The Metron tab contains a few tabs that contain information that is critical to HCP set up.
-
- Index Settings tab
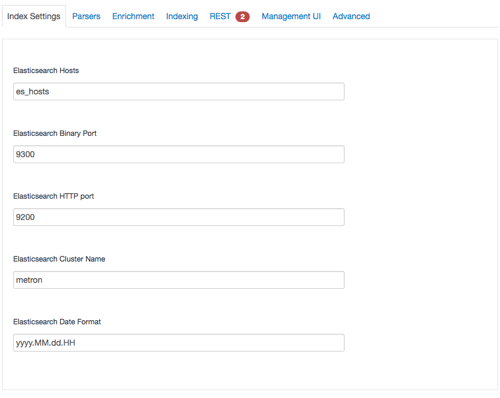
- Elasticsearch Hosts
- A comma separated list of Elasticsearch data nodes that you identified in Step 10.
- Index Settings tab
- REST tab
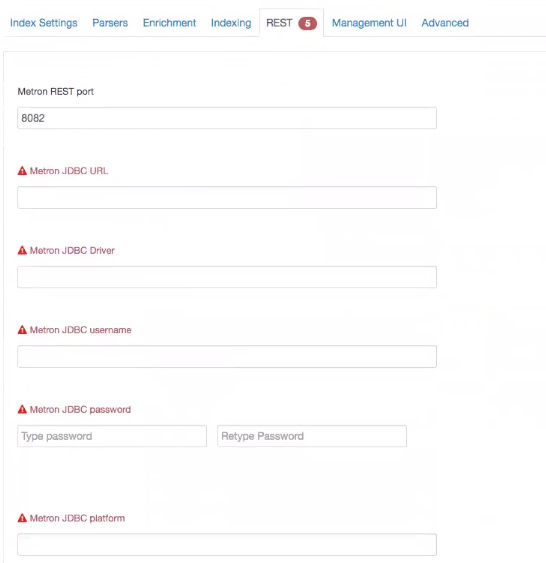
- JDBC URL
jdbc:mysql://mysql_host:3306/metronrest- JDBC Driver
com.mysql.jdbc.Driver
- JDBC Username
- Metron REST user name
- JDBC Password
- Metron REST password
- Metron JDBC client path
<MYSQL_JAVA_CONNECTOR_PATH>/mysql-connector-java-5.1.41-bin.jar
- Advanced Tab (Metron)
- Most of the fields in the Advanced tab are auto populated and should not be modified.
- Misc tab
- The service account users and groups are available under the Misc tab. These are the operating system accounts the service components will run as. If these users do not exist on your hosts, Ambari will automatically create the users and groups locally on the hosts. If these users already exist, Ambari will use those accounts.
-
Browse through each service tab.
-
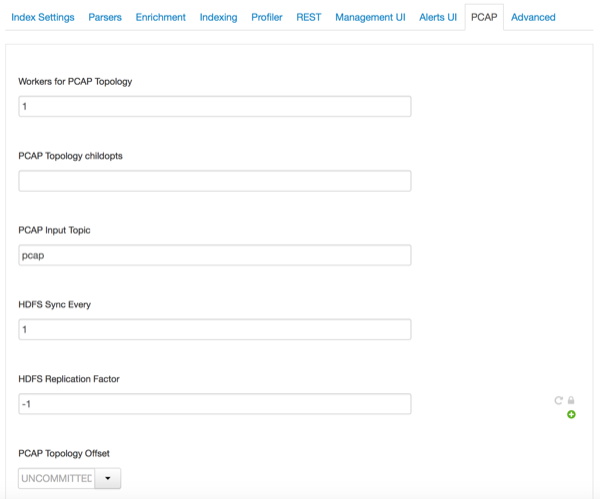
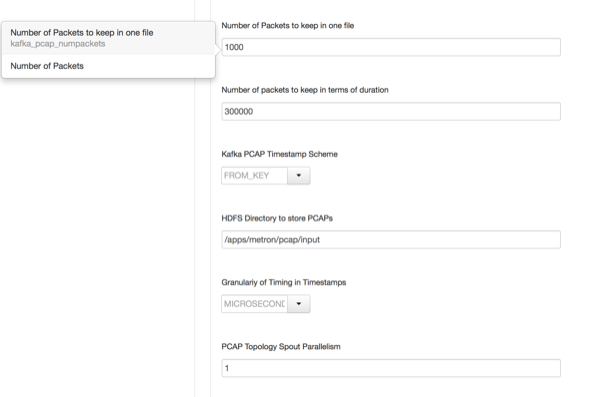
OPTIONAL: Configure the PCAP topology by setting your PCAP properties in the
PCAP tab.
- Check the assignments displayed by Ambari to ensure that everything is correct, and then click
Deploy.