
To enable remote scripting and to configure right domain policies for Windows Remote Management complete the following instructions on a domain controller machine (all actions are performed via \/):
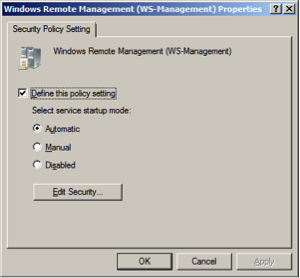
Set the WinRM service to auto start.
Go to -> -> -> -> -> .
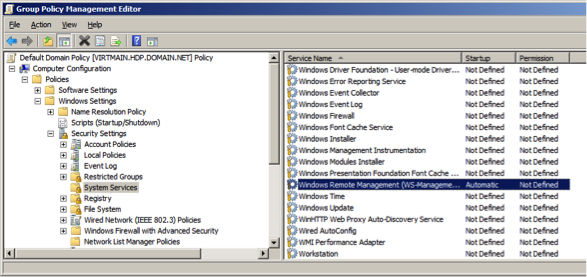
Set Startup Mode to Automatic.
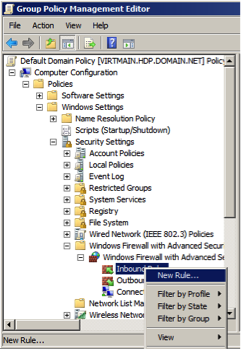
Add firewall exceptions to allow the service to communicate.
Go to -> -> -> -> .
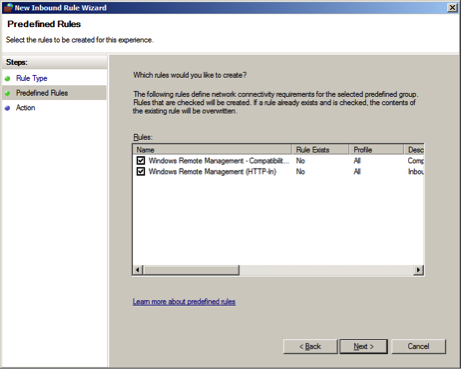
Right click on to create a new Inbound Rule.
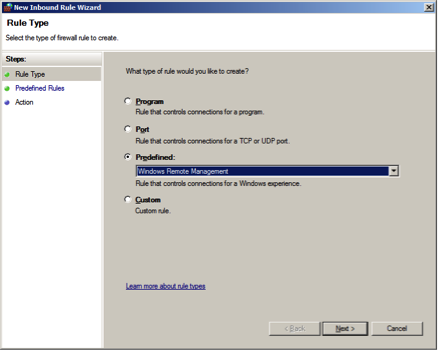
Select the type of rule as as .
The Predefined rule will automatically create two rules as shown below:
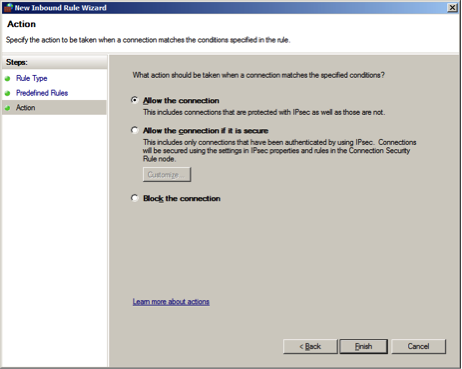
Configure the Action as and click .
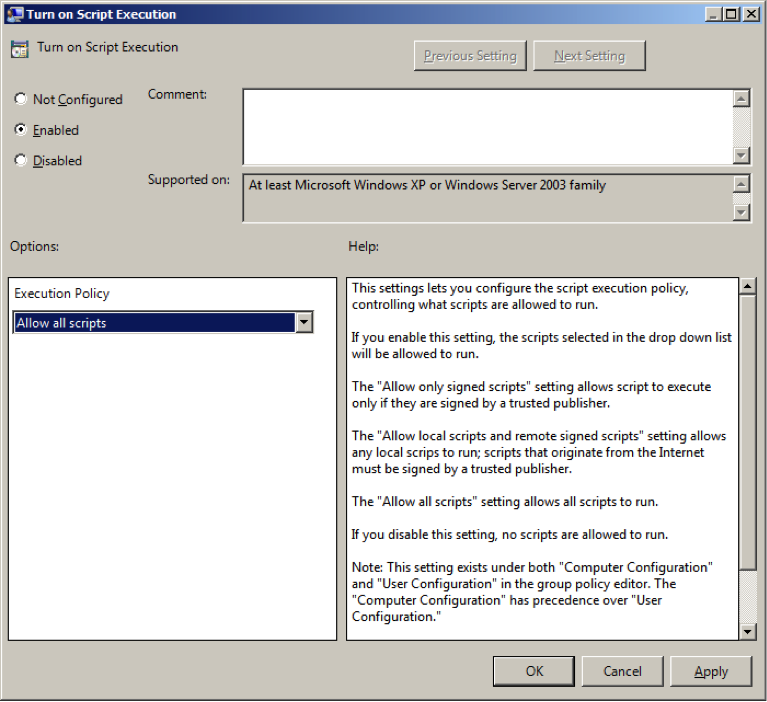
Set script execution policy.
Go to -> -> -> -> .
Enable .
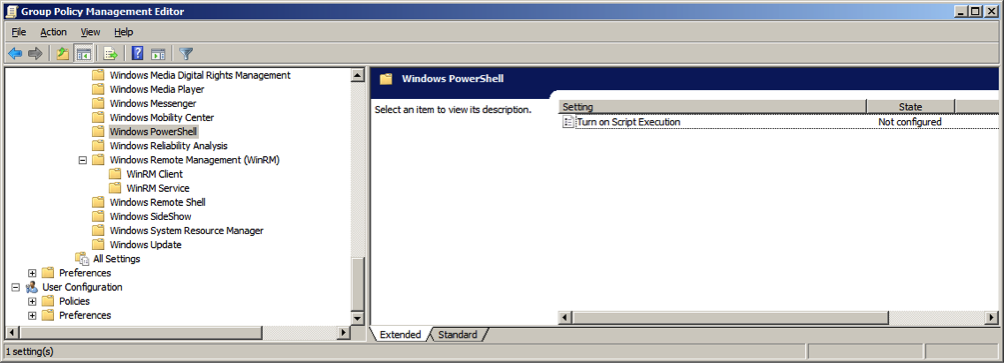
Set Execution Policy to .
Setup WinRM service.
Go to -> -> -> -> -> .
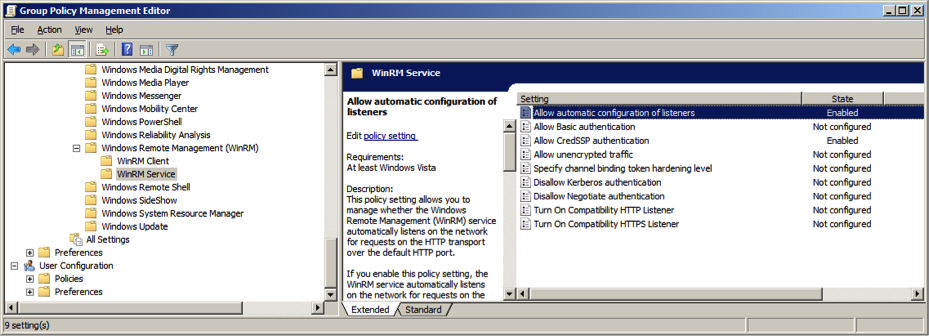
Create a WinRM listener.
To allow automatic configuration of listeners, select Enabled.
Set IPv4 filter to
*(all addresses or specify range)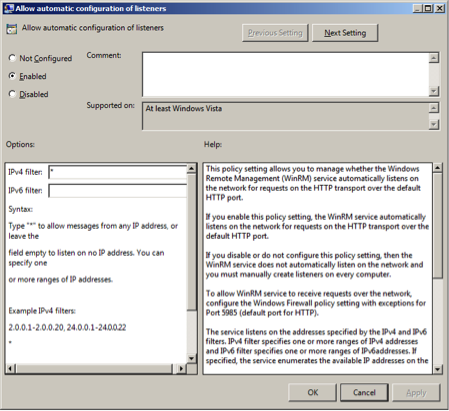
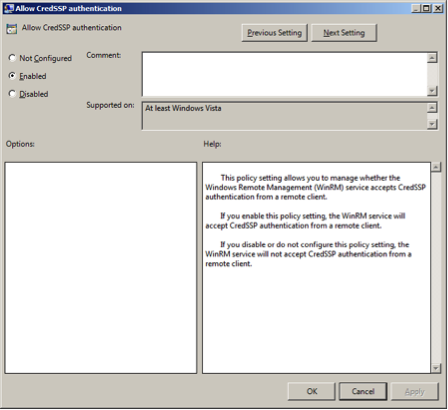
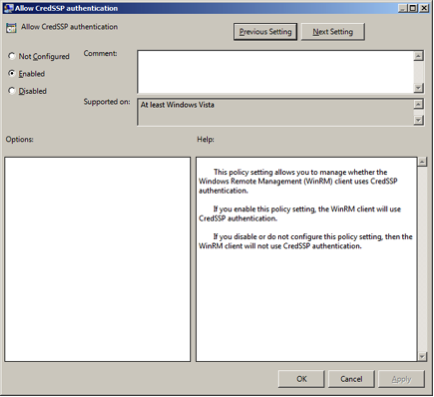
Allow CredSSP authentication and click OK.
Setup WinRM client.
Go to -> -> -> -> -> .
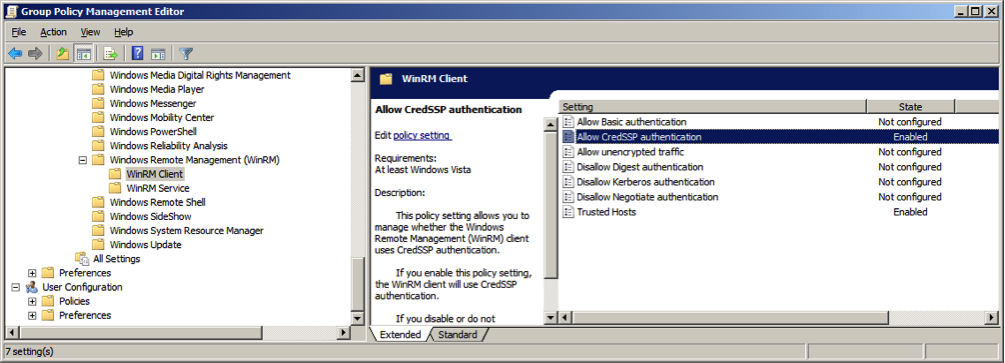
Configure the trusted host list (the IP addreses of the computers that can initate connections to the WinRM service). To do this, set TrustedHostsList to
*(all addresses or specify range).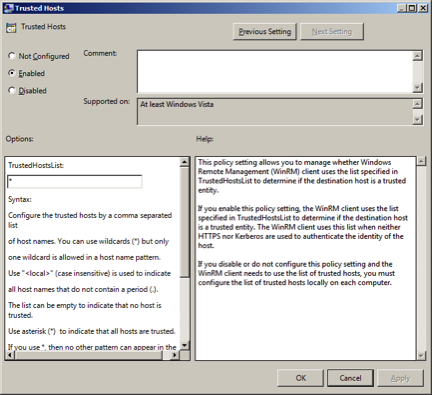
Allow CredSSP authentication and click OK.
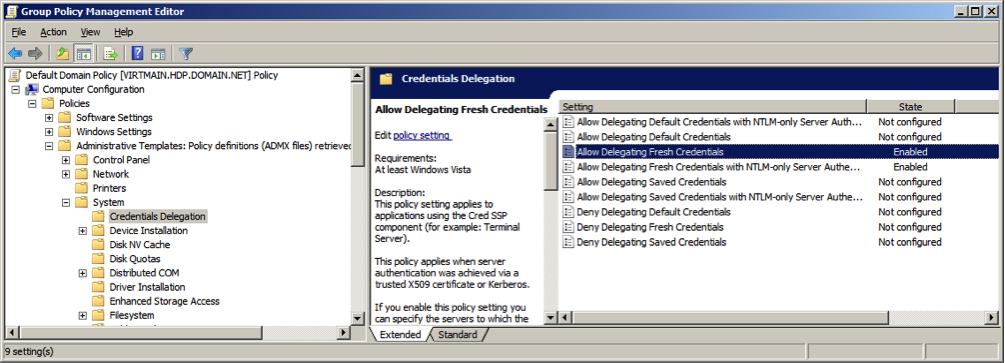
Enable credentials delegation.
Go to -> -> -> -> .
Select Enabled to allow delegation fresh credentials.
Under Options click on . Set WSMAN to
*(all addresses or specify range). Click on Next Setting.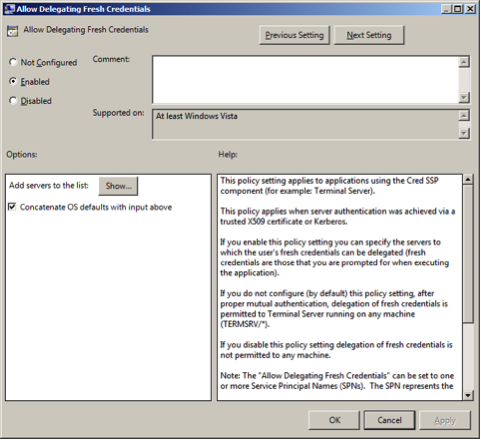
Select Enabled to allow delegation fresh credentials with NTLM-only server authentication.
Under Options click on . Set WSMAN to
*(all addresses or specify range). Click on Finish.
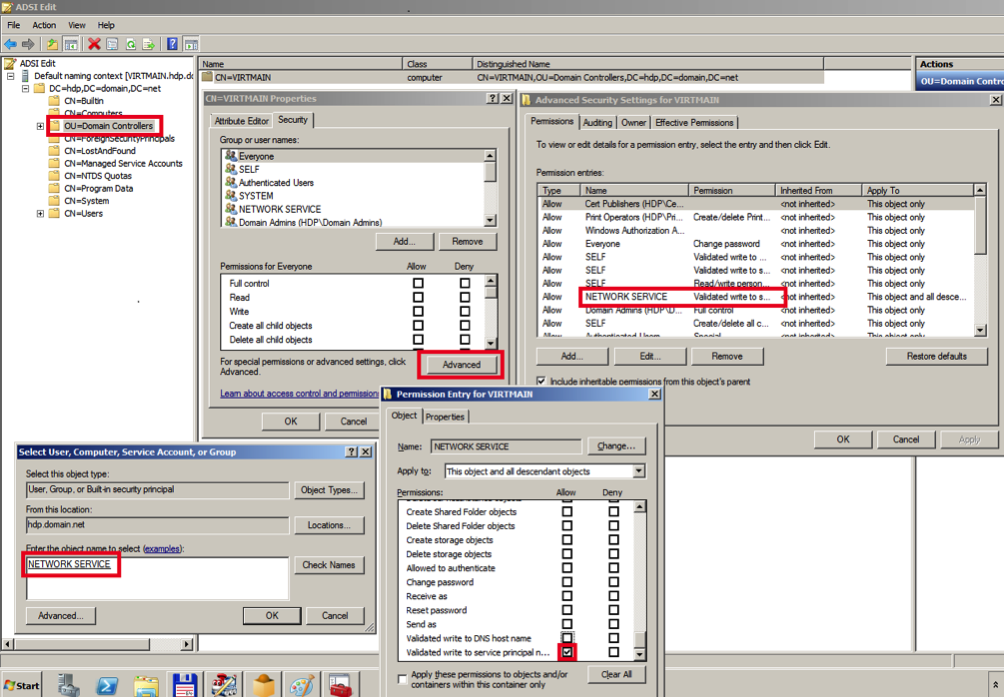
Enable creating WSMAN SPN.
Go to -> . In the dialog box, type
ADSIEdit.mscand click .Expand menu item and select . Go to Properties -> Security -> Advanced -> Add.
Enter NETWORK SERVICE, click , then . In the Permission Entry select Validated write to service principal name. Click and to save your changes.
Restart WinRM service and update policies.
On the domain controller machine, execute the following commands in PowerShell:
Restart-Service WinRM
On other hosts in domain, execute the following commands:
gpupdate /force
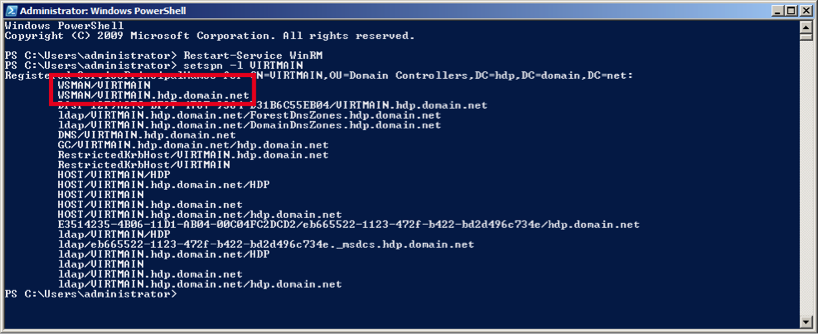
Ensure that SPN-s WSMAN is created for your environment. Execute the following command on your domain controller machine:
setspn -l $Domain_Controller_Hostname
You should see output similar to the following:
Check the WSMAN SPN on other host in domain. Execute the following command on any one of your host machines:
setspn -l $Domain_Controller_Hostname
You should see output similar to the following:

