

Installing Spark Over Ambari
The following diagram shows the Spark installation process using Ambari. (For general information about installing HDP components using Ambari, see Adding a Service in the Ambari Documentation Suite.)

To install Spark using Ambari, complete the following steps.
![[Note]](../common/images/admon/note.png) | Note |
|---|---|
If you wish to install the Spark Thrift Server, you can install it during component installation (described in this subsection) or at any time after Spark has been installed and deployed. To install the Spark Thrift Server later, add the optional STS service to the specified host. For more information, see "Installing the Spark Thrift Server after Installing Spark" (later in this chapter). Before installing the Spark Thrift Server, make sure that Hive is deployed on your cluster. |
Choose the Ambari "Services" tab.
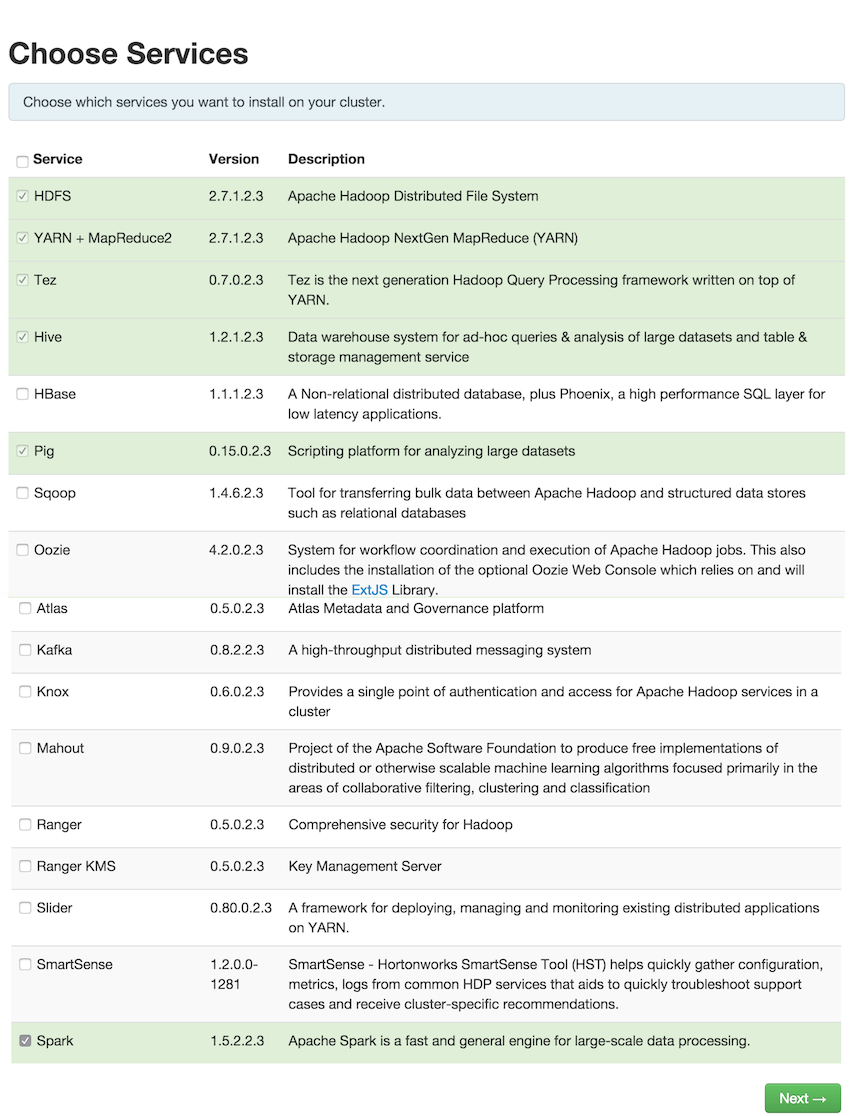
In the Ambari "Actions" pulldown menu, choose "Add Service." This will start the Add Service Wizard. You'll see the Choose Services screen.
Select "Spark", and click "Next" to continue.
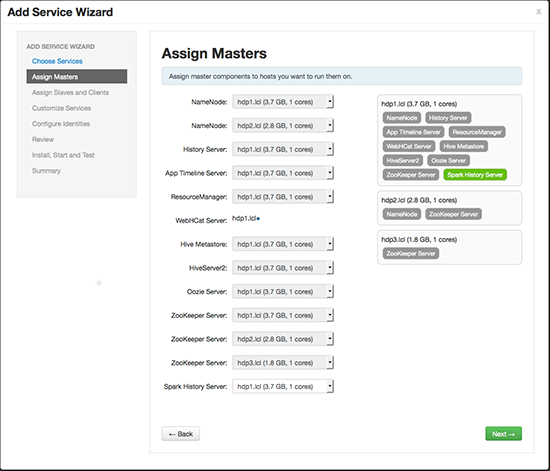
On the Assign Masters screen, review the node assignment for the Spark History Server. Modify the assignment if desired.
Click "Next" to continue.
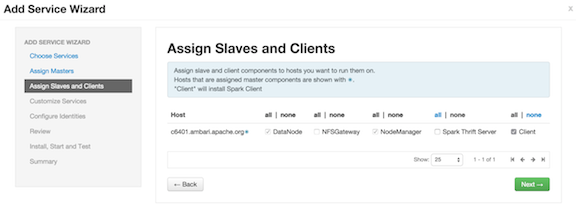
On the Assign Slaves and Clients screen:
Specify the node(s) that will run Spark clients. These nodes will be the nodes from which Spark jobs can be submitted to YARN.
(Optional) If you are installing the Spark Thrift Server at this time, review the node assignments for the Spark Thrift Server. Assign one or two nodes to the Spark Thrift Server, as needed.
Click "Next" to continue.
(Optional) On the "Customize Services" screen: If you are installing the Spark Thrift Server at this time, choose the "Spark" tab and navigate to the "Advanced spark-thrift-sparkconf" group. Set the
spark.yarn.queuevalue to the name of the YARN queue that you want to use.Aside from the YARN queue setting, we recommend that you use default values for your initial configuration. For additional information about configuring property values, see Customizing Dynamic Resource Allocation and Spark Thrift Server Settings.
Click "Next" to continue.
Ambari will display the Review screen.
![[Important]](../common/images/admon/important.png)
Important On the Review screen, make sure all HDP components are version 2.3.4 or later.
Click "Deploy" to continue.
Ambari will display the Install, Start and Test screen. The status bar and messages will indicate progress.
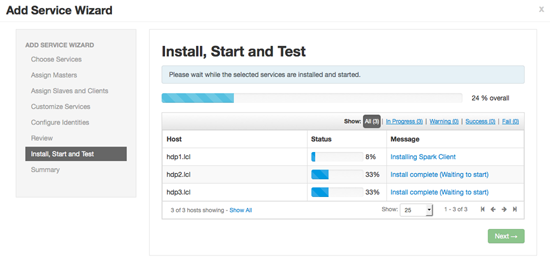
When finished, Ambari will present a summary of results. Click "Complete" to finish installing Spark.
![[Caution]](../common/images/admon/caution.png) | Caution |
|---|---|
Ambari will create and edit several configuration files. Do not edit these files directly if you configure and manage your cluster using Ambari. |