

Chapter 2. Installing Apache Storm
Before installing Storm, ensure that your cluster meets the following prerequisites:
HDP cluster stack version 2.5.0 or later.
(Optional) Ambari version 2.4.0 or later.
Although you can install Apache Storm on a cluster not managed by Ambari (see Installing and Configuring Apache Storm in the Non-Ambari Cluster Installation Guide), this chapter describes how to install Storm on an Ambari-managed cluster.
![[Note]](../common/images/admon/note.png) | Note |
|---|---|
Storm is not supported on the Windows operating system. |
Before you install Storm using Ambari, refer to Adding a Service in the Ambari Operations Guide for background information about how to install HDP components using Ambari.
To install Storm using Ambari, complete the following steps.
Click the Ambari "Services" tab.
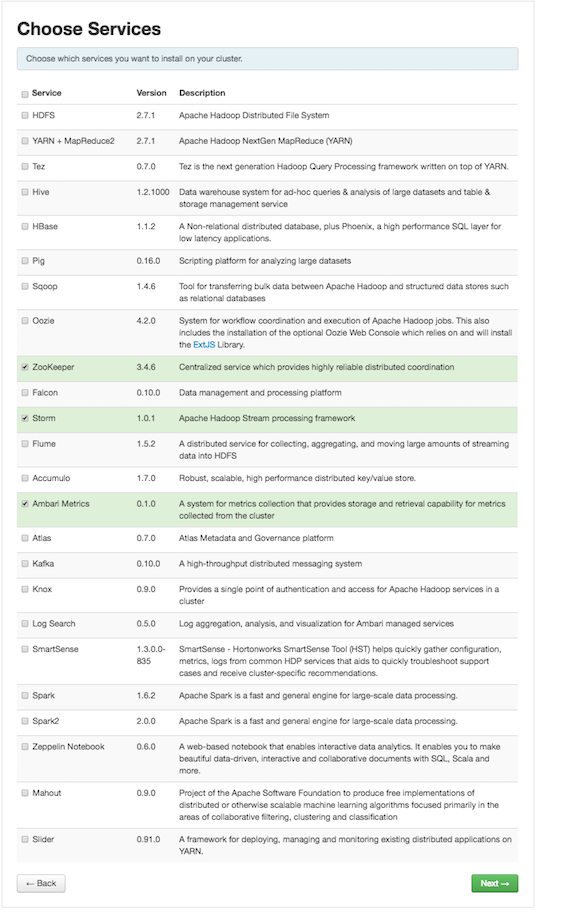
In the Ambari "Actions" menu, select "Add Service." This starts the Add Service Wizard, displaying the Choose Services screen. Some of the services are enabled by default.
Scroll down through the alphabetic list of components on the Choose Services page, select "Storm", and click "Next" to continue:
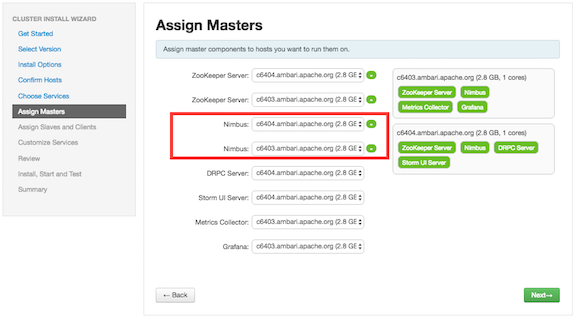
On the Assign Masters page, review node assignments for Storm components.
If you want to run Storm with high availability of nimbus nodes, select more than one nimbus node; the Nimbus daemon automatically starts in HA mode if you select more than one nimbus node.
Modify additional node assignments if desired, and click "Next".
On the Assign Slaves and Clients page, choose the nodes that you want to run Storm supervisors and clients:
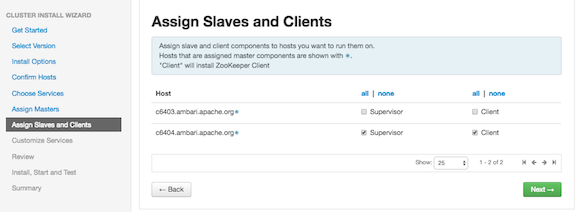
Storm supervisors are nodes from which the actual worker processes launch to execute spout and bolt tasks.
Storm clients are nodes from which you can run Storm commands (
jar,list, and so on).Click "Next" to continue.
Ambari displays the Customize Services page, which lists a series of services:

For your initial configuration you should use the default values set by Ambari. If Ambari prompts you with the message "Some configurations need your attention before you can proceed," review the list of properties and provide the required information.
For information about optional settings that are useful in production environments, see Configuring Apache Storm.
Click "Next" to continue.
When the wizard displays the Review page, ensure that all HDP components correspond to HDP 2.5.0 or later:
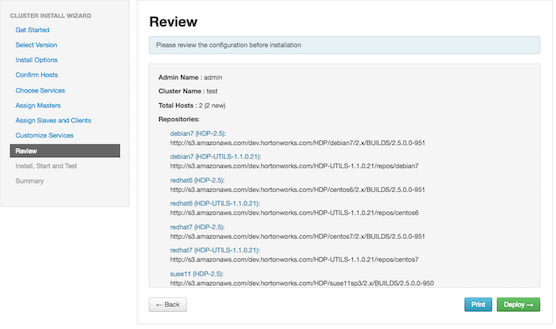
Click "Deploy" to begin installation.
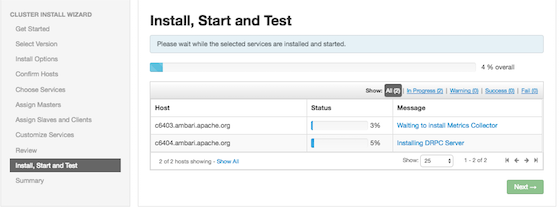
Ambari displays the Install, Start and Test page. Review the status bar and messages for progress updates:
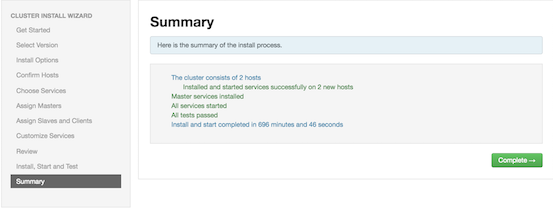
When the wizard presents a summary of results, click "Complete" to finish installing Storm:
To validate the Storm installation, complete the following steps:
Point your browser to the Storm UI URL for Ambari:
http://<storm-ui-server>:8744You should see the Storm UI web page.
Submit the following command:
storm jar
                    /usr/hdp/current/storm-client/contrib/storm-starter/storm-starter-topologies-*.jar
                    org.apache.storm.starter.WordCountTopology wordcount
The WordCount sample topology should run successfully.