Tutorial: developing and deploying a JDBC Source dataflow in Kafka Connect using Stateless NiFi
A step-by step tutorial that walks you through how you can create a JDBC Source dataflow and how to deploy the dataflow as a Kafka Connect connector using the Stateless NiFi Source connector. The connector/dataflow presented in this tutorial reads records from an Oracle database table and forwards them to Kafka in JSON format.
- Look up the Stateless NiFi plugin version either by using the Streams Messaging
Manager (SMM) UI, or by logging into a Kafka Connect host and checking the
Connect plugin directory.
- Access the SMM UI, and click
 Connect in the navigation sidebar.
 - Click the
 New Connector option.
 - Locate the StatelessNiFiSourceConnector or
StatelessNiFiSinkConnector cards. The version is located
on the card.
The version is made up of multiple digits. The first three represent the NiFi version. For example, if the version on the card is
1.18.0.2.4.3.0-63, then you should use NiFi1.18.0to build your flow.
- Access the SMM UI, and click
- Download and start NiFi. You can download NiFi from https://archive.apache.org/dist/nifi/. This example uses NiFi 1.18.0 (nifi-1.18.0-bin.zip).
- The connector/dataflow developed in this tutorial requires the Oracle JDBC
driver to function. Ensure that the driver JAR is deployed and available on
every Kafka Connect host under the same path with correct file permissions. Note
down the location where you deploy the driver, you will need to set the location
as a property value during connector deployment. For
example:
cp ./ojdbc8-[***VERSION***].jar /var/lib/kafka_connect_jdbc/oracle-connector-java.jarchmod 644 /var/lib/kafka_connect_jdbc/oracle-connector-java.jar
-
In NiFi, create a process group and give it a name.
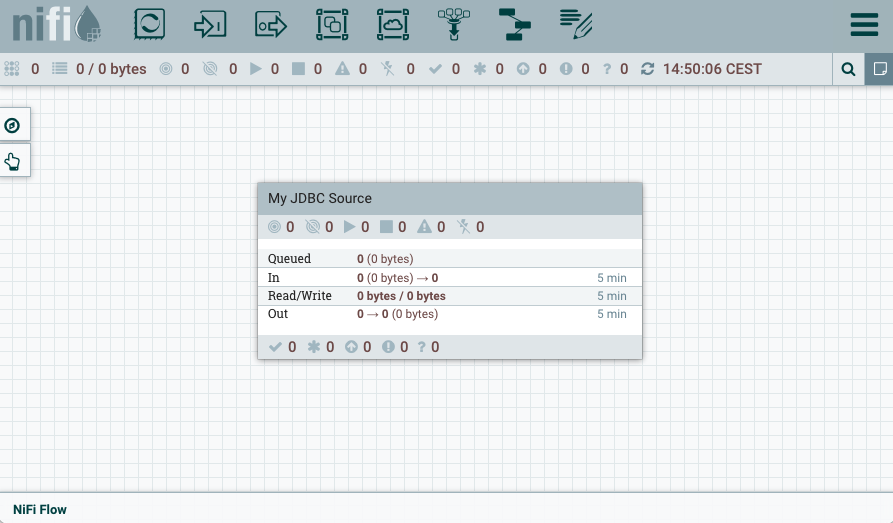
-
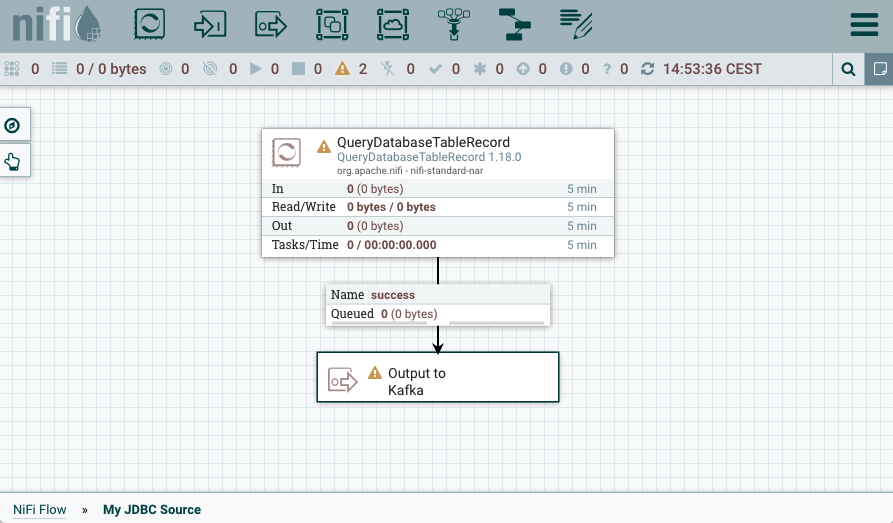
Add a QueryDatabaseTableRecord processor and an output port to the process
group.
Note down the name of the output port, you will need to set the name as the value of a connector property during connector deployment.
-
Add a DBCPConnectionPool and a JsonRecordSetWriter controller service to the
process group.
The controller services are required for the QueryDatabaseTableRecord processor to access the database and to convert records.
-
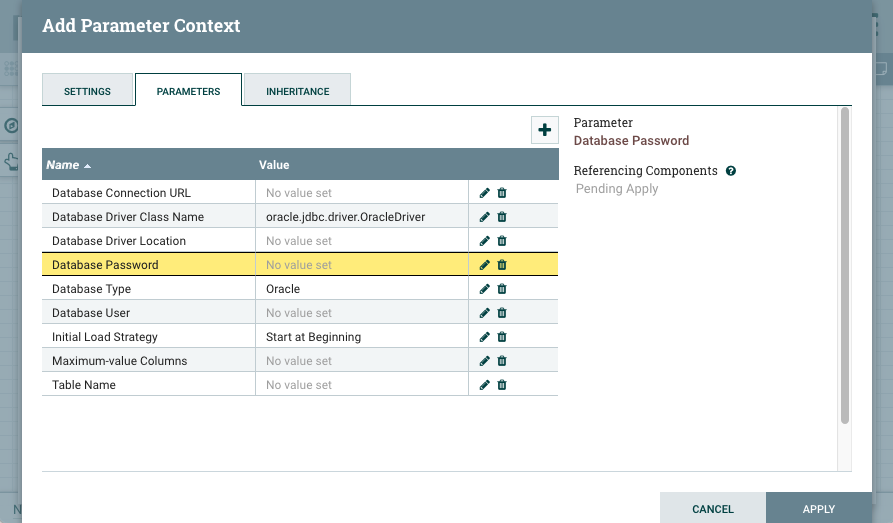
Create a parameter context, give it a name, and add the above mentioned
parameters to the parameter context.
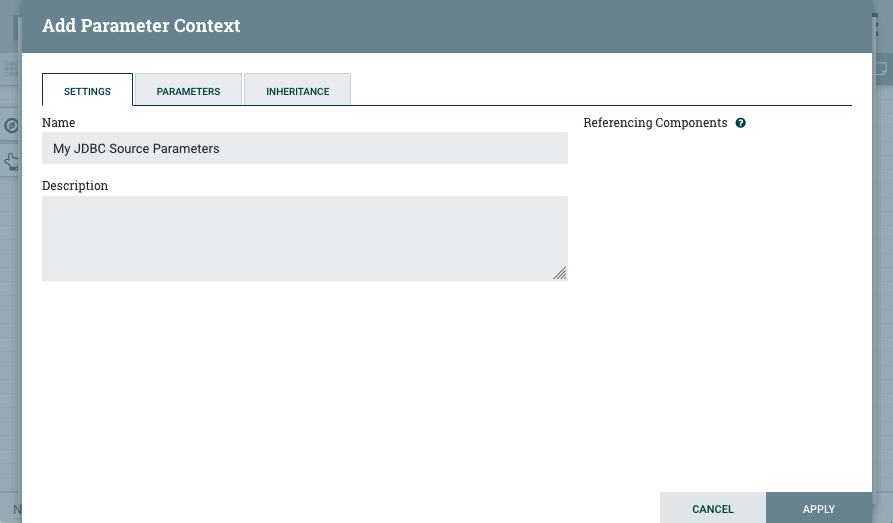
You can assign values to the parameters in this step. The values you assign here serve as default values for the parameters when the flow is deployed as a connector. Assigning values is not mandatory as all parameters will be configurable during connector deployment. However, assigning sensible default values is a good practice and makes the dataflow easier to deploy in Kafka Connect.
In this example, the connector will connect to an Oracle database. Therefore, values are specified for Database Driver Class Name and Database Type parameters. Additionally, Initial Load Strategy is set to Start at Beginning.
Ensure that you mark the Database Password parameter as a Sensitive Value during creation. This is because only sensitive parameters can be referenced from sensitive processor or controller service properties.
-
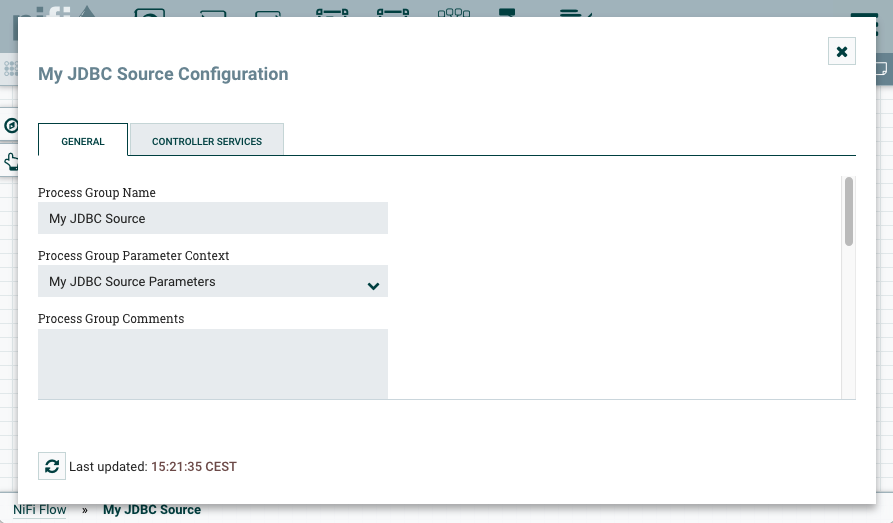
Assign the parameter context to the process group.
-
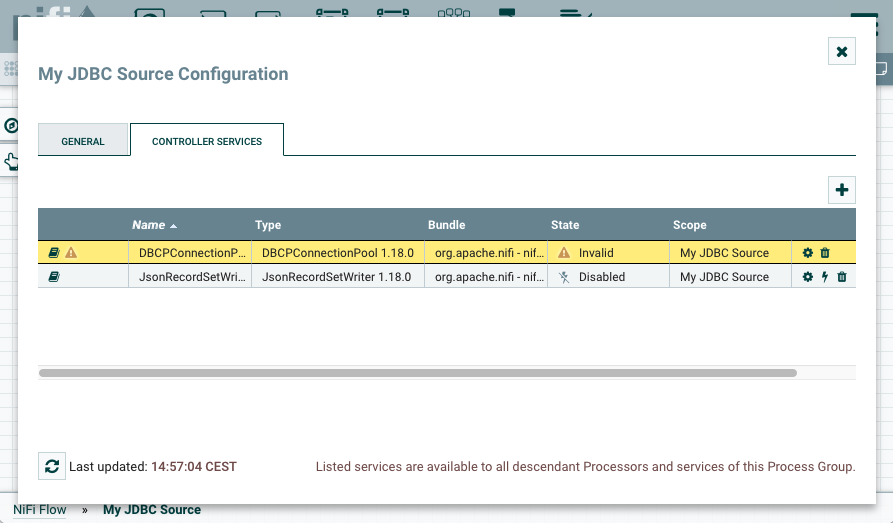
Reference the parameters from the processor and the controller services.
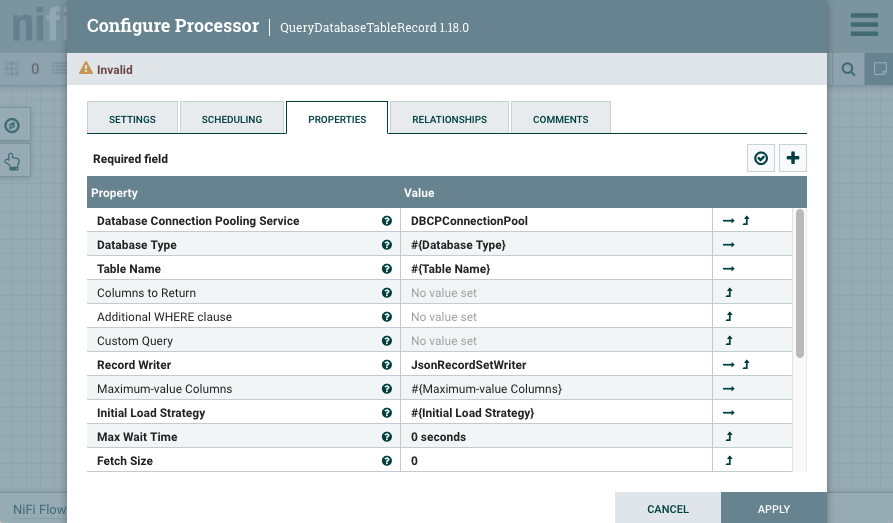

At this point, one controller service is invalid, and the other is disabled, but that is expected. Neither processors, nor controller services need to be valid, started, or enabled at this point.
-
Open the configuration of the QueryDatabaseTableRecord processor, and go to the
SCHEDULING tab.
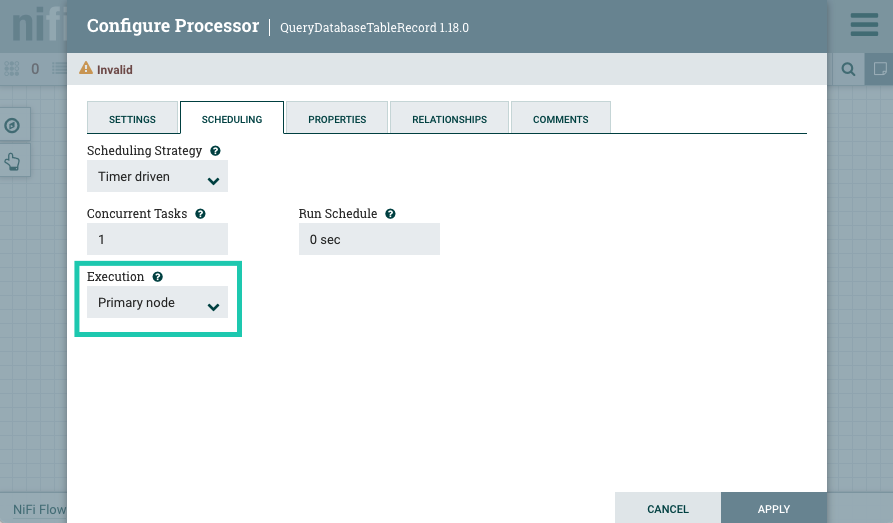
Notice that Execution is set to Primary node (which is the only option for this particular processor). For Stateless NiFi Kafka connectors, this setting means that the connector is going to be deployed with one task, regardless of the value of the
tasks.maxconnector property. -
At this point, your dataflow is in the following state.
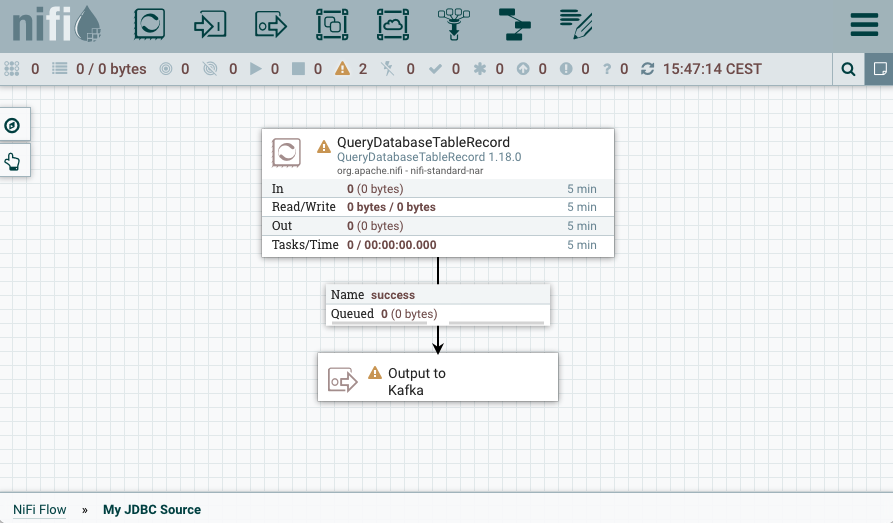
Notice how the dataflow is not running, and there are warnings present. This is expected. The dataflow does not need to run in order for you to be able to download the flow definition. The properties you must configure to make the dataflow function will be set later on during connector deployment.
-
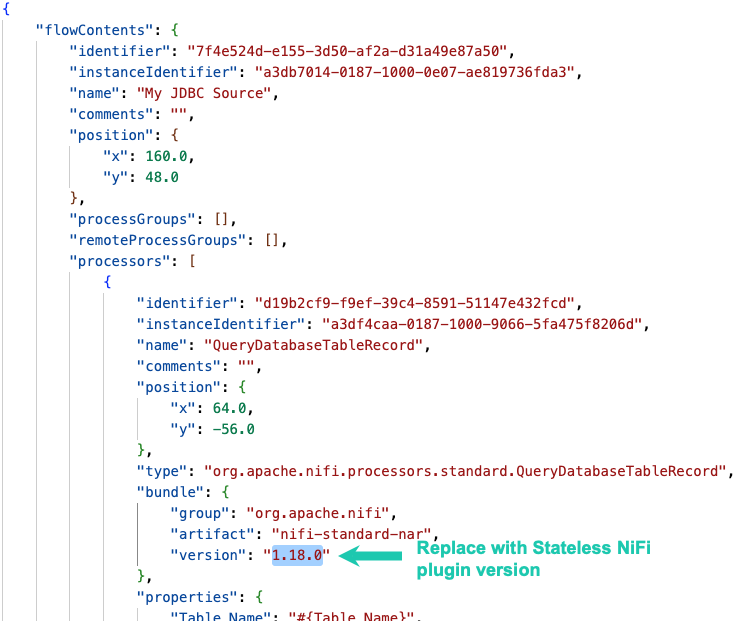
Open the downloaded JSON file, and replace every
occurrence of the version number (1.18.0) with the version number of
your Stateless NiFi plugin.
-
Click
 Connect in the navigation sidebar.
-
Click the
 New Connector option.
-
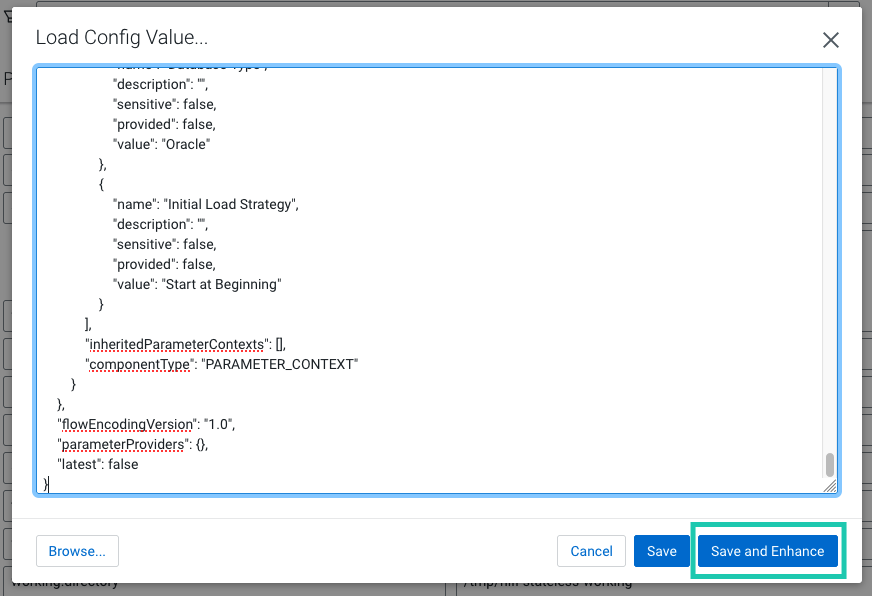
Configure the
flow.snapshotproperty.Theflow.snapshotproperty specifies the dataflow that the connector runs. This is the dataflow that you developed and exported as flow definition JSON in the previous steps. While you have multiple options when configuring this property, this tutorial uses the Import and Enhance option in SMM.-
Click
 found next to
flow.snapshot.
-
Click
-
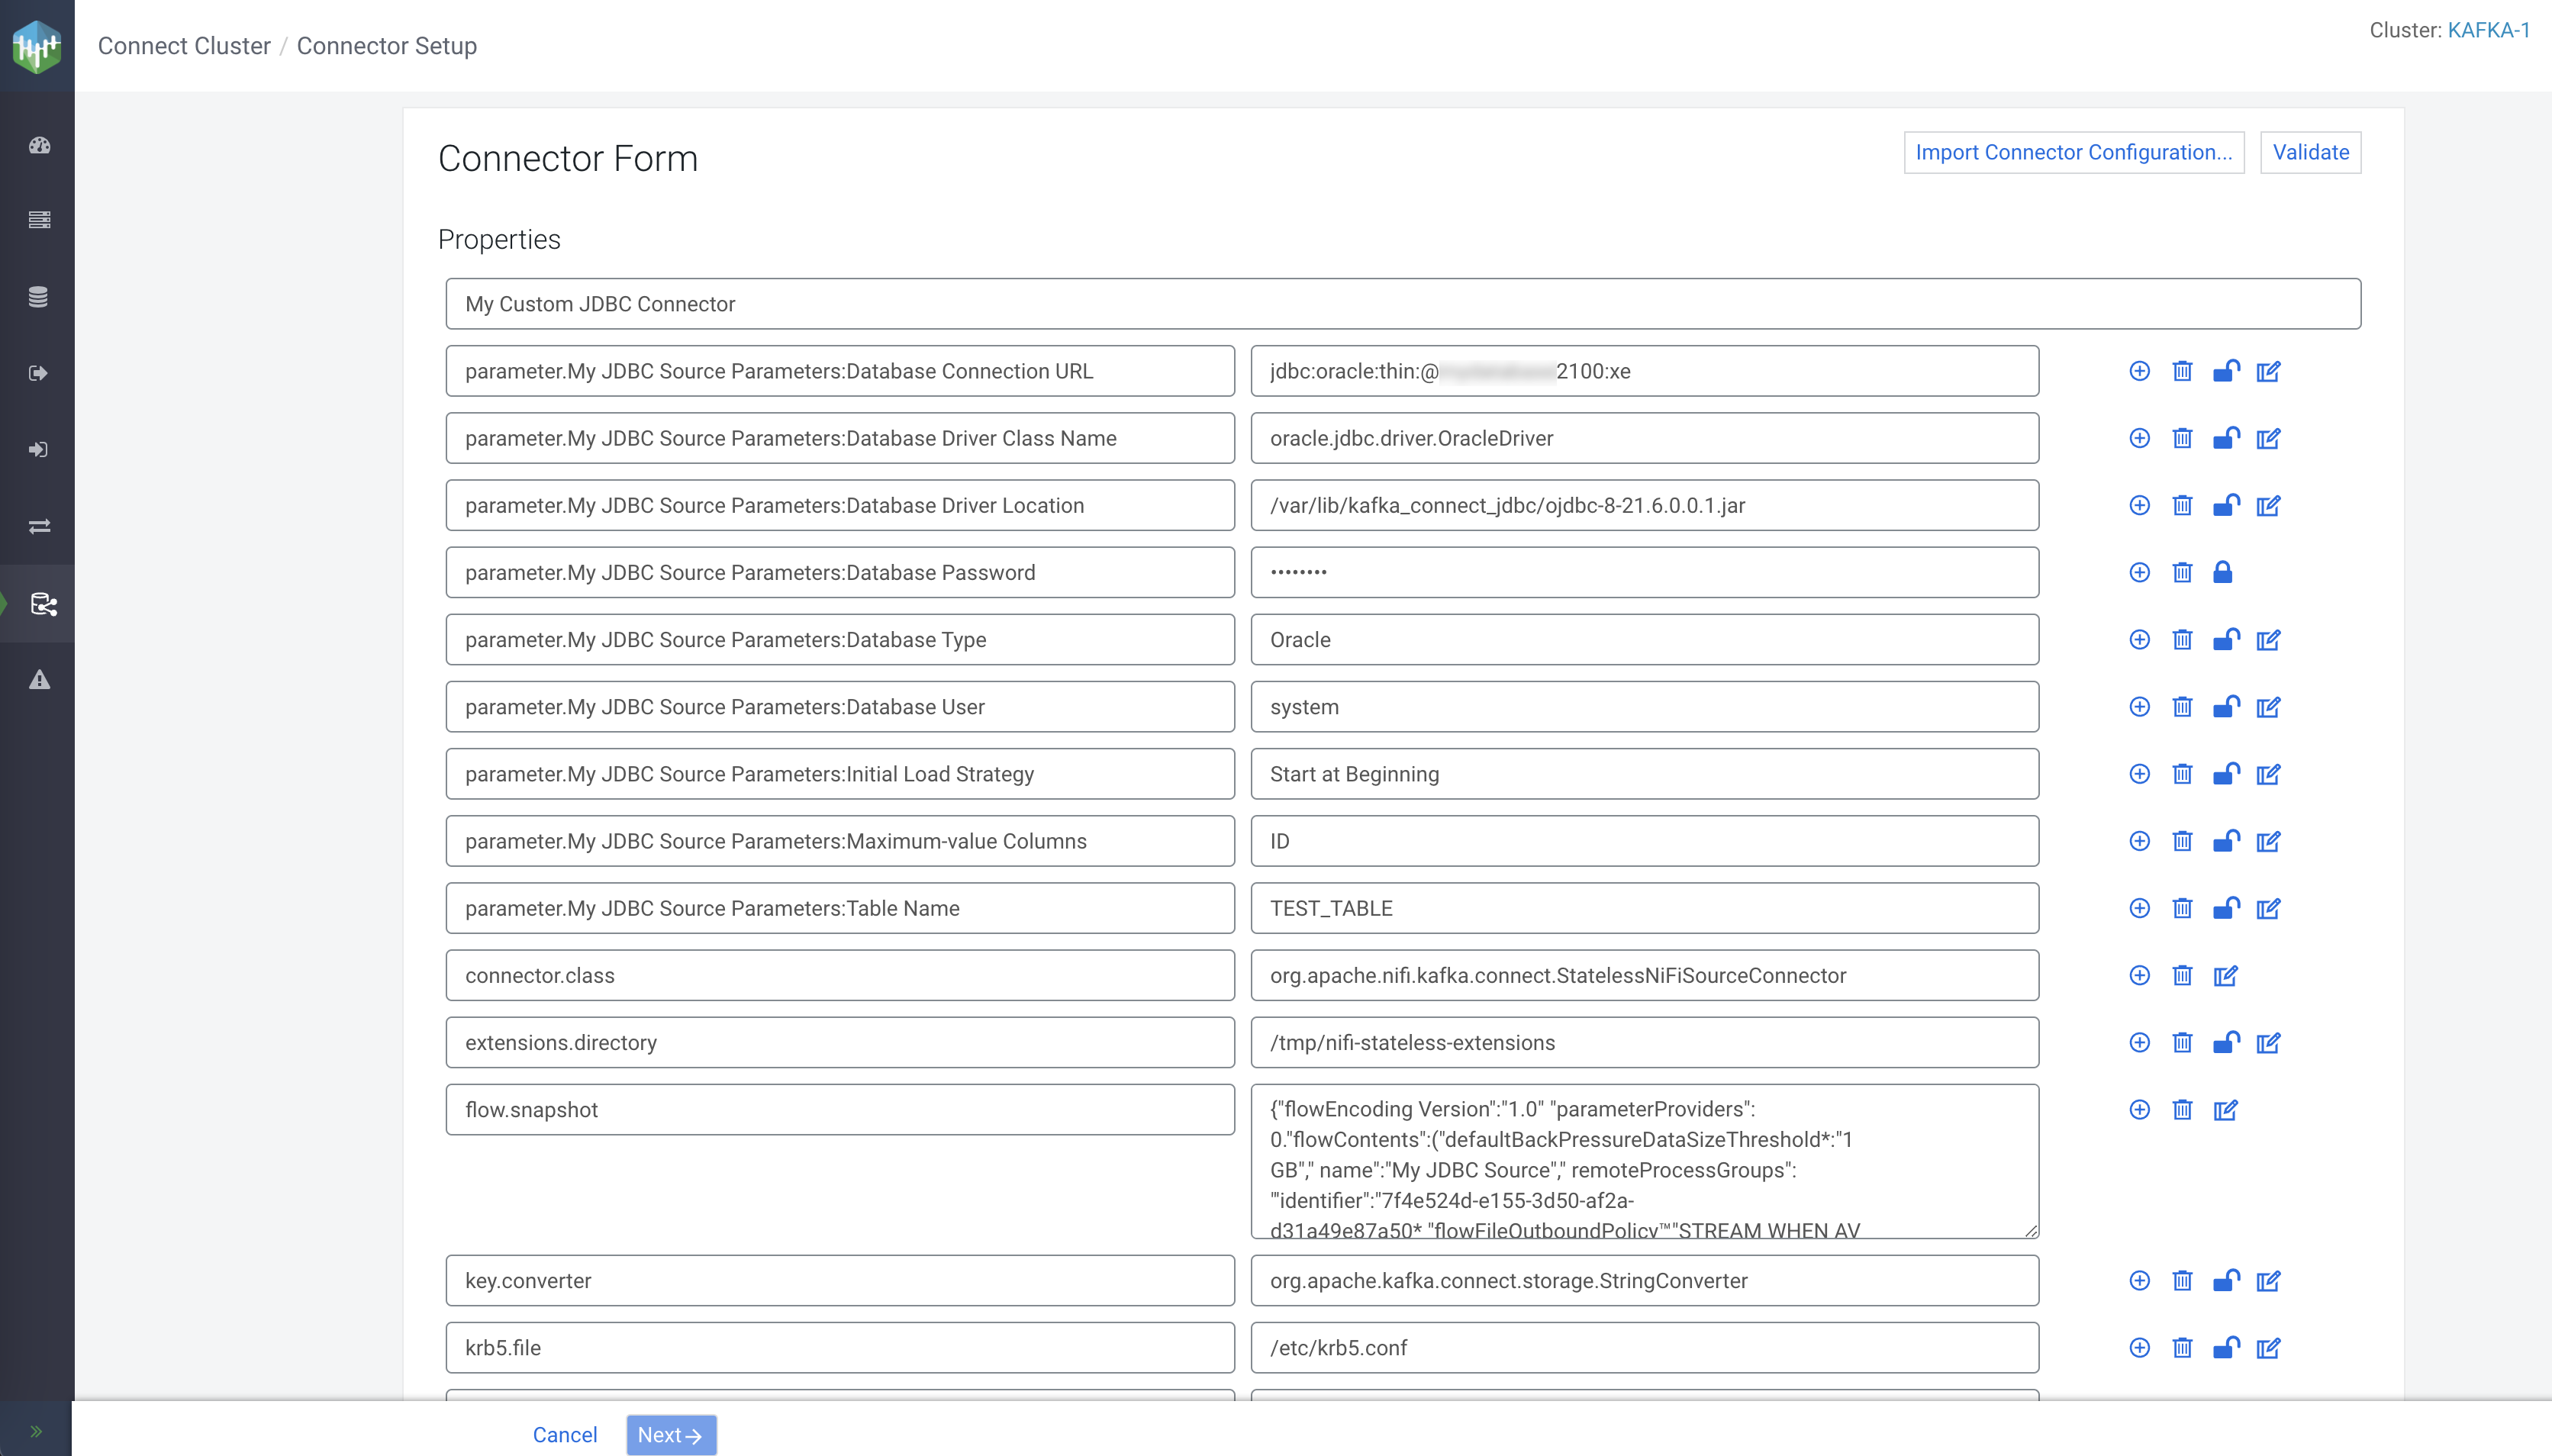
Review your configuration.
 Connector Profile page of the connector. On this page you can
view various details regarding the connector. Most importantly, you can view what the
connector's status is, and which workers the connector and its task were assigned to.
Connector Profile page of the connector. On this page you can
view various details regarding the connector. Most importantly, you can view what the
connector's status is, and which workers the connector and its task were assigned to.
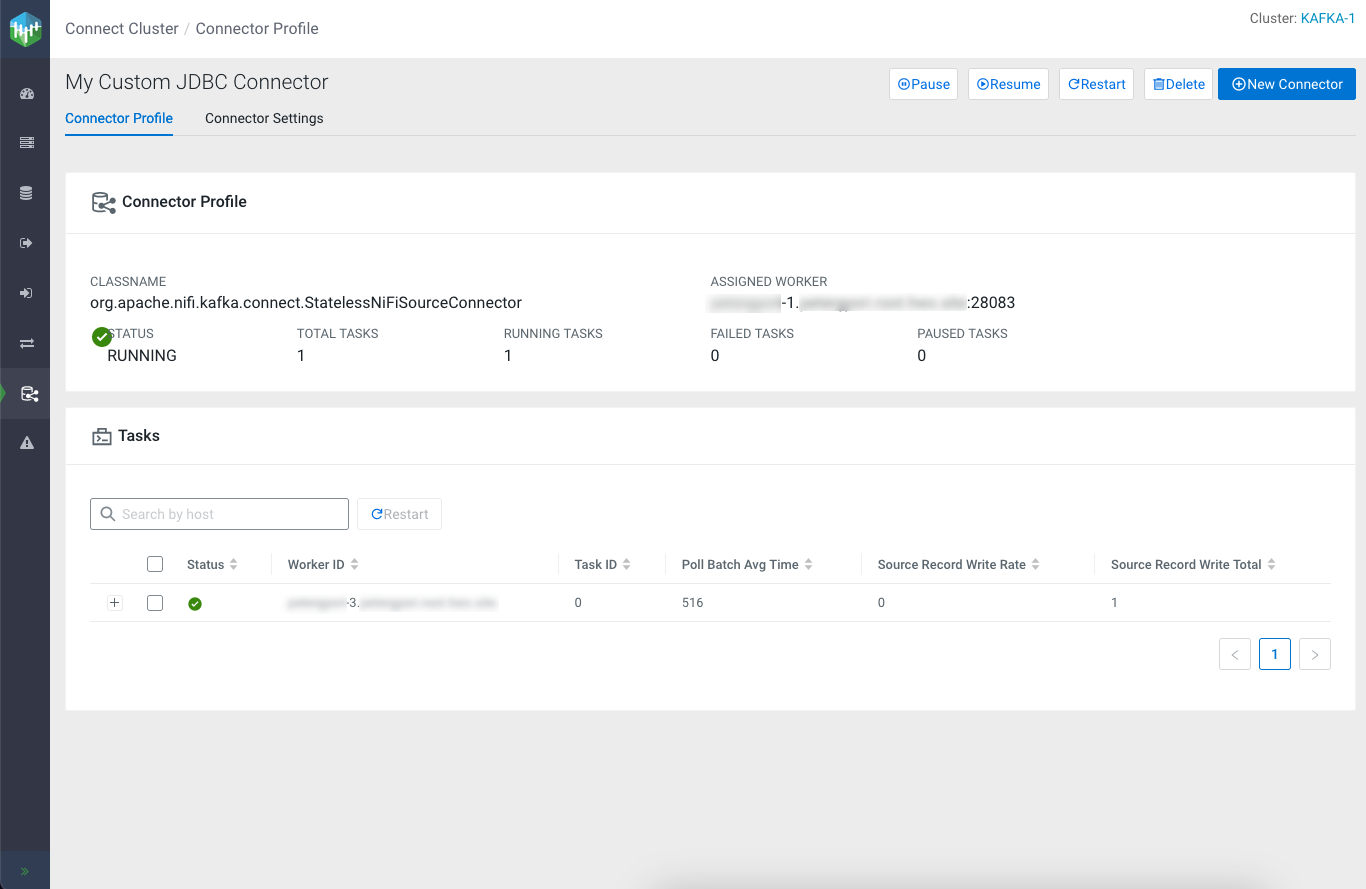
In this particular case, the connector was assigned to the worker running on cluster host 1, whereas the task was assigned to worker running on cluster host 3. This means that dataflow log entries will be present in the Kafka Connect log file on host 3.
In addition to monitoring the connector, you can also check the
contents of the topic that the connector is writing to. This can be done in SMM by
navigating to the  Topics page, searching for the topic, and clicking
  . This opens the SMM Data
Explorer in a modal window. You can use the Data Explorer to sample the data that is
flowing through the topic. The database table’s records appear in the topic in JSON
format.
. This opens the SMM Data
Explorer in a modal window. You can use the Data Explorer to sample the data that is
flowing through the topic. The database table’s records appear in the topic in JSON
format.