Installing Edge Flow Manager on your Base cluster

Learn how to add and configure the Cloudera Edge Management service on Cloudera Base on premises.

Ensure that you have successfully installed a Cloudera Base on premises cluster.

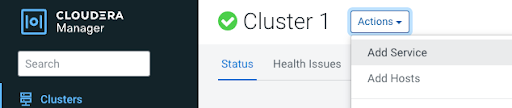
  1. In Cloudera Manager, navigate to the Home > Status tab and click Actions > Add Service.
    Install one service at a time.
  2. Select the Edge Flow Management service and click Continue to open the Add Service wizard.
  3. Configure the Cloudera Edge Management dependencies as needed, then click Continue.
    Select Knox if you want to provide a secure single entry point for accessing services.
  4. Assign roles to Cloudera Edge Management by selecting the appropriate hosts where you want to install the service components, and then click Continue.
  5. Review the configuration changes and click Continue to start the service installation.
    • Specify a value for Initial Admin Identity.
    • Configure the database properties using the values prepared in Installing and configuring a database for Cloudera Edge Management.
    • Select the authentication method (LDAP or Knox) based on your environment requirements. For more information, see the related section in the User authentication documentation.
    • Optionally, you can further customize your Cloudera Edge Management configuration here.
  6. Click Continue, then click Finish to complete the installation process.
  7. After the installation completes, configure the following properties under Configuration.
    • efm.paywall.cpp.baseUrl
    • efm.paywall.java.baseUrl

    Set both properties to at least an empty value.

You have completed your Cloudera Edge Management installation and it is available in your Cloudera Base on premisescluster. To access the Cloudera Edge Management UI, open a web browser and enter the following URL: https://[***HOSTNAME***]:10090/efm/ui

Verify that the service was added successfully by checking its health status. If the service health status is good, the installation completed successfully.