Changing the Configuration of a Service or Role Instance
- Edit the property value.
- To facilitate entering some types of values, you can specify not only the value, but also the units that apply to the value. for example, to enter a setting that specifies bytes per second, you can choose to enter the value in bytes (B), KiBs, MiBs, or GiBs—selected from a drop-down menu that appears when you edit the value.
- If the property allows a list of values, click the
 icon to the right of the edit field to add
an additional field. An example of this is the HDFS DataNode Data
Directory property, which can have a comma-delimited list of
directories as its value. To remove an item from such a list,
click the
icon to the right of the edit field to add
an additional field. An example of this is the HDFS DataNode Data
Directory property, which can have a comma-delimited list of
directories as its value. To remove an item from such a list,
click the  icon to the right of the field you want to
remove.
icon to the right of the field you want to
remove.
Many configuration properties have different values that are configured by multiple role groups.
To edit configuration values for multiple role groups:
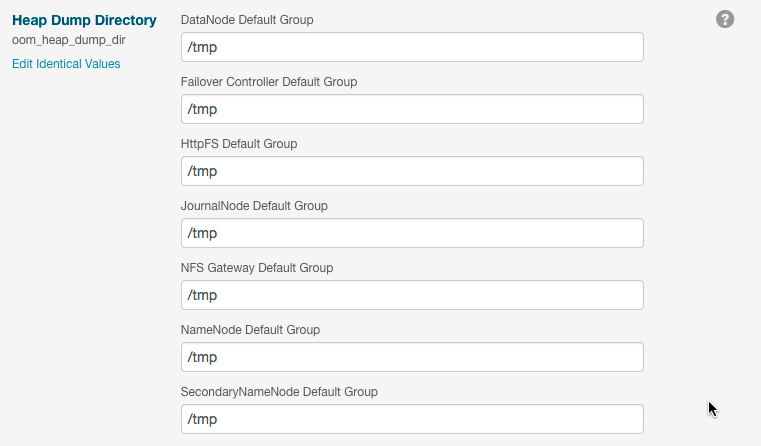
- Go to the property, For example, the configuration panel
for the Heap Dump Directory property
displays the DataNode Default Group (a role group), and a link
that says ... and 6 others.

- Click the ... and 6 others link
to display all of the role groups:

- Click the Show fewer link to
collapse the list of role groups.
If you edit the single value for this property, Cloudera Manager applies the value to all role groups. To edit the values for one or more of these role groups individually, click Edit Individual Values. Individual fields display where you can edit the values for each role group. For example:
- Click Save Changes to commit the changes.You can add a note that is included with the change in the Configuration History. This changes the setting for the role group, and applies to all role instances associated with that role group. Depending on the change you made, you may need to restart the service or roles associated with the configuration you just changed. Or, you may need to redeploy your client configuration for the service. You should see a message to that effect at the top of the Configuration page, and services will display an outdated configuration
 (Restart Needed),
  (Refresh Needed), or outdated client configuration
  indicator. Click the indicator to display the Stale
Configurations page.
indicator. Click the indicator to display the Stale
Configurations page.