Modifying Data Shares
Update a Data Share in Cloudera Data Catalog: change some settings while the Share is Shared, or use Modify to edit assets and user membership, then publish again.
What you can change depends on whether the Data Share is in Shared or Not Shared state (similar to a draft):
 icon on the Share details page:
- Data Share name
-
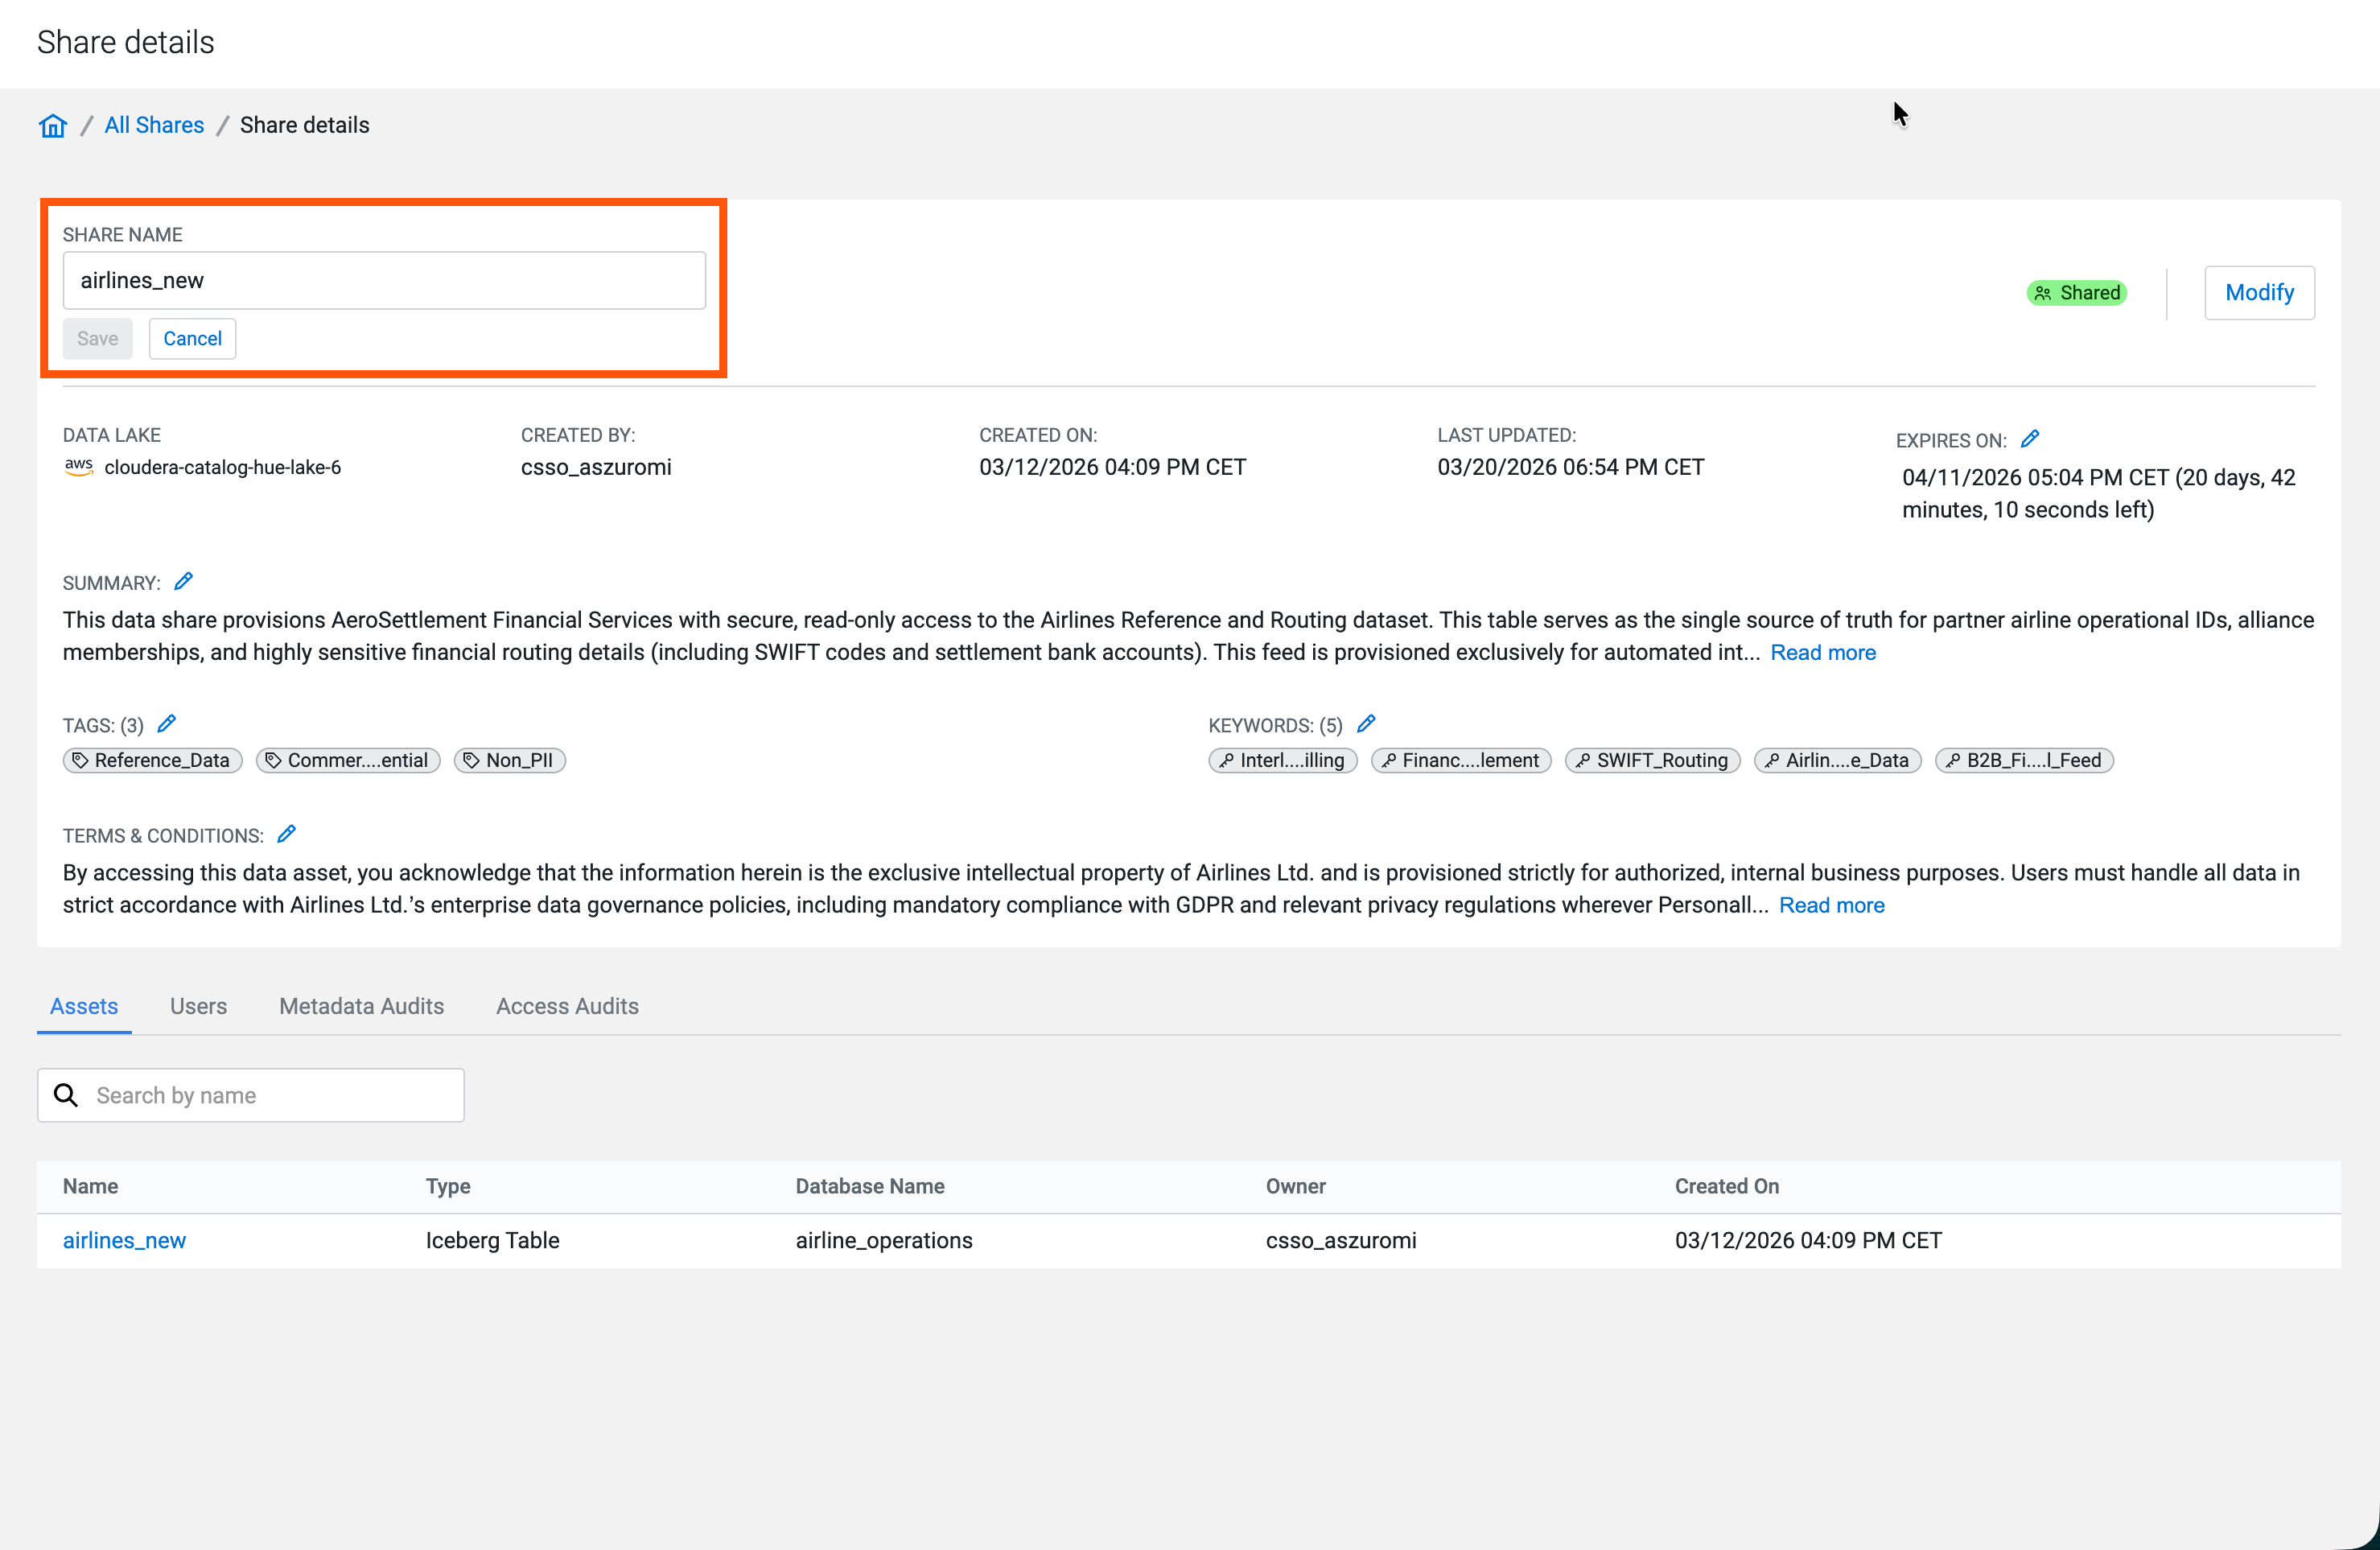
- Share expiration
-
Figure 1. Editing expiration time 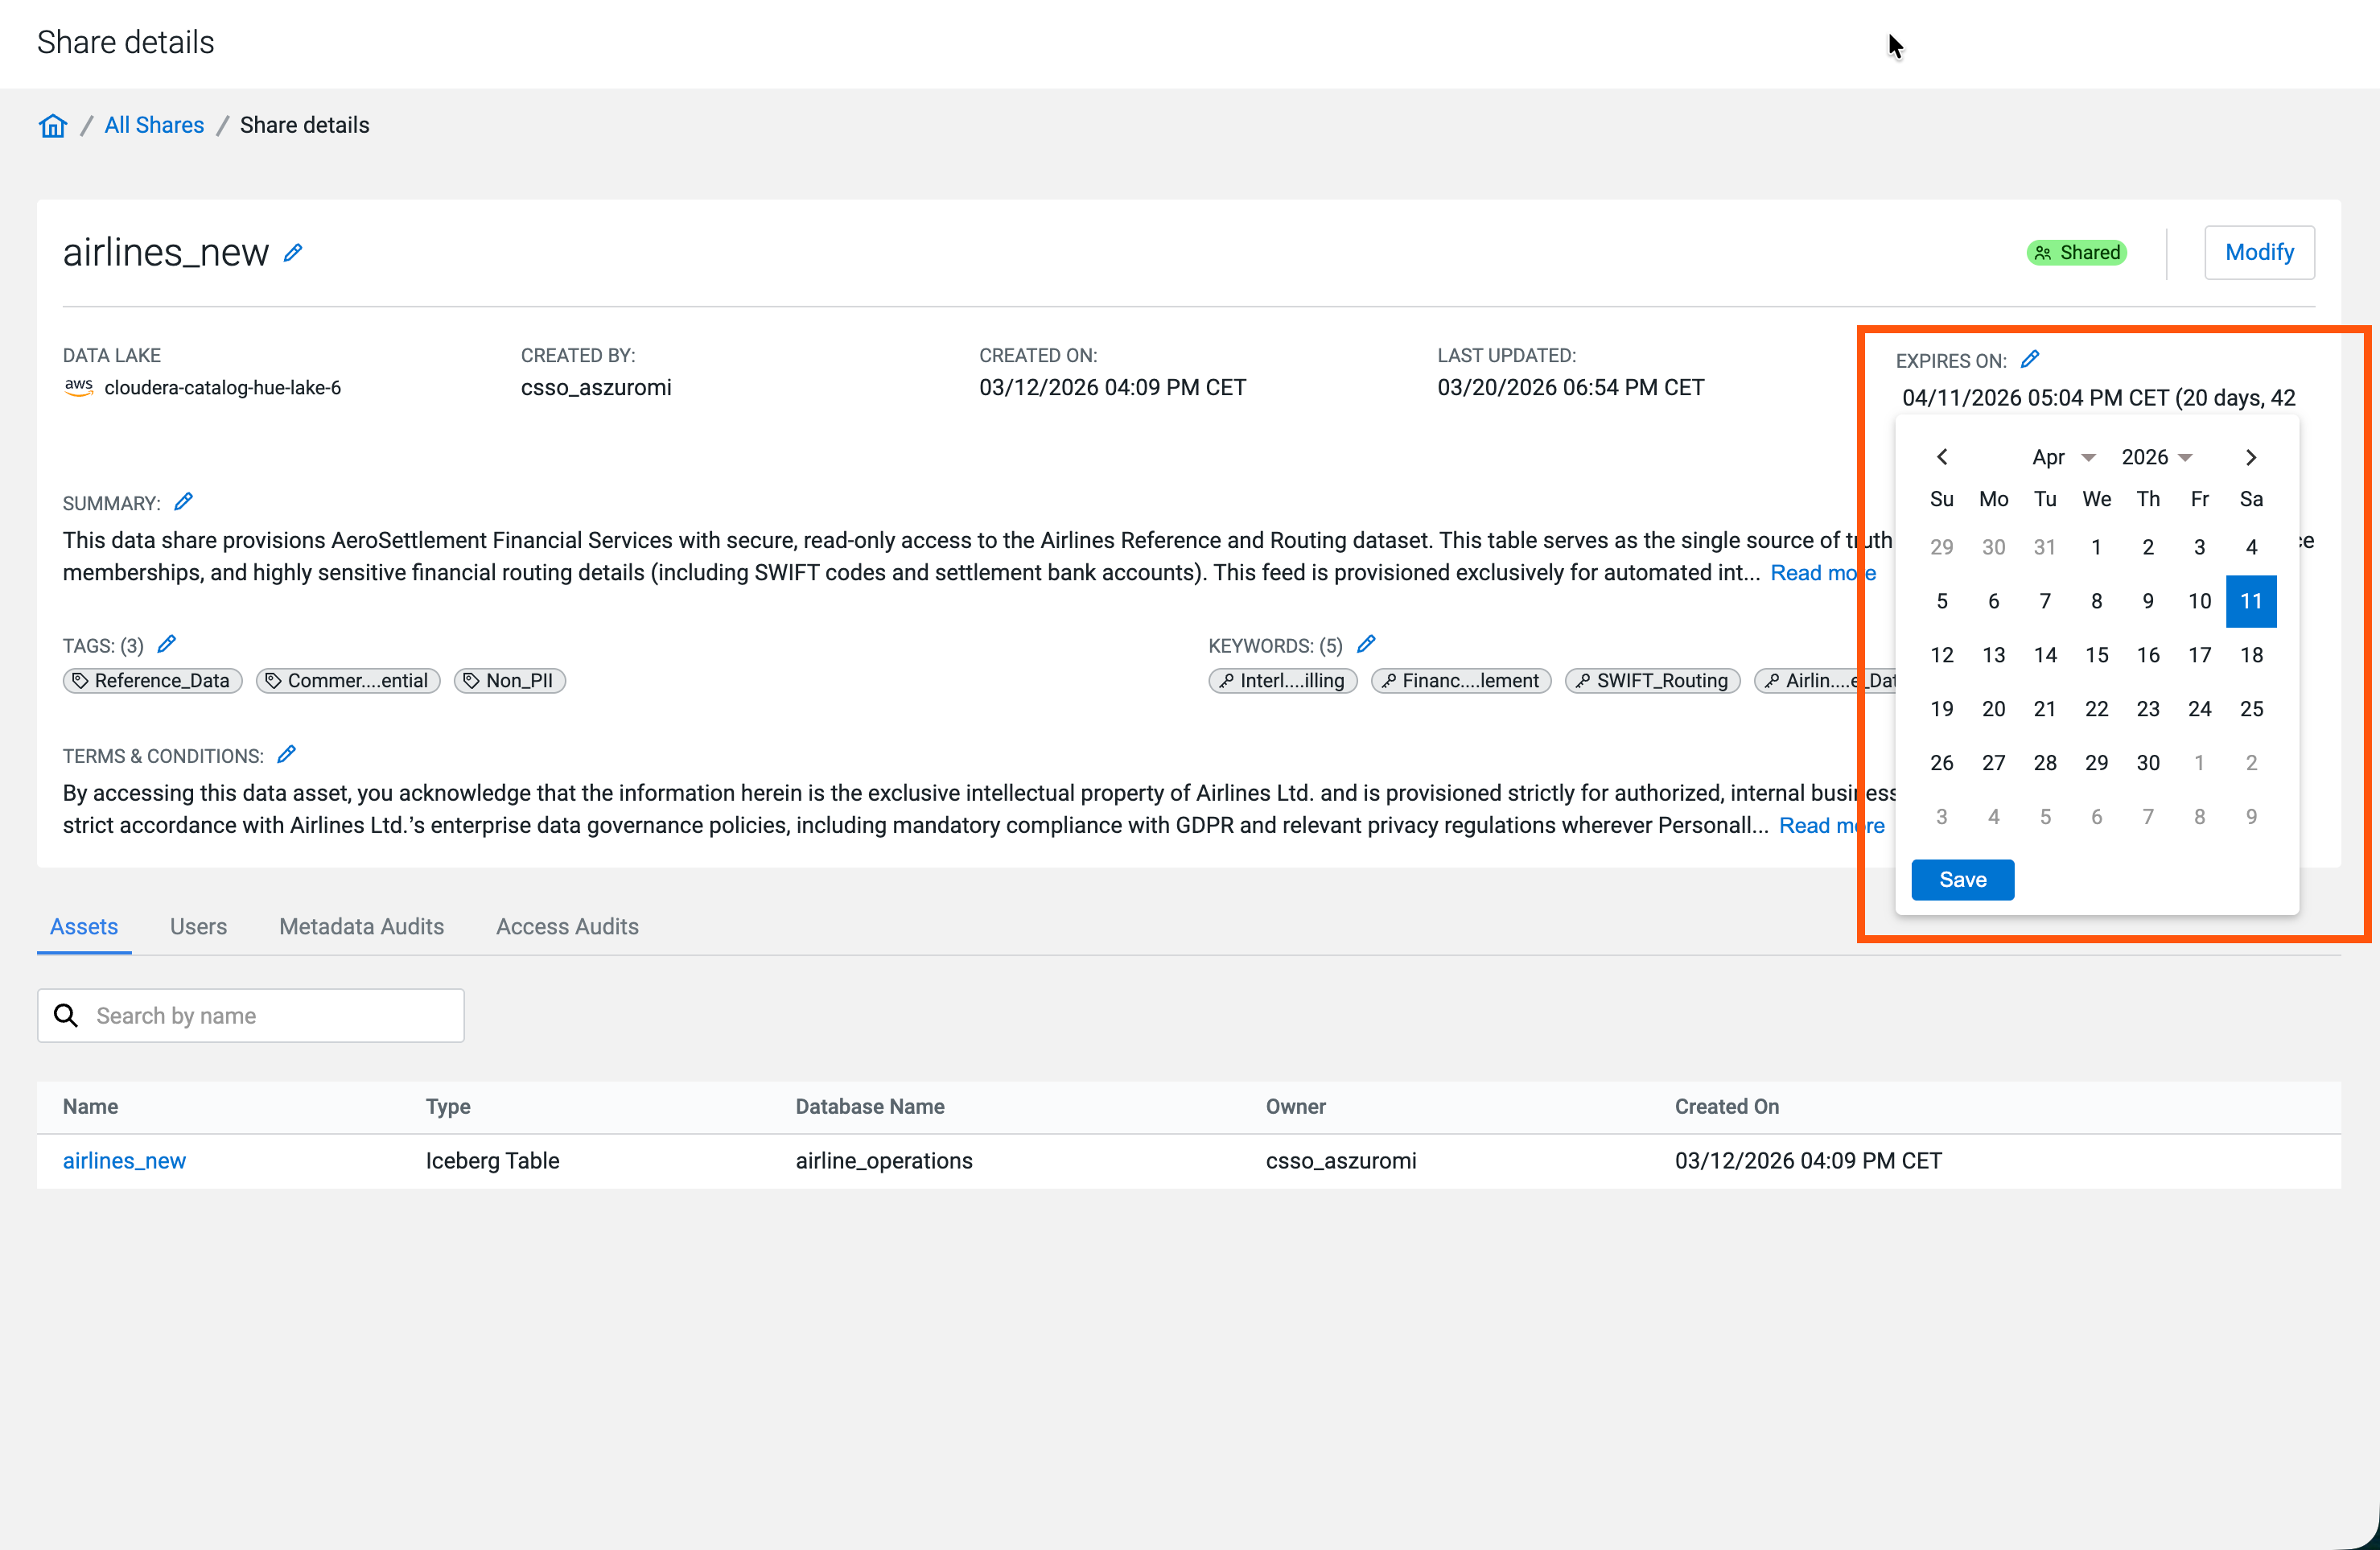
- Summary
-
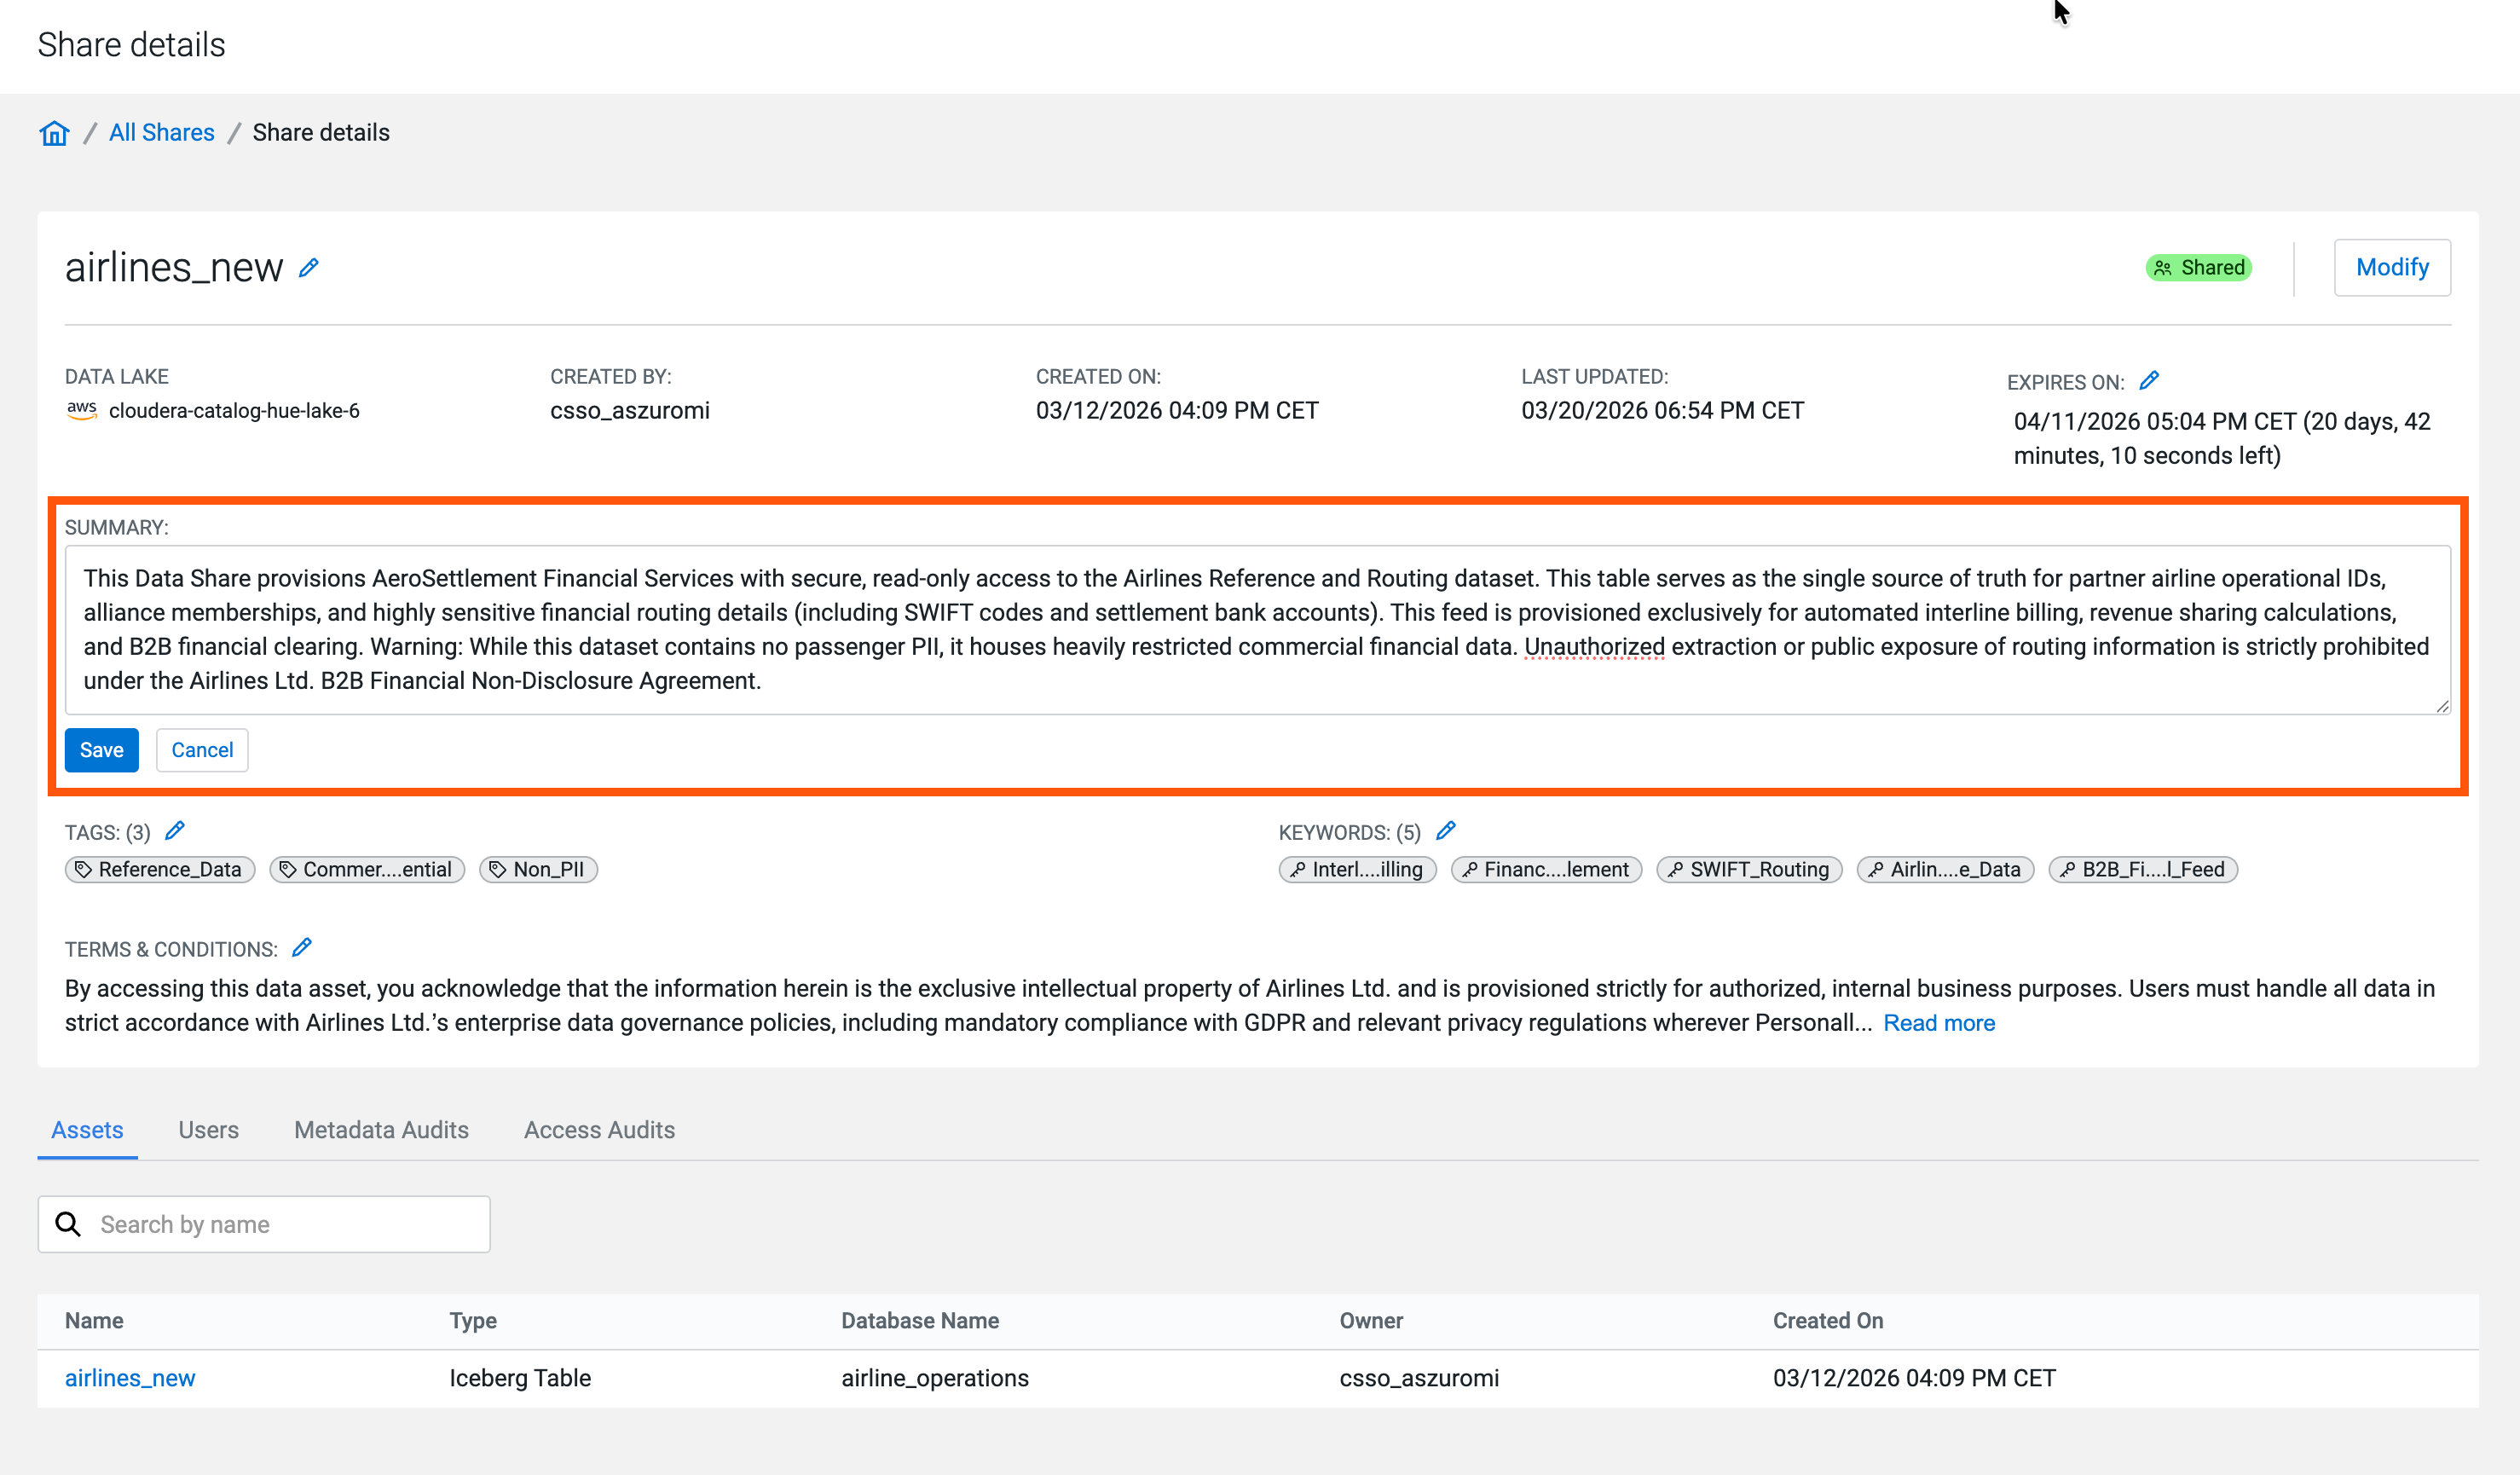
- Tags
-
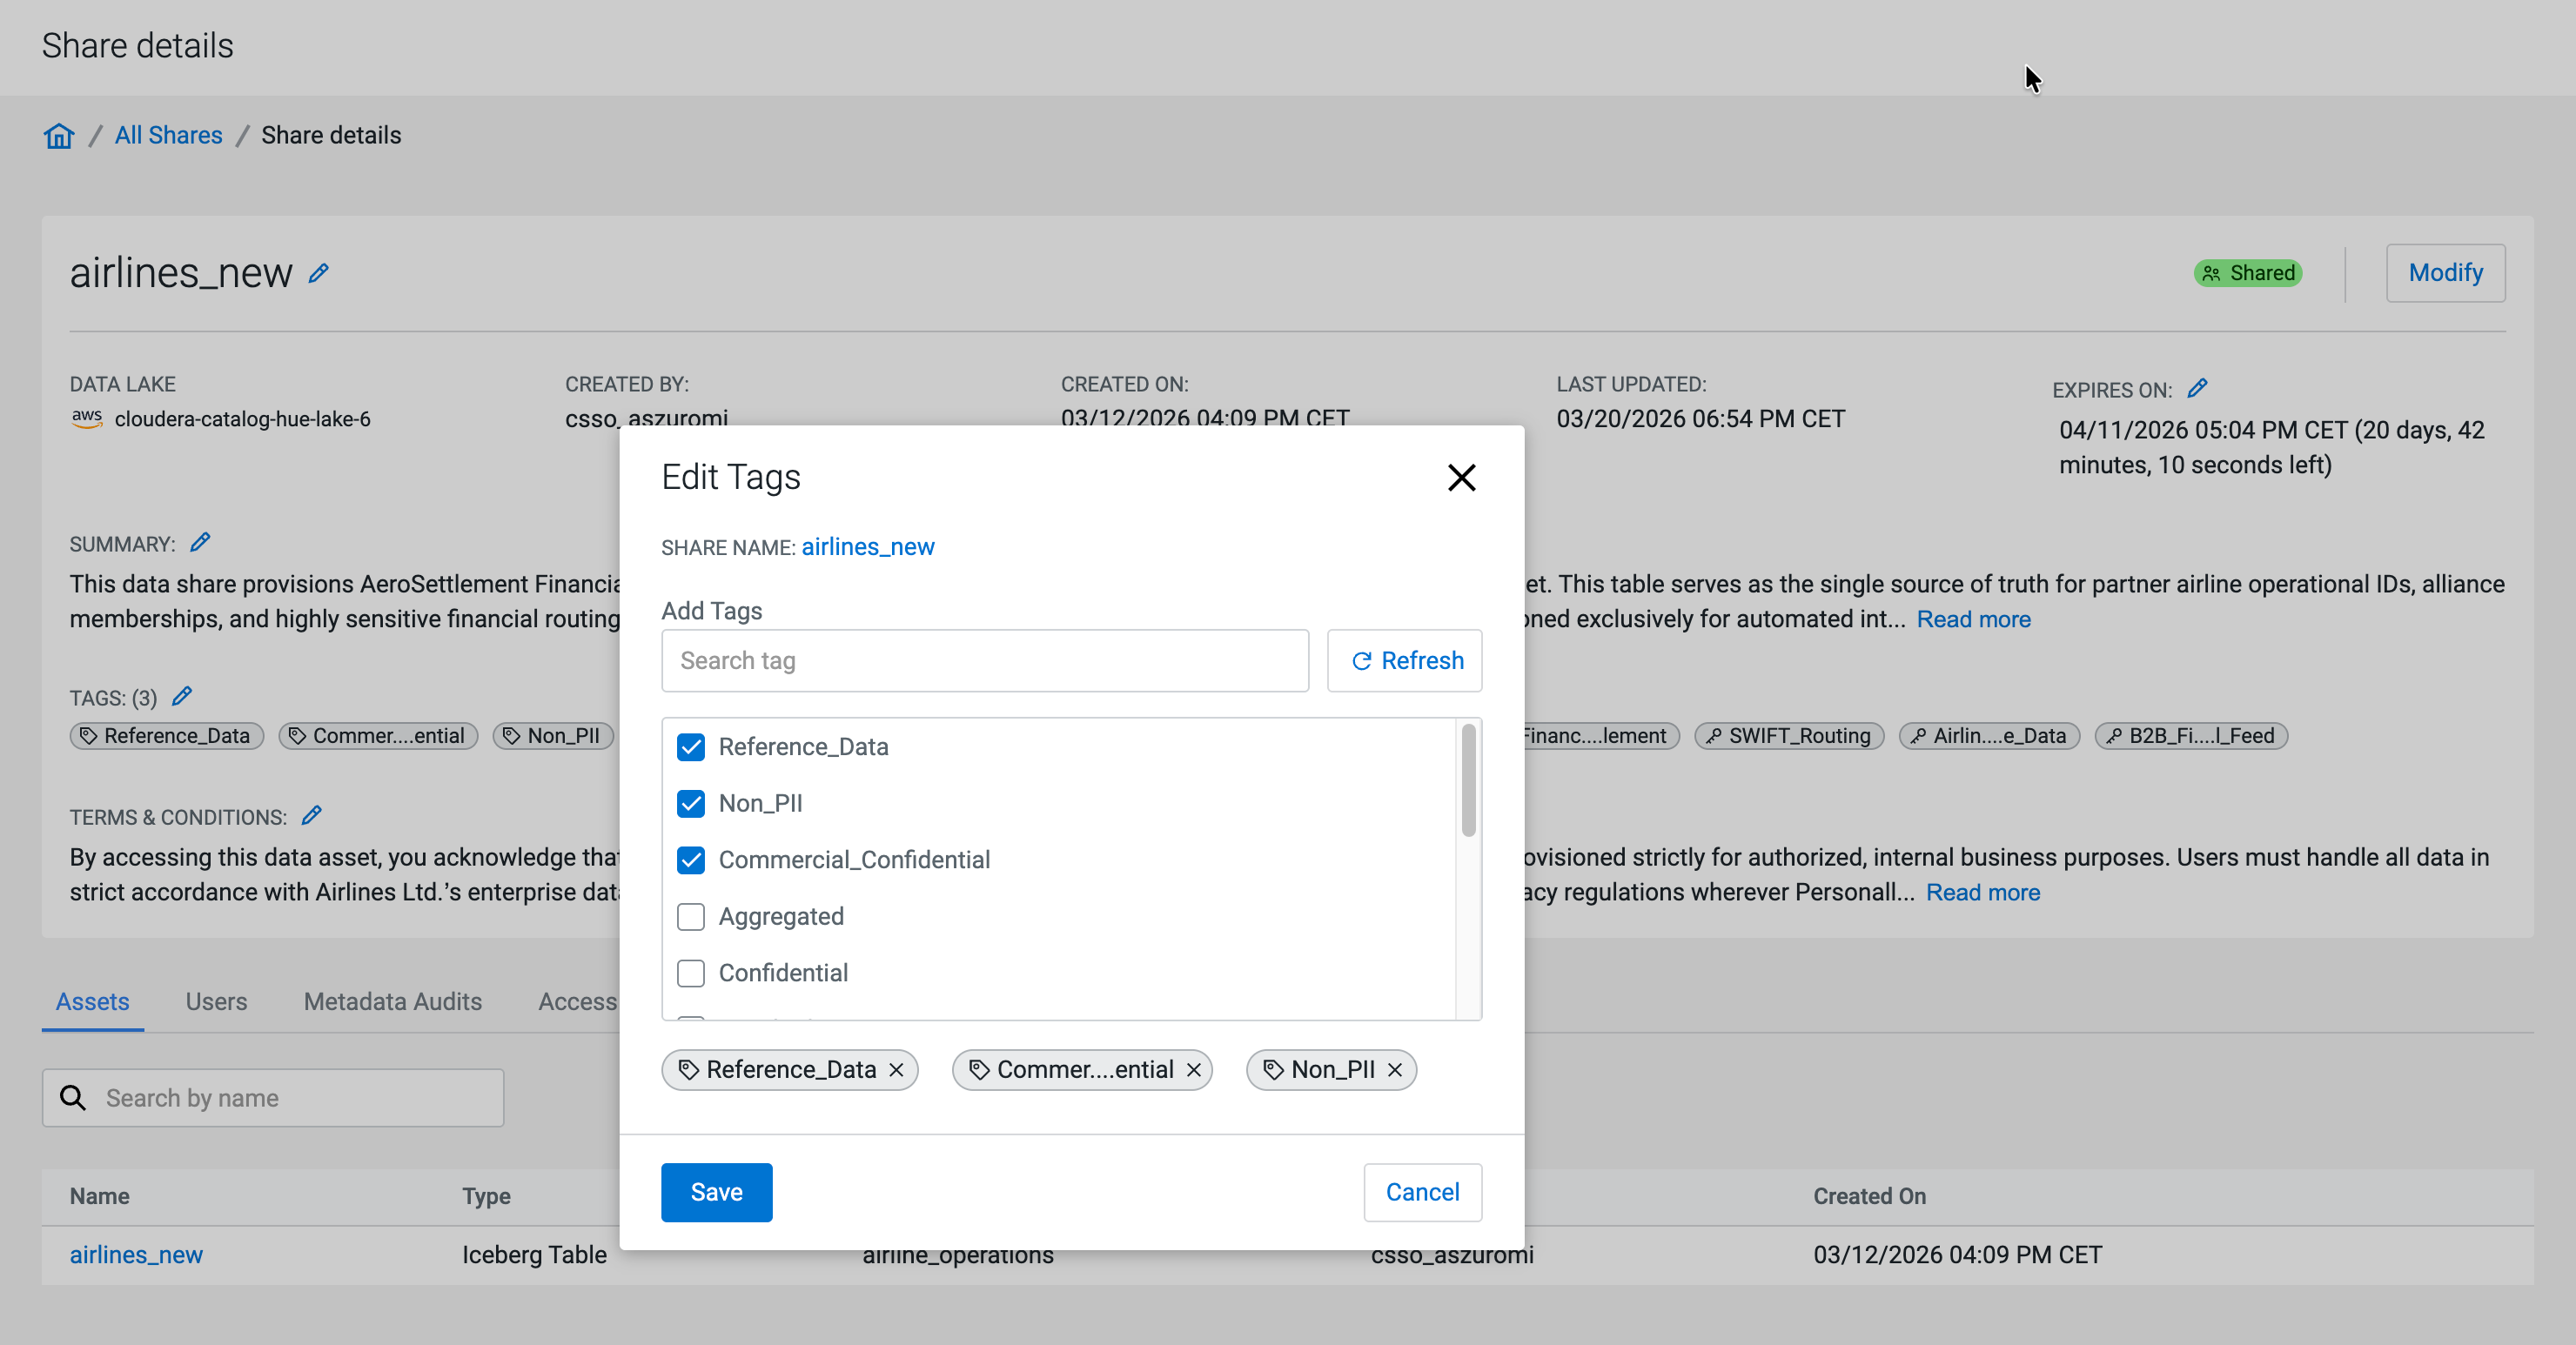
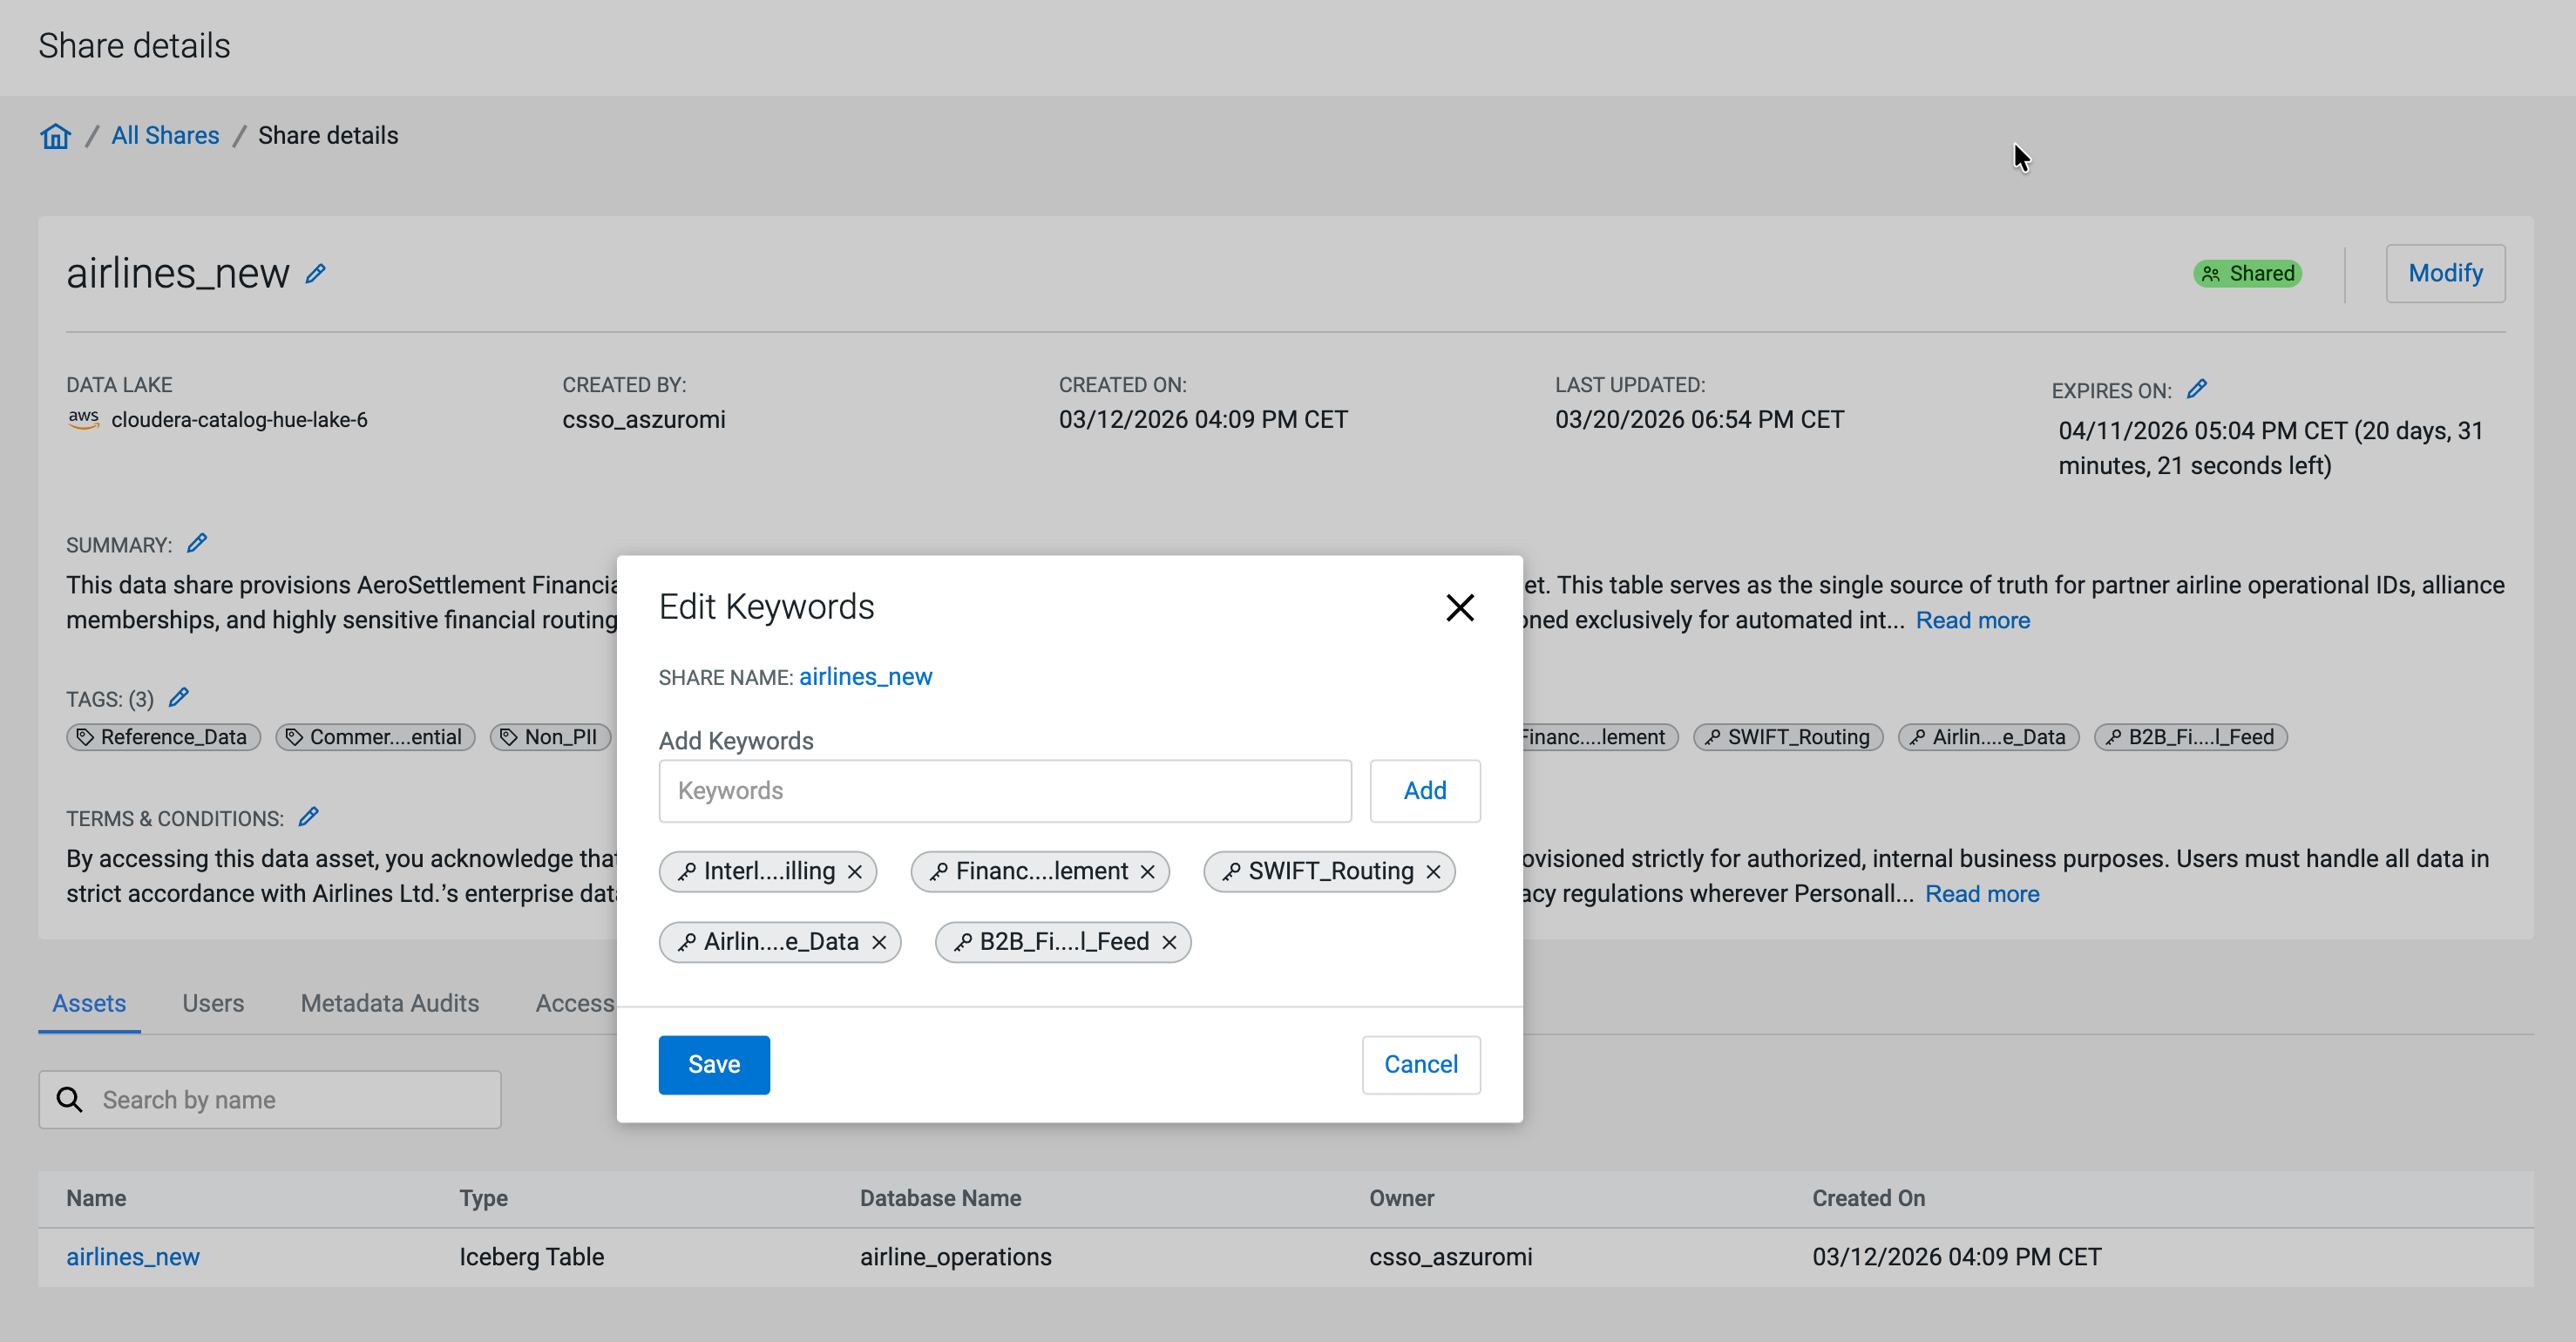
- Keywords
-
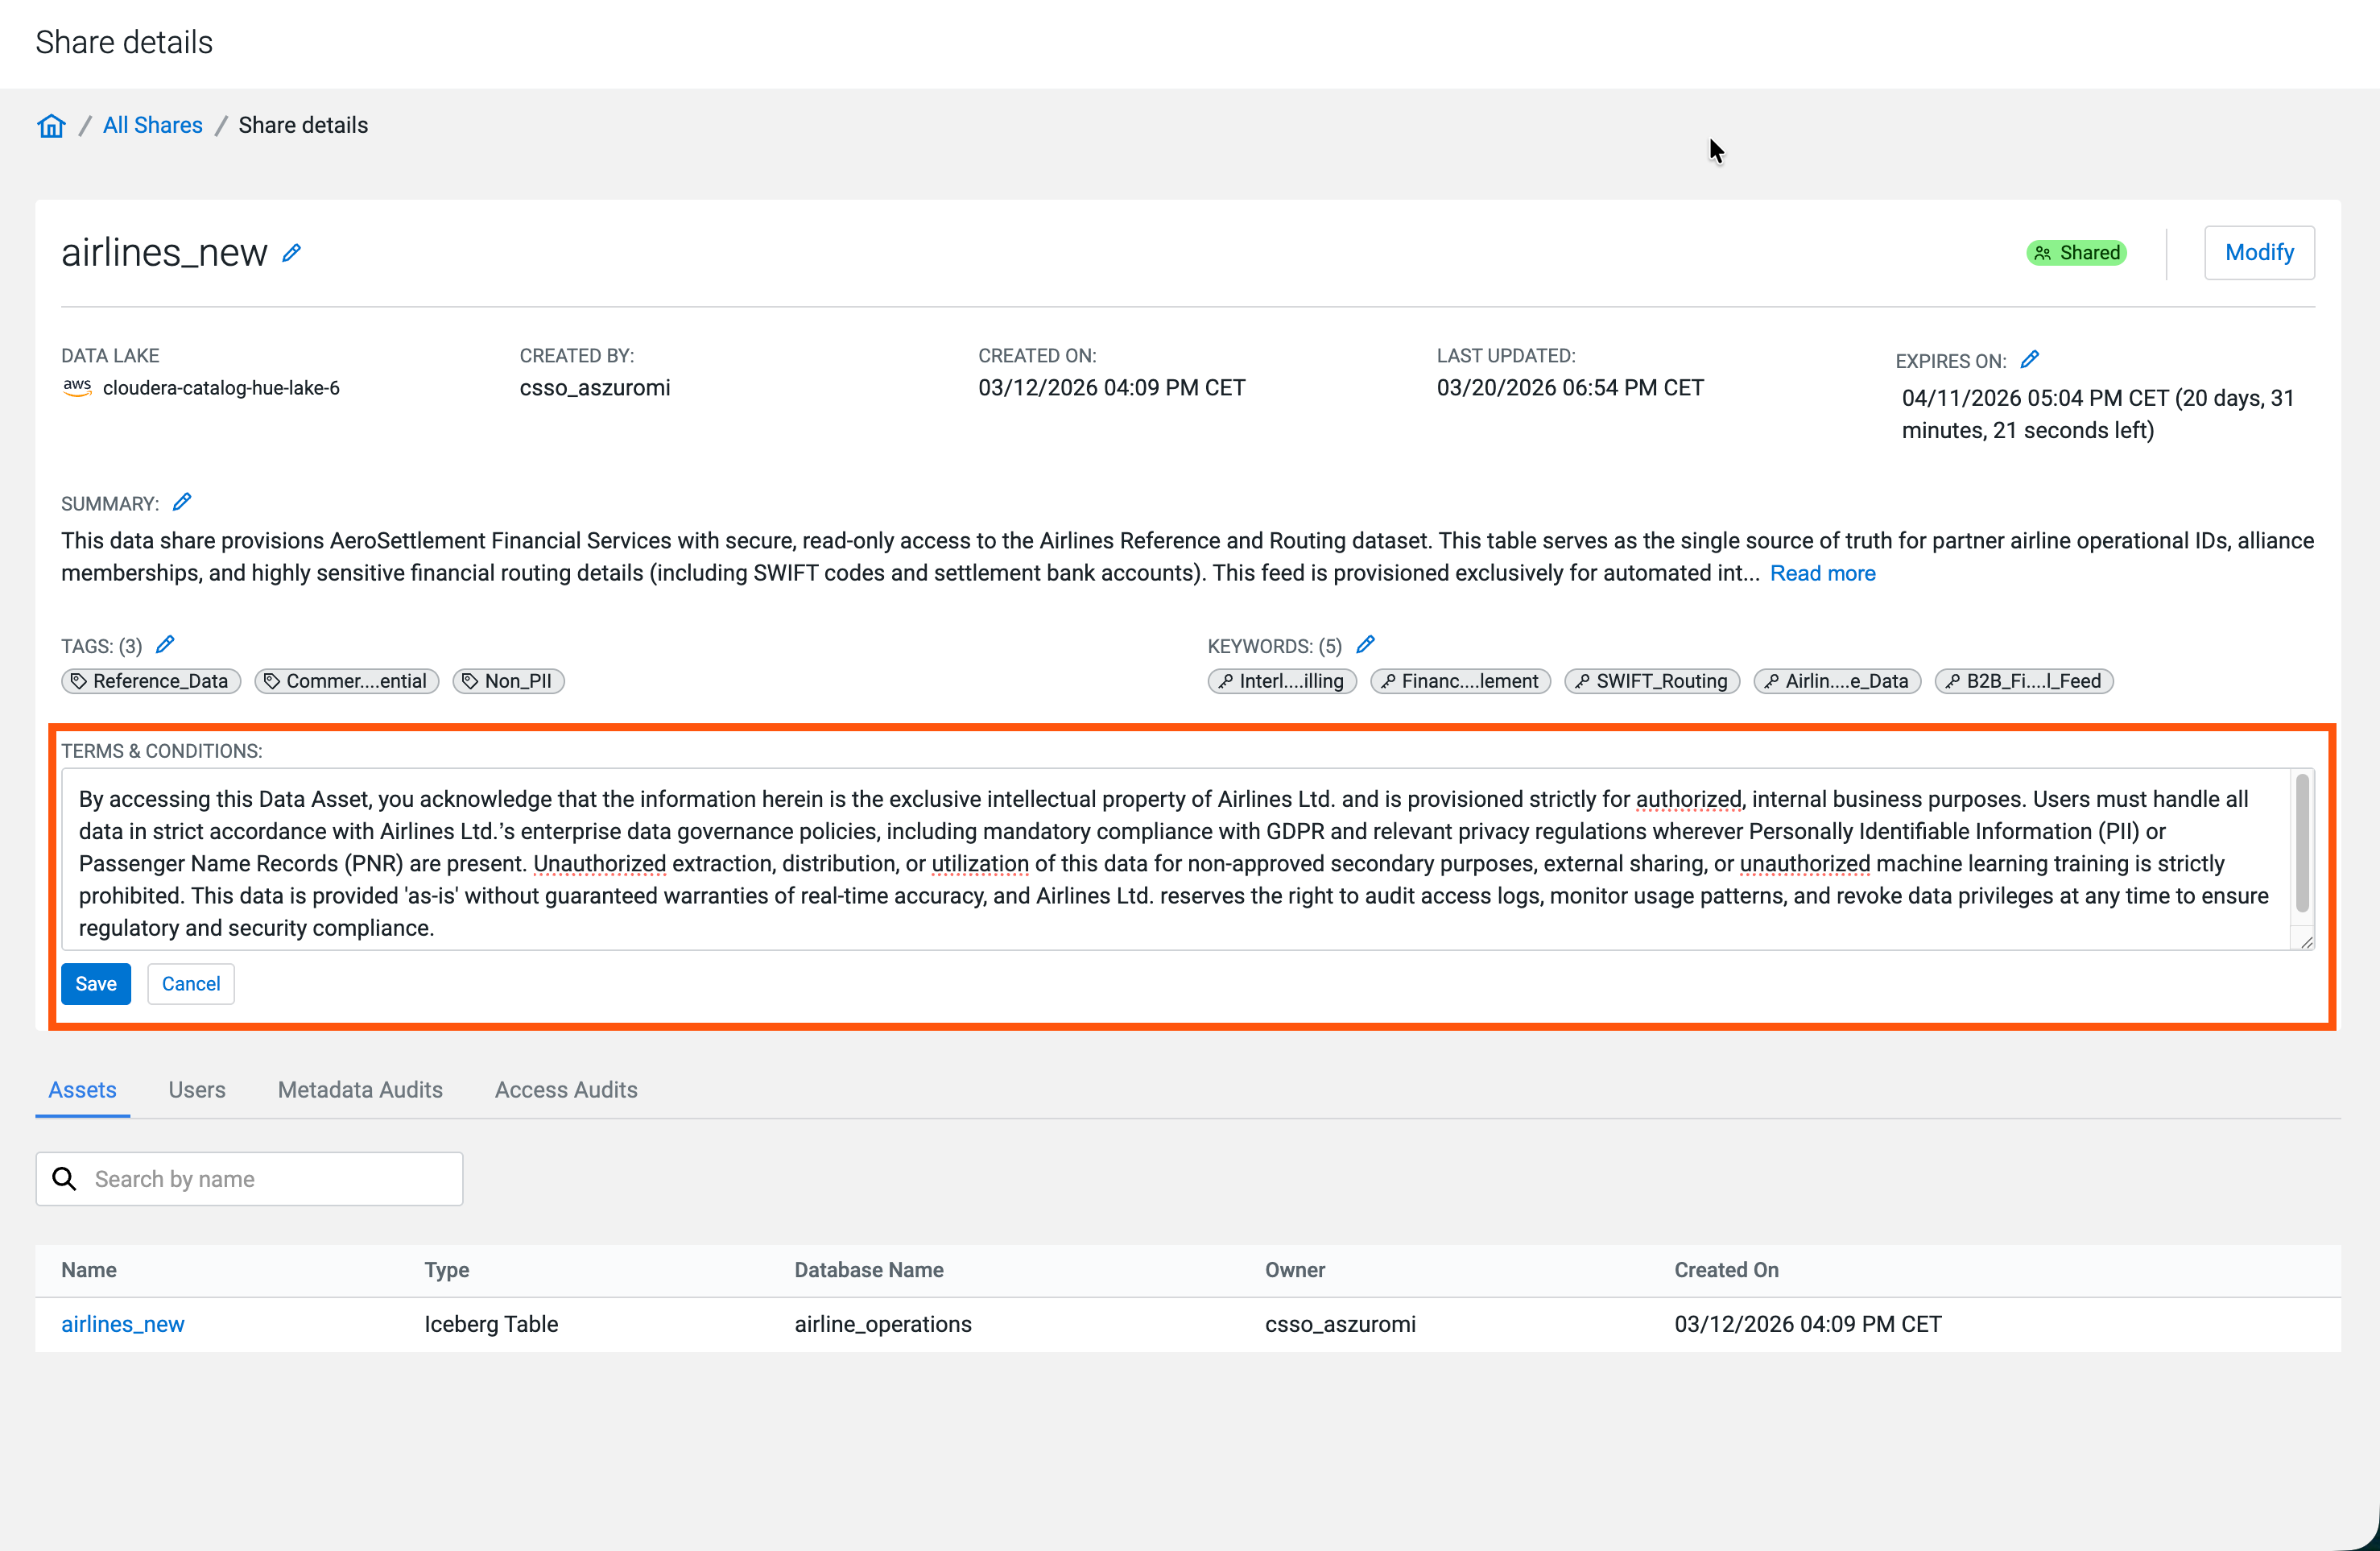
- Terms & Conditions
-
You must have the DataShareAdmin resource role for the relevant
environment.
-
If the Share status is Shared, click
Modify.
Figure 2. Modify dialog for a published Data Share 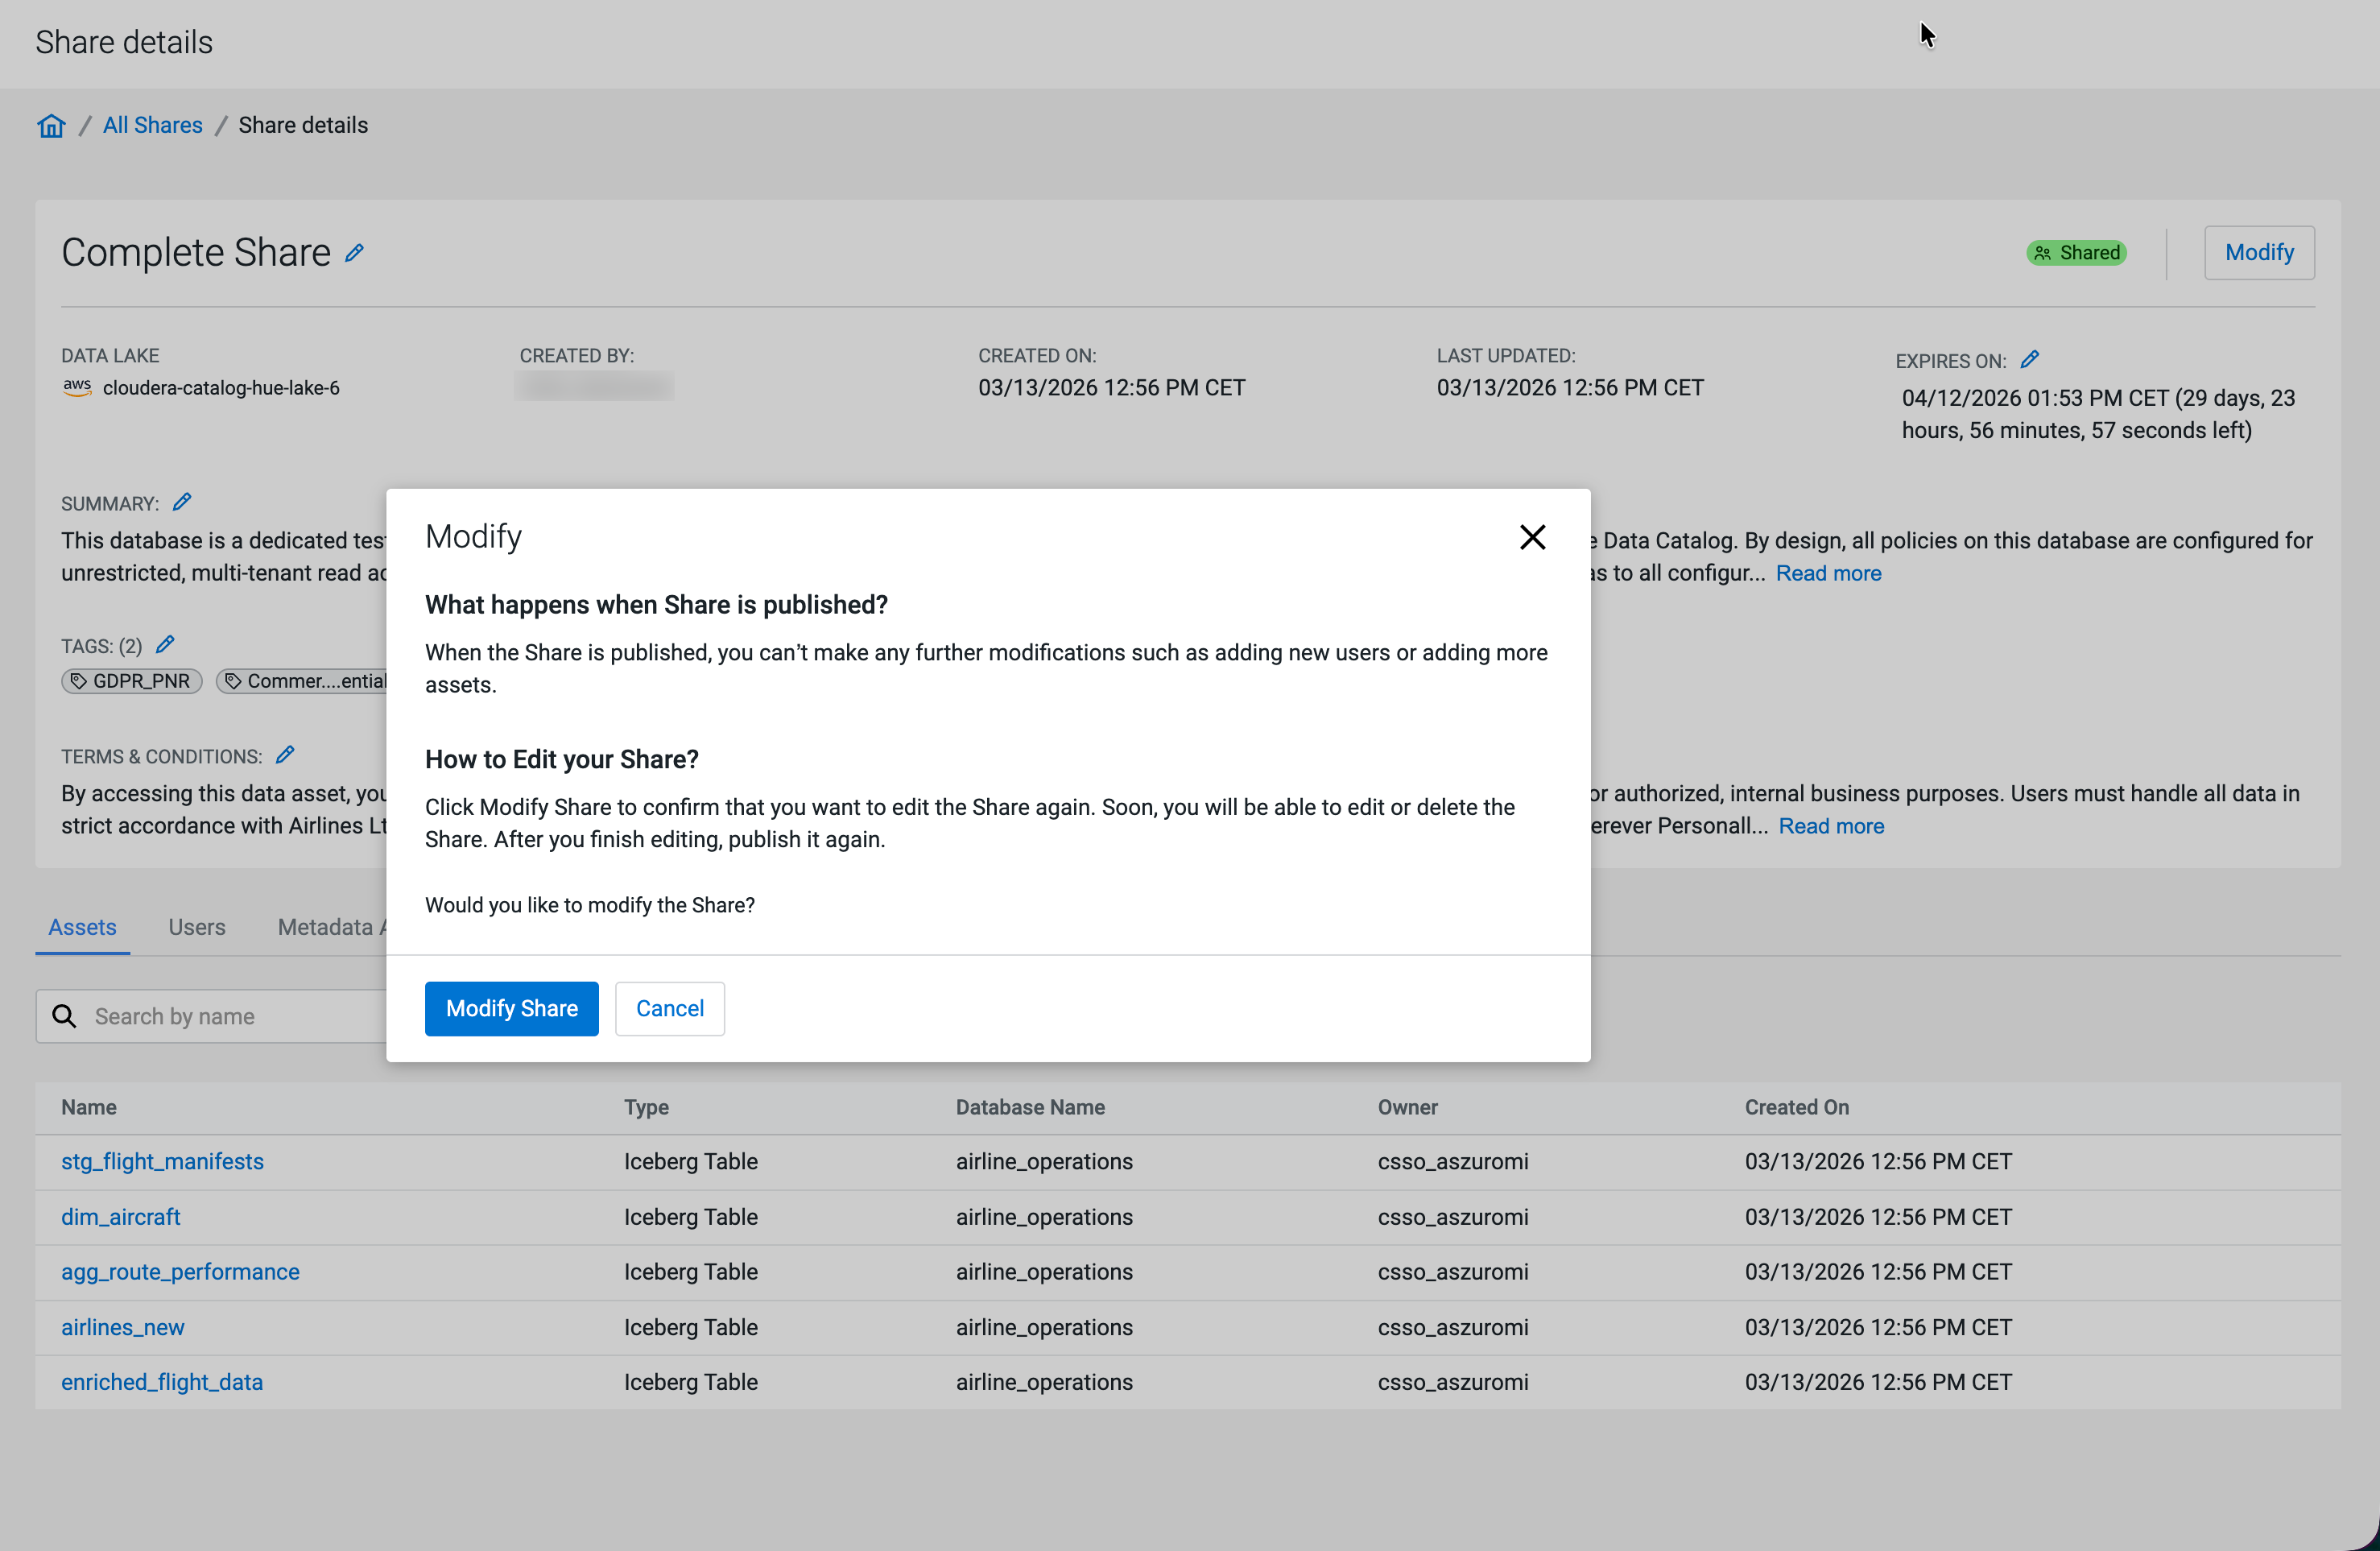
-
In the confirmation dialog, click Modify Share.
The Share details page reloads with Not Shared status. You can now edit the Share using the same sections as in the New Share wizard flow. For step-level guidance, see https://docs.cloudera.com/data-catalog/cloud/data-sharing-data-catalog/topics/dc-creating-a-new-share.html.
Figure 3. Share details page in Not Shared state 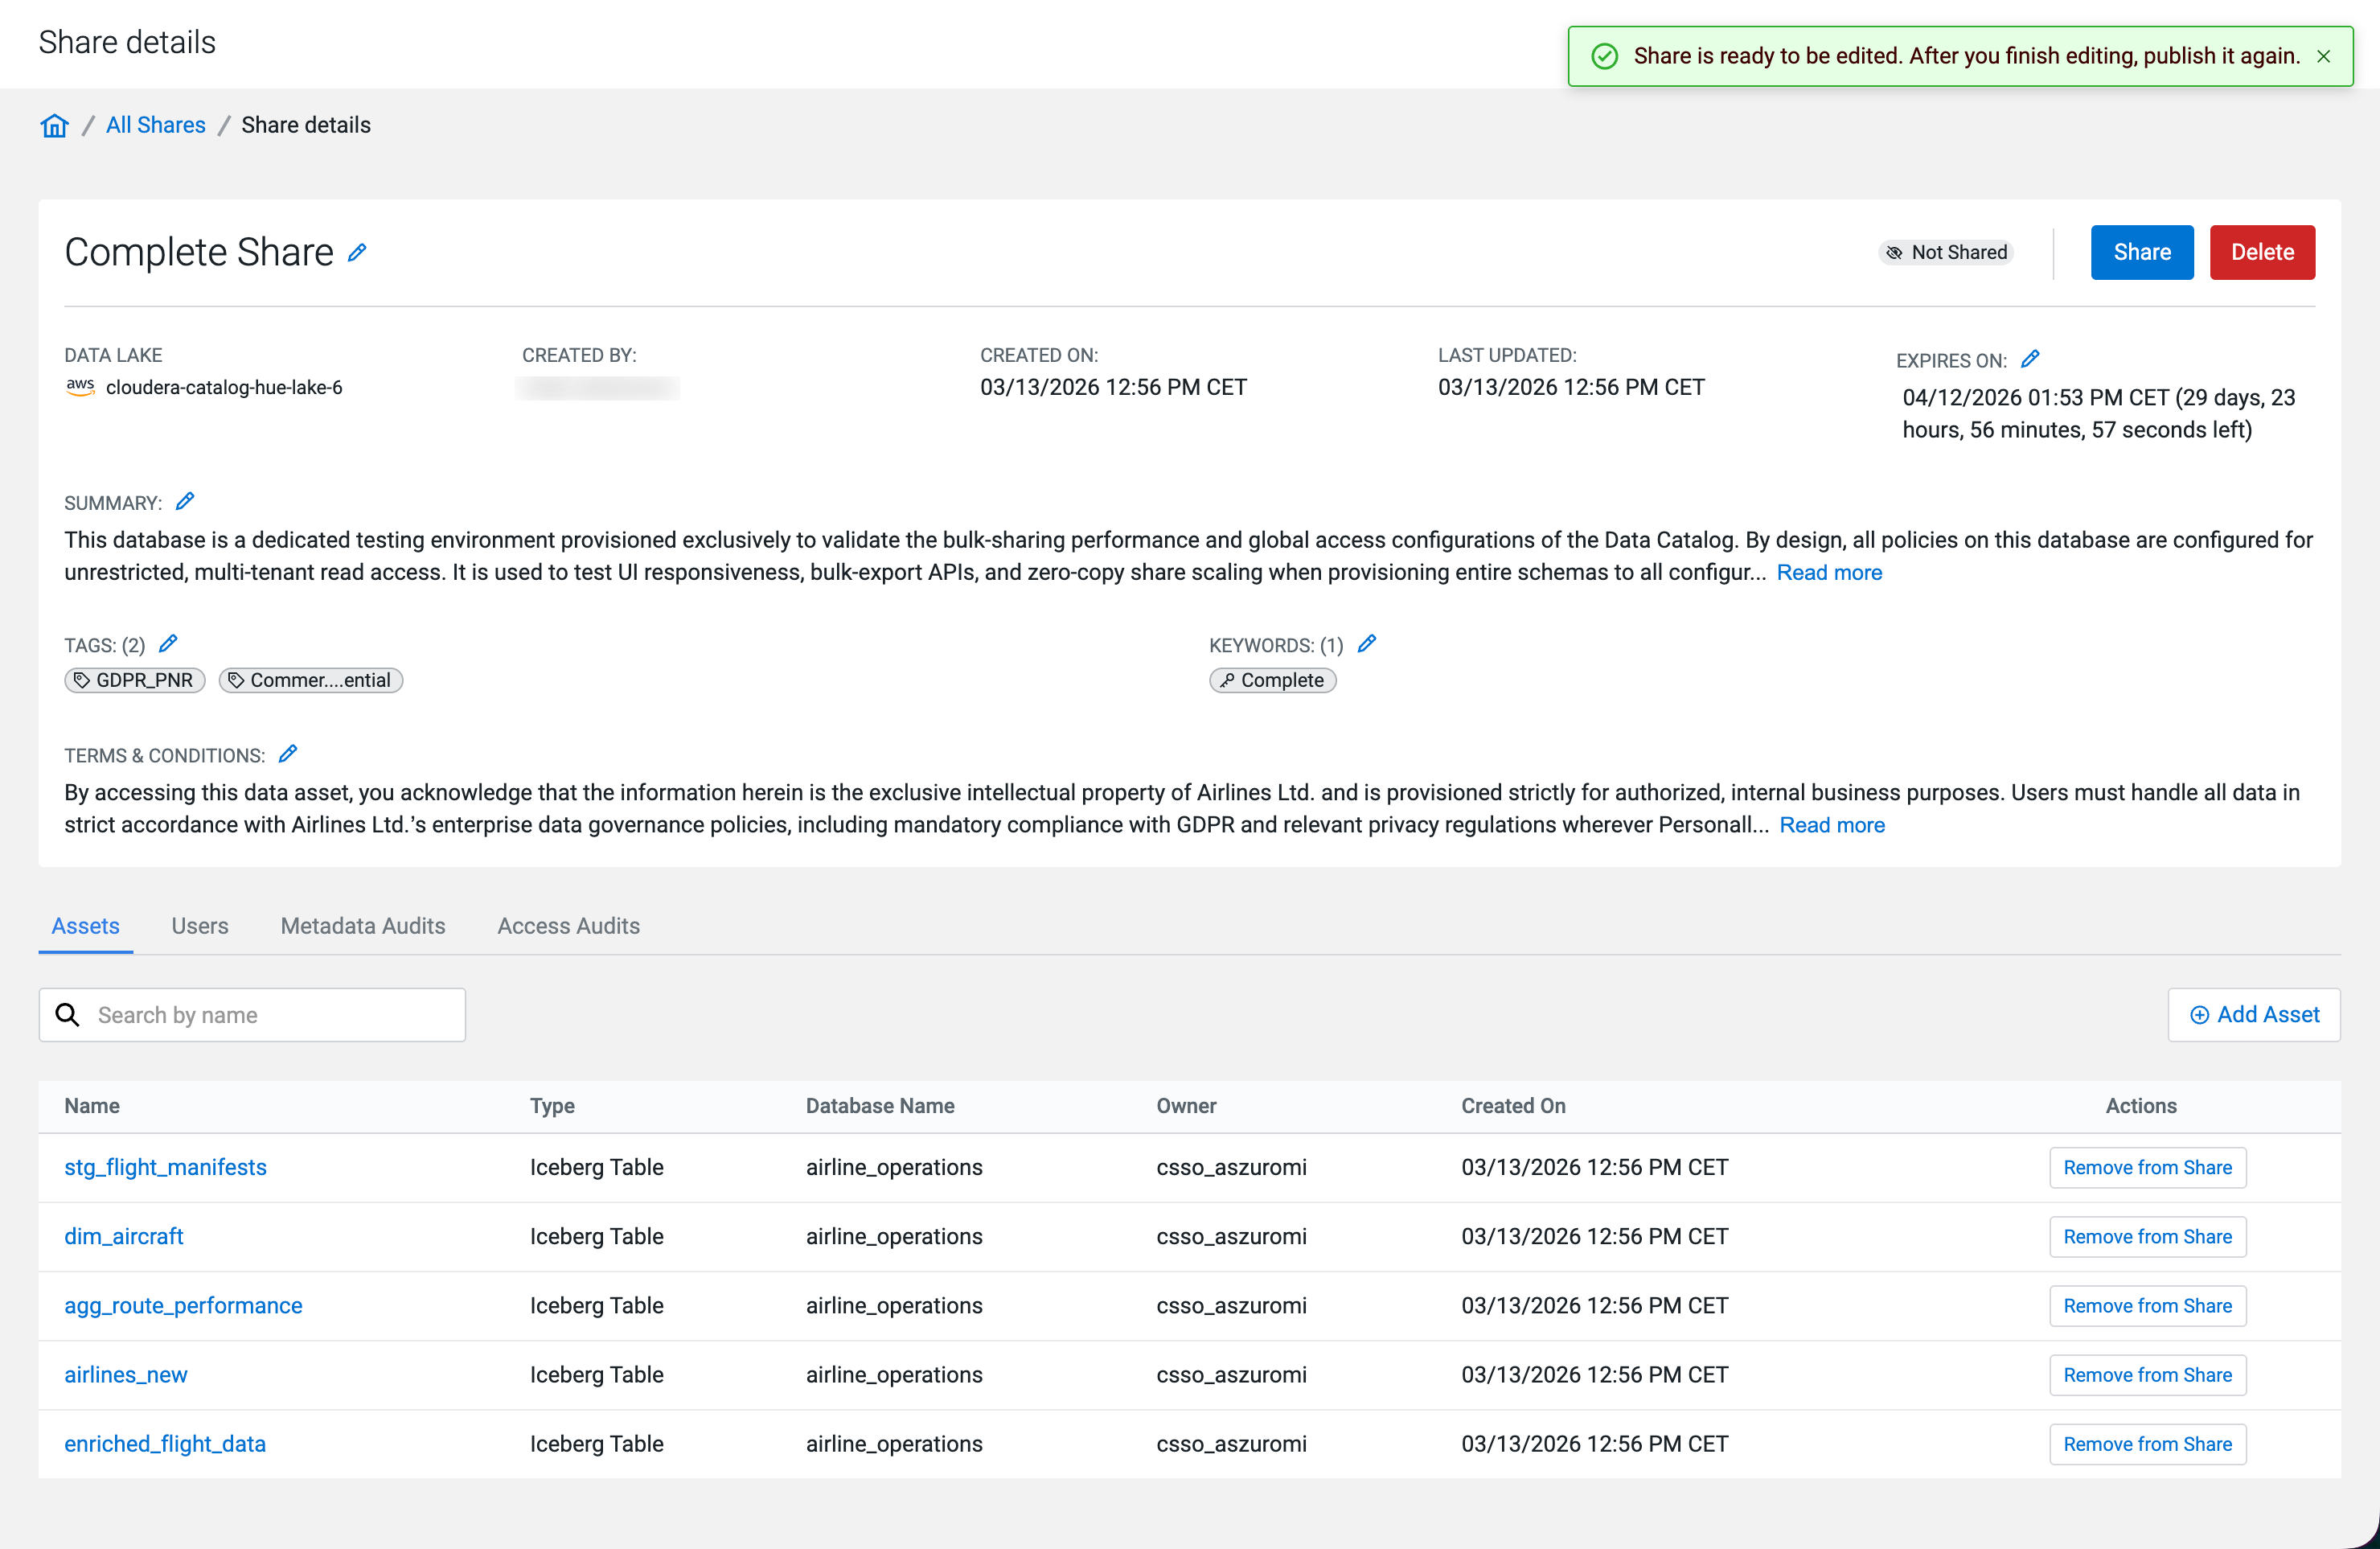
Make your changes in the Data Share:
- Adding or removing assets
-
You can add assets, or remove them individually by clicking the
 icon on the asset row. To remove multiple assets in bulk, select the
checkboxes for the assets and click Remove
Asset.
icon on the asset row. To remove multiple assets in bulk, select the
checkboxes for the assets and click Remove
Asset.Figure 4. Adding assets 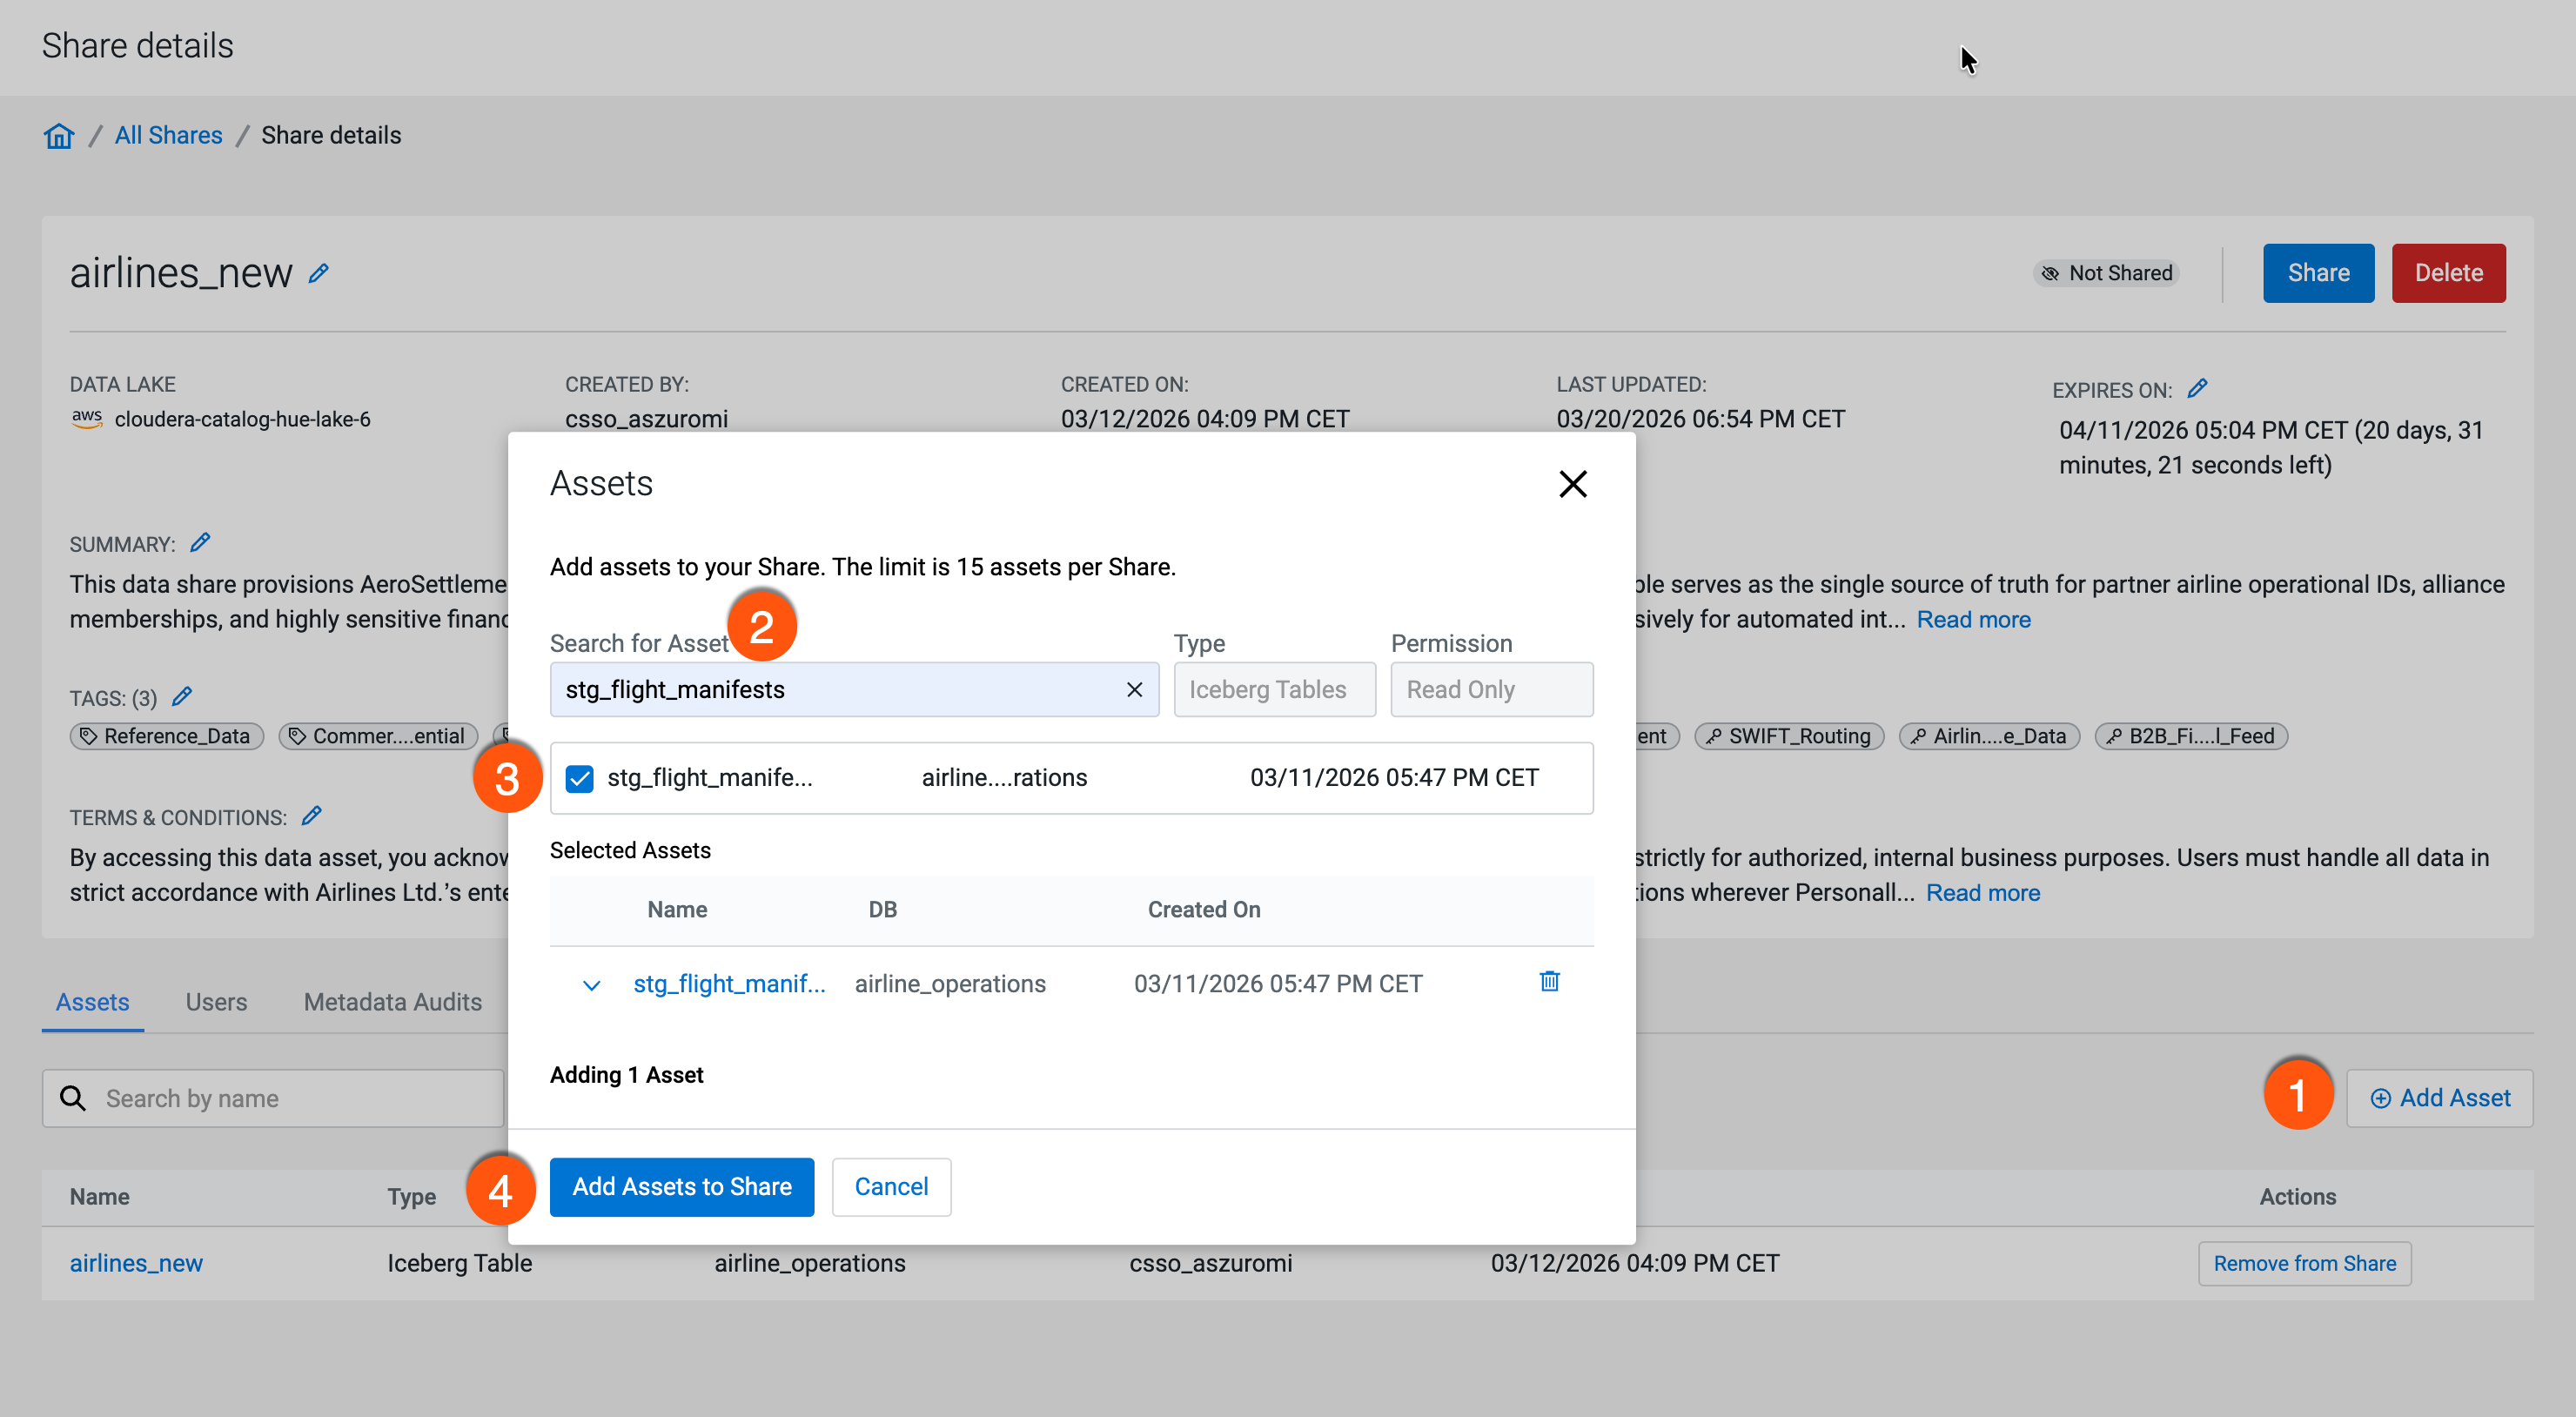
Figure 5. Removing assets 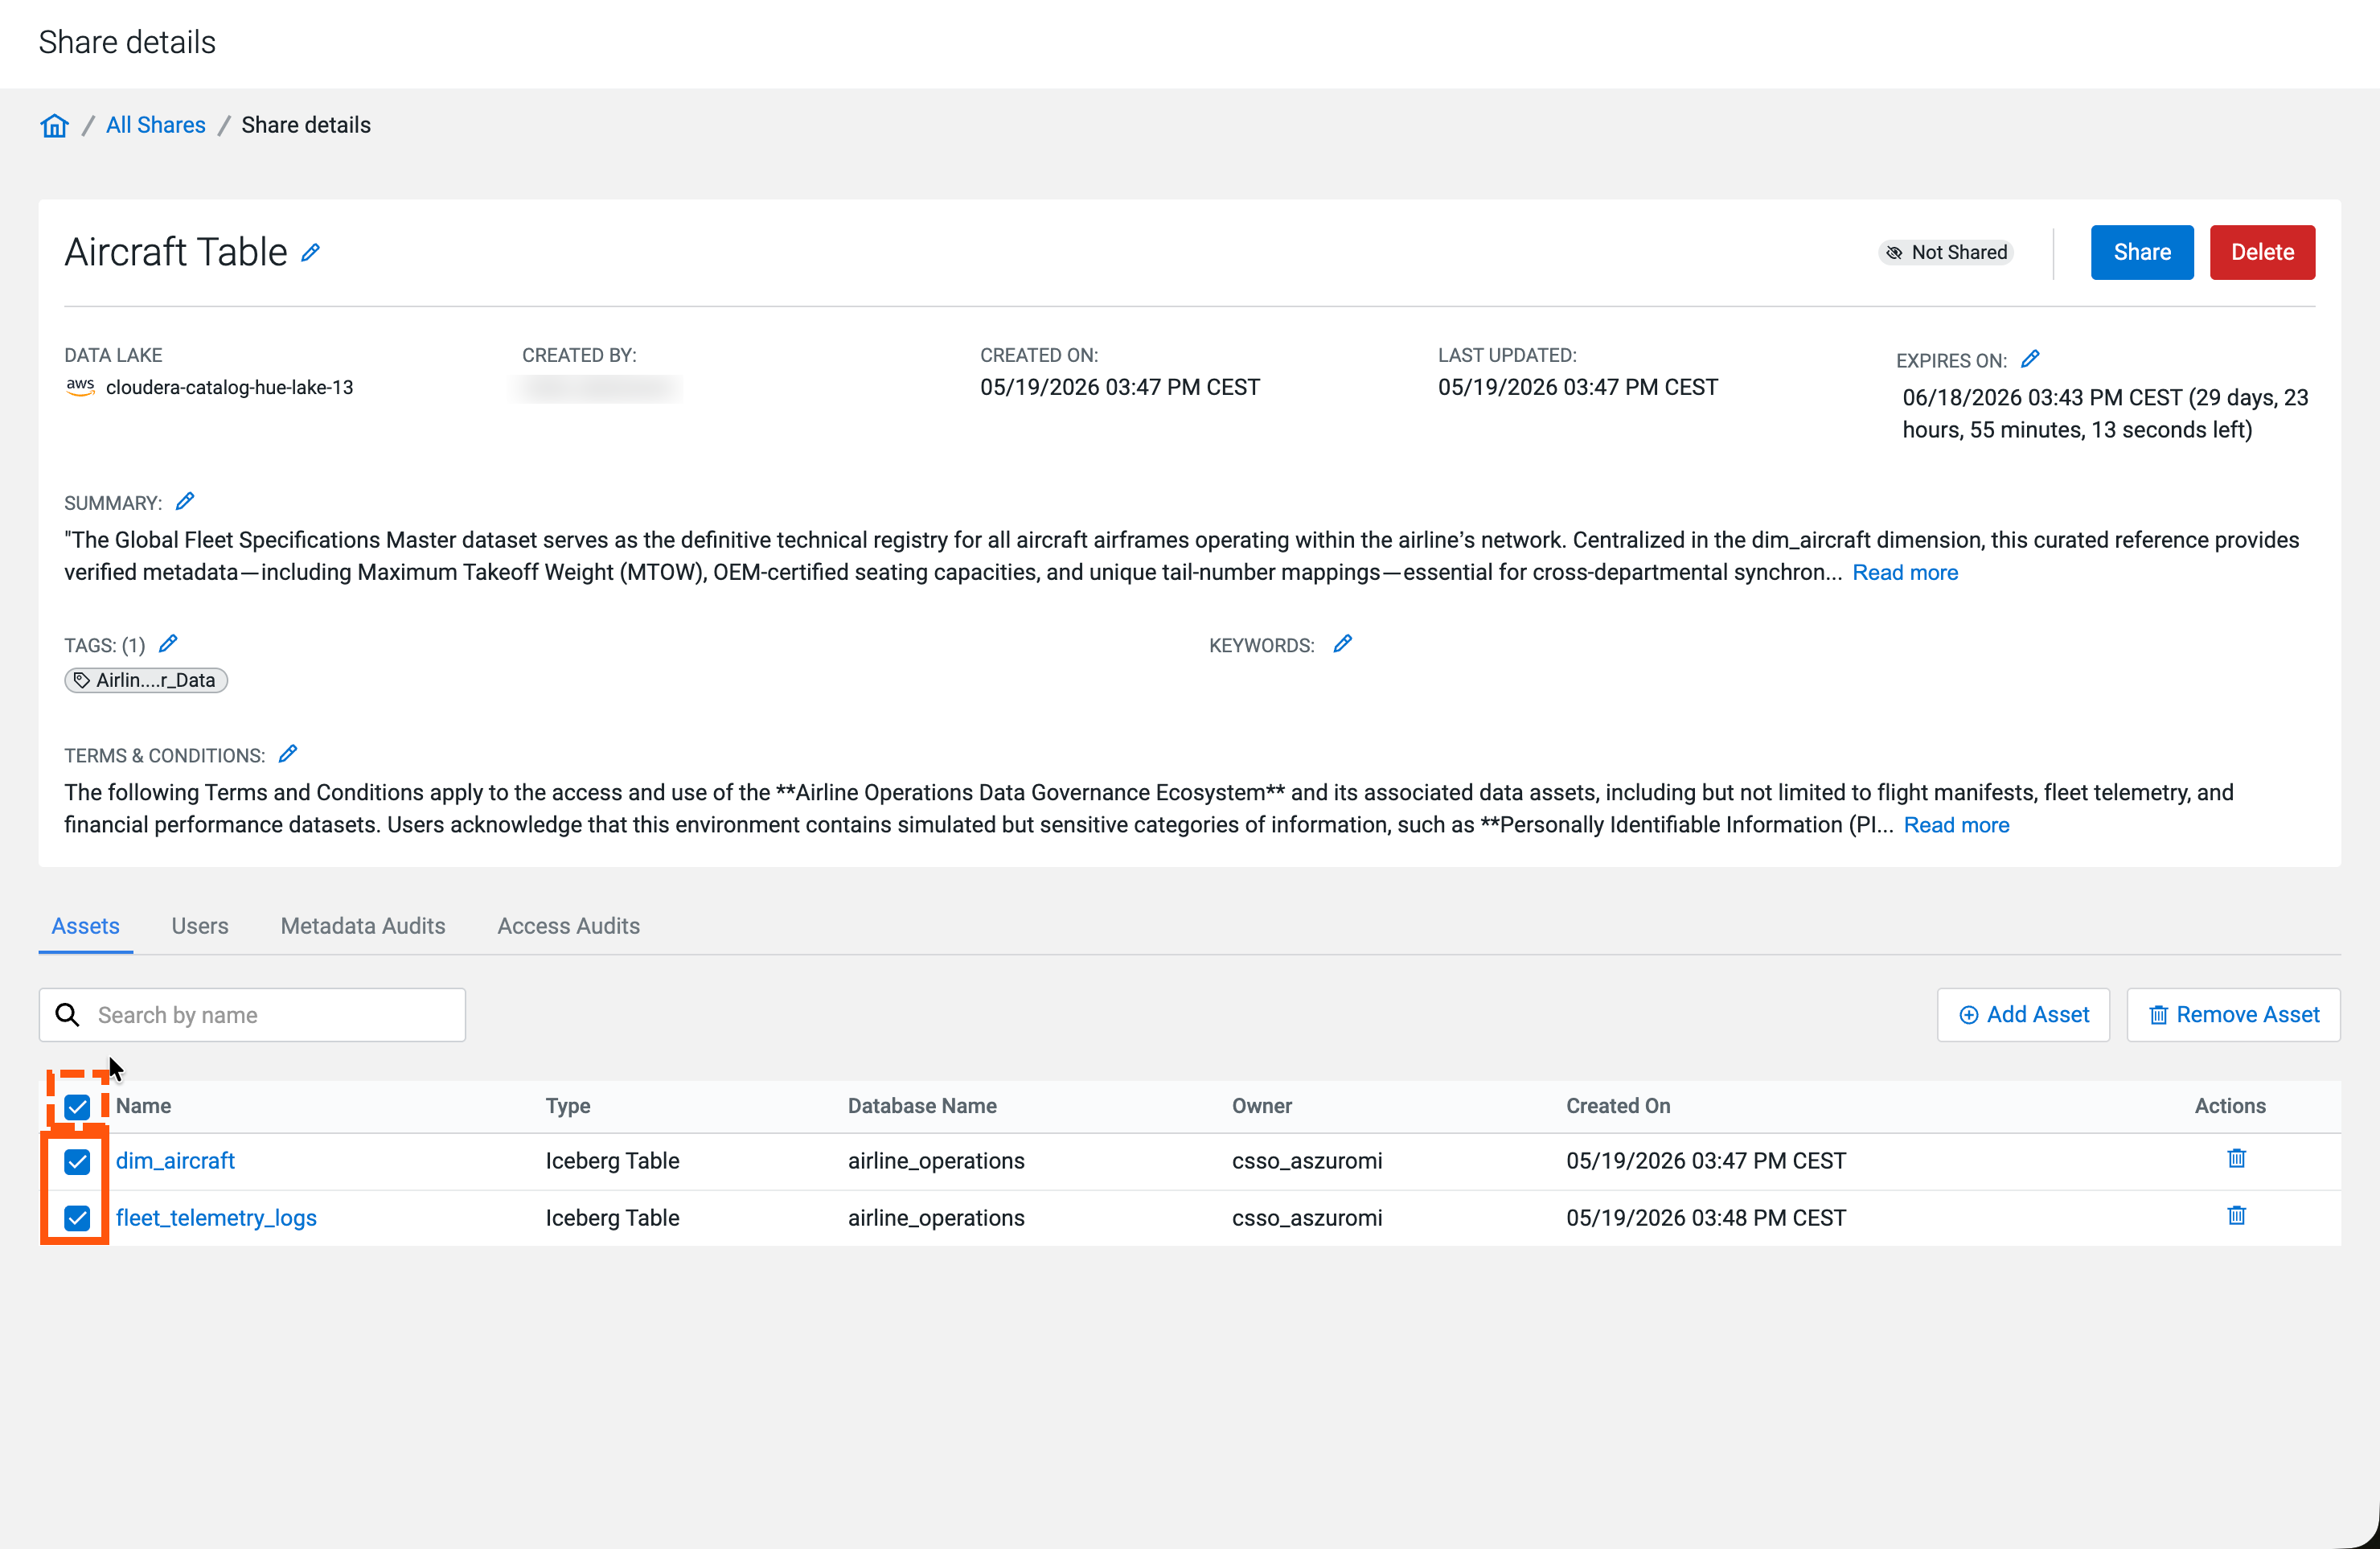
- Editing access time
-
- Click the
 icon, then Edit Access
Time.
icon, then Edit Access
Time. - Select a new date.
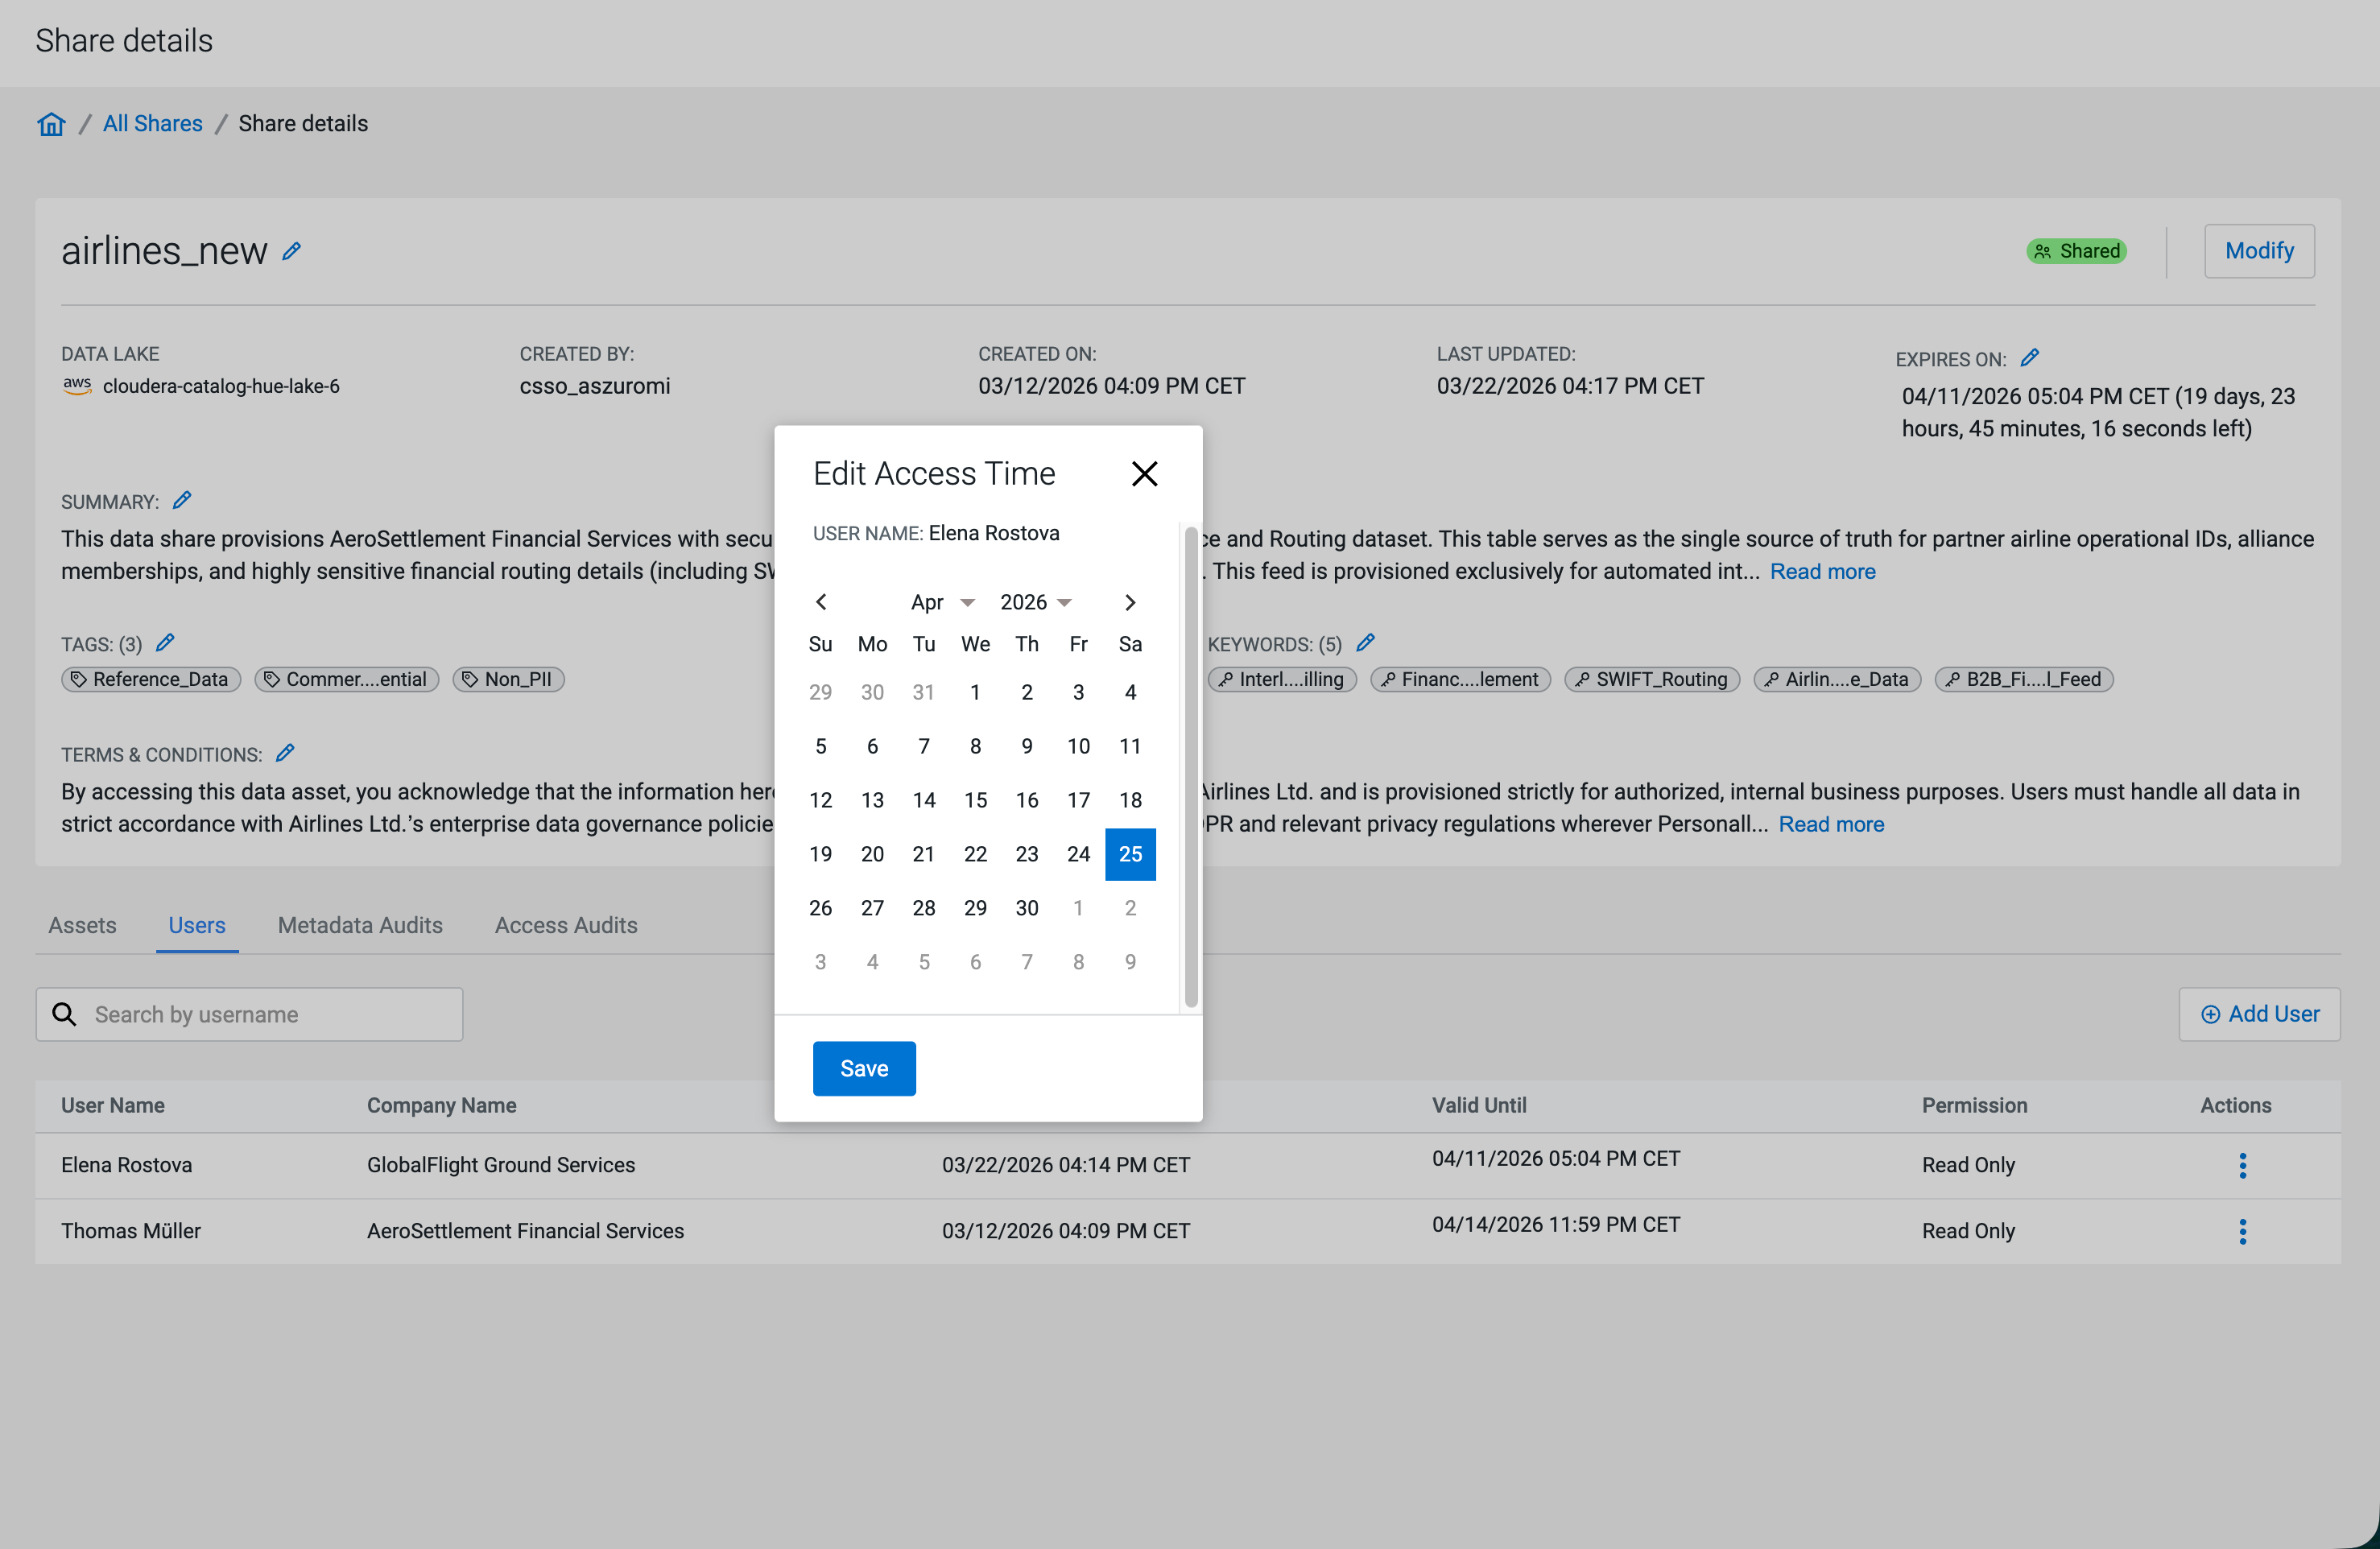
- Click the
- Revoking user access
-
- Click the icon, then Revoke
Access.
- Confirm revoking the user's access.
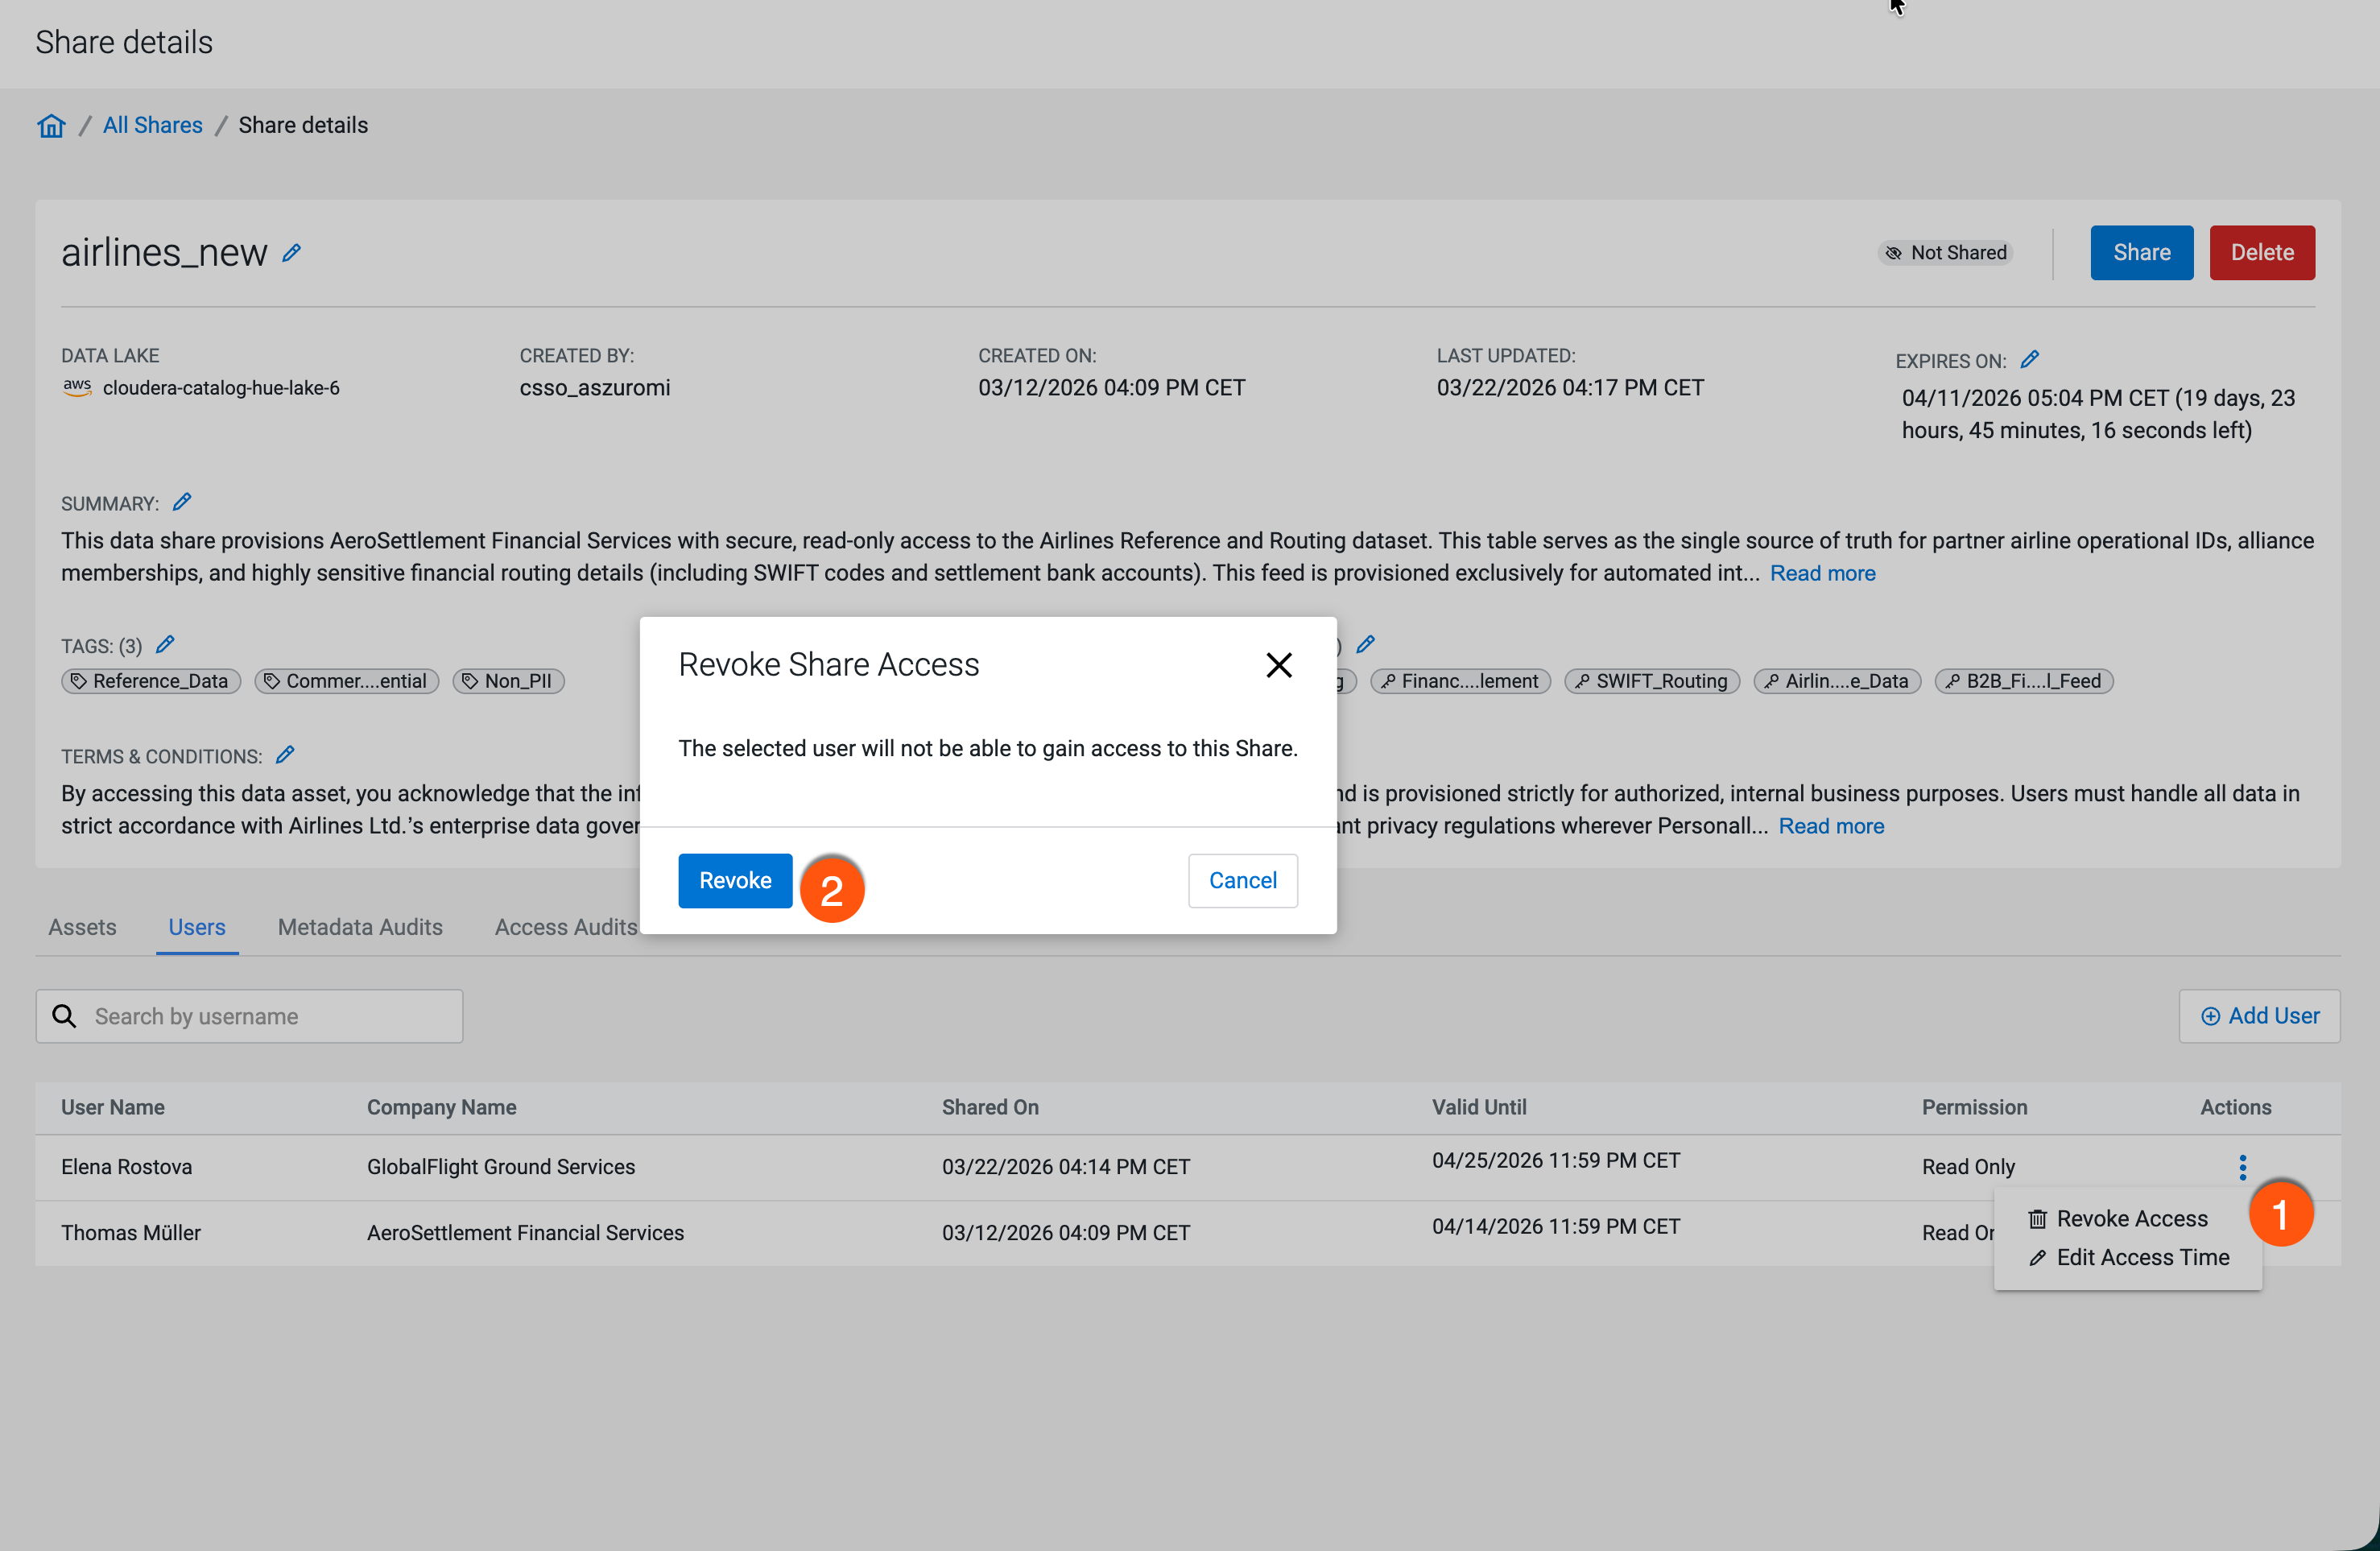
- Click the
-
Update the Share as needed (for example, assets, users, terms and conditions, or
additional information), then click Share and
Confirm Sharing to publish the updated Share.
Figure 6. Confirm Sharing dialog 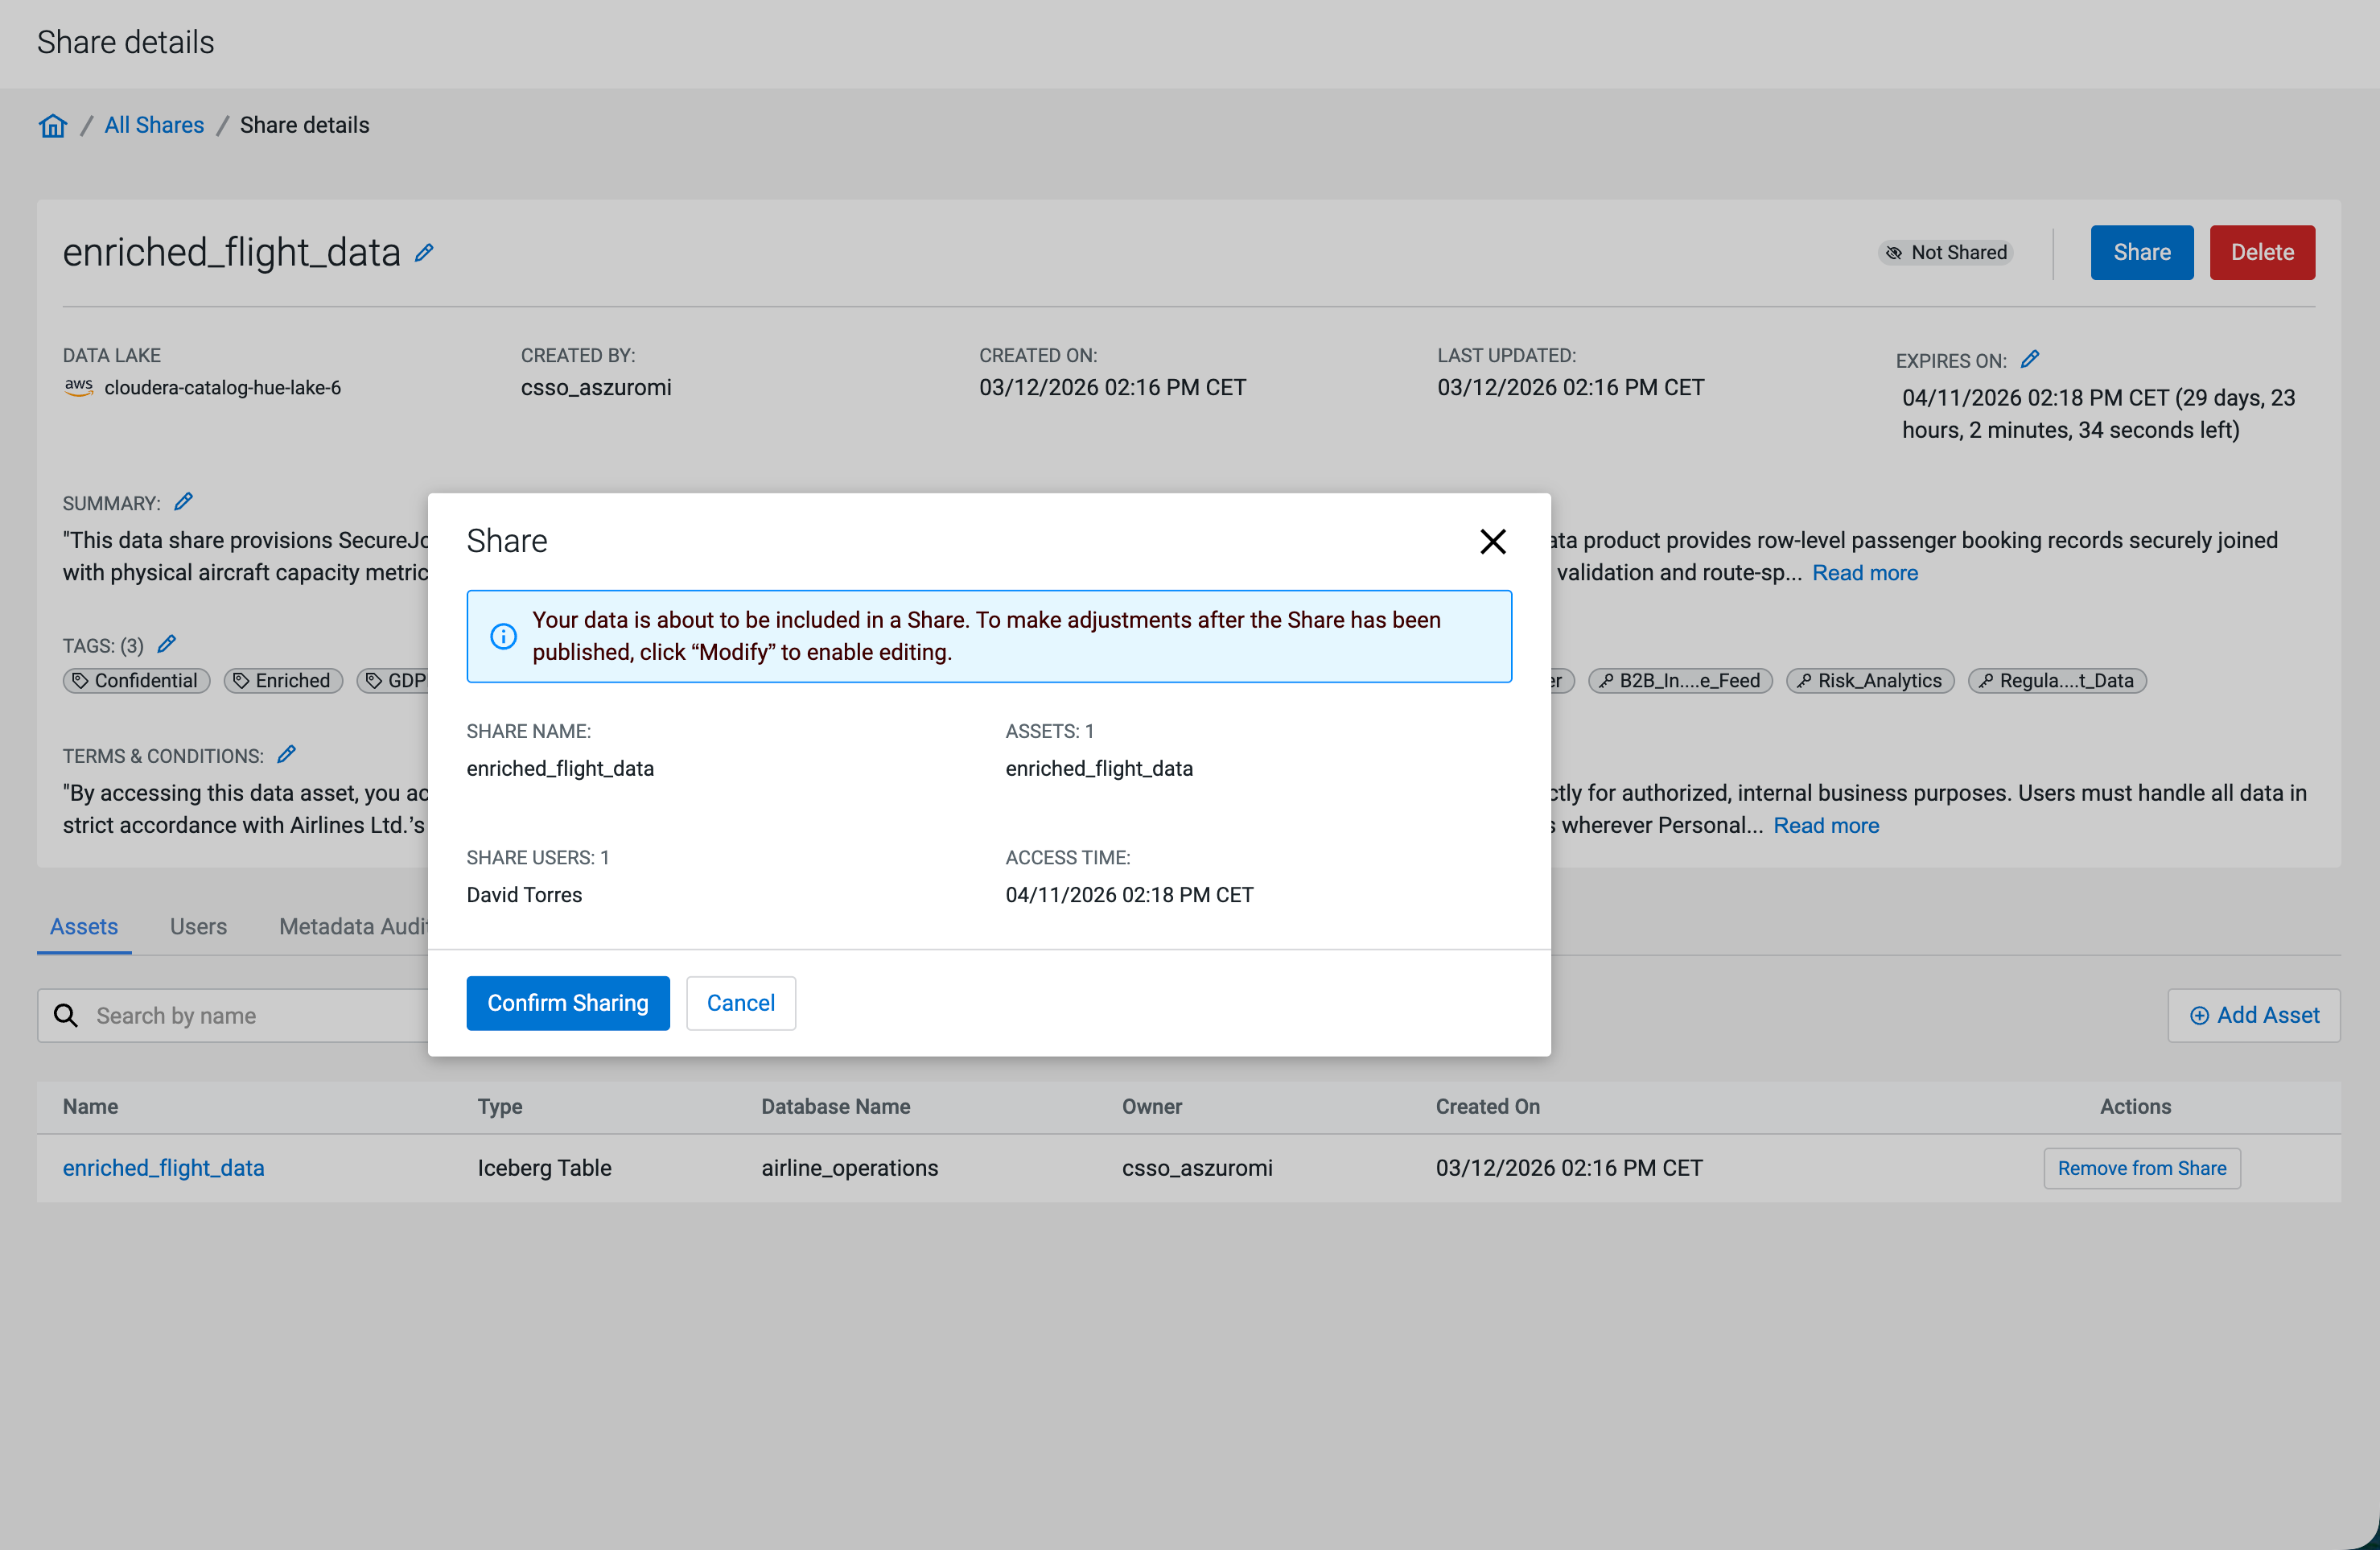
The Data Share is published again with Shared status. External users receive access consistent with the updated configuration and assignments.