Creating a new Data Share
Create and publish a Data Share in Cloudera Data Catalog to grant external users read-only access to Iceberg tables.
A Data Share is a logical unit that groups one or more Iceberg tables and grants specific external users read-only access to them for a defined period. The New Share wizard guides you through six steps: Share Name, Assets, Users, Terms and Conditions, Additional Information, and Review. All steps can be revisited after creation, you can also populate and customize a Share after initially creating it.
- You must have the
DataShareAdminresource role for the relevant environment. - External users who will be granted access must already be registered on the Manage Users page. For more information, see https://docs.cloudera.com/data-catalog/cloud/data-sharing-data-catalog/topics/dc-creating-external-users.html.
-
In Cloudera Data Catalog, go to Data
Sharing and click New Share.
Select the target Data Lake from the dropdown if it is not already selected. The New Share wizard opens.
Figure 1. All Shares page 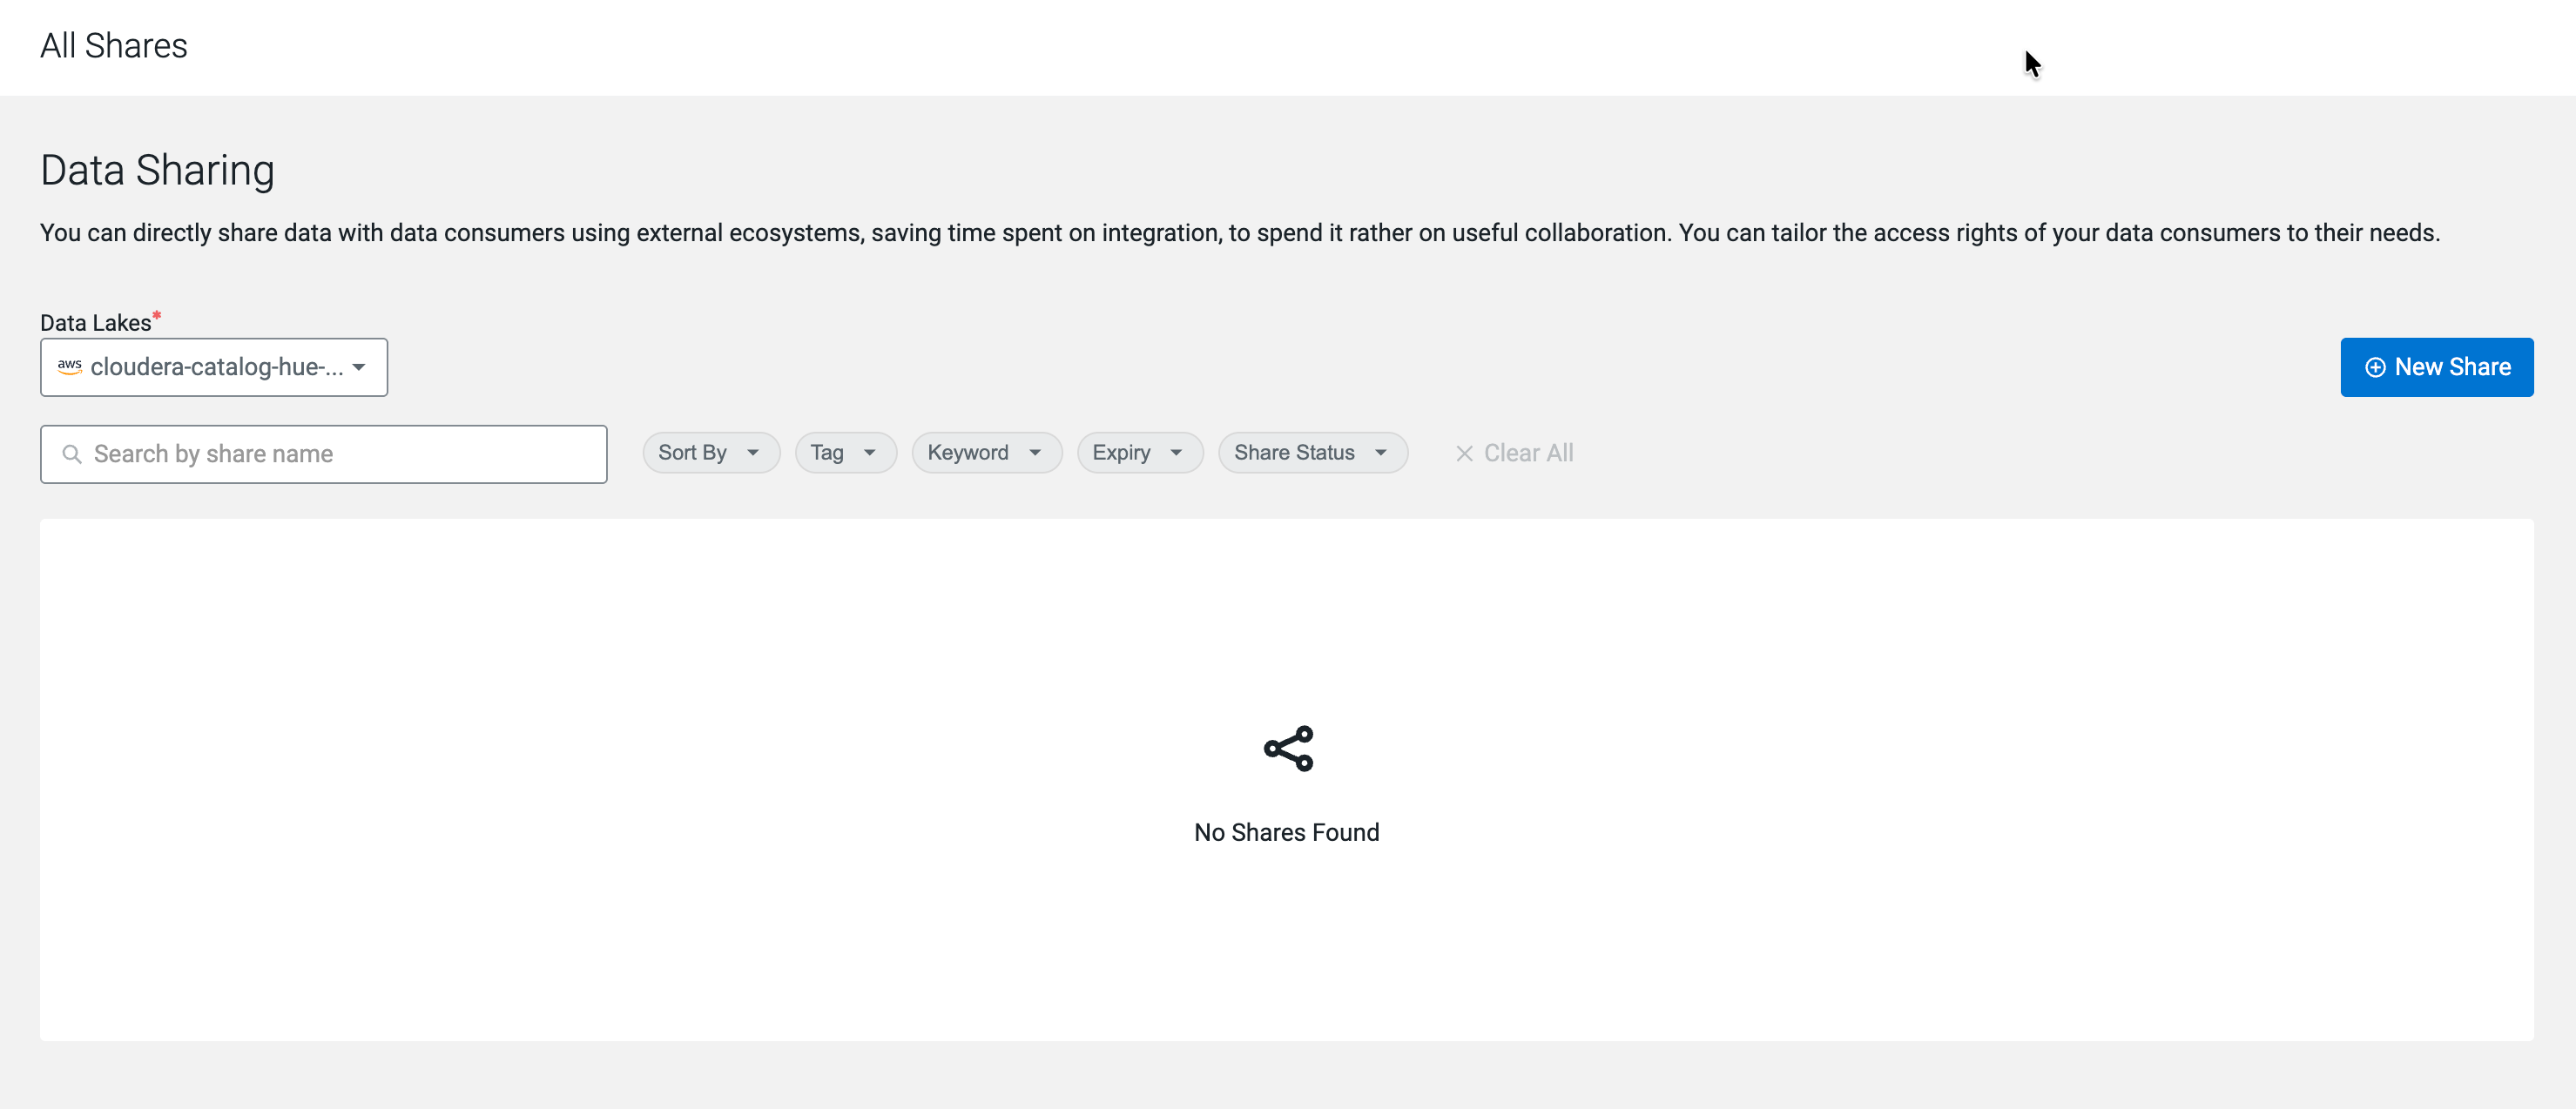
-
On the Assets step, search for and select the Iceberg
tables to include in the Data Share, then click
Next.
Type a name in the Search for Asset field and check the checkbox next to the asset to add it to the Selected Assets list.
Figure 2. Asset selection 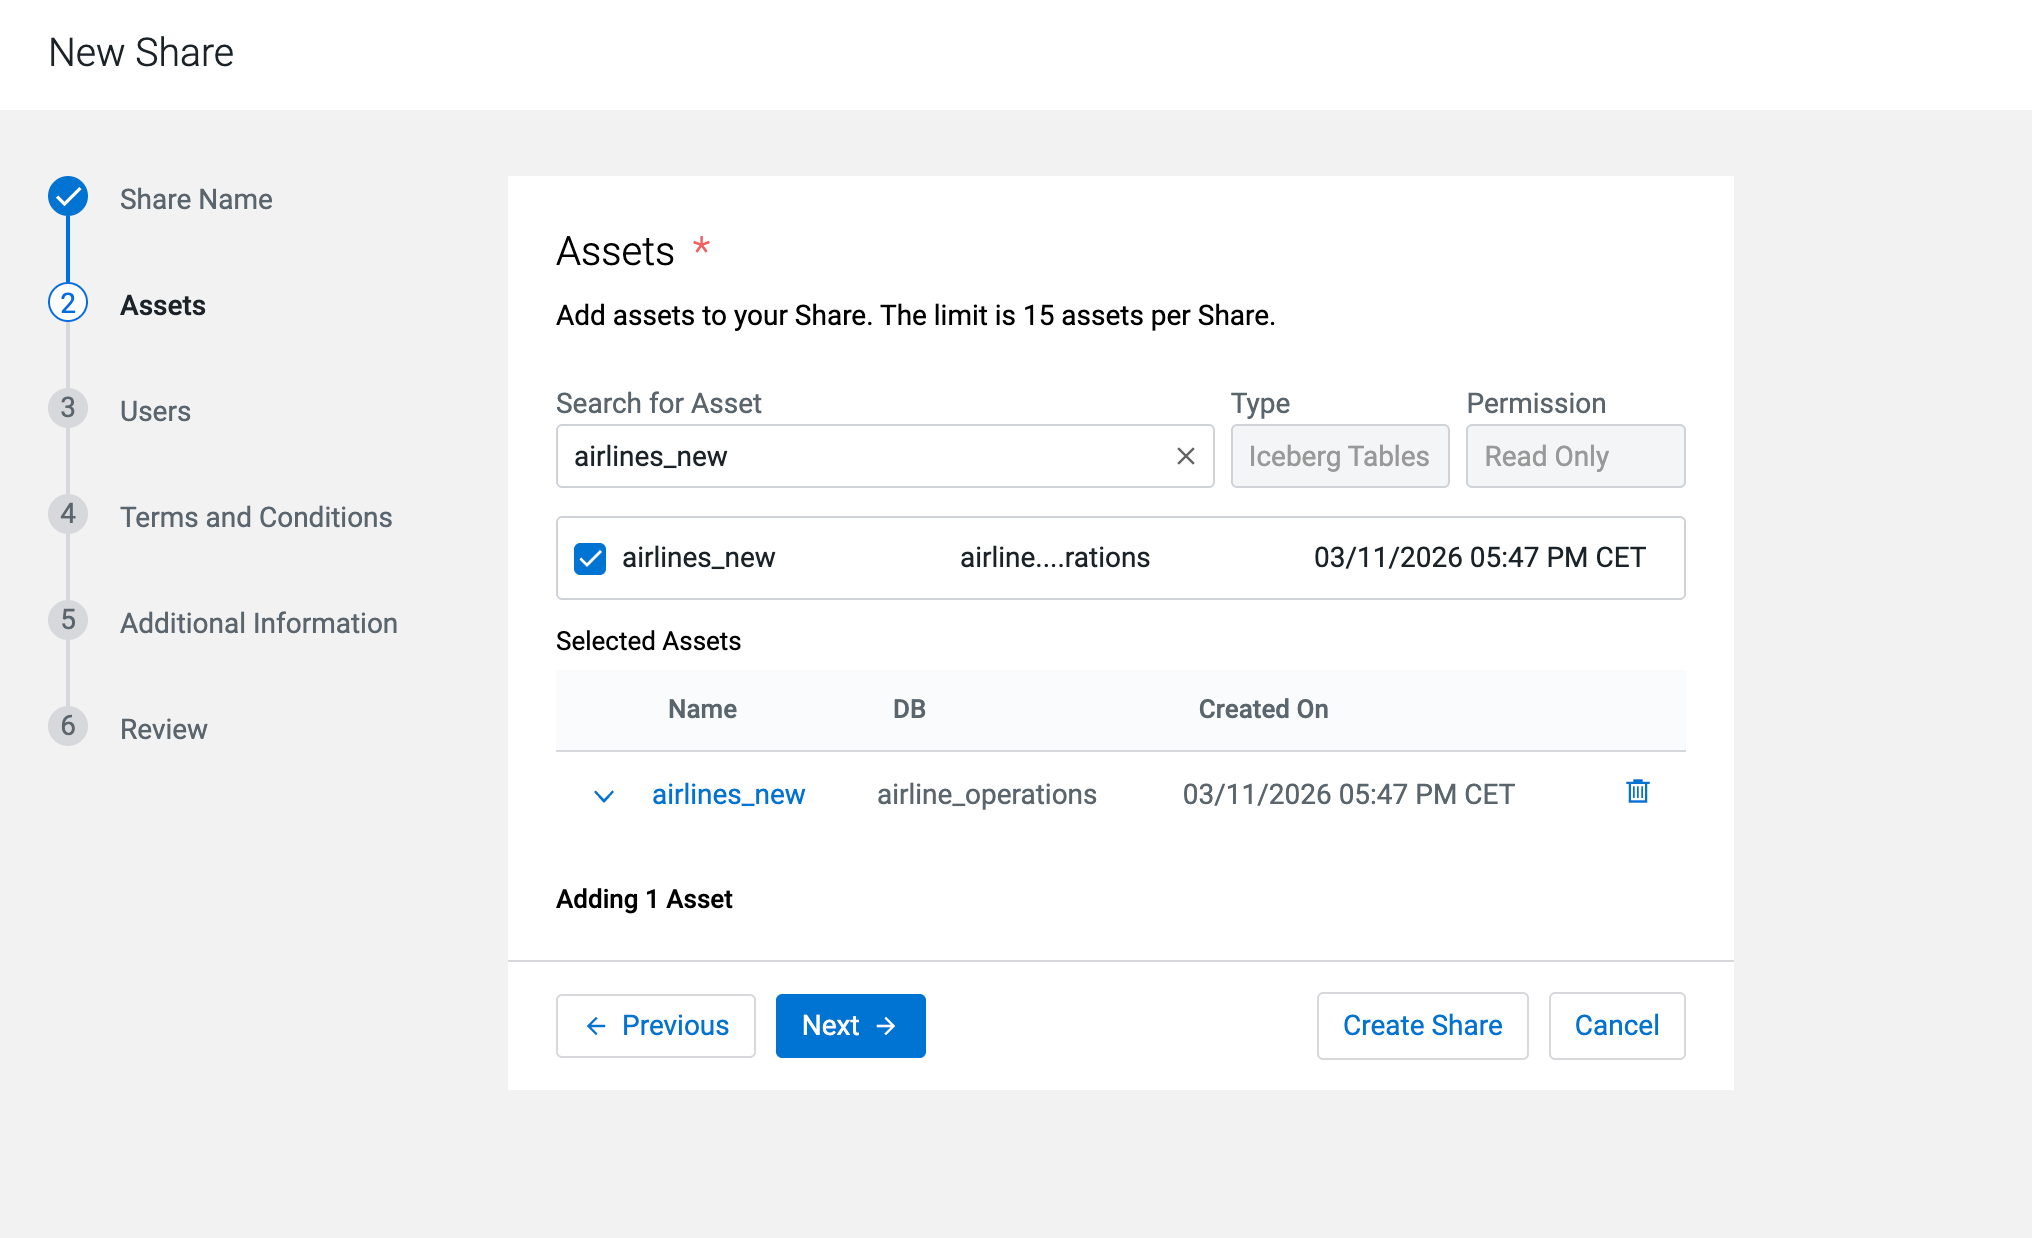
-
On the Users step, search for and select the external
users who will have access to this Data Share, then click
Next.
Type a name in the Search for User field and check the checkbox next to the user to add them to Selected Users. The Valid Until date defaults to 30 days from creation and can be adjusted per user by clicking the date. If the required user is not listed, click Register New User to register them first.
Figure 3. User selection 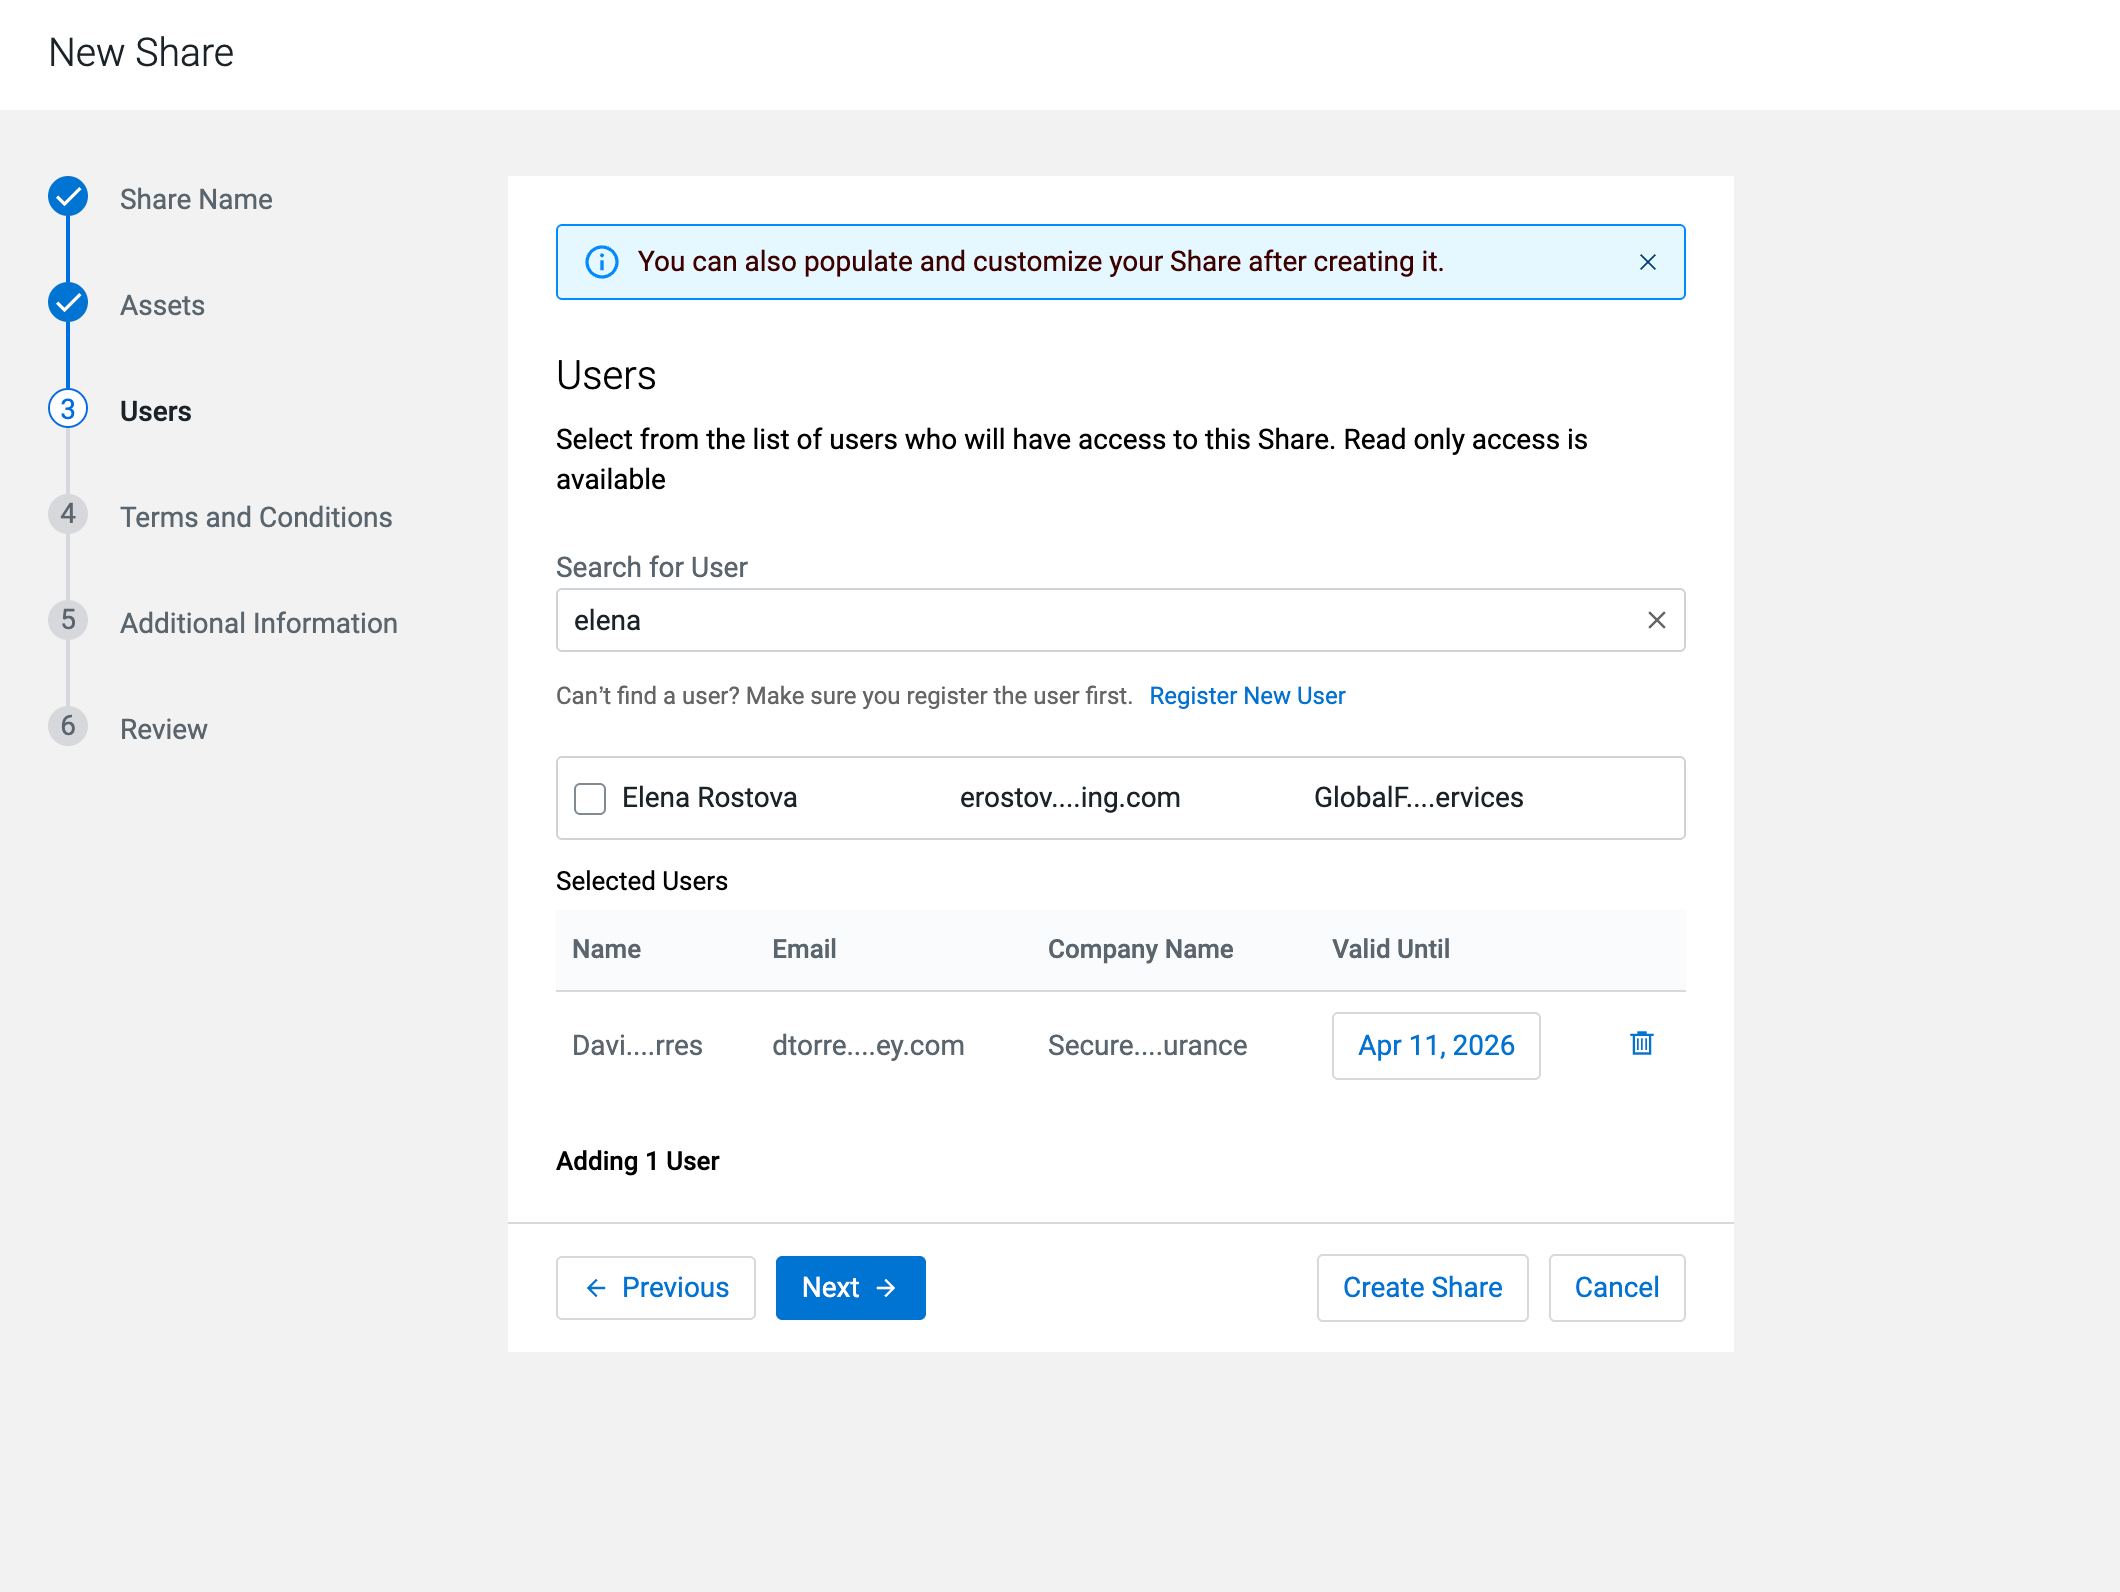
-
On the Terms and Conditions step, optionally enter a
terms and conditions text, then click Next.
Use this field to communicate data usage obligations, compliance requirements, or contractual constraints to Data Consumers. The field accepts up to 10,000 characters.
Figure 4. Terms and Conditions step 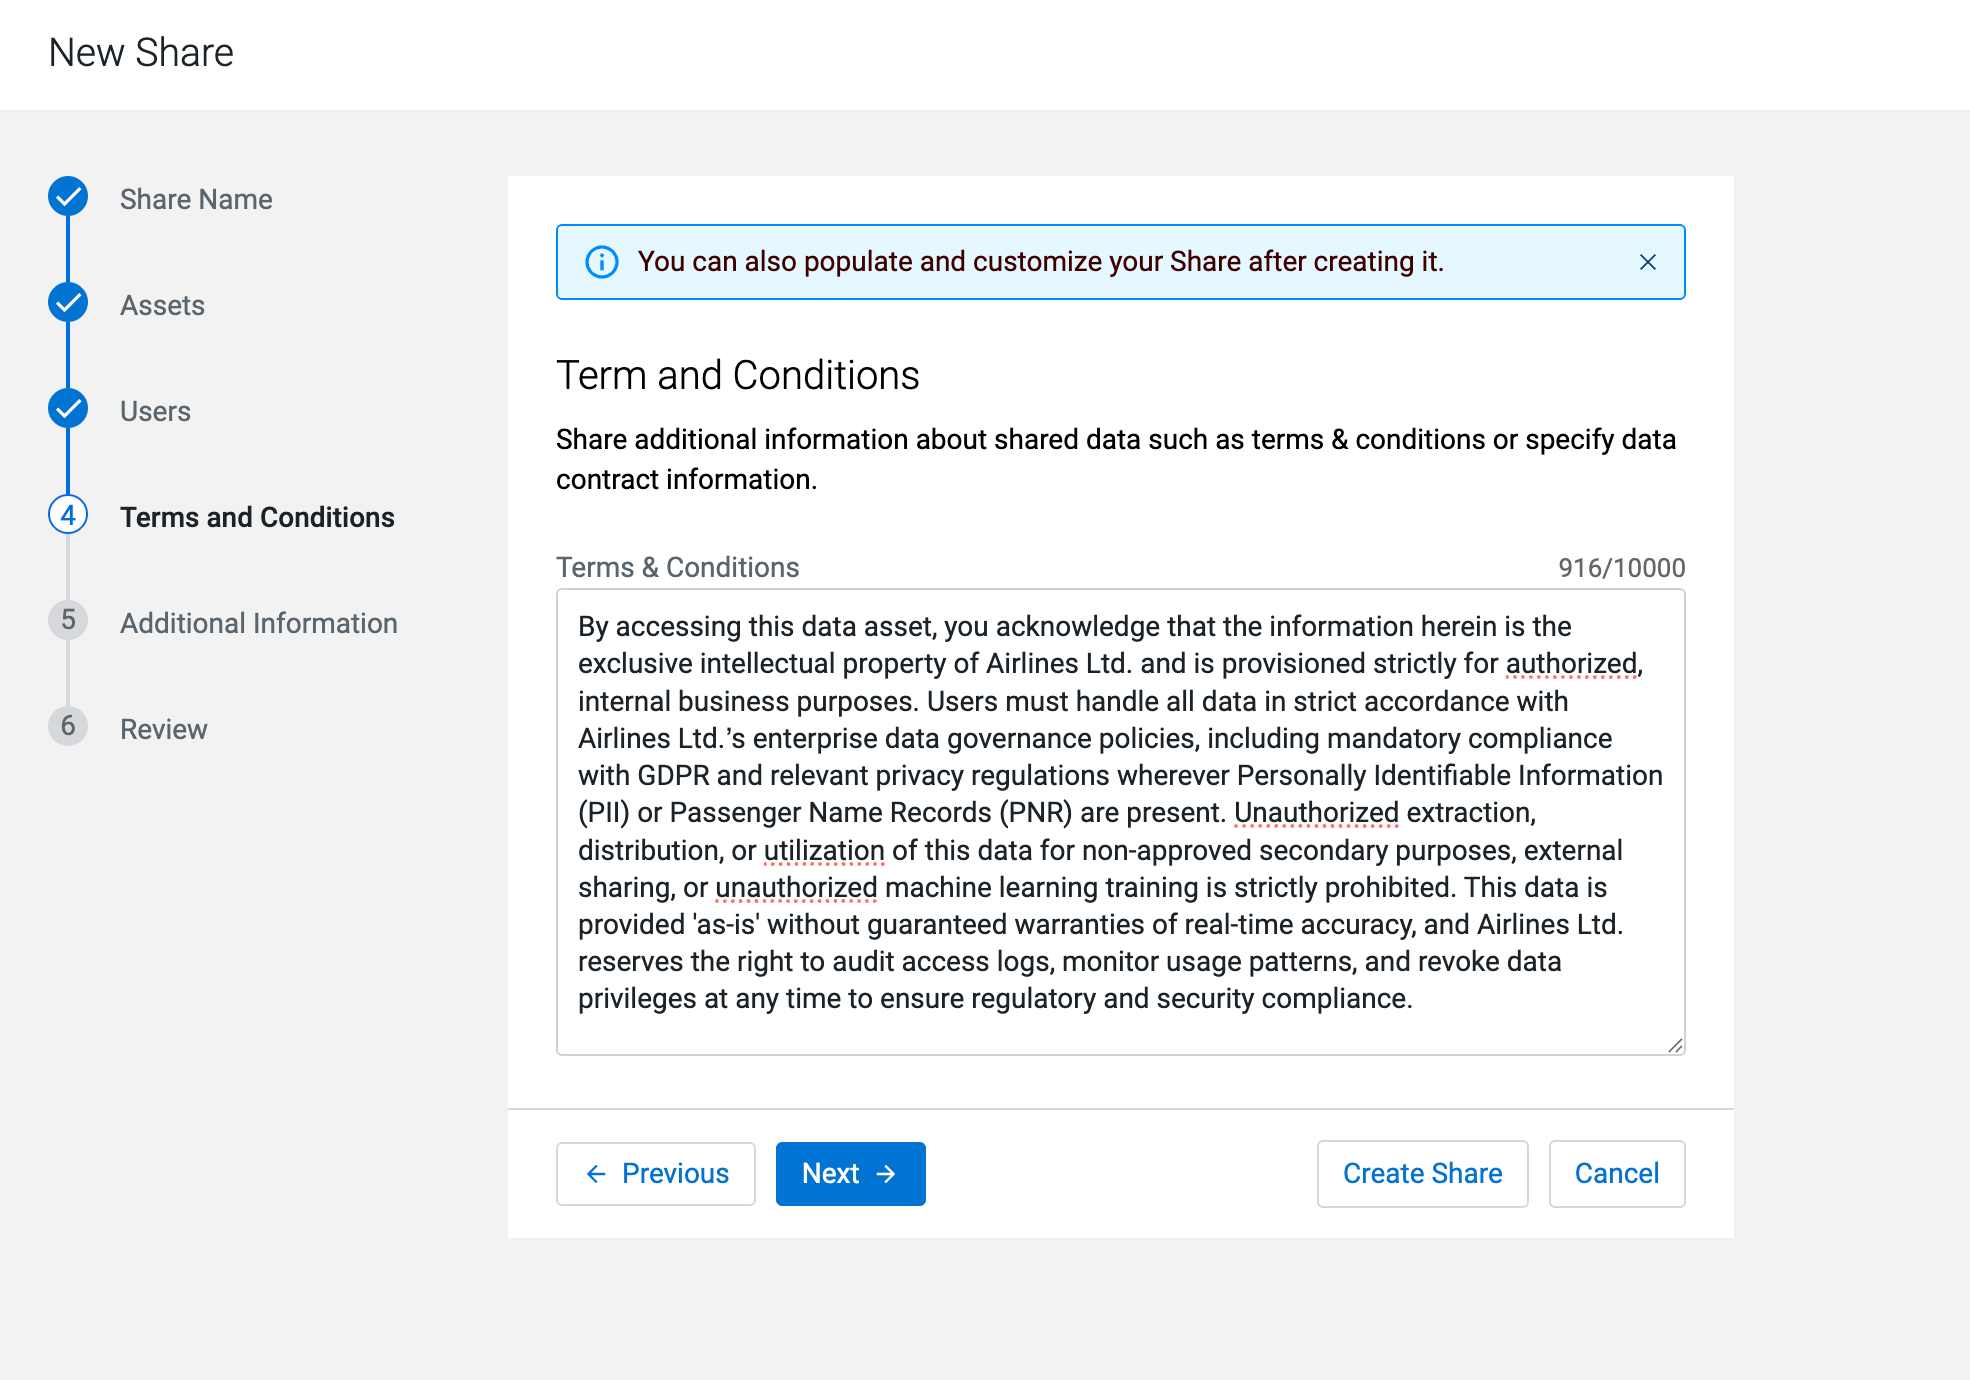
-
On the Additional Information step, optionally enter a
Summary, add Keywords, and
select Tags, then click
Next.
The summary (up to 10,000 characters) describes the Data Share content and intended audience, making it easier to discover. Keywords provide broad, high-level categorization. Tags apply Atlas tags (classifications) for specific context and subsequent lookup. Both keywords and Atlas classifications are internal to Cloudera Data Catalog search for Data Shares.
Figure 5. Additional Information step 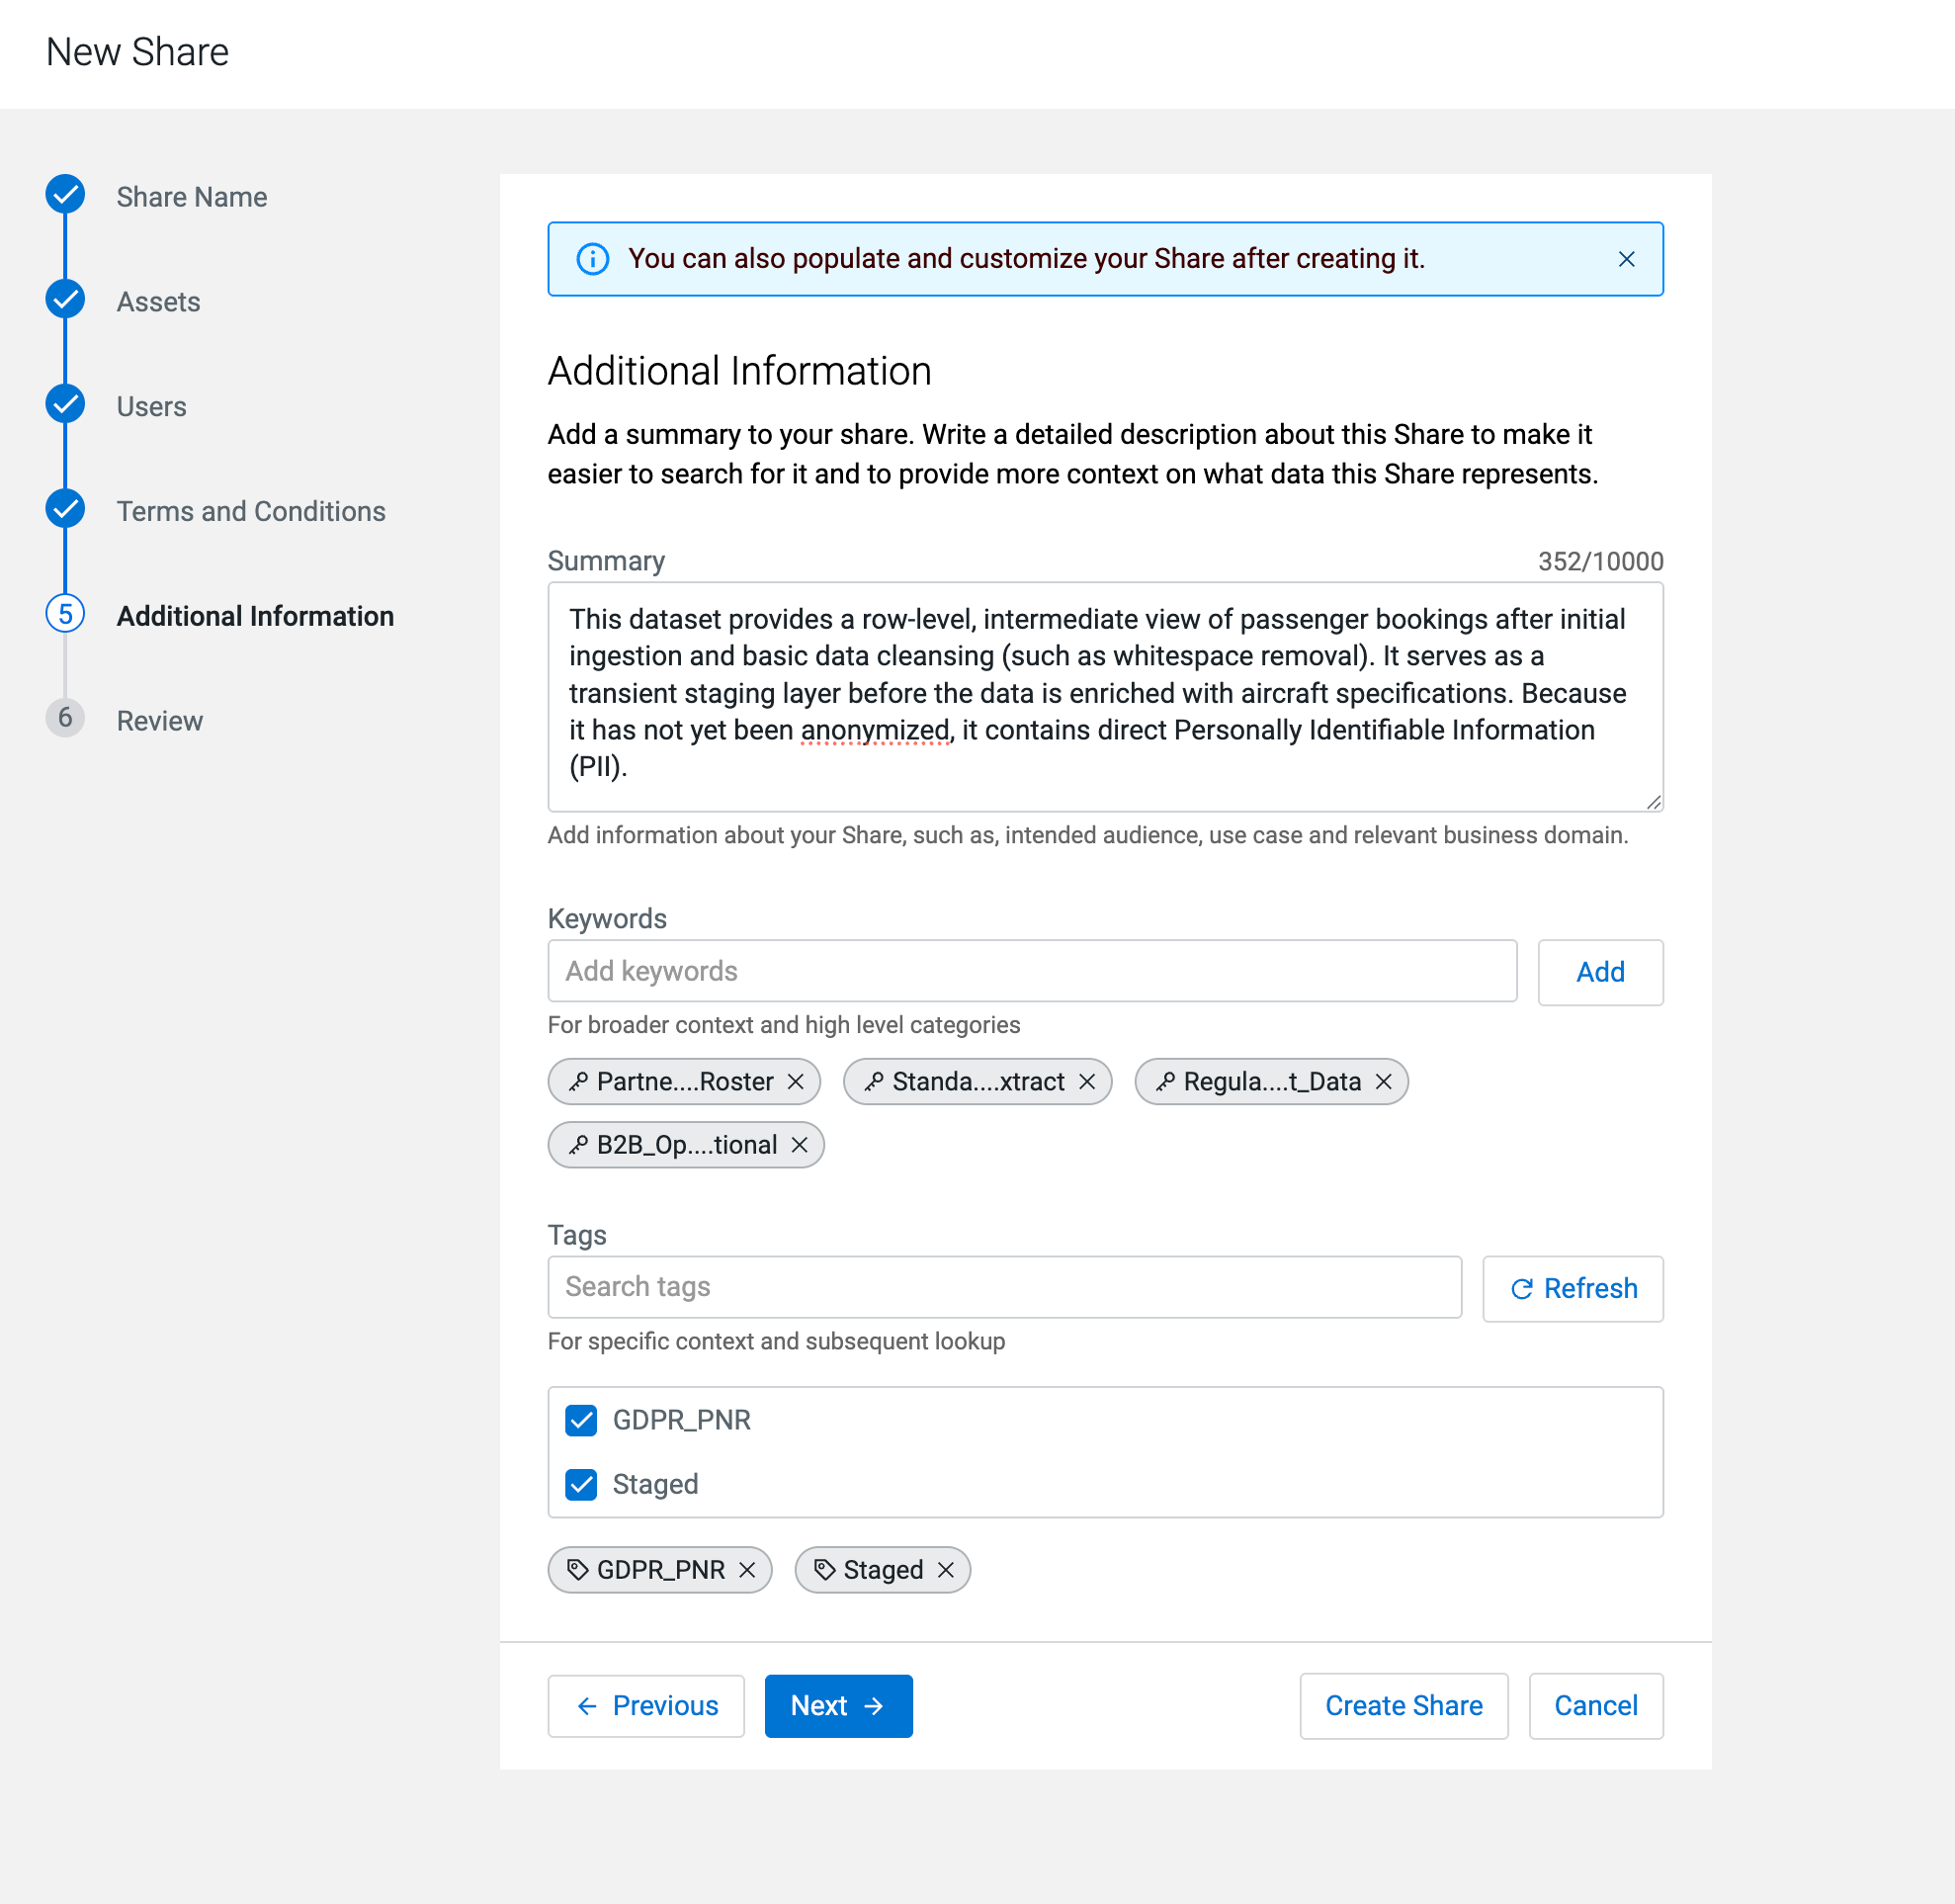
-
On the Review step, verify all Data Share details and
click Create Share.
Figure 6. New Share review step 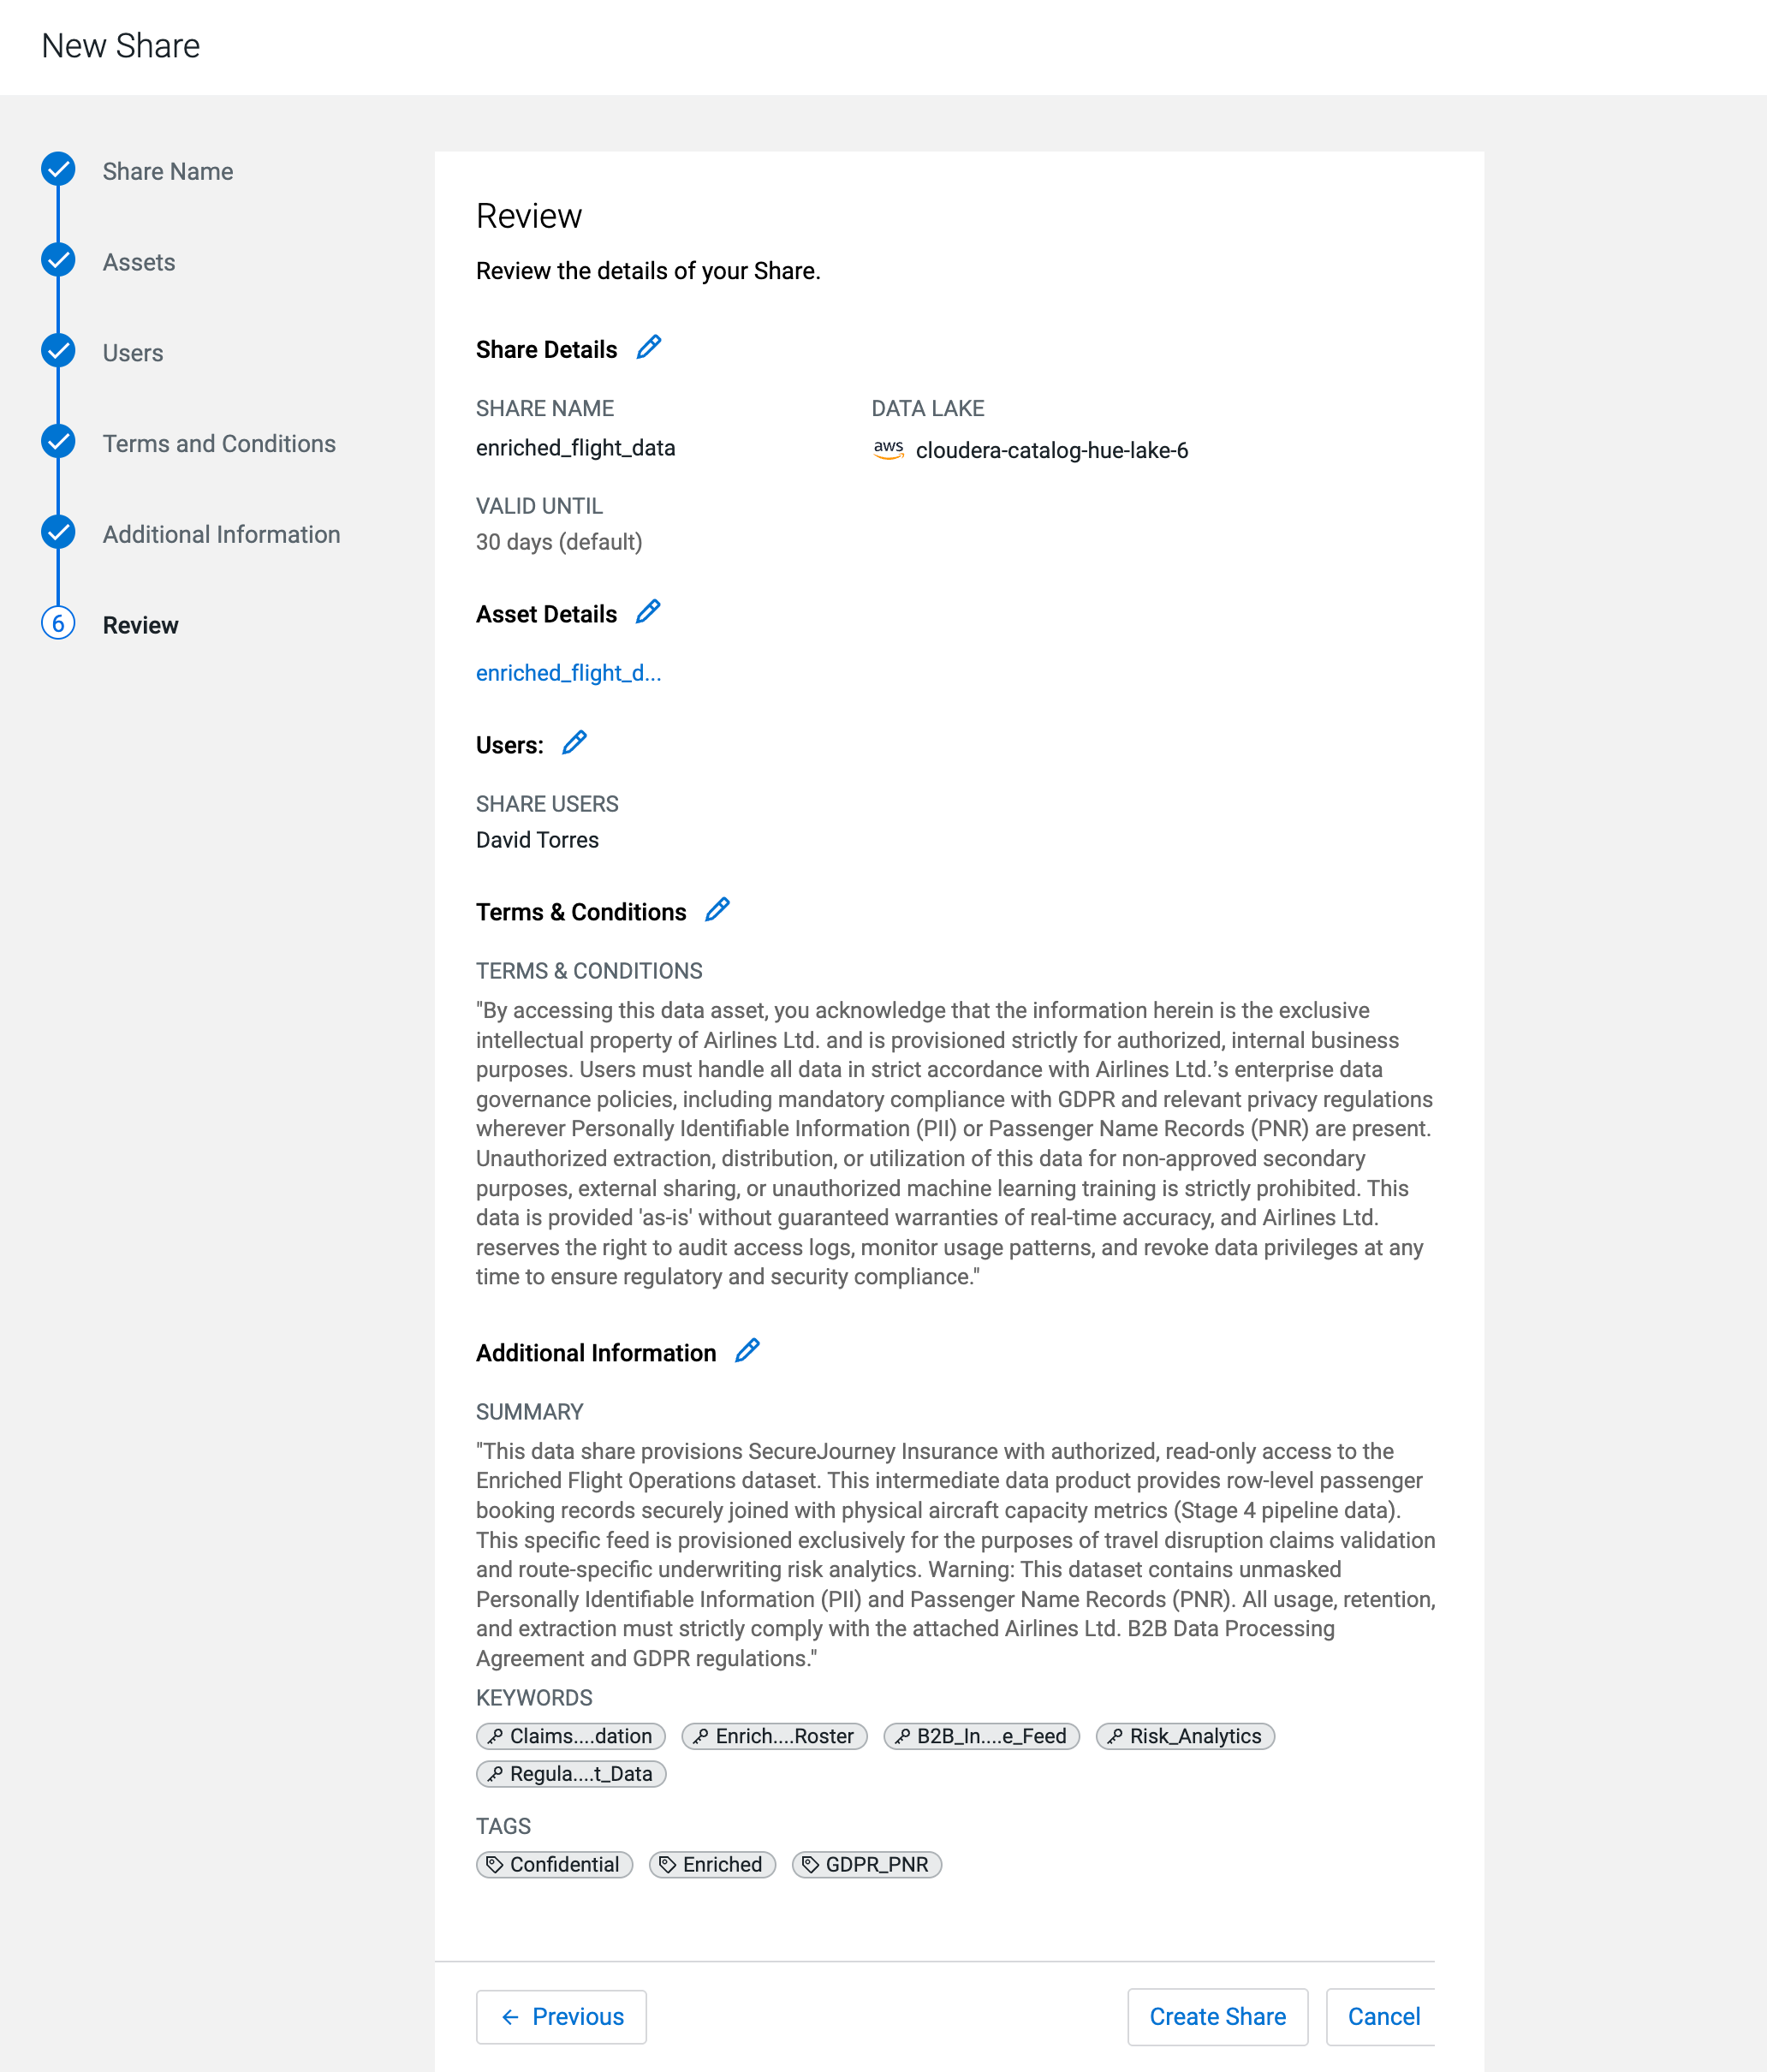
Data Shares are created in Not Shared status. Assets are not yet accessible to users until you publish the Data Share.

-
On the Share details page, click
Share.
The Share confirmation dialog opens, showing the Data Share name, included assets, assigned users, and the access expiry time.
Figure 7. Confirm Sharing dialog 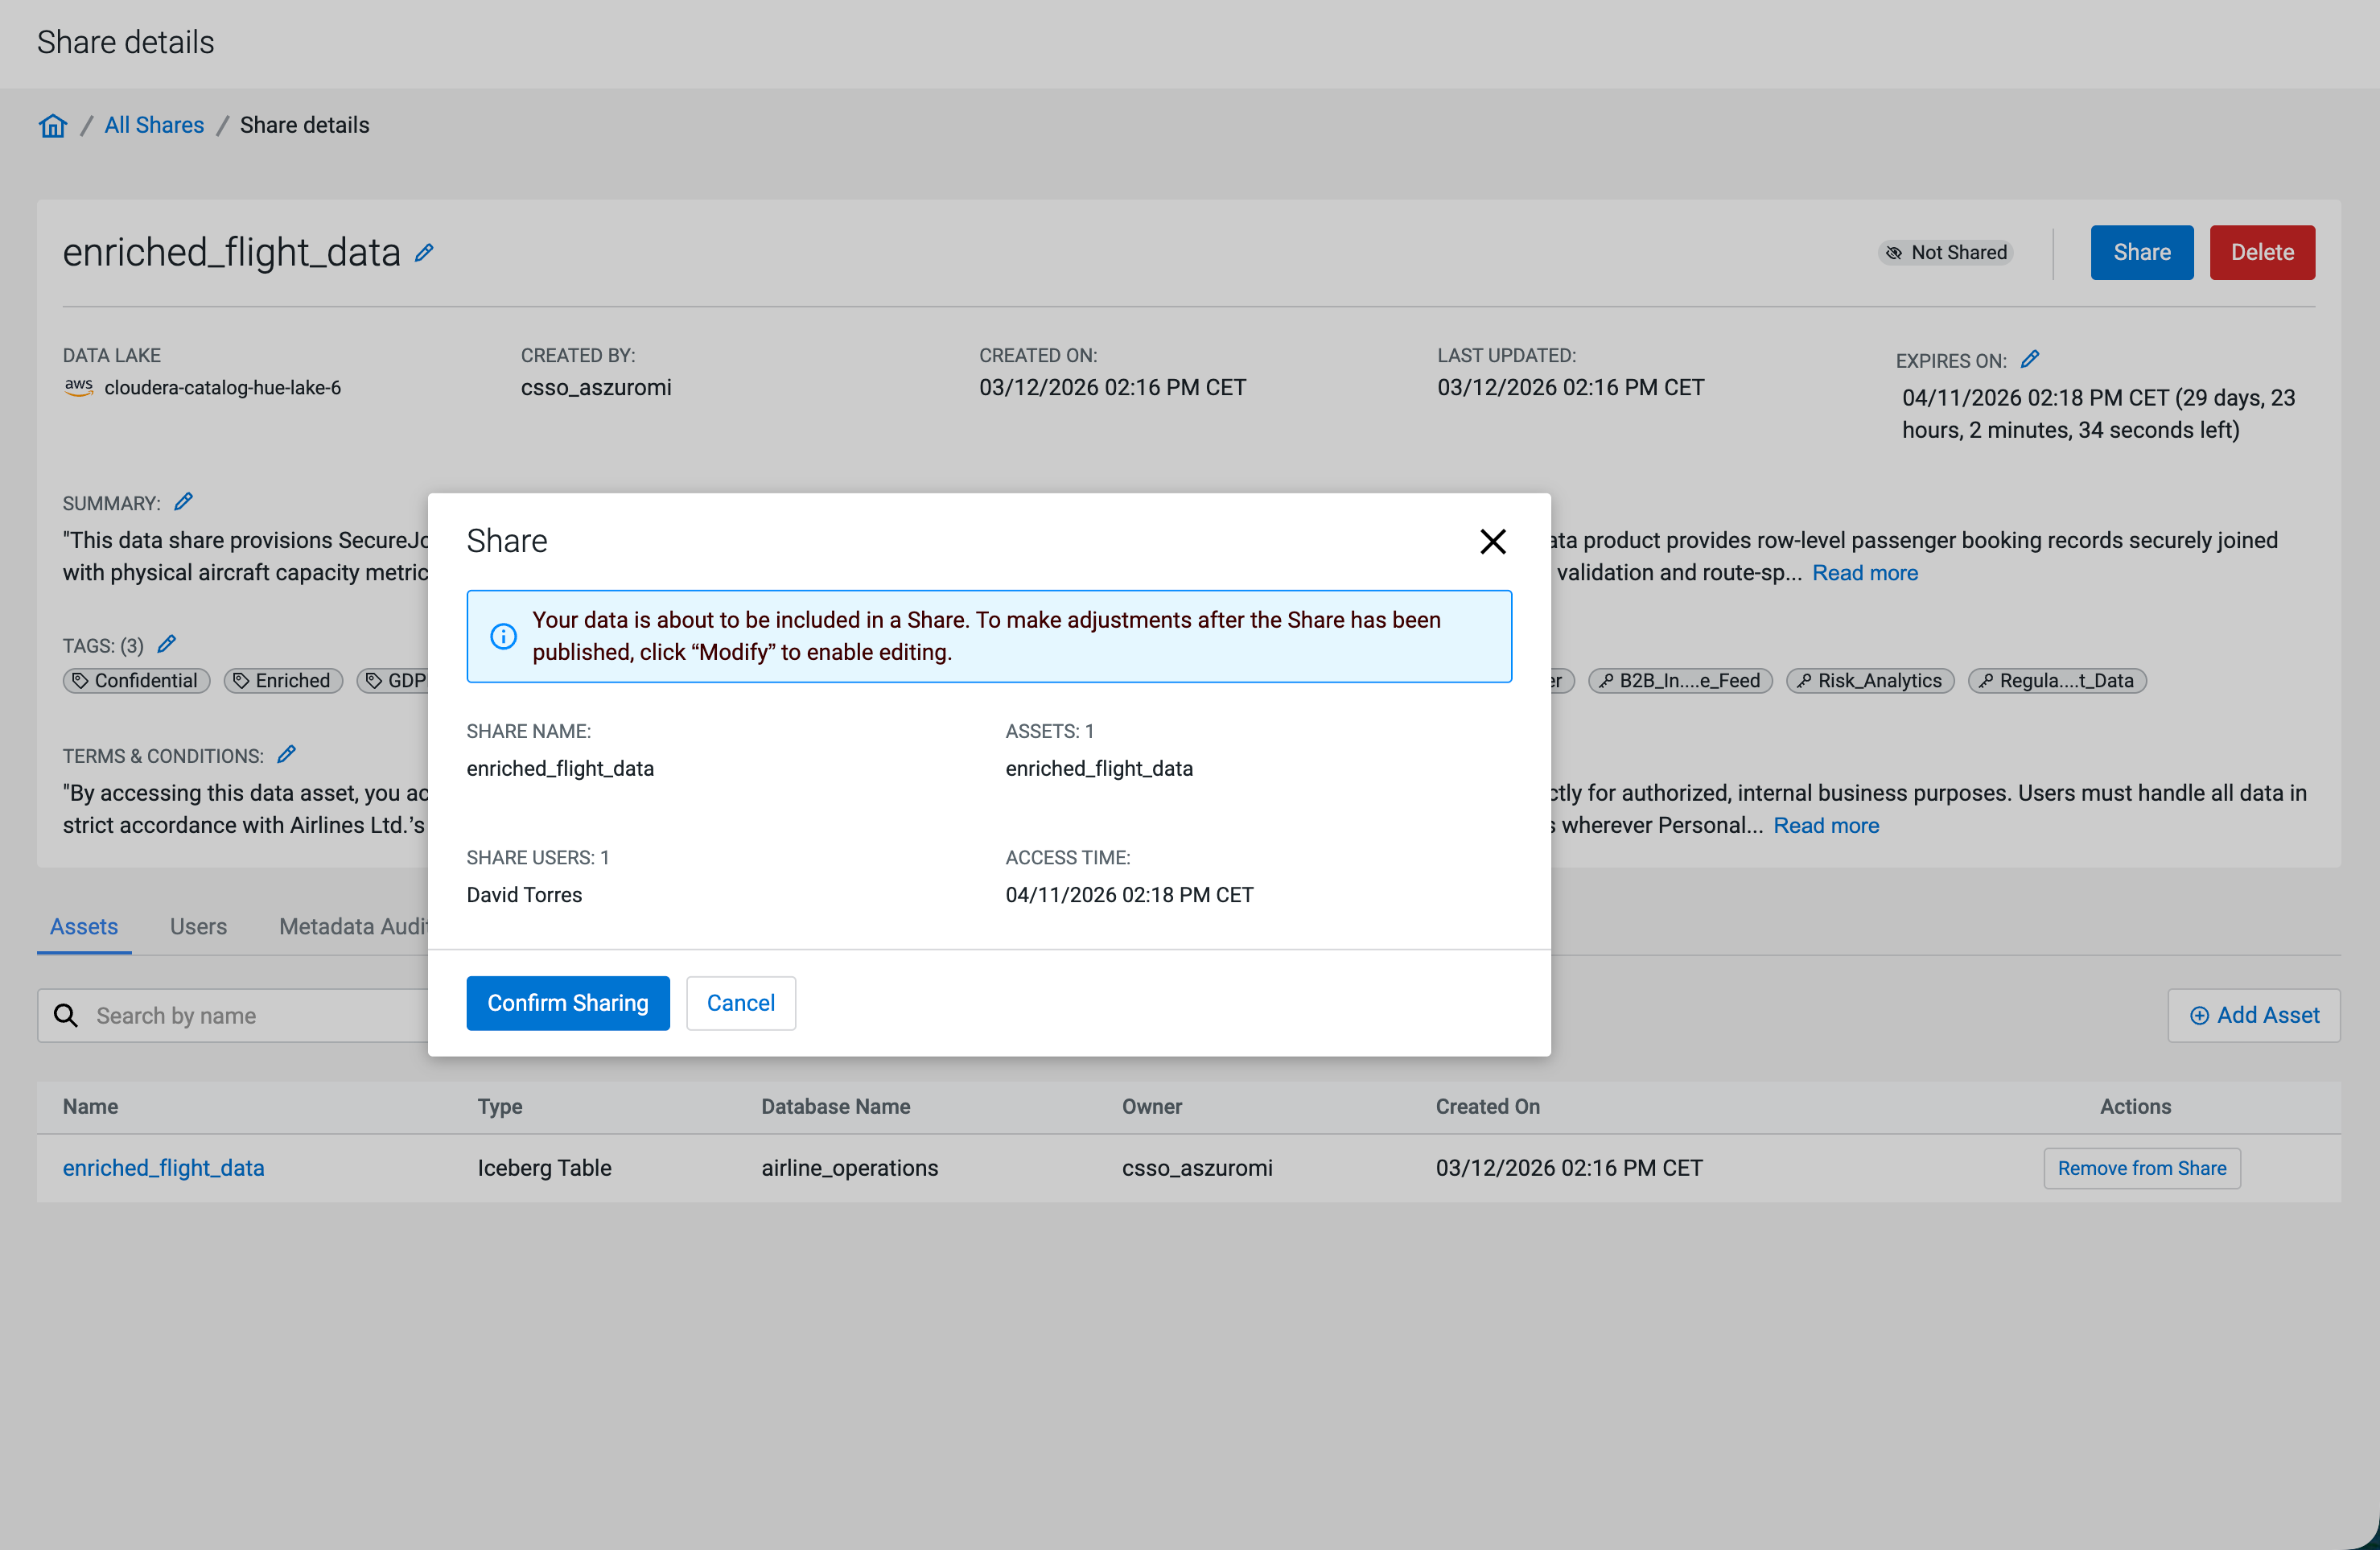
The Data Share is published. The status badge changes to Shared and a success banner confirms publication. The Share button is replaced by a Modify button.
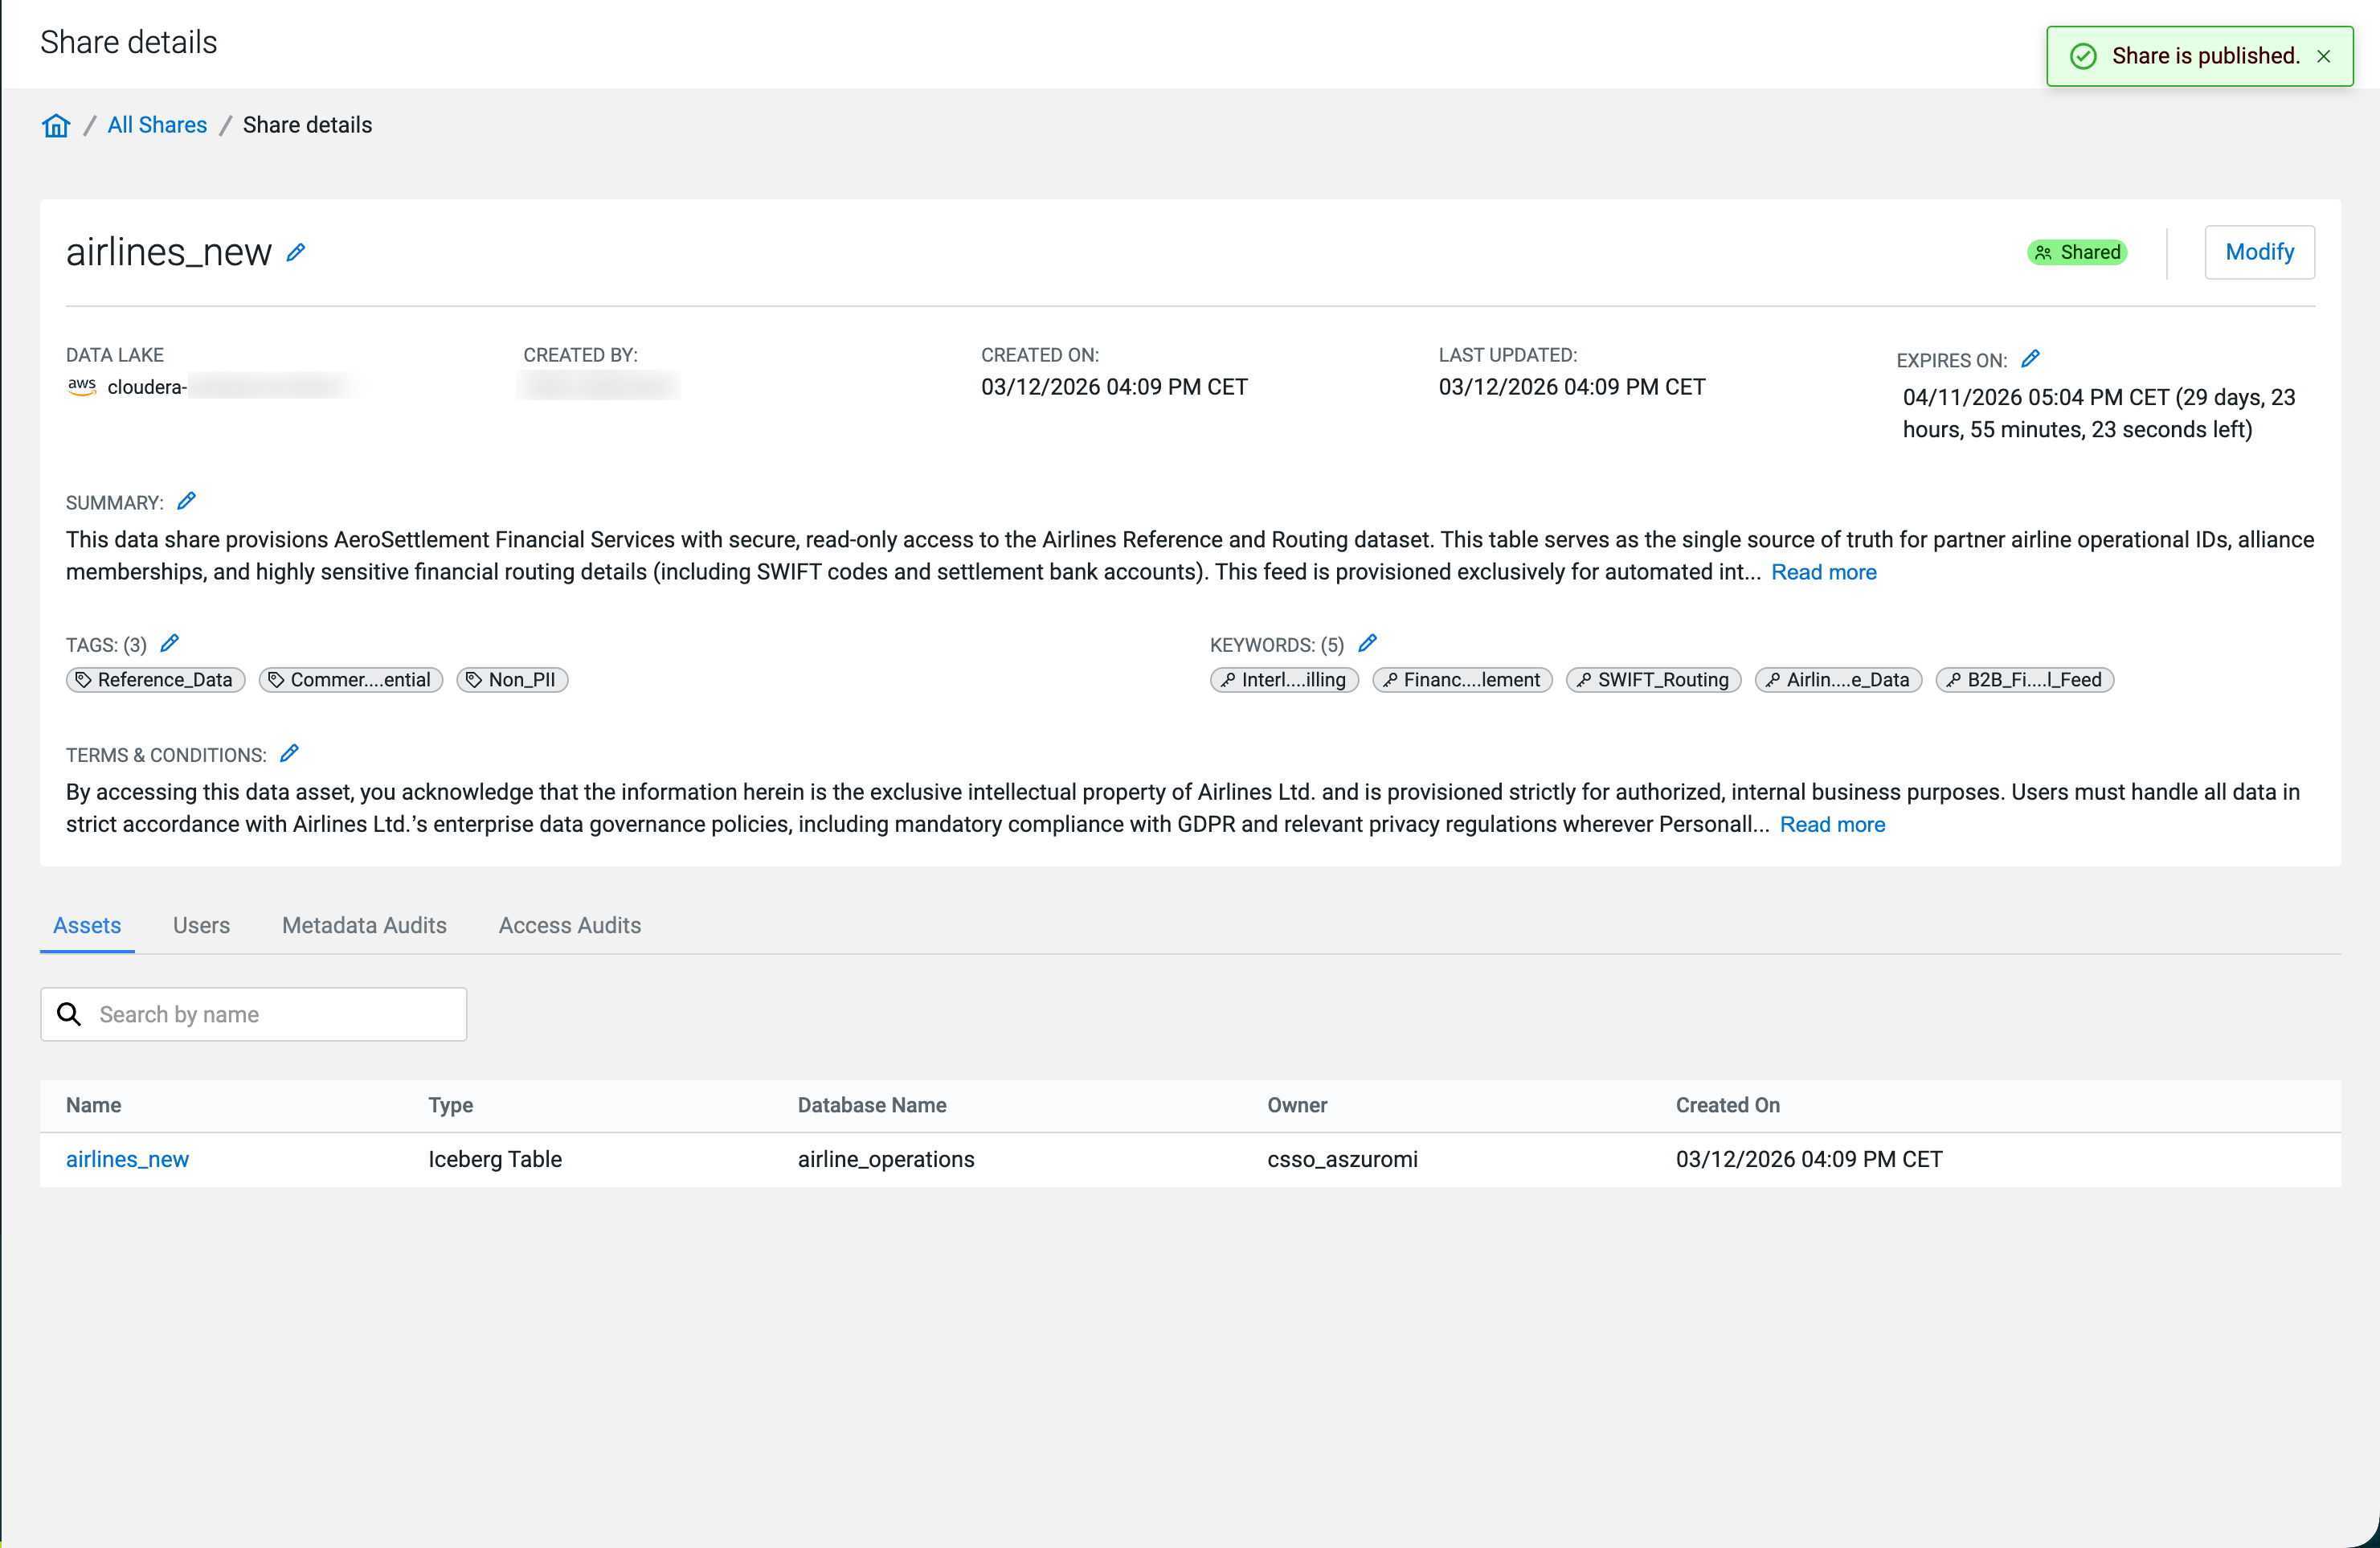
Share the credentials file with the external users so they can configure their Iceberg REST Catalog compatible compute engine. Monitor access activity using the Access Audits tab on the Share details page.