Creating a Data Share with CDP CLI
Learn how to register external clients in Cloudera on cloud and create Data Shares using CDP CLI commands. This process involves provisioning credentials for external users and managing data sharing through a series of CLI commands. Ensure that prerequisites are met and follow the steps to securely share data assets with external users.
Resource owners or Data Share administrators who want to share their Iceberg tables
in Cloudera with external clients must first
register the external client in the Cloudera on cloud
environment using the cdp datacatalog create-external-users CDP
CLI command. This provisions a CLIENT_ID and
CLIENT_SECRET for the external user.
After registering the external user, the resource owner creates a Data Share using
the cdp datacatalog create-data-share CDP CLI command. The
command packages specified data assets (Iceberg tables) into a shareable unit and
optionally grants access to registered external users during creation using the
--external-users parameter.
The CDP CLI also provides commands to manage the entire Data Share lifecycle, including listing, updating, activating, deactivating, and deleting shares, as well as managing asset membership and external user access.
- Users who run the token generation commands, must be a part of the Knox admin
users and groups configuration. For more information see Knox configuration in
gateway-site.xml.
Having the
DataShareAdminresource role includes theknoxAdminrole. For more information, see Providing access to users. - You must run all commands within the network of your Cloudera Runtime or through a VPN.
- For Cloudera on cloud environments, you can alternatively register external users using the Cloudera Data Catalog user interface. For more information, see Creating external users.
- CDP CLI must be installed and configured. For more information, see CLI client setup.
- You must have the following information before creating a Data Share:
- Share Admin user and password
- Username and password of the Cloudera Administrator. For more information, see Cloudera account administrator.
- Data Lake name
- Go to , copy and record the Data Lake name.
-
Figure 1. Data Lake Details 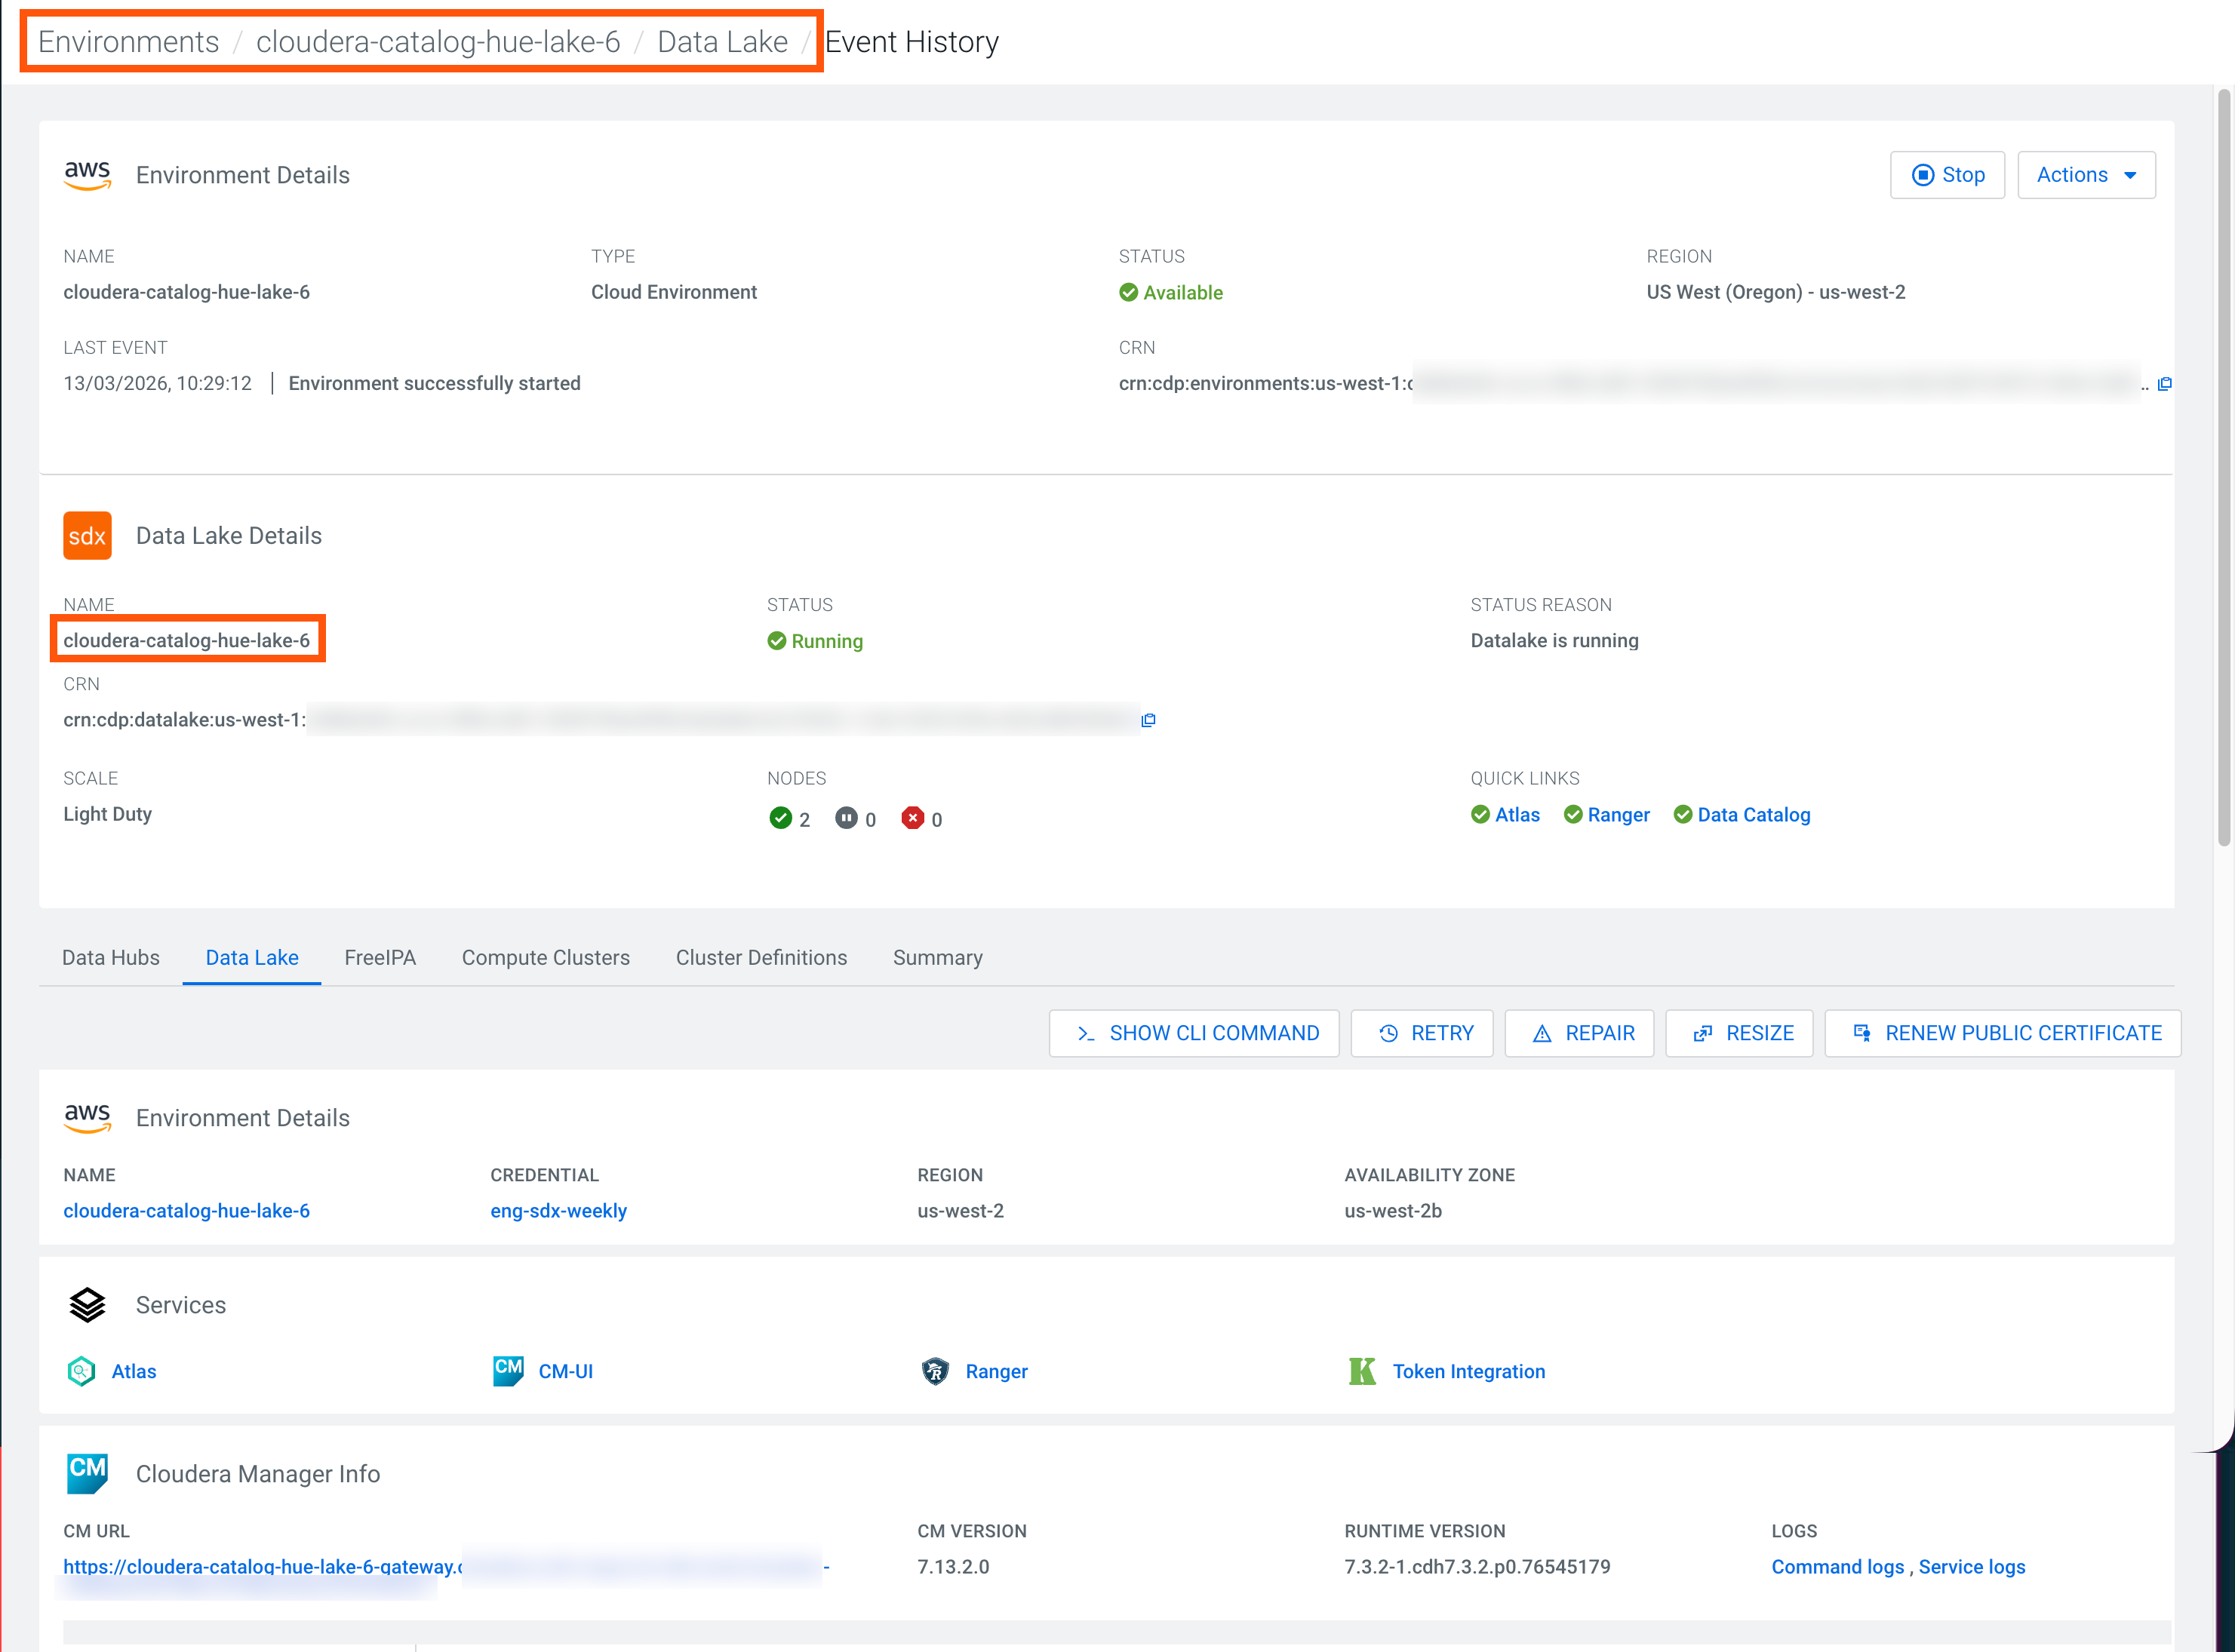
Data Share management commands
The following additional CDP CLI commands are available for Data Share management:
- cdp datacatalog create-external-users — Creates external user
accounts for individuals outside Cloudera, generating a
CLIENT_IDandCLIENT_SECRETfor each user. - cdp datacatalog list-external-users — Lists external users registered for data sharing, with optional filtering and pagination.
- cdp datacatalog revoke-external-user-credentials — Revokes the active credentials for an external user.
- cdp datacatalog regenerate-external-user-credentials — Issues a new set of credentials for an external user, invalidating the old ones.
- cdp datacatalog delete-external-user — Permanently deletes an external user and removes their access to all data shares.
- cdp datacatalog create-data-share — Creates a new data share and packages specified data assets into a shareable unit.
- cdp datacatalog list-data-shares — Lists all available data shares within a specified Data Lake.
- cdp datacatalog get-data-share — Retrieves the full details of a specific data share, including its assets and user access list.
- cdp datacatalog update-data-share — Updates the metadata for an existing data share, such as its name, keywords, or expiration.
- cdp datacatalog delete-data-share — Permanently deletes a data share.
- cdp datacatalog share-data-share — Activates a data share, making its assets available to the configured external users.
- cdp datacatalog unshare-data-share — Deactivates a data share, making its assets temporarily unavailable.
- cdp datacatalog add-assets-to-data-share — Adds new data assets, such as tables or views, to an existing data share.
- cdp datacatalog remove-assets-from-data-share — Removes one or more assets from an existing data share by resource ID.
- cdp datacatalog grant-access-to-external-users-on-data-share — Grants one or more external users access to a data share, with an optional expiration.
- cdp datacatalog update-access-of-external-users-on-data-share — Adds external users to a data share or updates their access expiration time.
- cdp datacatalog remove-access-of-external-users-on-data-share — Removes one or more external users' access from a specific data share.
-
Verify the
CLIENT_IDgeneration using one of the following methods:-
Verify using Ranger Audits.
- TGo to . Your external user creation events are displayed as
User created
[***CLIENTID***].
Figure 2. Client ID verification in Ranger 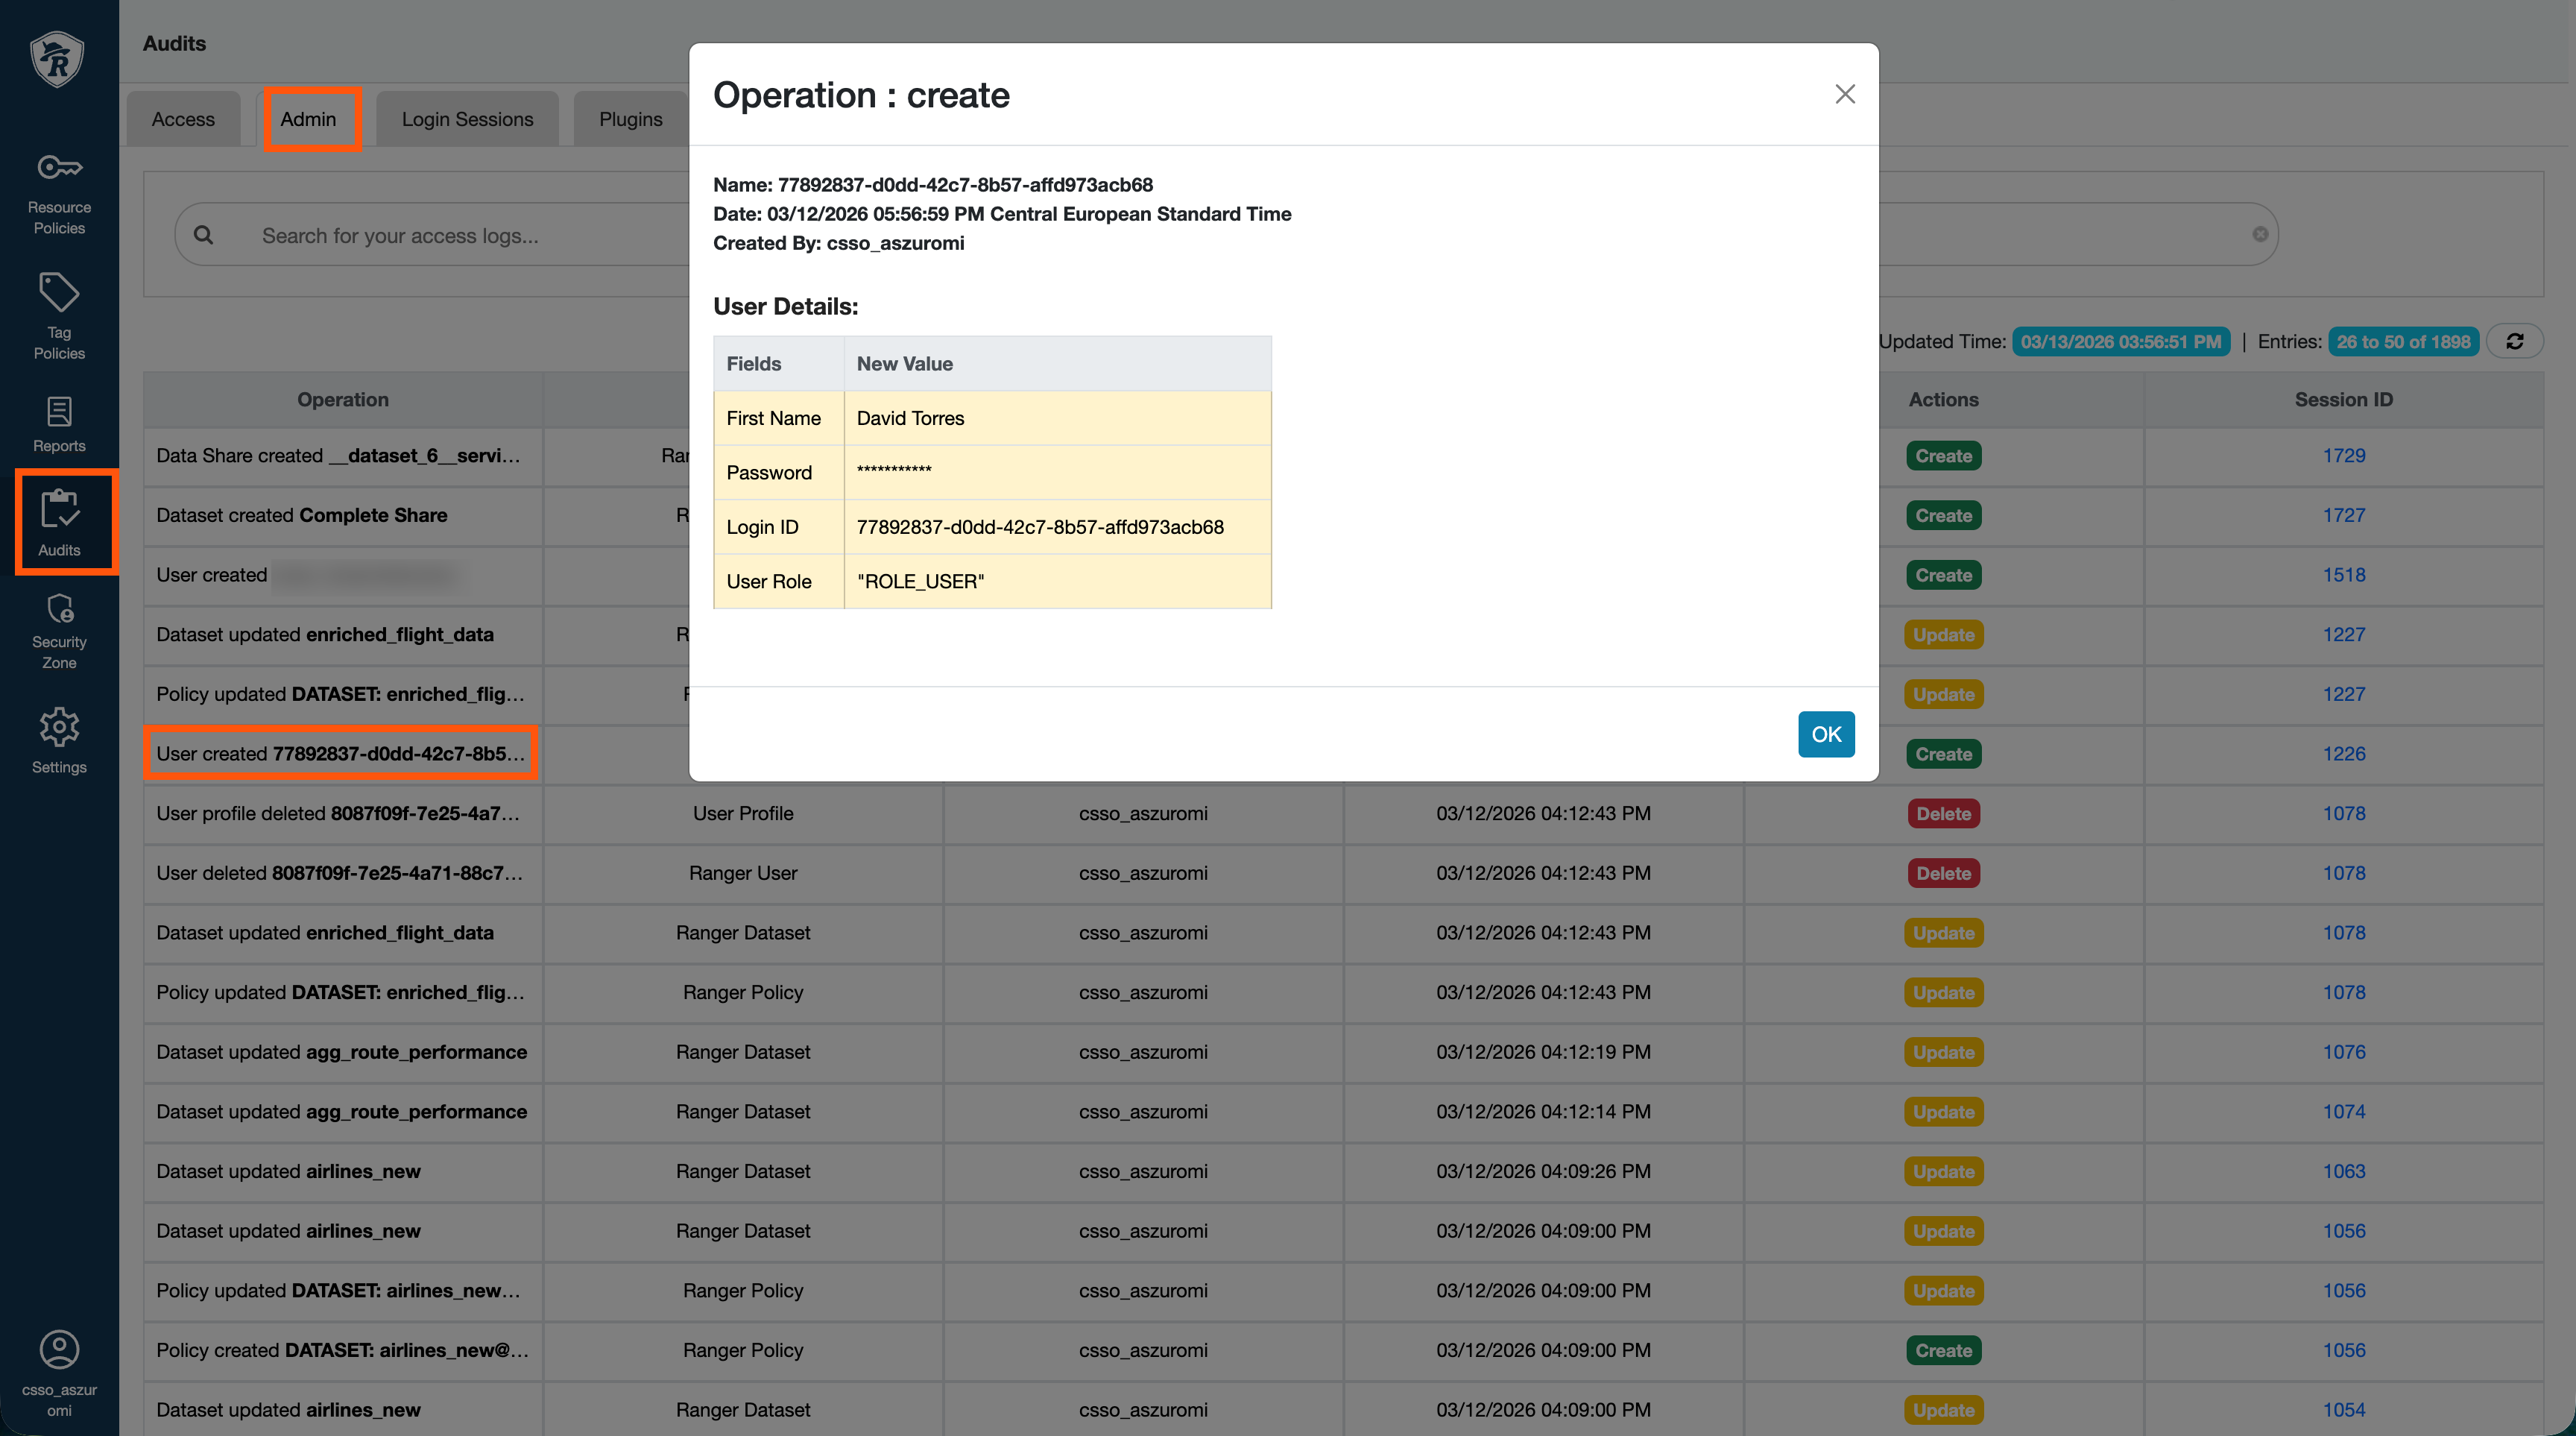
- TGo to . Your external user creation events are displayed as
User created
[***CLIENTID***].
-
Verify using the Data Catalog UI.
- In Cloudera Data Catalog, go to Manage Users.
- Select the target Data Lake from the drop-down
menu at the top of the page. The user list displays all existing
external users for the selected Data Lake, including their Client
ID, email address, company name, associated shares, and registration
date.
Figure 3. List of external users 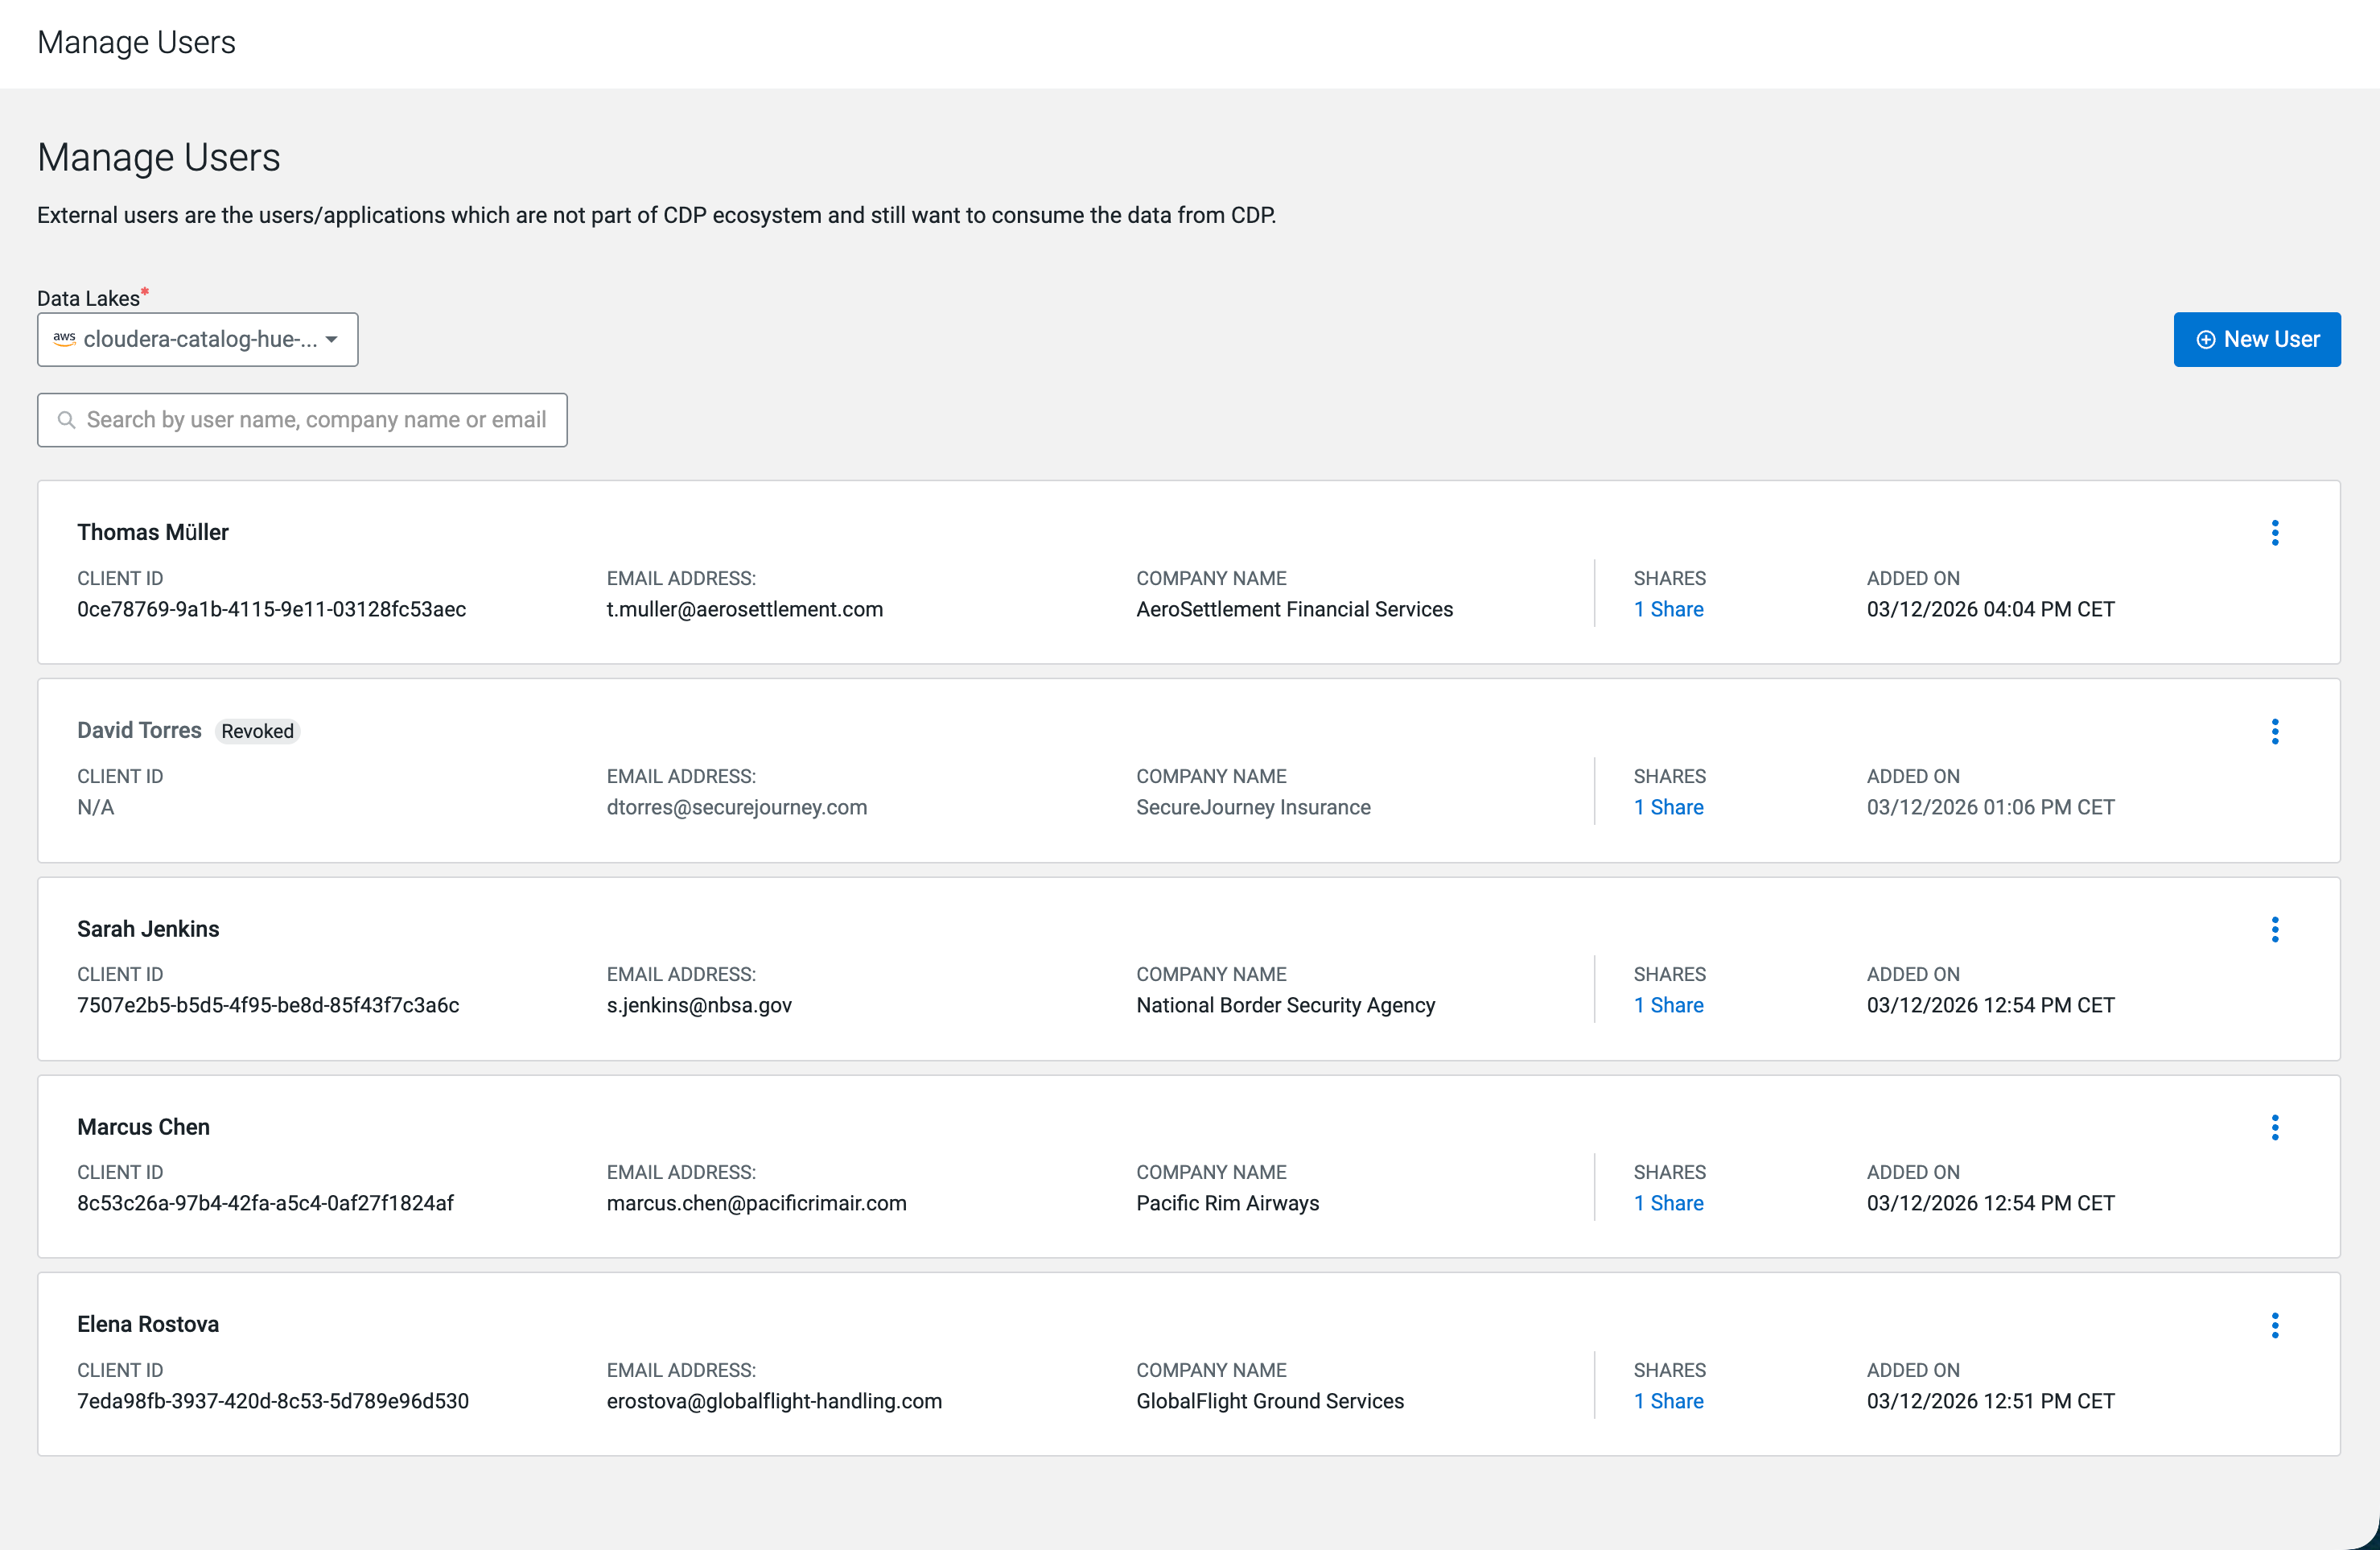
- Verify using the Knox user interface.
External user Client IDs are also visible in Knox under
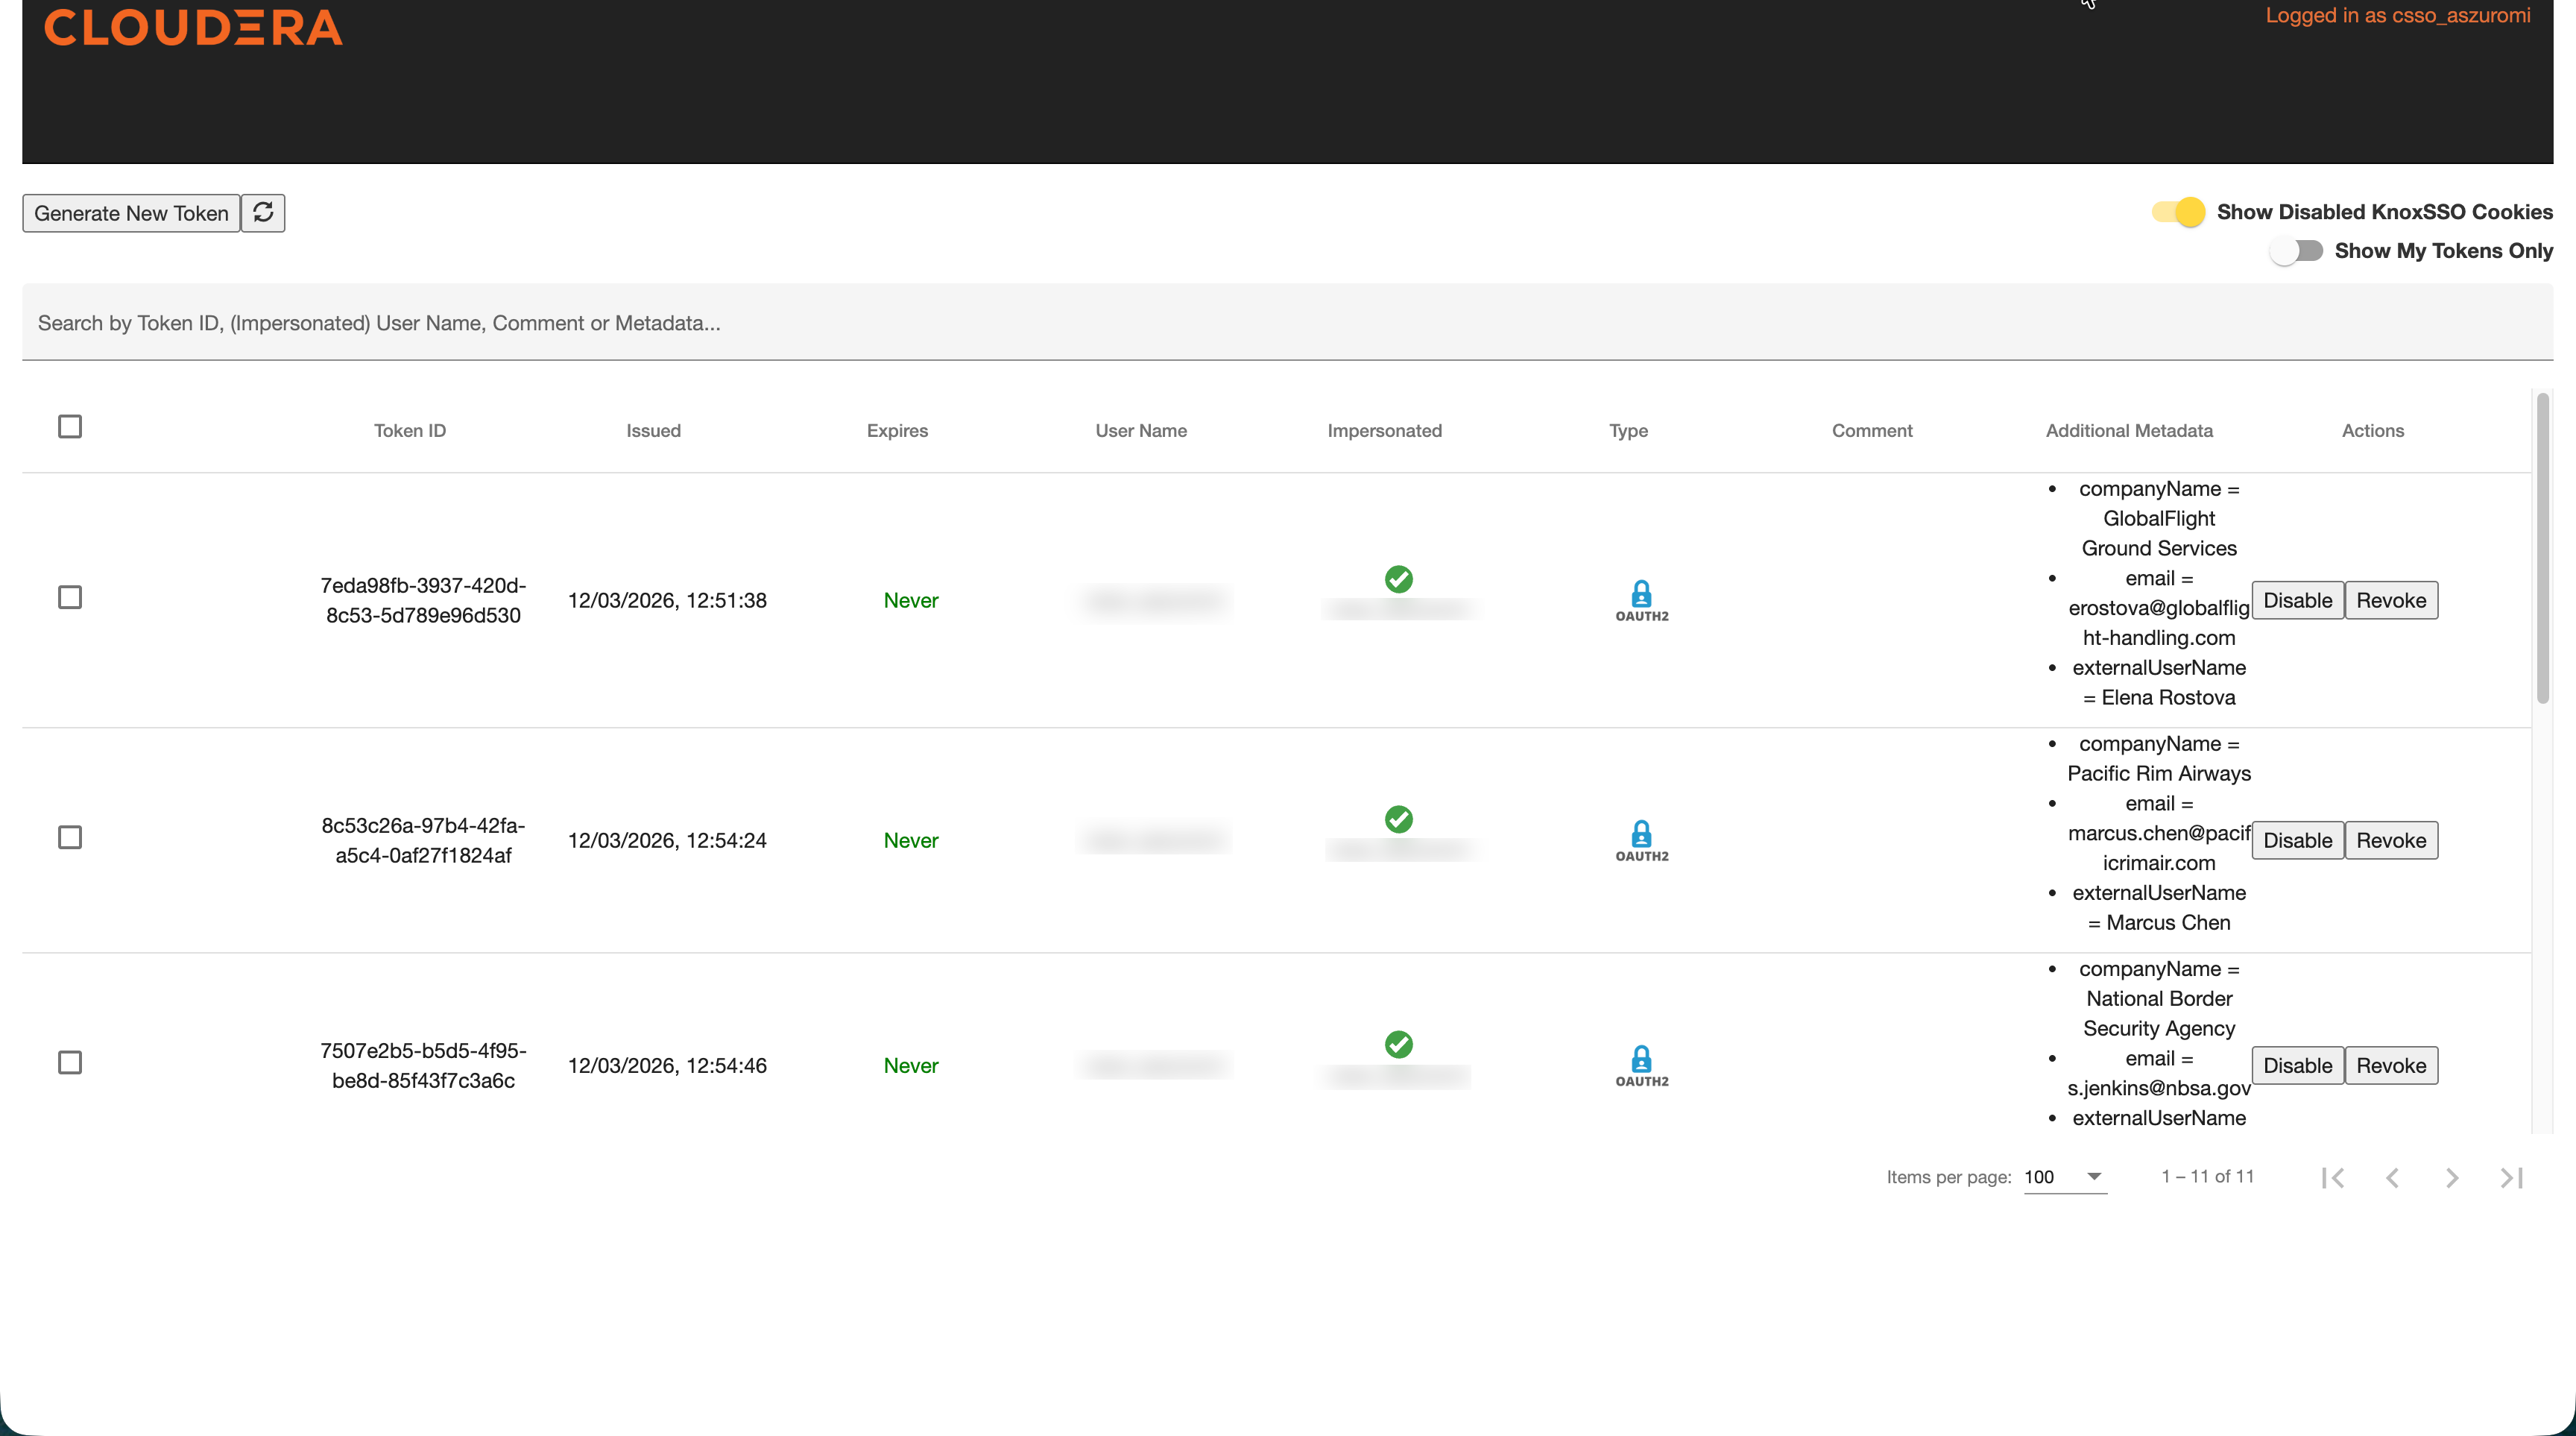
-
-
Verify the Data Share generation by using one of the following methods:
-
Verify using Ranger Audits.
- Go to . Your Data Share creation events are displayed as the
following consecutive Ranger audit events:
- DataShare in Dataset created
- Data Share created ***DATASET SERVICE NAME***
- Dataset create ***DATASHARE NAME***
Figure 4. Data Share verification in Ranger 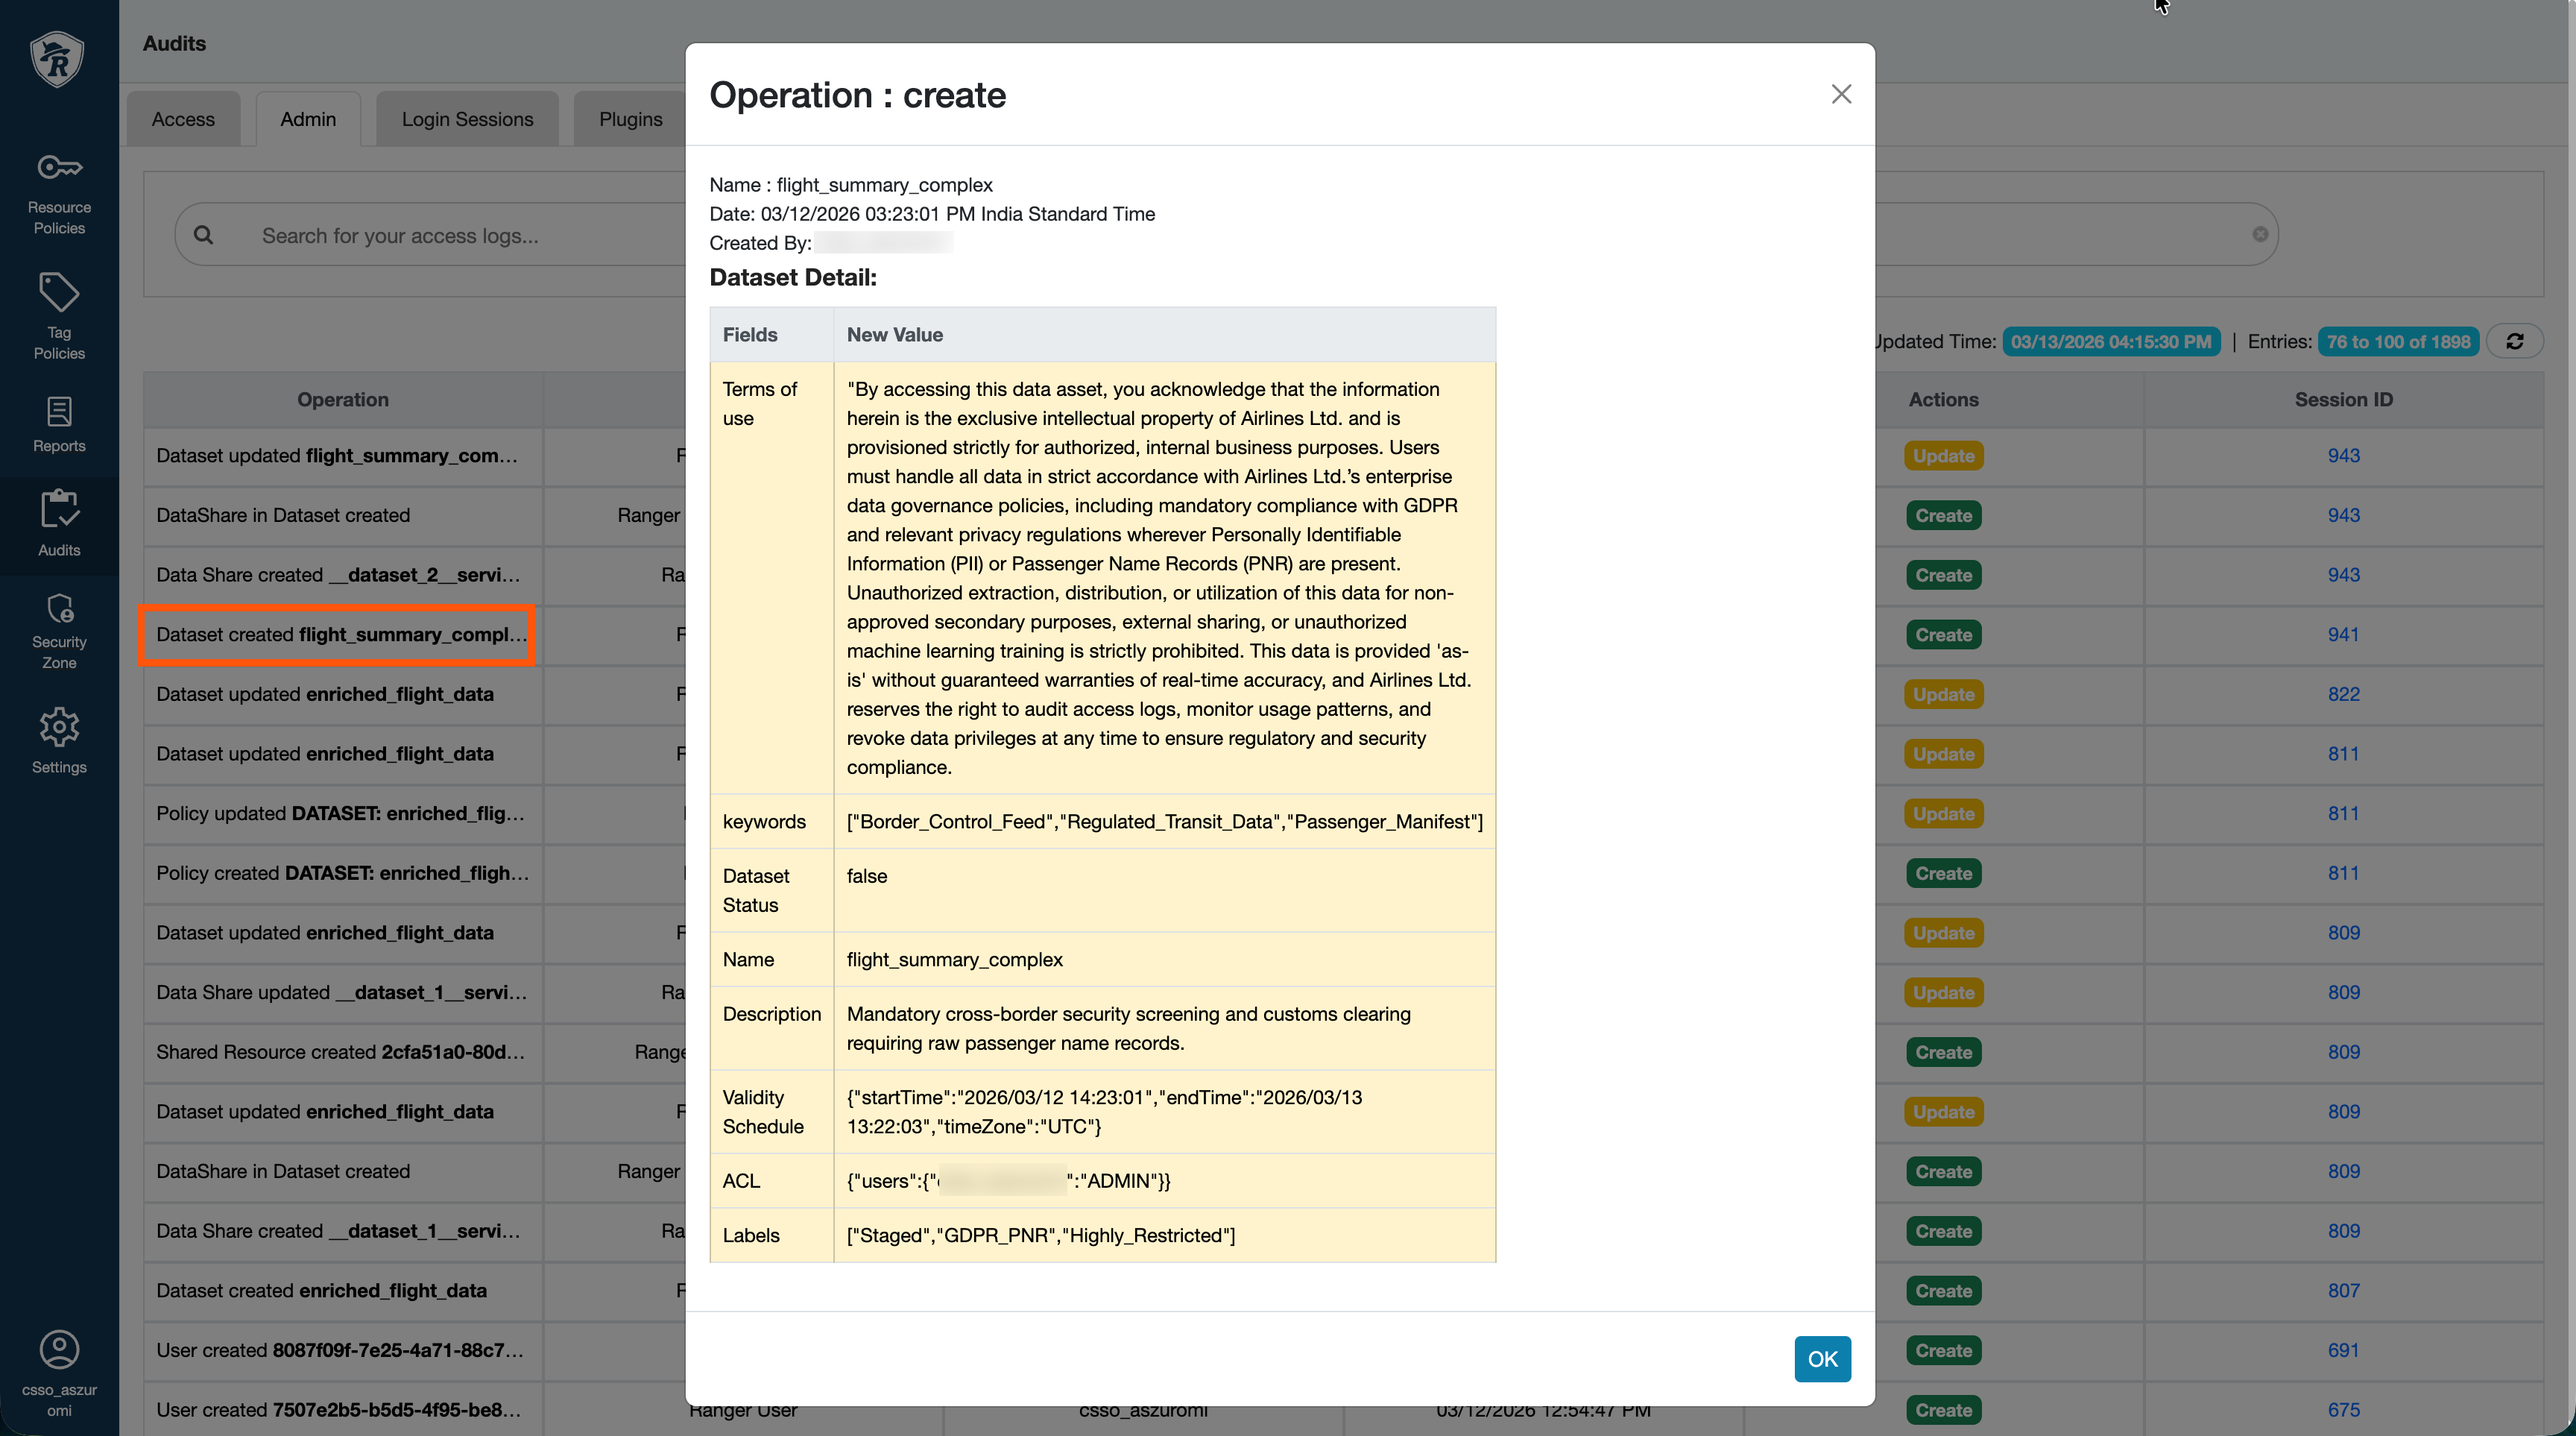
- Go to . Your Data Share creation events are displayed as the
following consecutive Ranger audit events:
-
Verify using the Data Catalog UI.
- In Cloudera Data Catalog, go to Data
Sharing. The new Data Share is listed on the
All Shares page in Not
Shared status until you publish it.
Figure 5. All Shares page 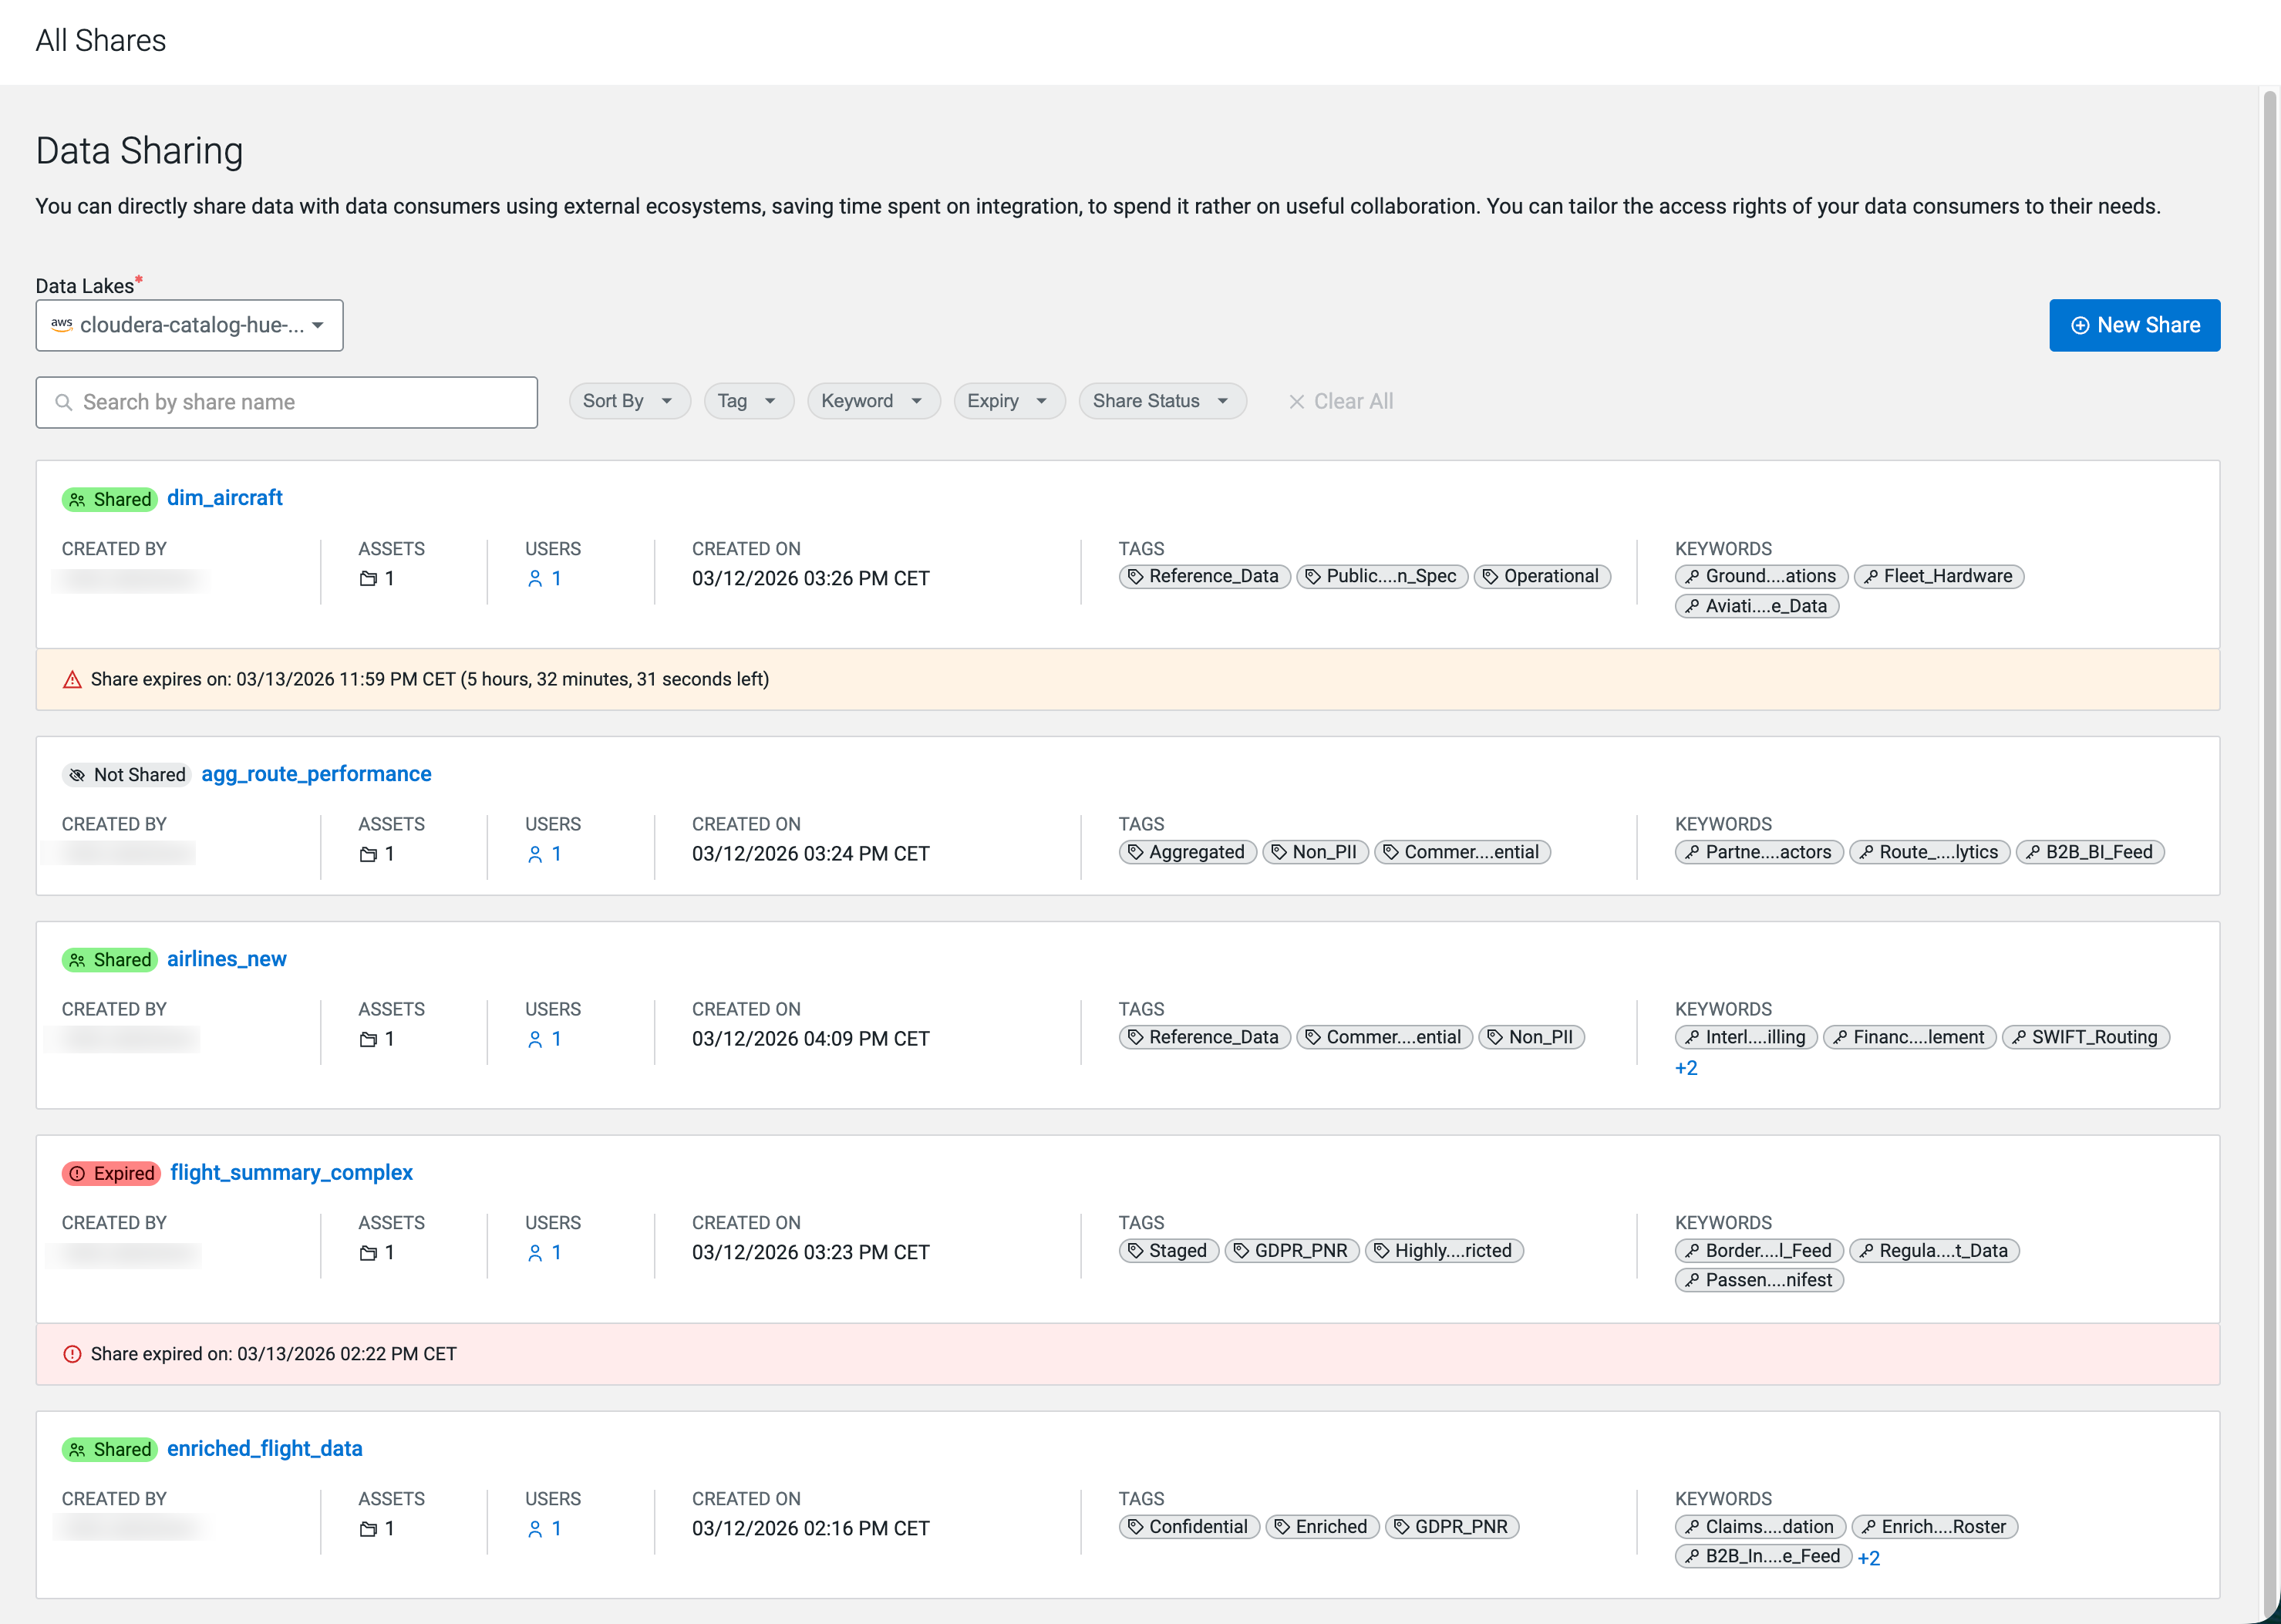
- In Cloudera Data Catalog, go to Data
Sharing. The new Data Share is listed on the
All Shares page in Not
Shared status until you publish it.
-
After you create the Data Share, publish it so external users can access its assets.
Run the cdp datacatalog share-data-share command with the same
--datalake-crn and --environment-crn values
you used for the cdp datacatalog create-data-share command, and
the dataShareId value from the create command response. The command
calls POST /api/v1/datacatalog/shareDataShare with those three
values in the request body.
cdp datacatalog share-data-share \
    --datalake-crn "[***DATALAKE-CRN***]" \
    --environment-crn "[***ENVIRONMENT-CRN***]" \
    --data-share-id "[***DATA-SHARE-ID***]"
On success, the command returns a JSON object that matches
ShareDataShareResponse:
{
    "success": true
}
For example, if you created the share in the previous step, you can publish it using the same environment and Data Lake CRNs along with the returned identifier:
cdp datacatalog share-data-share \
    --datalake-crn "crn:cdp:datalake:us-west-1:..." \
    --environment-crn "crn:cdp:environments:us-west-1:..." \
    --data-share-id "1"