Creating new administrator accounts
An administrator can create new administrator accounts in Cloudera Data Visualization.
The following steps demonstrate how to create a new admin account.
-
Click Users & Groups.
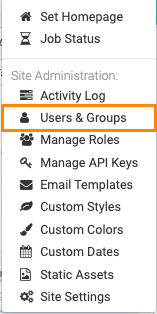
The Manage Users & Groups interface appears, open on the Users tab.
-
Click NEW USER.
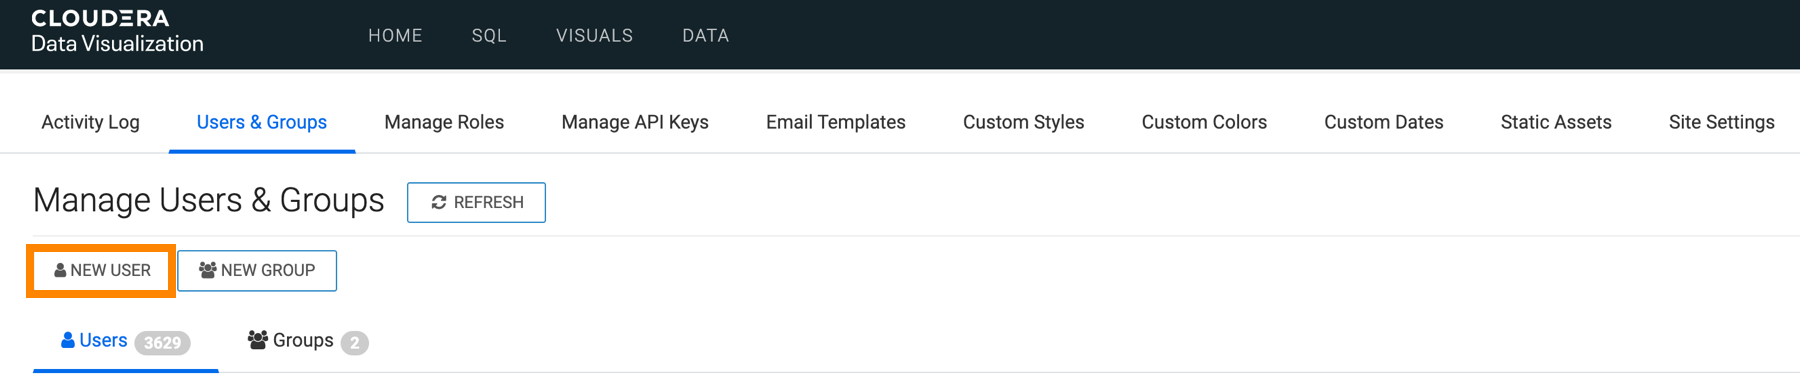
The New User modal window appears.
-
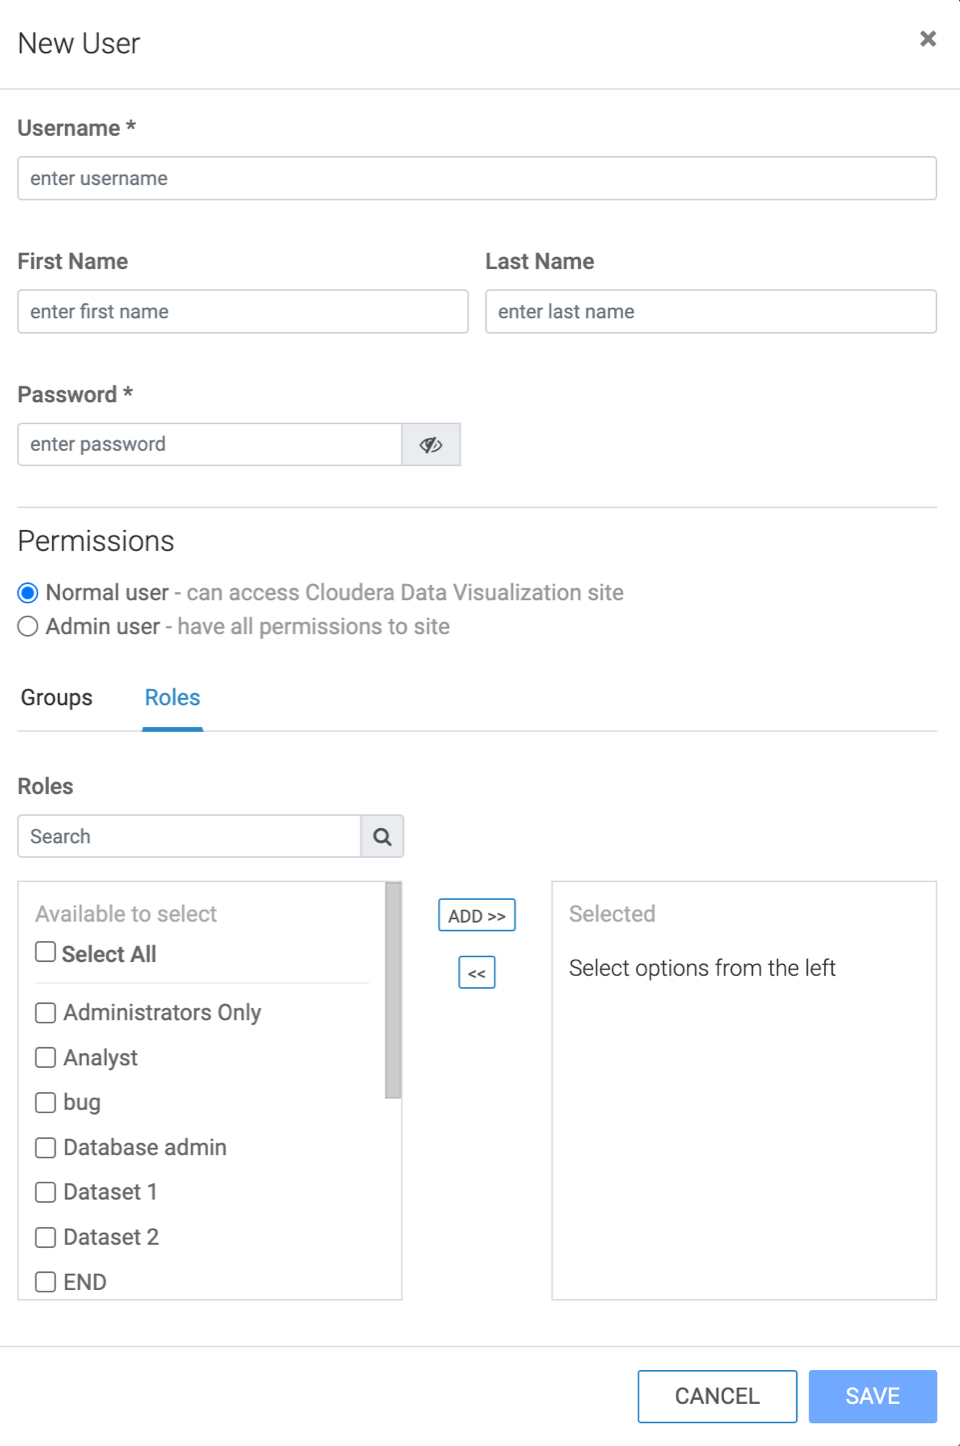
Fill in the new admin details:
- Name & password
-
Username
-
First Name and Last Name
You can also pick these values from LDAP user definitions.
-
Password
For more information, see Setting user password requirements.After five failed login attempts, Cloudera Data Visualization locks out the user. For instructions on how to change the account lockout configuration settings or to unlock the user, see Configuring account lockout. You can check the Show Password option to display the password.
-
- Permissions
-
Normal user and Admin user
Select Admin user.
- [Optional] On the Groups tab, under Group Membership, you can use the Search box to find user groups, and assign the new user to existing groups by selecting user groups on the left list, and then clicking Add to move them to the right. For more information on how to add users to groups see, Creating new user groups.
- [Optional] On the Roles tab, under Roles, you can use the Search box to find roles, and assign the new user to existing roles by selecting roles on the left list, and then clicking Add to move them to the right. For more information on users and roles, see Assigning roles to users.
-
- Name & password
After the operation succeeds, you can see the Manage Users & Groups page, showing the Users tab with the new admin user's information.