Installing Cloudera Data Visualization in Cloudera Base on premises

Learn how to deploy Cloudera Data Visualization in Cloudera Base on premises.

Cloudera Data Visualization, when deployed in Cloudera Base on premises, allows you to explore datasets and build interactive visualizations directly within your on-premises Cloudera clusters. One key benefit of this deployment option is that it does not require a container runtime, and can be used without a Kubernetes environment.

This guide provides step-by-step instructions for installing Cloudera Data Visualization on a Cloudera Base on premises cluster.

Limitations
  • OS compatibility:
    Only RHEL 8 and 9 are supported. For the detailed list of supported OS versions, see the Support Matrix.
  • Data source connections:
    Data connection auto-discovery is not supported. You need to manually set up and configure connections to the data sources.
Prerequisites

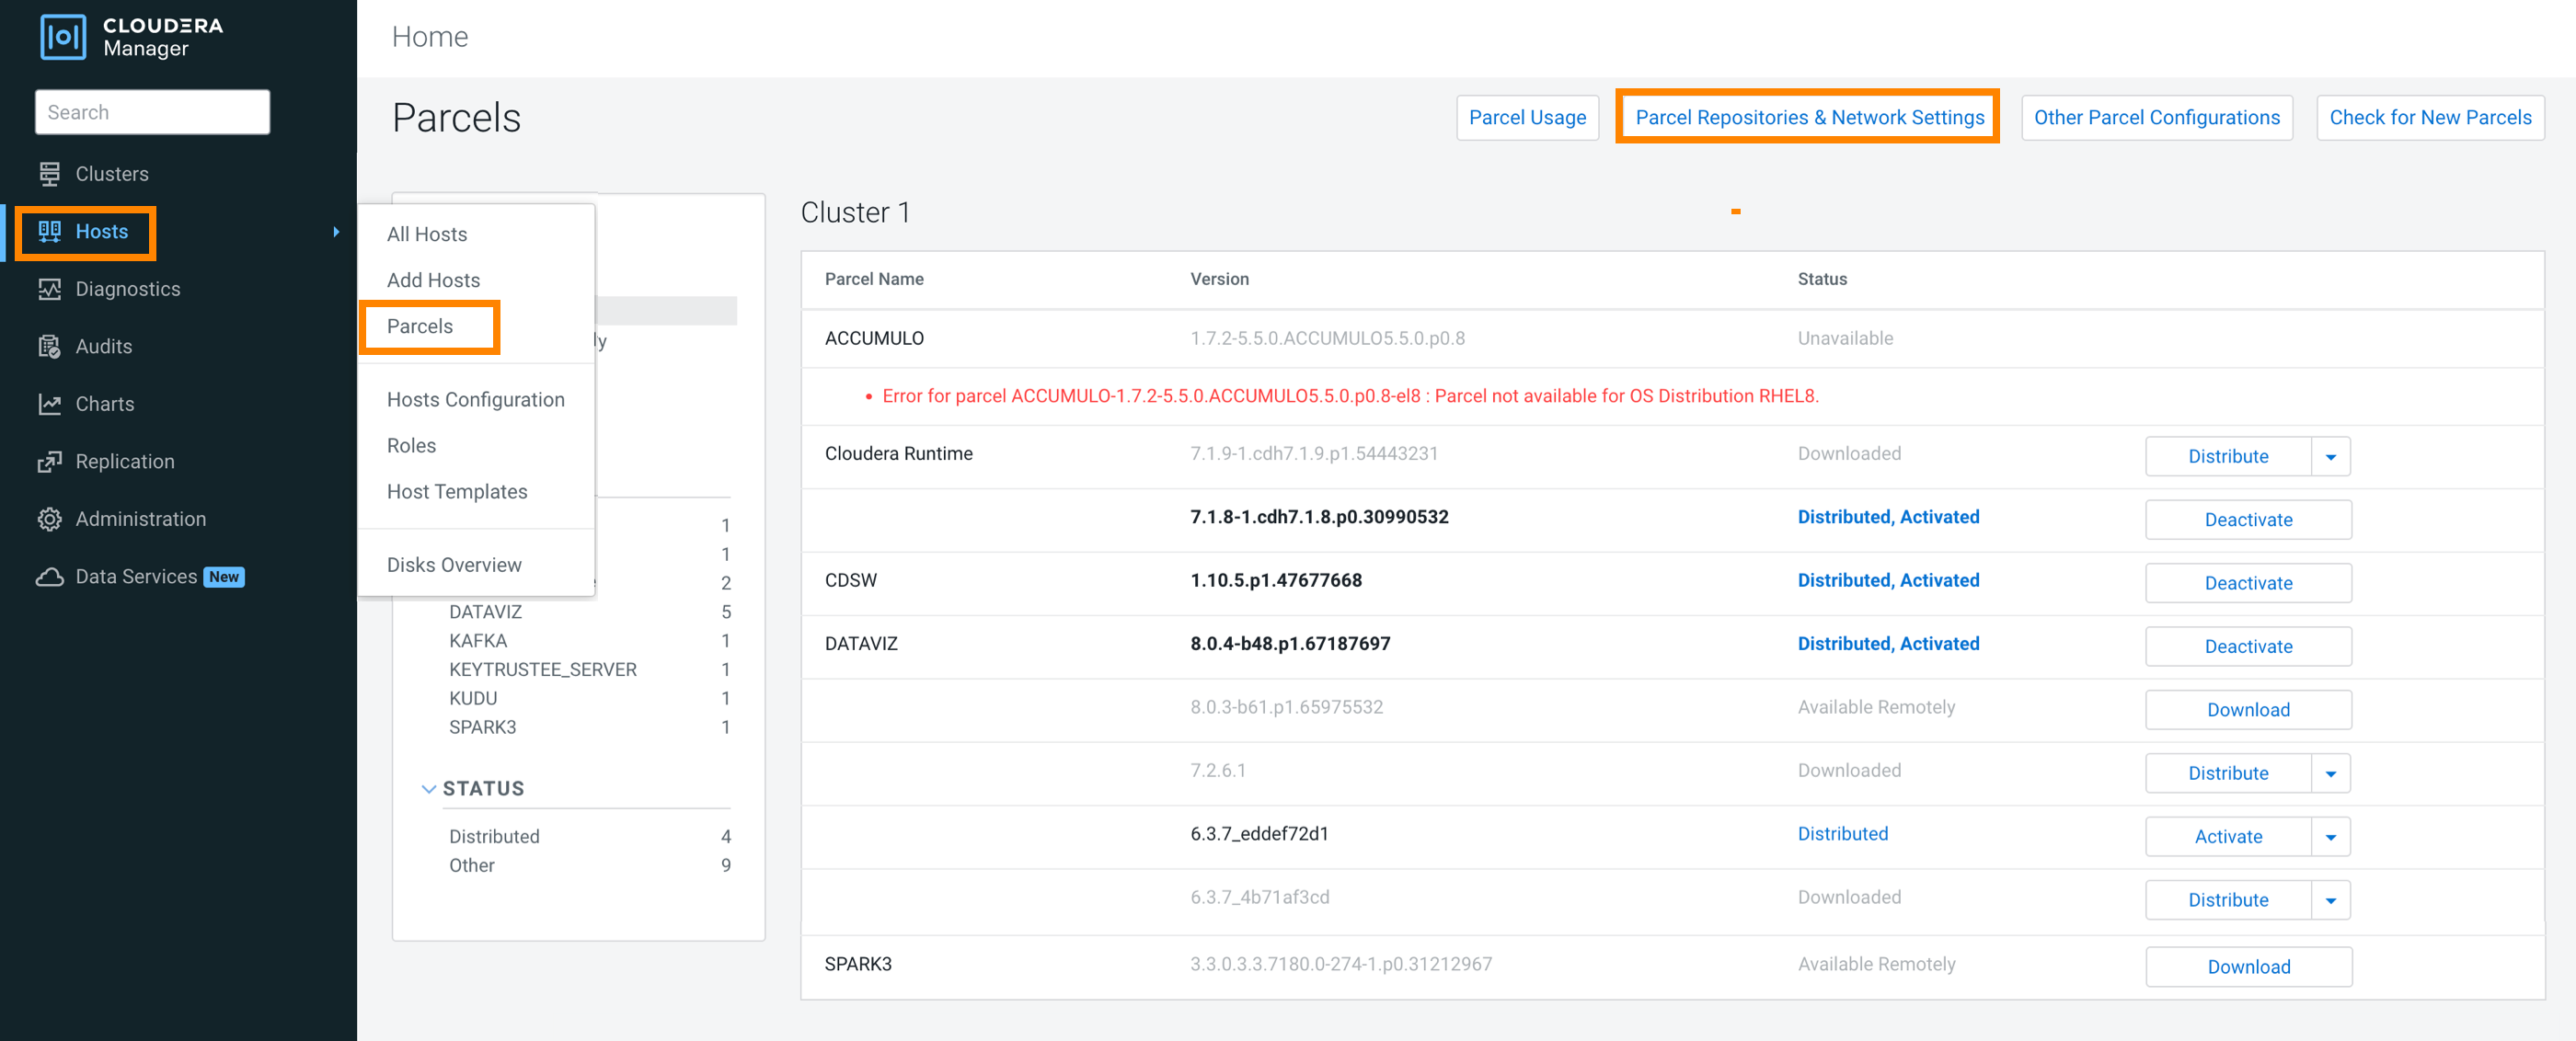
Adding Cloudera Data Visualization parcel repository to Cloudera Manager

Before installing Cloudera Data Visualization, you must set up two components: a Cloudera Data Visualization parcel and a Custom Service Descriptor (CSD).

This guide explains how to add the Cloudera Data Visualization parcel to Cloudera Manager. It involves updating the parcel repository URL, then downloading, distributing, and activating the parcel to make it available for installation.

  1. Log in to Cloudera Manager.
  2. From the left navigation bar, go to Hosts > Parcels.
  3. Select Parcel Repositories & Network Settings on the Parcels page.
  4. On the Parcel Repository & Network Settings page, click + to add a new row in the Remote Parcel Repository URLs list.
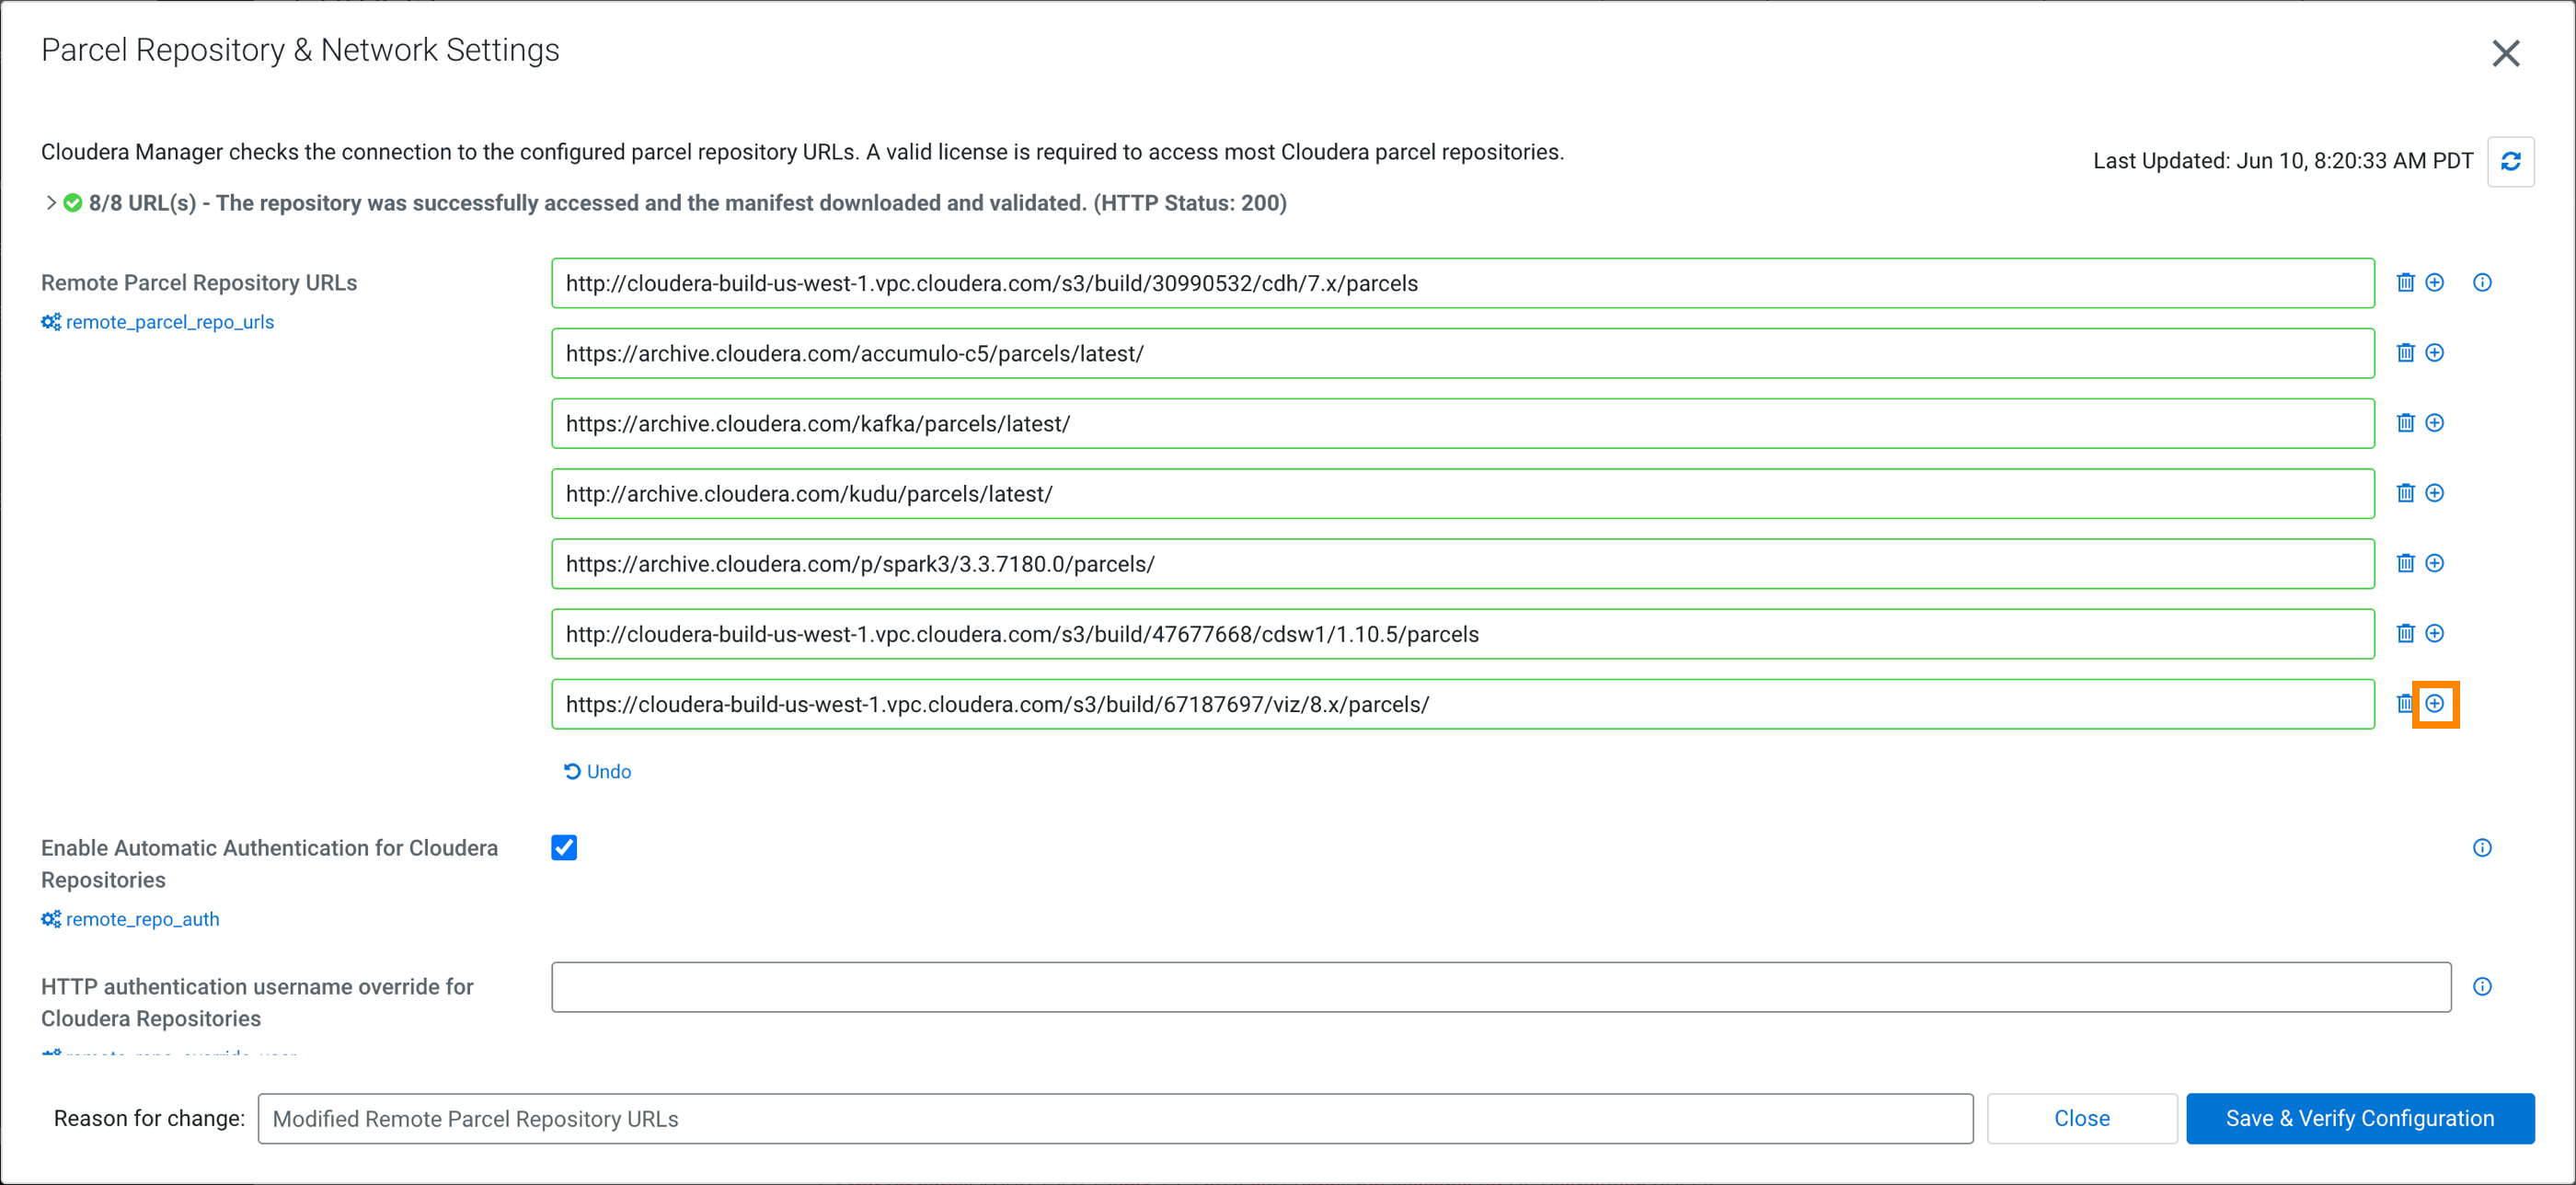
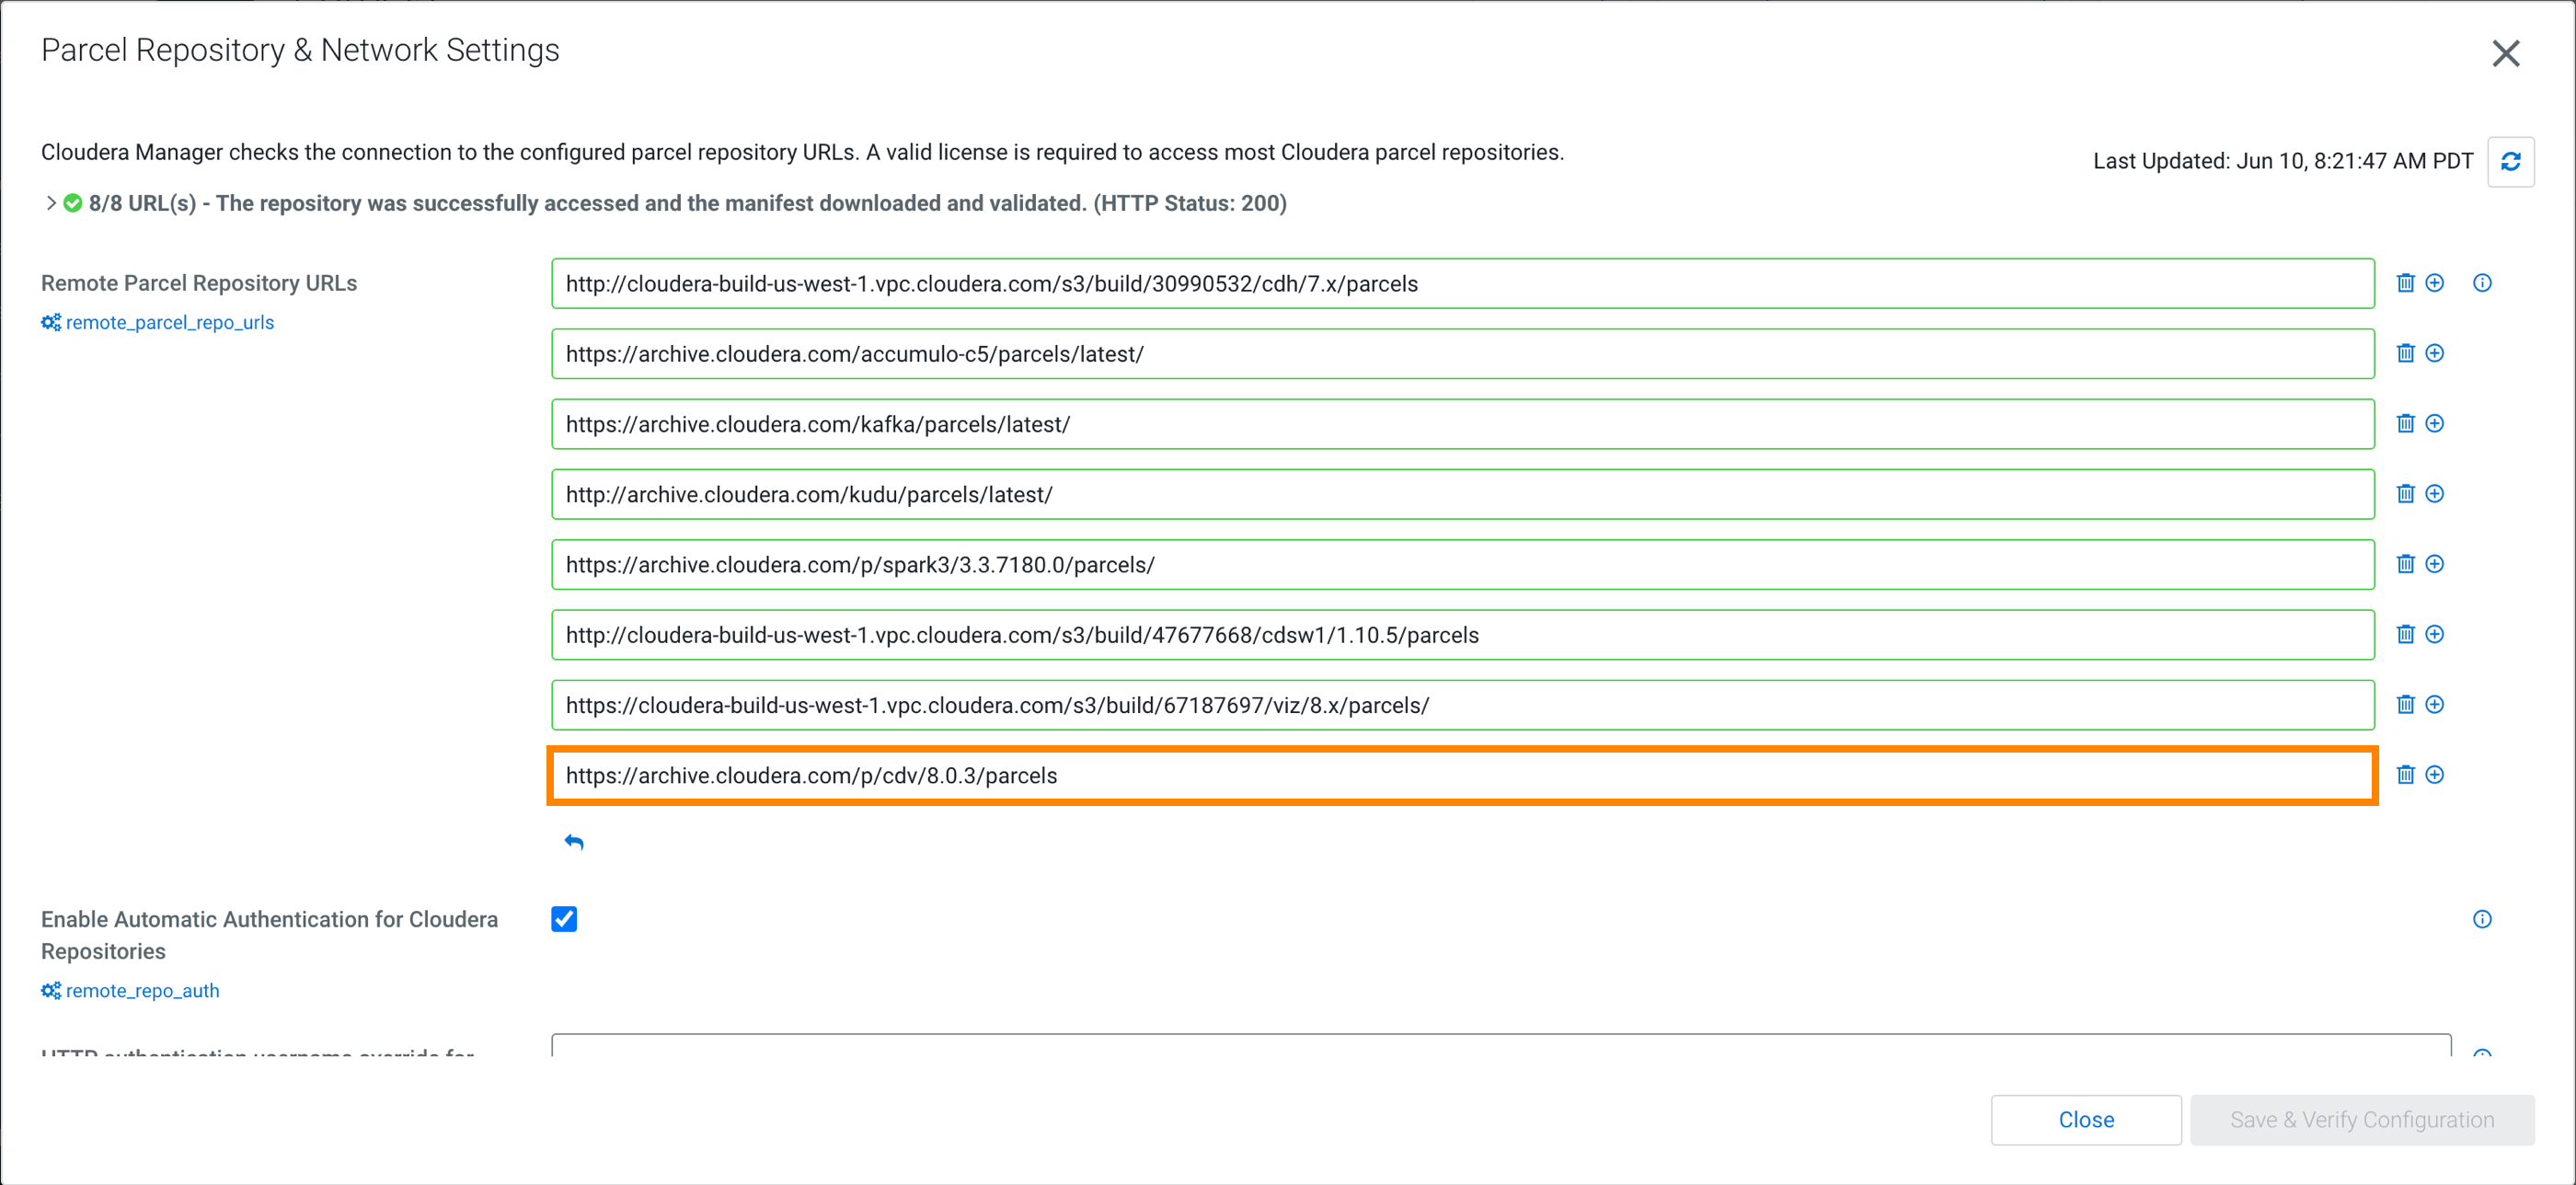
  5. Enter the URL of the Cloudera Data Visualization parcel repository.
  6. Click Save & Verify Configuration.
  7. Click Close to return to the Parcels page.
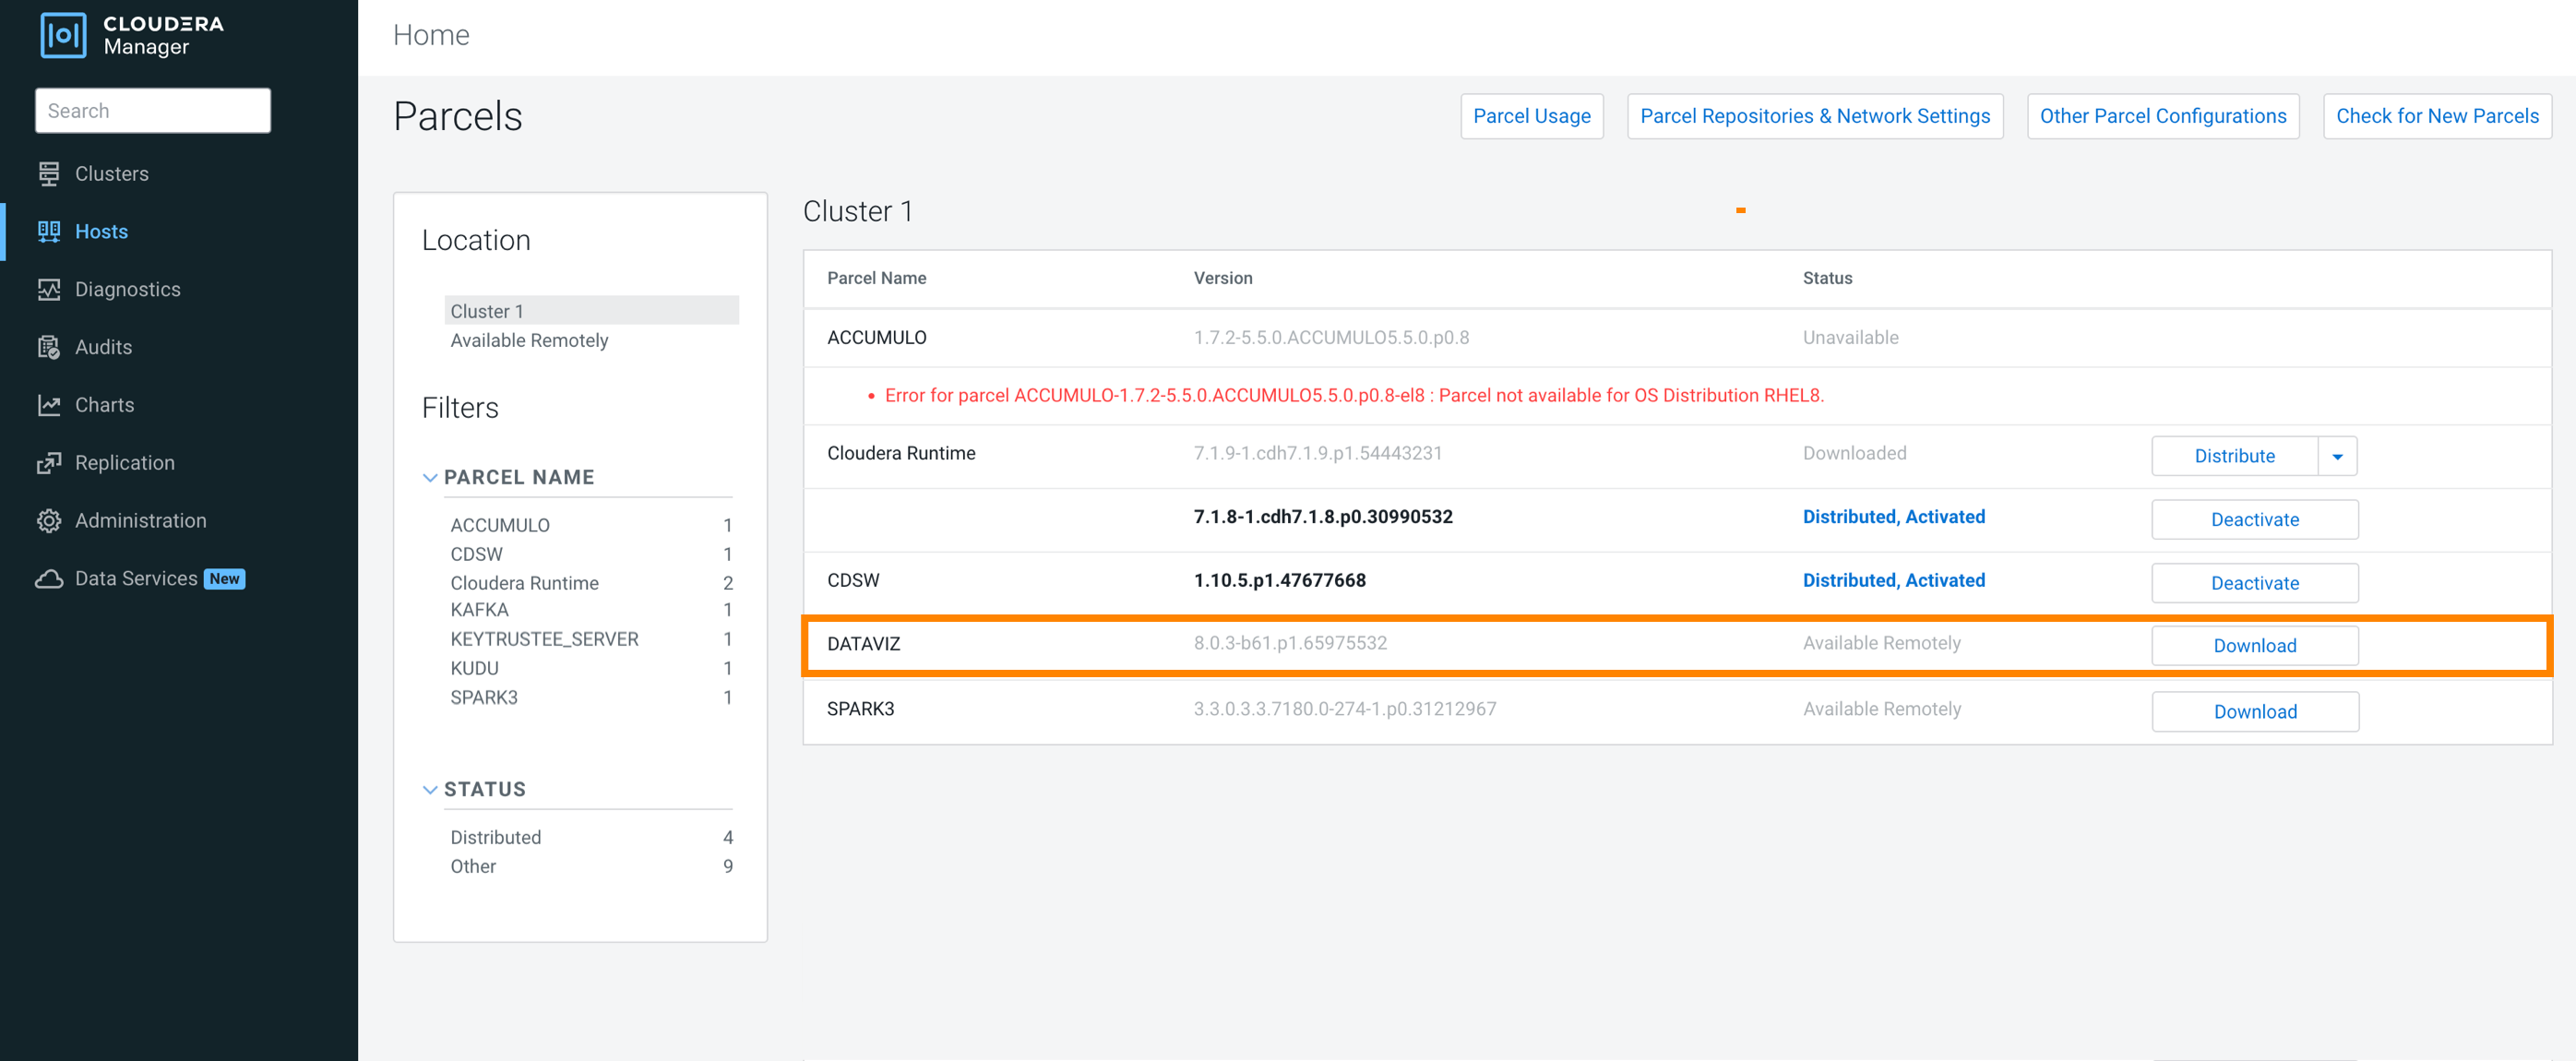
  8. On the Parcels page, locate the Cloudera Data Visualization parcel in the list.
  9. Click Download.
  10. Once the download is complete, click Distribute.
  11. After distribution, click Activate.
    When prompted, choose whether to restart the service or activate without restarting. Select your preferred option and click OK.
After activation, the parcel becomes available for use when adding the Cloudera Data Visualization service.
Once the parcel is activated, you must add the Cloudera Data Visualization CSD files to Cloudera Manager. For instructions, see Downloading Cloudera Data Visualization CSD files.

Downloading and adding Cloudera Data Visualization CSD files

A Custom Service Descriptor (CSD) file contains the configuration details for Cloudera Managerto recognize and manage a new service. Follow the steps below to download the required CSD file, apply the correct permissions, and restart Cloudera Manager.

  • You must have root or sudo privileges on the Cloudera Manager host.
  1. Open a terminal and connect to the host where Cloudera Manager is installed.
    ssh [***username***]@[***cloudera-manager-host***]
    • Replace [***username***] with a user that has appropriate permissions (for example: root or a sudo-enabled user).
    • Replace [***cloudera-manager-host***] with the appropriate hostname or IP address of your Cloudera Manager server.

    Example: ssh root@cloudera-manager.example.com

  2. Once logged in, verify that the default CSD directory exists.
    ls -lA /opt/cloudera/csd
  3. Navigate to the CSD directory.
    cd /opt/cloudera/csd
  4. Download the Cloudera Data Visualization CSD files to the default CSD directory on the Cloudera Manager host.
    sudo wget https://[***your-download-location***]/[***your-csd-file***].jar
    • Replace [***your-download-location***] with the download URL provided by your administrator or Cloudera.

    • Replace [***your-csd-file***].jar with the actual filename provided by your administrator or Cloudera.

    For example: https://archive.cloudera.com/p/cdv/8.0.3/redhat8/yum/DATAVIZ-8.0.3-b61.p1.65975532.jar

  5. List the directory contents to confirm that the file has been downloaded.
    ls -lA

    You should see the downloaded JAR file listed in the directory.

  6. Restart the Cloudera Manager Server to load the new CSD by running the following command on the host where Cloudera Manager is installed.

    sudo service cloudera-scm-server restart

  7. Restart Cloudera Management Service in the UI.
    1. Go to the Status tab.
    2. Select Actions > Restart to restart the Cloudera Management Service.

After restarting, Cloudera Manager will detect the Cloudera Data Visualization service. You can now proceed to add and configure it in your cluster.

Adding Cloudera Data Visualization as a service

Use the Add Service wizard in Cloudera Manager to deploy and configure Cloudera Data Visualization on a Cloudera Base on premises cluster.

Ensure the following:

  • A Cloudera Base on premises cluster is installed and running.
  • You have added the Cloudera Data Visualization CSD files in the /opt/cloudera/csd folder, and Cloudera Manager has been restarted.
  • You have added, downloaded, distributed, and activated the Cloudera Data Visualization parcel in Cloudera Manager.
  1. Log in to Cloudera Manager.
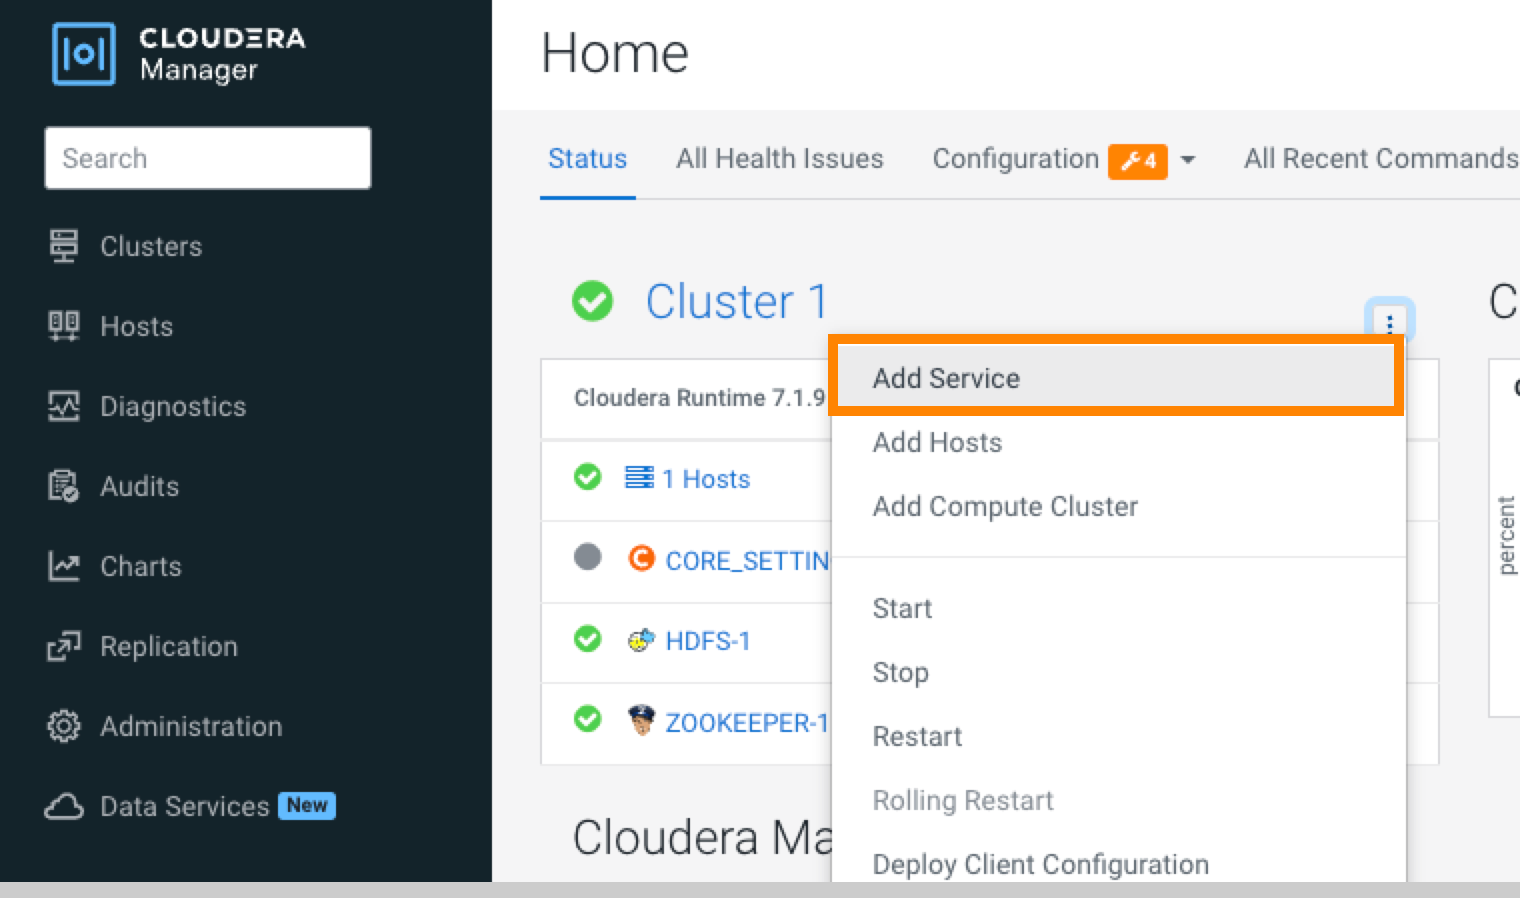
  2. On the Home screen, open the drop-down menu next to your cluster name and select Add Service.
  3. Select Dataviz from the list of available services, then click Continue.

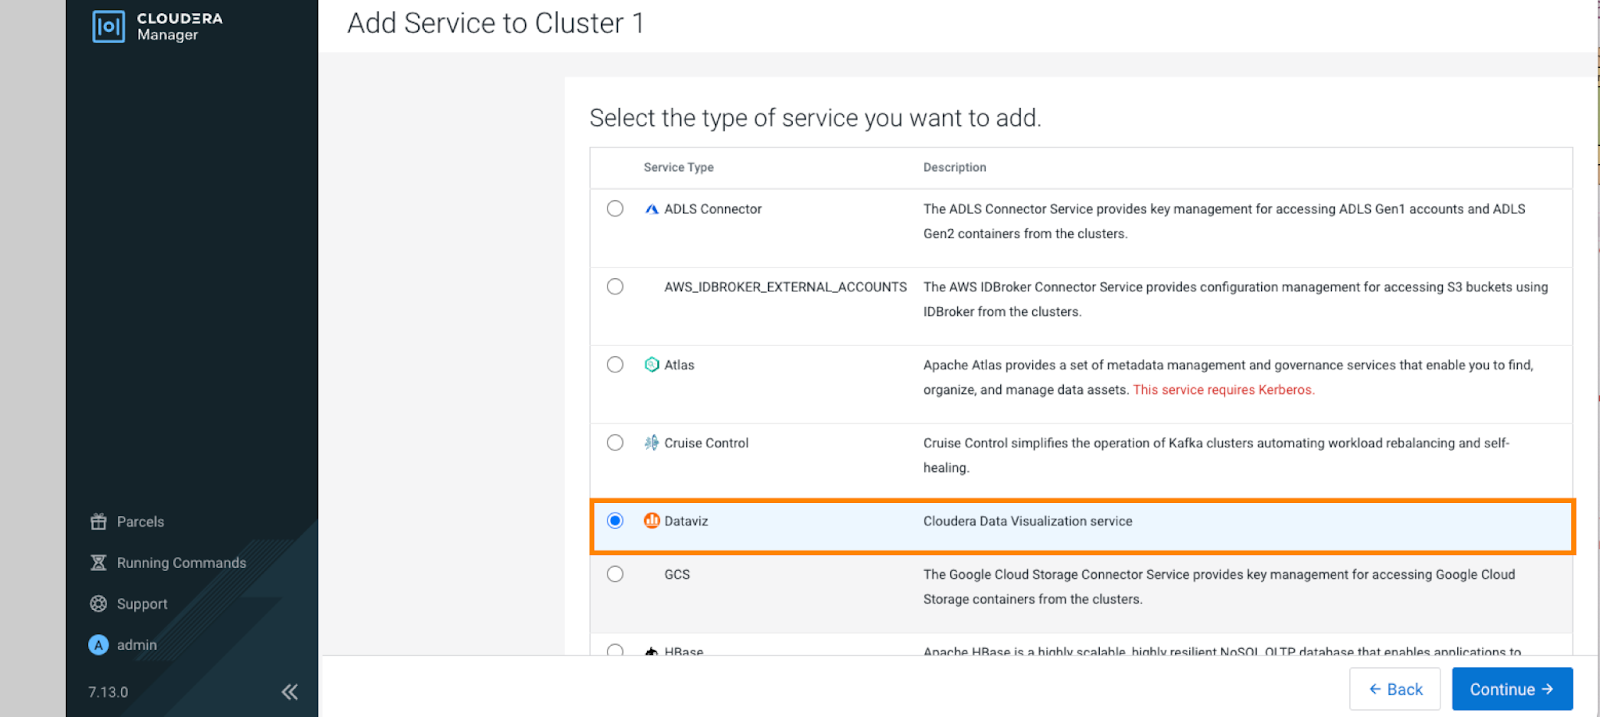
    The Add Service wizard is displayed.

  4. In the Select Dependencies step, leave the default No Optional Dependencies setting and click Continue.
  5. Assign roles to hosts.
    • On single-node clusters, roles are automatically assigned, so click Continue to proceed.

    • On multi-node clusters, manually assign roles to the desired hosts and then click Continue to proceed.

  6. Configure a metadata database.
    1. Configure the required database connection details:
      • Type: Select your database type from the dropdown. (For example: MySQL)
      • Database Hostname: Enter the hostname used when creating the database.
      • Database Name: Add the name of the Cloudera Data Visualization database.
      • Username: Add the Cloudera Data Visualization database username.
      • Password: Add the Cloudera Data Visualization database password.
    2. You can click Test Connection to verify the database settings.
    3. Click Continue.
  7. Review the service configuration summary, then click Continue to begin the installation.
  8. On the Command Details screen, monitor the installation progress.
  9. Once the installation is complete, click Continue.
  10. On the Summary screen, click Finish to complete the setup.

    The Cloudera Data Visualization service is now added to your cluster. It will appear in the list of cluster services in Cloudera Manager.

  11. Restart the Cloudera Management Service to update stale configurations with new monitoring entities.
  12. Check the health status of the new service to verify it has started correctly.

    If the Health Status is Good, the service has started successfully.

You have completed your Cloudera Data Visualization installation on Cloudera Base on premises. For further information about adding services to Cloudera Runtime, see Adding a service.

Open the Cloudera Data Visualization web interface to begin creating dashboards.

Accessing the Cloudera Data Visualization UI

After adding the service, follow these steps to access the Cloudera Data Visualization user interface.

  1. In Cloudera Manager, go to the Dataviz service details page.
  2. Click Dataviz Site.

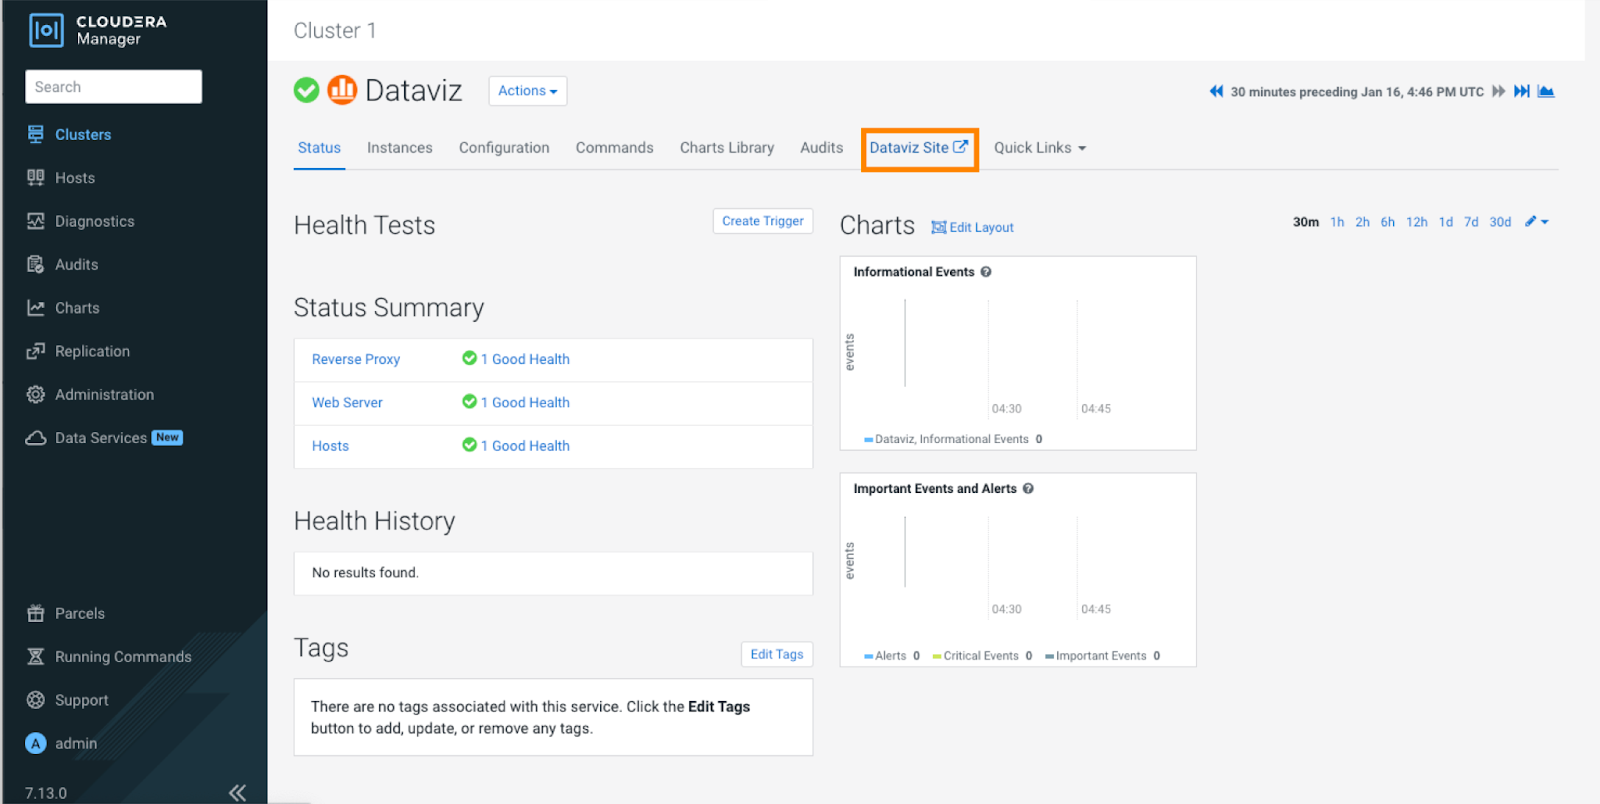
    This opens the Cloudera Data Visualization interface in a new browser tab.

  3. Use the default credentials to log in:
    • Username: vizapps_admin
    • Password: vizapps_admin
You have now successfully added the Cloudera Data Visualization service and logged into the user interface. You can begin:
  • Connecting to data sources
  • Creating dashboards and visualizations