Configuring Hive query isolation auto-scaling
You can configure your Hive Virtual Warehouse to add dedicated executors to run scan-heavy, data-intensive queries, also known as ETL queries. You learn how to enable a Virtual Warehouse auto-scaling feature and set a query isolation parameter in the Hive configuration.
- You are familiar with the auto-scaling process.
- You are creating a Hive Virtual Warehouse for running ETL-type queries.
- In Cloudera Data Warehouse, you added a Hive Virtual Warehouse, configured the size of the Hive Virtual Warehouse, and configured auto-suspend as described in previous topics.
- You obtained the DWAdmin role.
hive.query.isolation.scan.size.threshold configuration
parameter.-
In Concurrency Autoscaling properties, limit
auto-scaling by setting the minimum and maximum number of executor nodes that
can be added.
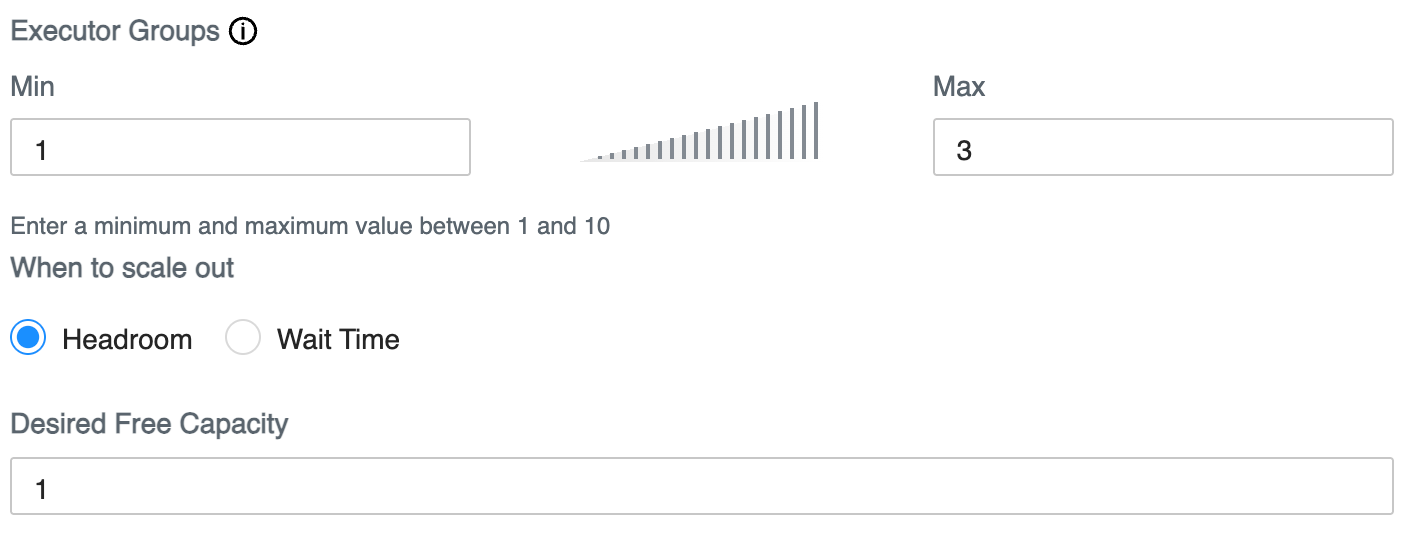
-
In Concurrency Autoscaling, select Enable
Query Isolation.
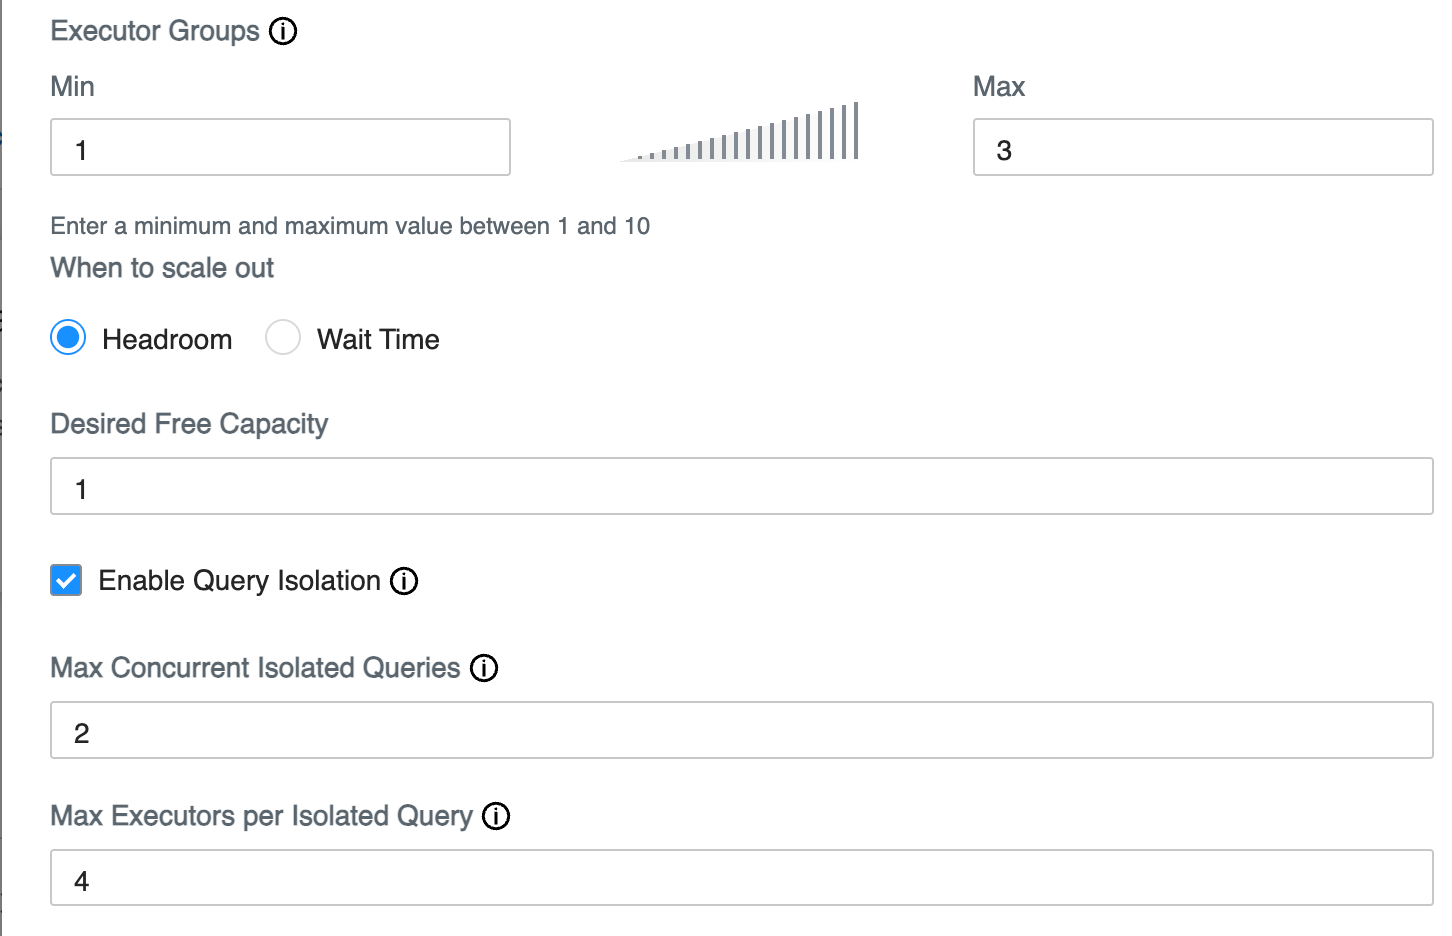 Two configuration options appear: Max Concurrent Isolated Queries and Max Executor Per Isolated Query.
 -
In the Cloudera Data Warehouse service
Overview page, click Virtual
Warehouses, and find your Virtual Warehouse. Click
 > Details > Configurations > Hiveserver2.