Adding a flow to an existing deployment
Follow these instructions to deploy your new flow into an existing cluster.
 .
.
Name your flow
When you add a flow to an existing deployment you must provide a flow name that is unique within that deployment. You can import an existing flow configuration to speed up flow deployment.
-
If the flow version you are deploying requires an inbound connection and the
target deployment does not have one, you see a warning. You cannot proceed until
you either add an inbound conection configuration to the deployment in the
Deployment Manager, or you select the I
understand and choose to proceed with the configuration as is.
option.

If you click To set a Custom Inbound Connections Configuration open the Deployment Manager
 option, Deployment Manager opens in a new window where
you can configure an inbound connection before proceeding with adding the
flow.
option, Deployment Manager opens in a new window where
you can configure an inbound connection before proceeding with adding the
flow.If you select the I understand and choose to proceed with the configuration as is. option, the Next
button becomes active and you can
proceed with adding the flow without configuring the inbound connection at
this time. -
Click Next .
Provide parameter values
Depending on the flow you deploy, you may need to specify parameter values like connection strings or credentials, and upload files like truststores or JARs.
-
When you finish setting configuration parameters, click Next .
-
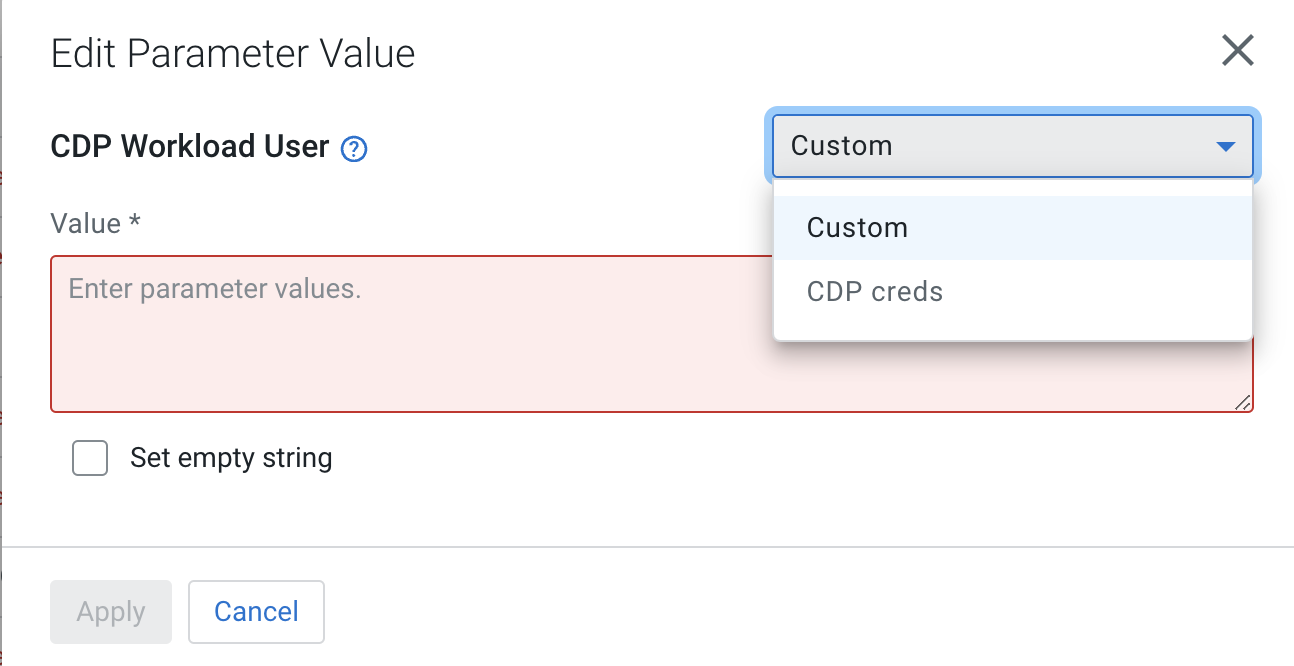
You may edit parameters individually by clicking the edit
 icon next to them
or you may edit entire parameter groups by selecting the Edit
Group option.
icon next to them
or you may edit entire parameter groups by selecting the Edit
Group option.
In either case, you have the option to define a custom parameter value that is specific to this deployment or, if available, select the value from a shared parameter group.
-
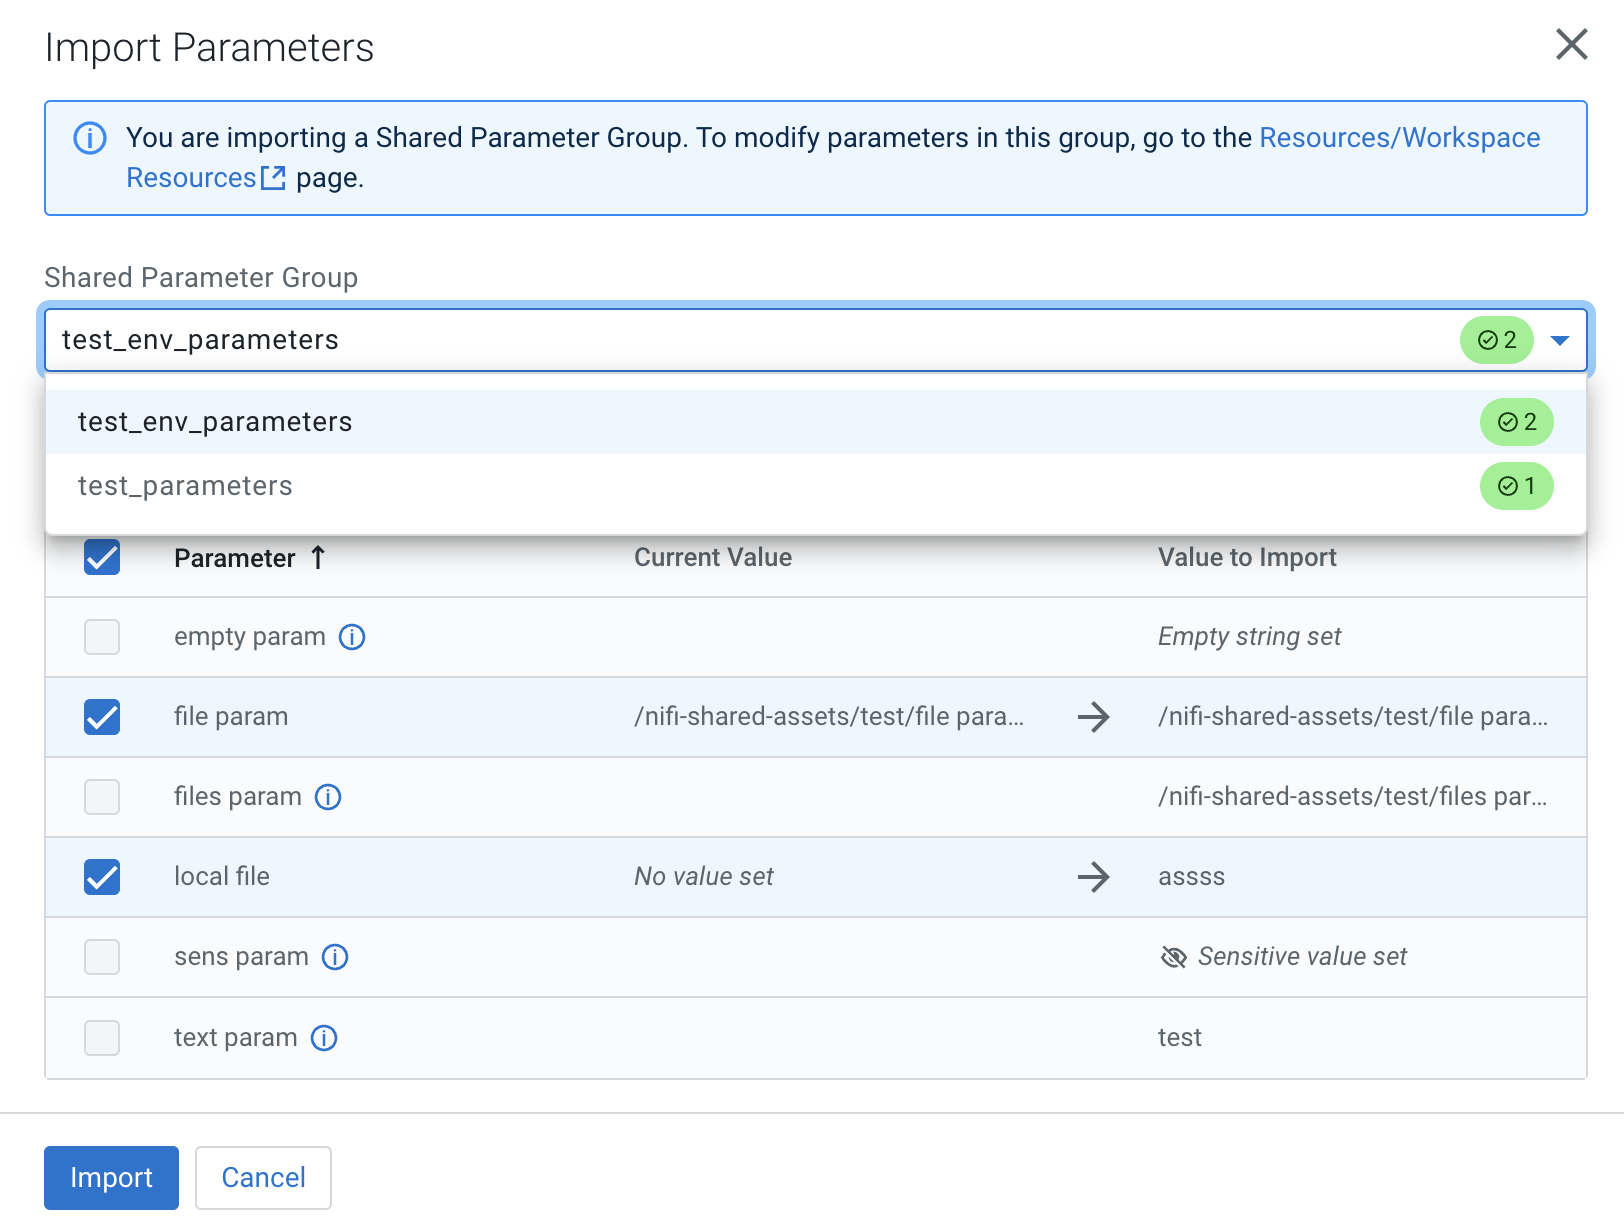
You may import a set of shared parameters from a parameter group to fill in
values and facilitate flow deployment. To do so, select the
 Import Shared Parameters option.
-
Parameters in the shared group that match a deployment parameter are preselected, unless you have already modified that parameter in the deployment wizard. In that case that particular parameter is left unselected to protect any changes you have already made and you need to manually select that parameter.
-
Set Key performance indicators
Optionally add key performance indicators to help you track the performance of your flow deployment then review your settings and launch the deployment process.
-
Click Next .
Verify your settings and initiate deployment
Review deployment settings, make any necessary changes, and start deployment.
-
Review a summary of the information provided and make
any necessary edits by clicking
 Previous.
After you click Deploy, you are redirected to the Alerts tab in the Flow Details where you can track how the deployment progresses.