Creating a new deployment

Follow these instructions if you want to deploy a new cluster to run your flow.

In the New Deployment modal select the Target Workspace where you want to deploy the flow then click Continue

Name your flow and deployment, and assign it to a project

On the Overview page provide deployment and flow names, and assign the deployment to a project. You can also import a previously exported deployment configuration, auto-filling configuration values and speeding up deployment.

  1. Select a Target Project for your deployment from the list of Projects available to you.
    • If you do not want to assign the deployment to any of the available Projects, select Unassigned. Unassigned deployments are accessible to every user with DFFlowUser role in the environment.
  2. Provide a unique Deployment Name.
    You can use this name to identify NiFi deployments in an environment.
  3. Provide a unique Flow Name.
    This name helps you distinguish between individual instances of a flow within a deployment.
  4. Optional: If you have previously exported a configuration that closely aligns with the one you are deploying now, you can import it under Import Configuration to auto-fill as much of the wizard as possible.
    You can overwrite imported configuration values in the deployment wizard.
  5. Optional: If you do not want the flow to start running after deployment, unselect the Automatically start flow upon successful deployment checkbox.
  6. Click Next .

Configure NiFi

After selecting the target environment, project, and naming your flow, you need to set Apache NiFi version, possible inbound connections, and custom processors. Depending on the flow definition, you may also need to provide values for a number of configuration parameters. Finally, you need to set the capacity of the NiFi cluster servicing your deployment.

  1. Pick a NiFi Runtime Version for your flow deployment.
    Select if you want to use Apache NiFi 1.x or 2.x with your deployment.
    Cloudera recommends that you always use the latest available version within the 1.x and 2.x lines, if possible.
  2. Specify whether you want to use inbound connections that allow your flow to receive data from an external data source.

    If yes, specify the endpoint host name and listening port(s) where your flow listens to incoming data.

    See Creating an inbound connection endpoint for complete information on endpoint configuration options.

  3. Specify whether you want to use NiFi Archives (NARs) to deploy custom NiFi processors or controller services.

    If yes, specify the Cloudera Workload Username, password, and cloud storage location where the NARs are stored.

    Make sure that you click the Save button specific to Custom NAR Configuration before proceeding.

  4. If you selected to run your flow with NiFi 2.x, specify whether you want to use custom Python processors with your flow.
    If yes, specify the Cloudera Workload Username, password, and cloud storage location where the processors are stored.

    Make sure that you click the Save button specific to Custom Python Processors before proceeding.

  5. Click Next .

Provide parameter values

Depending on the flow you deploy, you may need to specify parameter values like connection strings or credentials, and upload files like truststores or JARs.

  • Provide values to parameters required for your flow deployment.
    You have to provide values for all parameters. Filter for empty fields by selecting the No value checkbox.
  • When you finish setting configuration parameters, click Next .
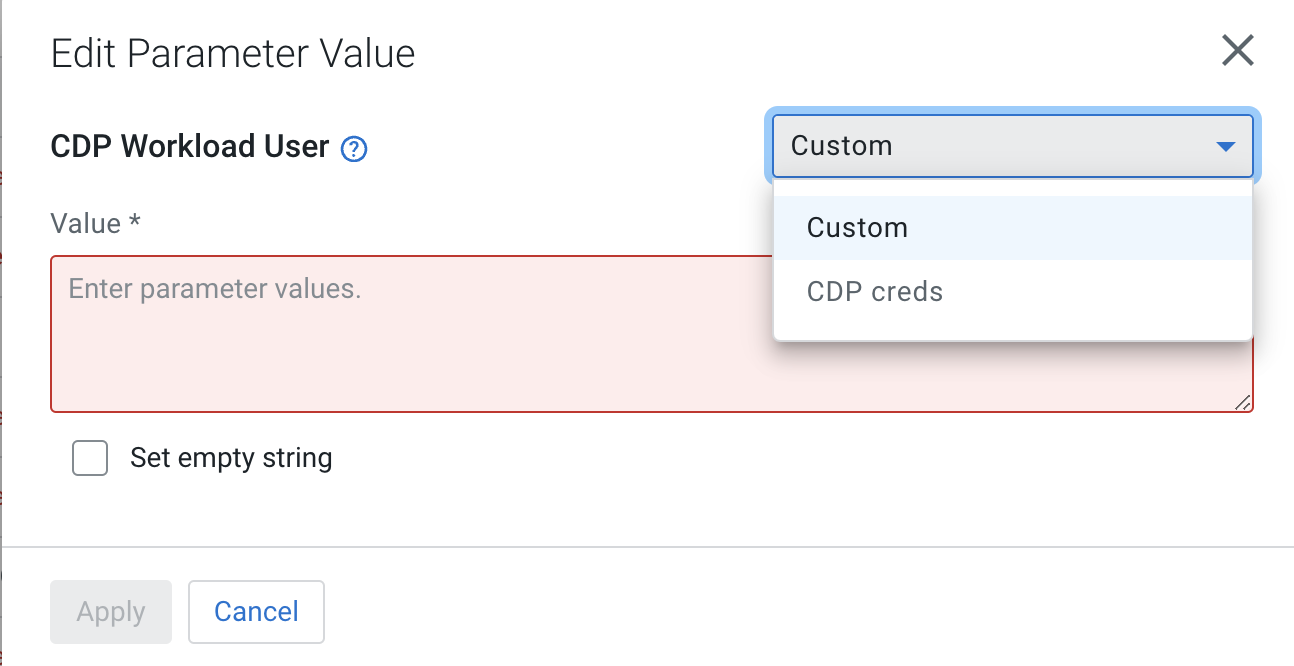
  • You may edit parameters individually by clicking the edit icon next to them or you may edit entire parameter groups by selecting the Edit Group option.

    In either case, you have the option to define a custom parameter value that is specific to this deployment or, if available, select the value from a shared parameter group.


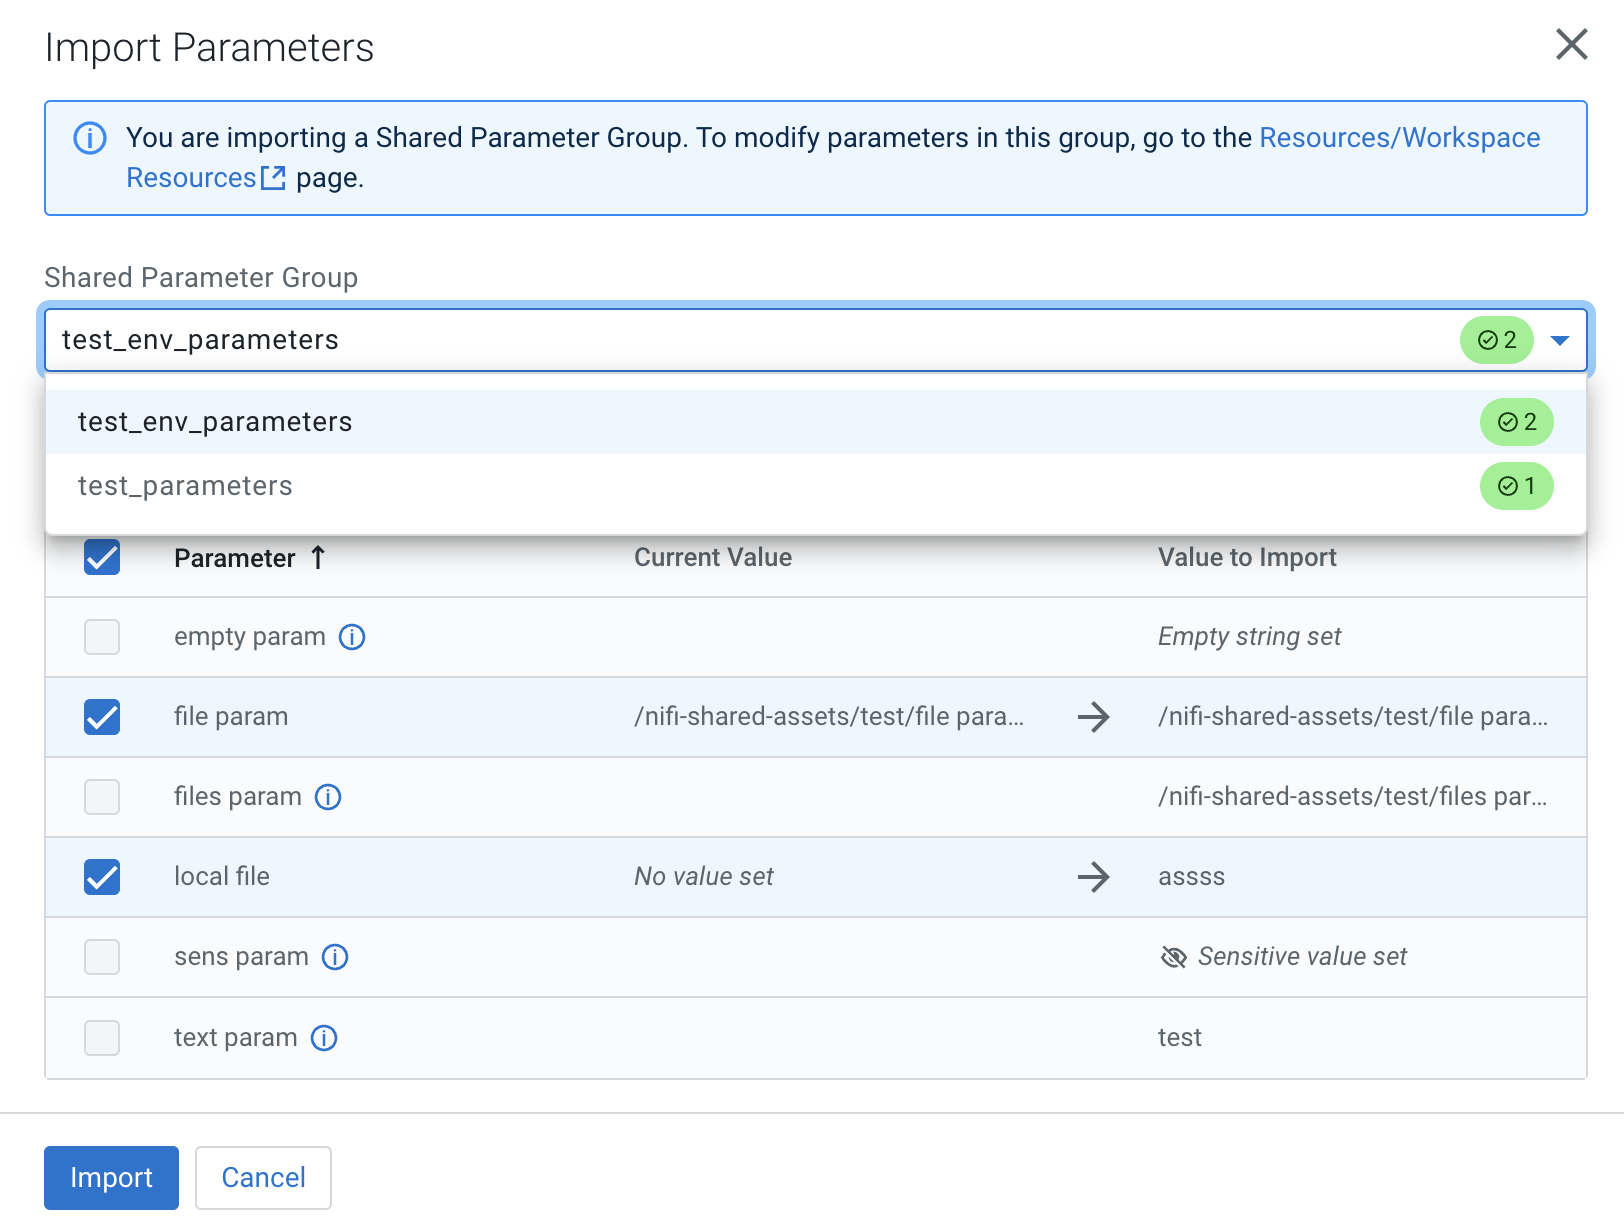
  • You may import a set of shared parameters from a parameter group to fill in values and facilitate flow deployment. To do so, select the Import Shared Parameters option.


    • Parameters in the shared group that match a deployment parameter are preselected, unless you have already modified that parameter in the deployment wizard. In that case that particular parameter is left unselected to protect any changes you have already made and you need to manually select that parameter.

Configure sizing and scaling

Set the size and number of Apache NiFi nodes, auto-scaling, and the type of storage to be used.

  1. Specify NiFi node size by selecting one of the options:
    • Extra Small: 2 vCores per Node, 4 GB RAM per Node
    • Small: 3 vCores per Node, 6 GB RAM per Node
    • Medium: 6 vCores per Node, 12 GB RAM per Node
    • Large: 12 vCores per Node, 24 GB RAM per Node
  2. Set the number of NiFi nodes and auto-scaling.
    • Select the Auto Scaling checkbox, if you want your cluster to automatically scale based on CPU utilization. When you enable auto-scaling, the minimum number of NiFi nodes are used for initial size and the workload scales up or down depending on resource demands.
    • Set the number of nodes between 1 and 32.
    • If you enabled Auto Scaling, you may enable your flow to scale based on flow performance metrics. To do so, select the Flow Metrics Scaling checkbox.
  3. Select storage type.
    Select whether you want your deployment to use storage optimized for cost or for performance. You also have the option to set a custom storage size. Only use the custom option if you know how changing individual values affects your deployment.
    • Standard: 512 GB Content Repo Size, 512 GB Provenance Repo Size, 256 GB Flow File Repo Size, 2300 IOPS, 150 MB/s Max Throughput
    • Performance: 1024 GB Content Repo Size, 1024 GB Provenance Repo Size, 256 GB Flow File Repo Size, 5000 IOPS, 200 MB/s Max Throughput
    • Custom:

      Depending on your deployment scenario, you have the following options:

      • On AWS, you can set the repo Size between 50 - 1000 GB, IOPS between 3000 - 7000 in increments of 1000, and Max Throughput between 125 MB/s - 500 MB/s in increments of 100 for both the Content Repo, Provenance Repo, and Flow File Repo. You can set the identical IOPS and Maximum throughput values to all repositories by setting the values for one repository and then selecting the Apply IOPS and Throughput values to all repositories. checkbox.
      • On Azure, you can select one of four predefined custom storage configurations for Content Repo, Provenance Repo, and Flow File Repo. Table Available Azure storage configurations describes the predefined custom storage values.
        Table 1. Available Azure storage configurations
        Storage configuration Disk size (GB) IOPS Throughput (MB/s)
        P6 64 240 50
        P10 128 500 100
        P15 256 1100 125
        P30 1024 5000 200
  4. If applicable, configure additional storage for Python processors.
    The wizard automatically detects if the flow definition being deployed contains any Python processors and suggests the amount of extra disk space to add because of them.
  5. Click Next .

Set Key performance indicators

Optionally add key performance indicators to help you track the performance of your flow deployment then review your settings and launch the deployment process.

  1. From KPIs, you may choose to identify key performance indicators (KPIs), the metrics to track those KPIs, and when and how to receive alerts about the KPI metrics tracking.

    See Working with KPIs for complete information about the KPIs available to you and how to monitor them.

  2. Click Next .

Verify your settings and initiate deployment

Review deployment settings, make any necessary changes, and start deployment.

  1. Review a summary of the information provided and make any necessary edits by clicking Previous.
  2. When you are finished, complete your flow deployment by clicking Deploy.

After you click Deploy, you are redirected to the Alerts tab in the Flow Details where you can track how the deployment progresses.