Migrating Workflows

This section details the steps to transfer a workflow template between Cloudera AI Agent Studio instances, covering both export from the source and import into the target instance.

Migrating Workflow across Agent Studio

Workflow templates are exported as ZIP files, and includes the following essential components:

  • Workflow template configuration
  • Agent templates
  • Tool templates
  • MCP templates
  • Task templates
  • Associated icons and assets
  1. Export workflow template from source Agent Studio
    1. Navigate to the Workflows page in your source Agent Studio instance
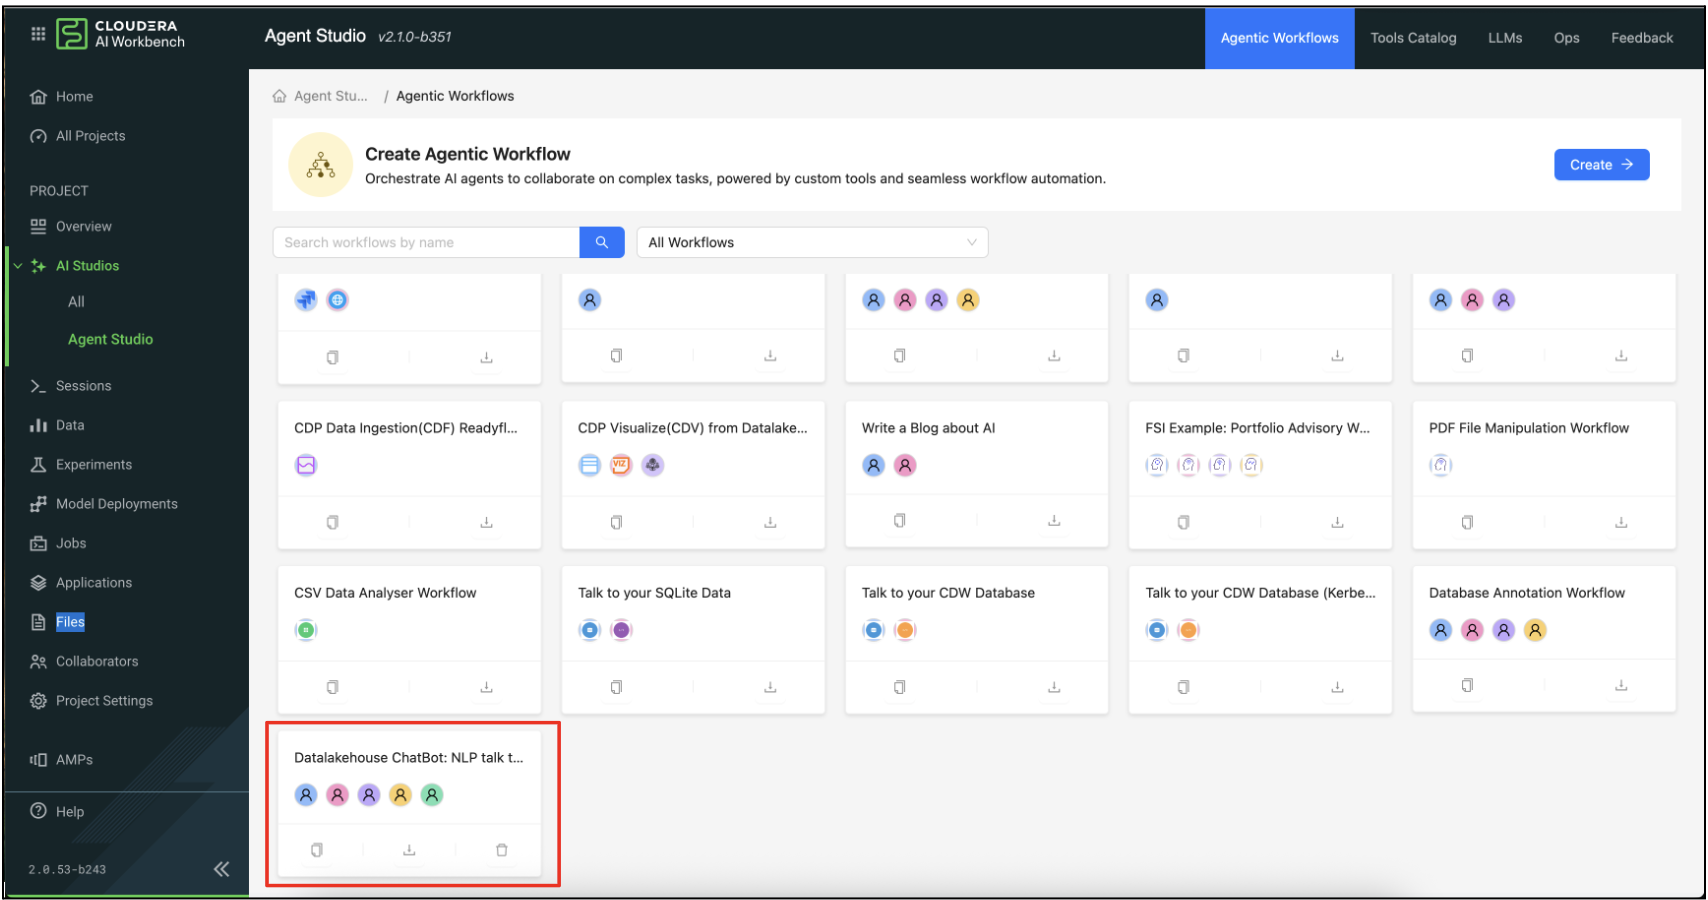
    2. Find the workflow template you want to migrate in the Templates section
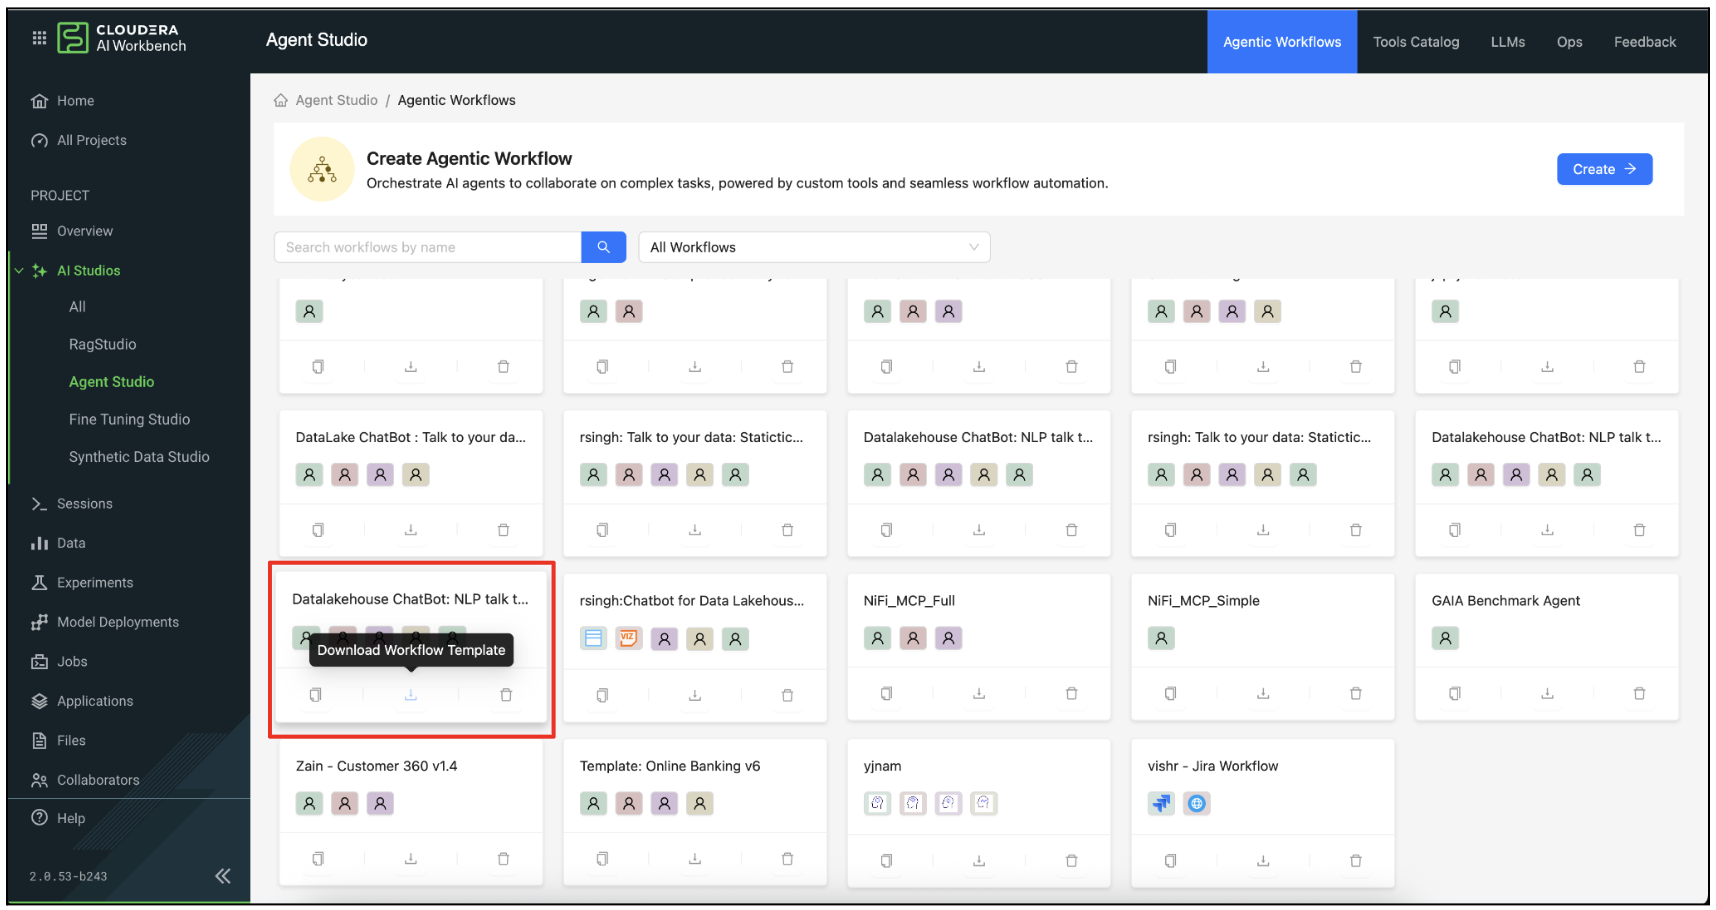
    3. Click the Download Workflow Template icon from the menu. The workflow template is downloaded as a ZIP file to your local machine. The file is named based on the template name
  2. Upload ZIP file to target Agent Studio:
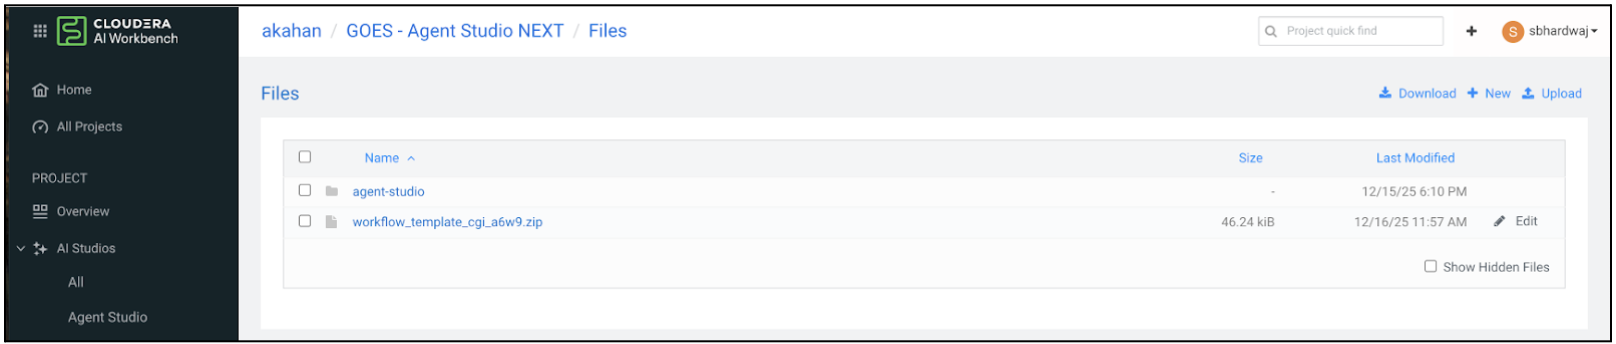
    1. In your target Agent Studio instance, you must to upload the ZIP file to the project files.
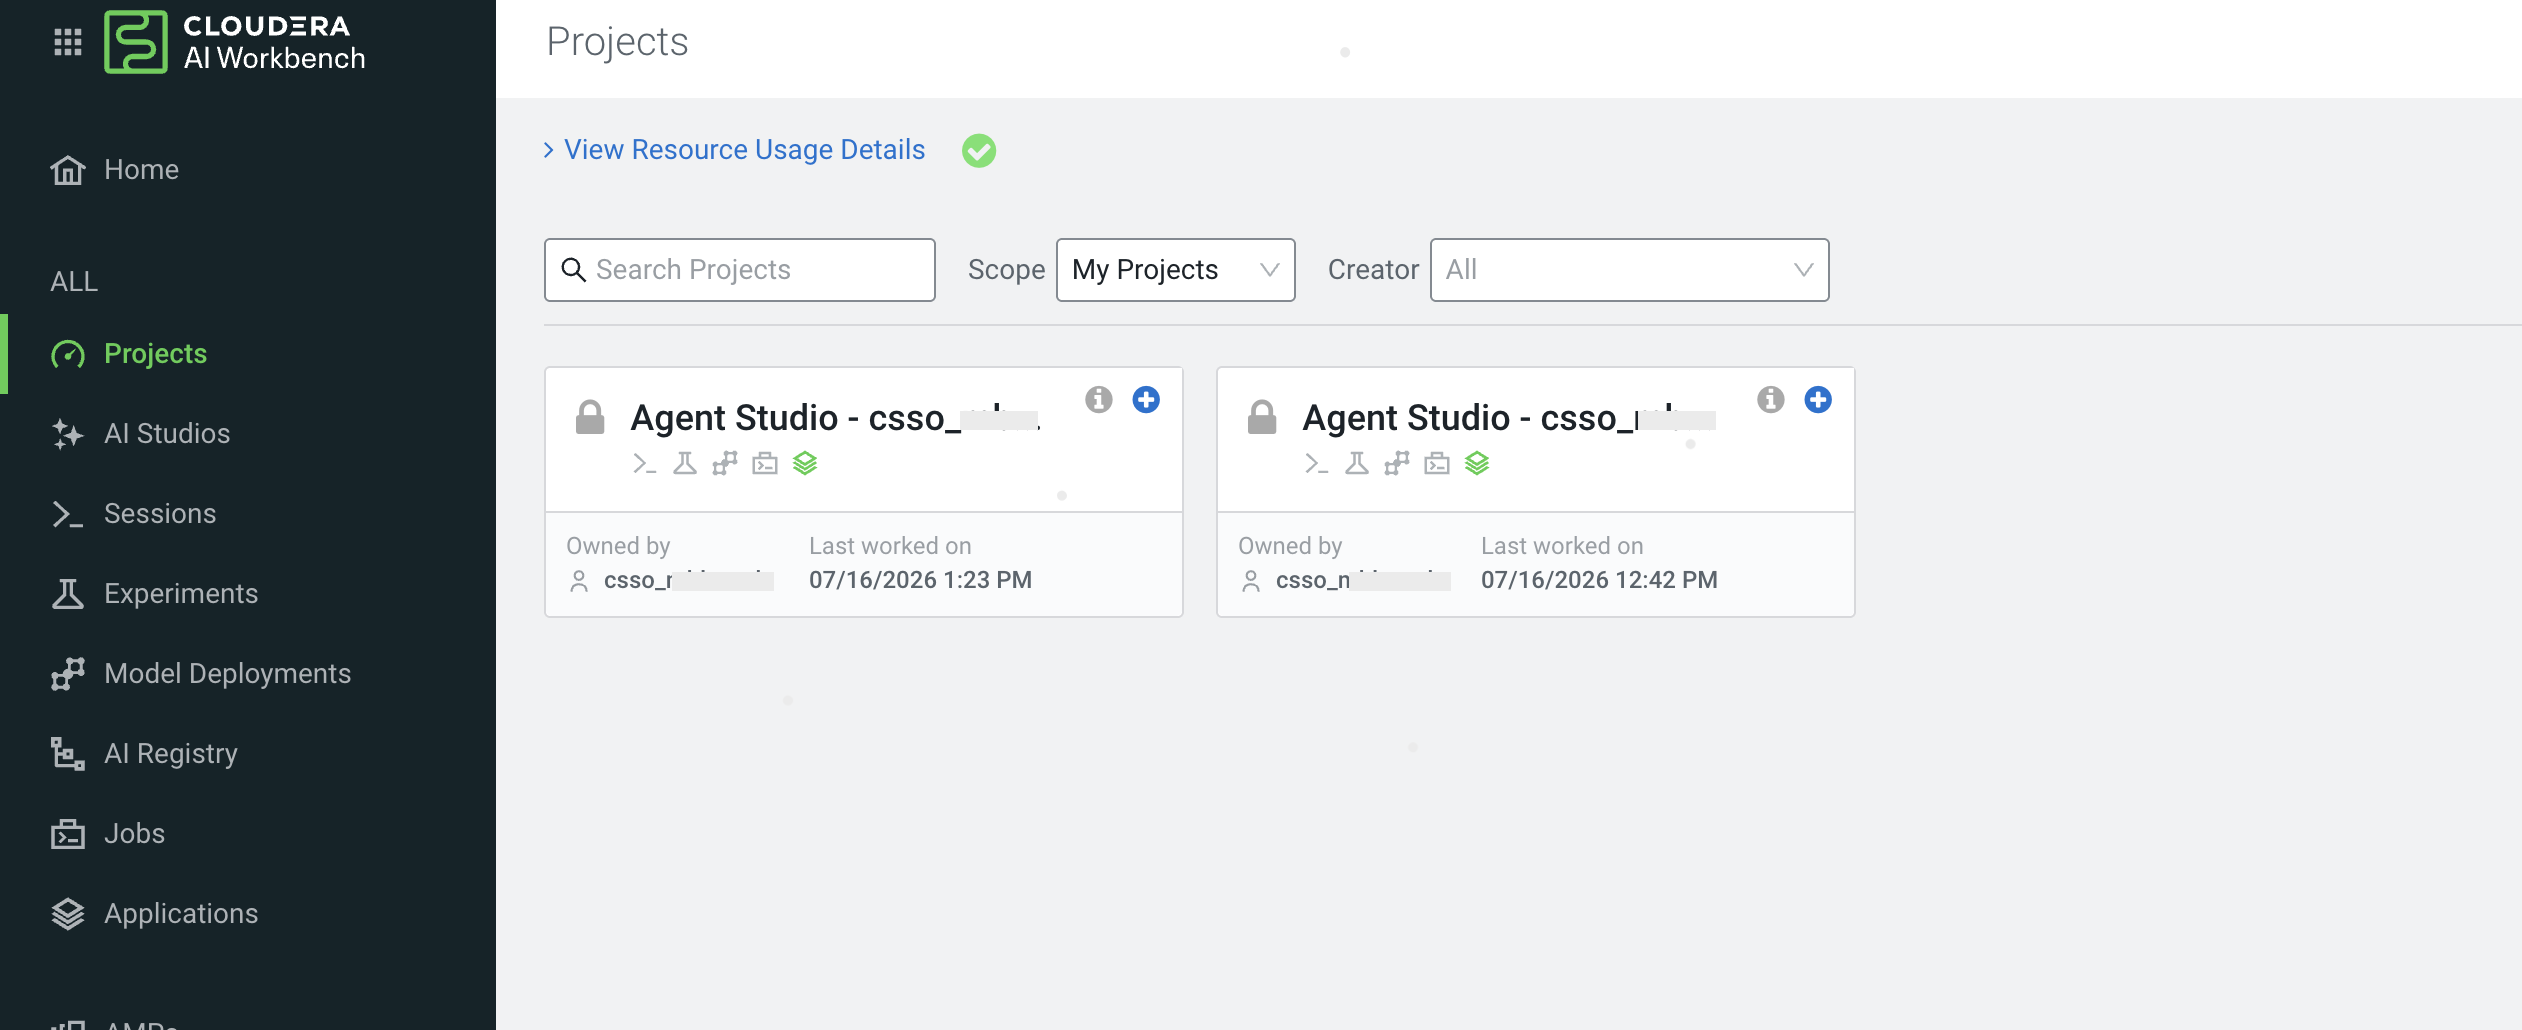
    2. Navigate to the Cloudera AI Workbench project file browser
    3. Upload the ZIP file to a location such as, /home/cdsw/ or any accessible directory
    4. Make a note of the complete relative path of the uploaded file (for instance, workflow_template.zip).
  3. Import Workflow Template in Target Agent Studio
    1. Navigate to the Workflows page in your target Agent Studio instance.
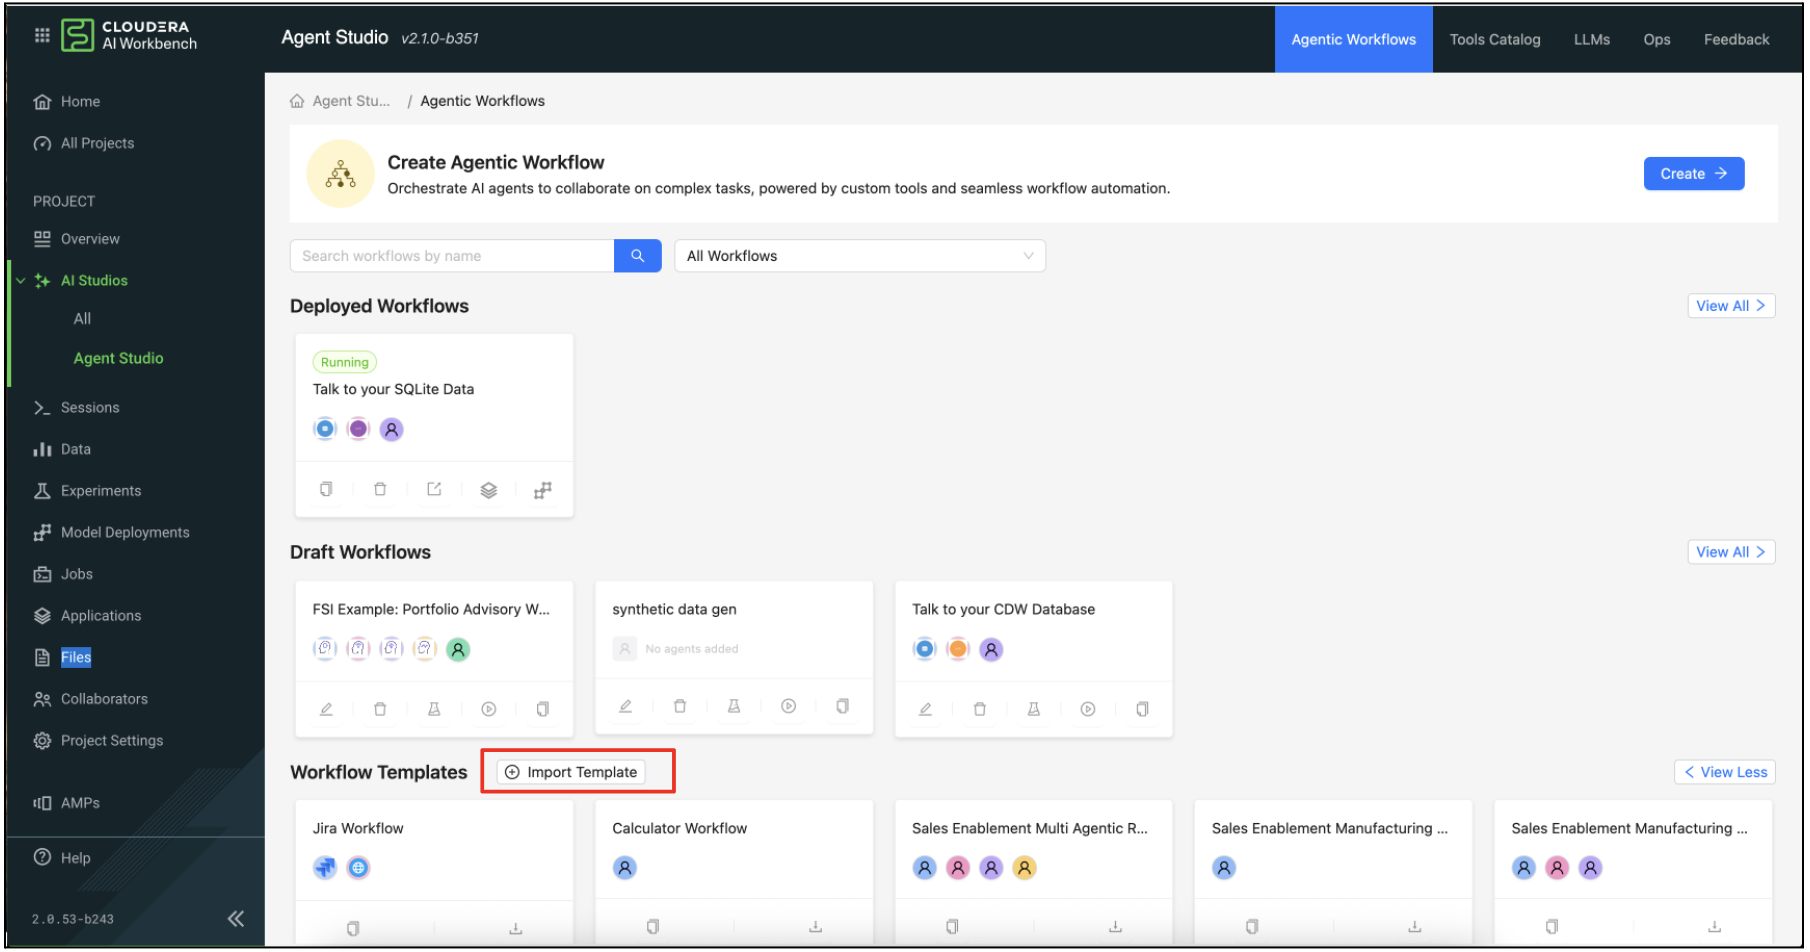
    2. In the Templates section, click the Import Template button (with a plus icon).
    3. The Import Workflow Template modal pops-up.
    4. Enter the relative path to the uploaded ZIP file in the input field.The path prefix /home/cdsw/ is automatically included, you must enter the relative path after /home/cdsw/ (for example, if the file is at /home/cdsw/workflow_template.zip, enter workflow_template.zip)
    5. The system automatically checks if the file exists at the specified path. You'll see:A green success message if the file is found and A warning message if there are some auth issues faced when confirming the file presence. You can ignore this warning message in most of the cases.

      If the file is successfully located, a green success message is displayed. Conversely, a warning message appears if authorization issues are encountered while attempting to confirm the file's presence. You can ignore this warning message in most of the cases.

    6. Once the file path is validated, click the Import button, or click the OK button.

      The workflow template import process ensures a smooth transfer by extracting the ZIP file, creating new UUIDs for all templates to prevent conflicts, importing all workflow components (agents, tools, tasks, MCP servers), copying associated assets (icons, tool templates), and, by making the template accessible in the target instance.

  4. The imported workflow template now appears in the Templates section and can be used to create new workflows.