Deploying Predictive Models
The following example illustrates how to train a model on a Cloudera AI workbench, register it, and then deploy it to Cloudera AI Inference.
In this section, the well-known wine classifier example is taken using the dataset from
UC Irvine.
-
Create a project in your Cloudera AI Workbench, open a session, and
execute the following command to install the necessary Python packages:Upload the model
artifact to your project’s file system.
pip install open-inference-openapi onnx==1.13.1 onnxruntime skl2onnx pandas scikit-learn -
Copy and paste the following Python code into your editor of choice in the workbench
session:
import logging import sys import warnings import onnx from urllib.parse import urlparse import numpy as np import pandas as pd from sklearn.linear_model import ElasticNet from sklearn.metrics import mean_absolute_error, mean_squared_error, r2_score from sklearn.model_selection import train_test_split from sklearn import pipeline from sklearn import linear_model from urllib.parse import urlparse from sklearn.preprocessing import FunctionTransformer import mlflow import mlflow.sklearn from mlflow.models import infer_signature from skl2onnx import to_onnx from skl2onnx import convert_sklearn from skl2onnx.common.data_types import FloatTensorType def convert_to_onnx(model, data): #check the specifications initial_types = list( zip( data.columns.values.tolist(), [FloatTensorType([None, 1]) for _ in range(len(data.columns))], ) ) onnx_model = convert_sklearn(model=model, initial_types=initial_types) print("onnx_model.type:",type(onnx_model)) mlflow.set_tag("onnx_version",onnx.__version__) return onnx_model def eval_metrics(actual, pred): rmse = np.sqrt(mean_squared_error(actual, pred)) mae = mean_absolute_error(actual, pred) r2 = r2_score(actual, pred) return rmse, mae, r2 warnings.filterwarnings("ignore") np.random.seed(40) csv_url = ( "http://archive.ics.uci.edu/ml" "/machine-learning-databases/wine-quality/winequality-red.csv" ) try: data = pd.read_csv(csv_url, sep=";") except Exception as e: logger.exception( "Unable to download training & test CSV, check your internet connection. Error: %s", e ) # Split the data into training and test sets. (0.75, 0.25) split. train, test = train_test_split(data) # The predicted column is "quality" which is a scalar from [3, 9] train_x = train.drop(["quality"], axis=1) test_x = test.drop(["quality"], axis=1) train_y = train[["quality"]] test_y = test[["quality"]] alpha = 0.5 l1_ratio = 0.5 with mlflow.start_run(): lr = ElasticNet(alpha=alpha, l1_ratio=l1_ratio, random_state=42) DummyScaler = FunctionTransformer(None) lr = pipeline.Pipeline( [("dummy", DummyScaler), ("reg", linear_model.ElasticNet(alpha=alpha, l1_ratio=l1_ratio, random_state=42))] ) lr.fit(train_x, train_y) predicted_qualities = lr.predict(test_x) (rmse, mae, r2) = eval_metrics(test_y, predicted_qualities) print(f"Elasticnet model (alpha={alpha:f}, l1_ratio={l1_ratio:f}):") print(f" RMSE: {rmse}") print(f" MAE: {mae}") print(f" R2: {r2}") mlflow.log_param("alpha", alpha) mlflow.log_param("l1_ratio", l1_ratio) mlflow.log_metric("rmse", rmse) mlflow.log_metric("r2", r2) mlflow.log_metric("mae", mae) predictions = lr.predict(train_x) model_signature = infer_signature(train_x, predictions) onnx_model = convert_to_onnx(lr, test_x) mlflow.onnx.log_model(onnx_model, "model", registered_model_name="ElasticnetWineModel", signature=model_signature) - Run the above code. If it completes successfully, you should see the ElasticnetWineModel model listed on the Registered Models page on the Cloudera AI control plane UI.
-
Click on the model name to view details about the model, and deploy it to Cloudera AI Inference service.
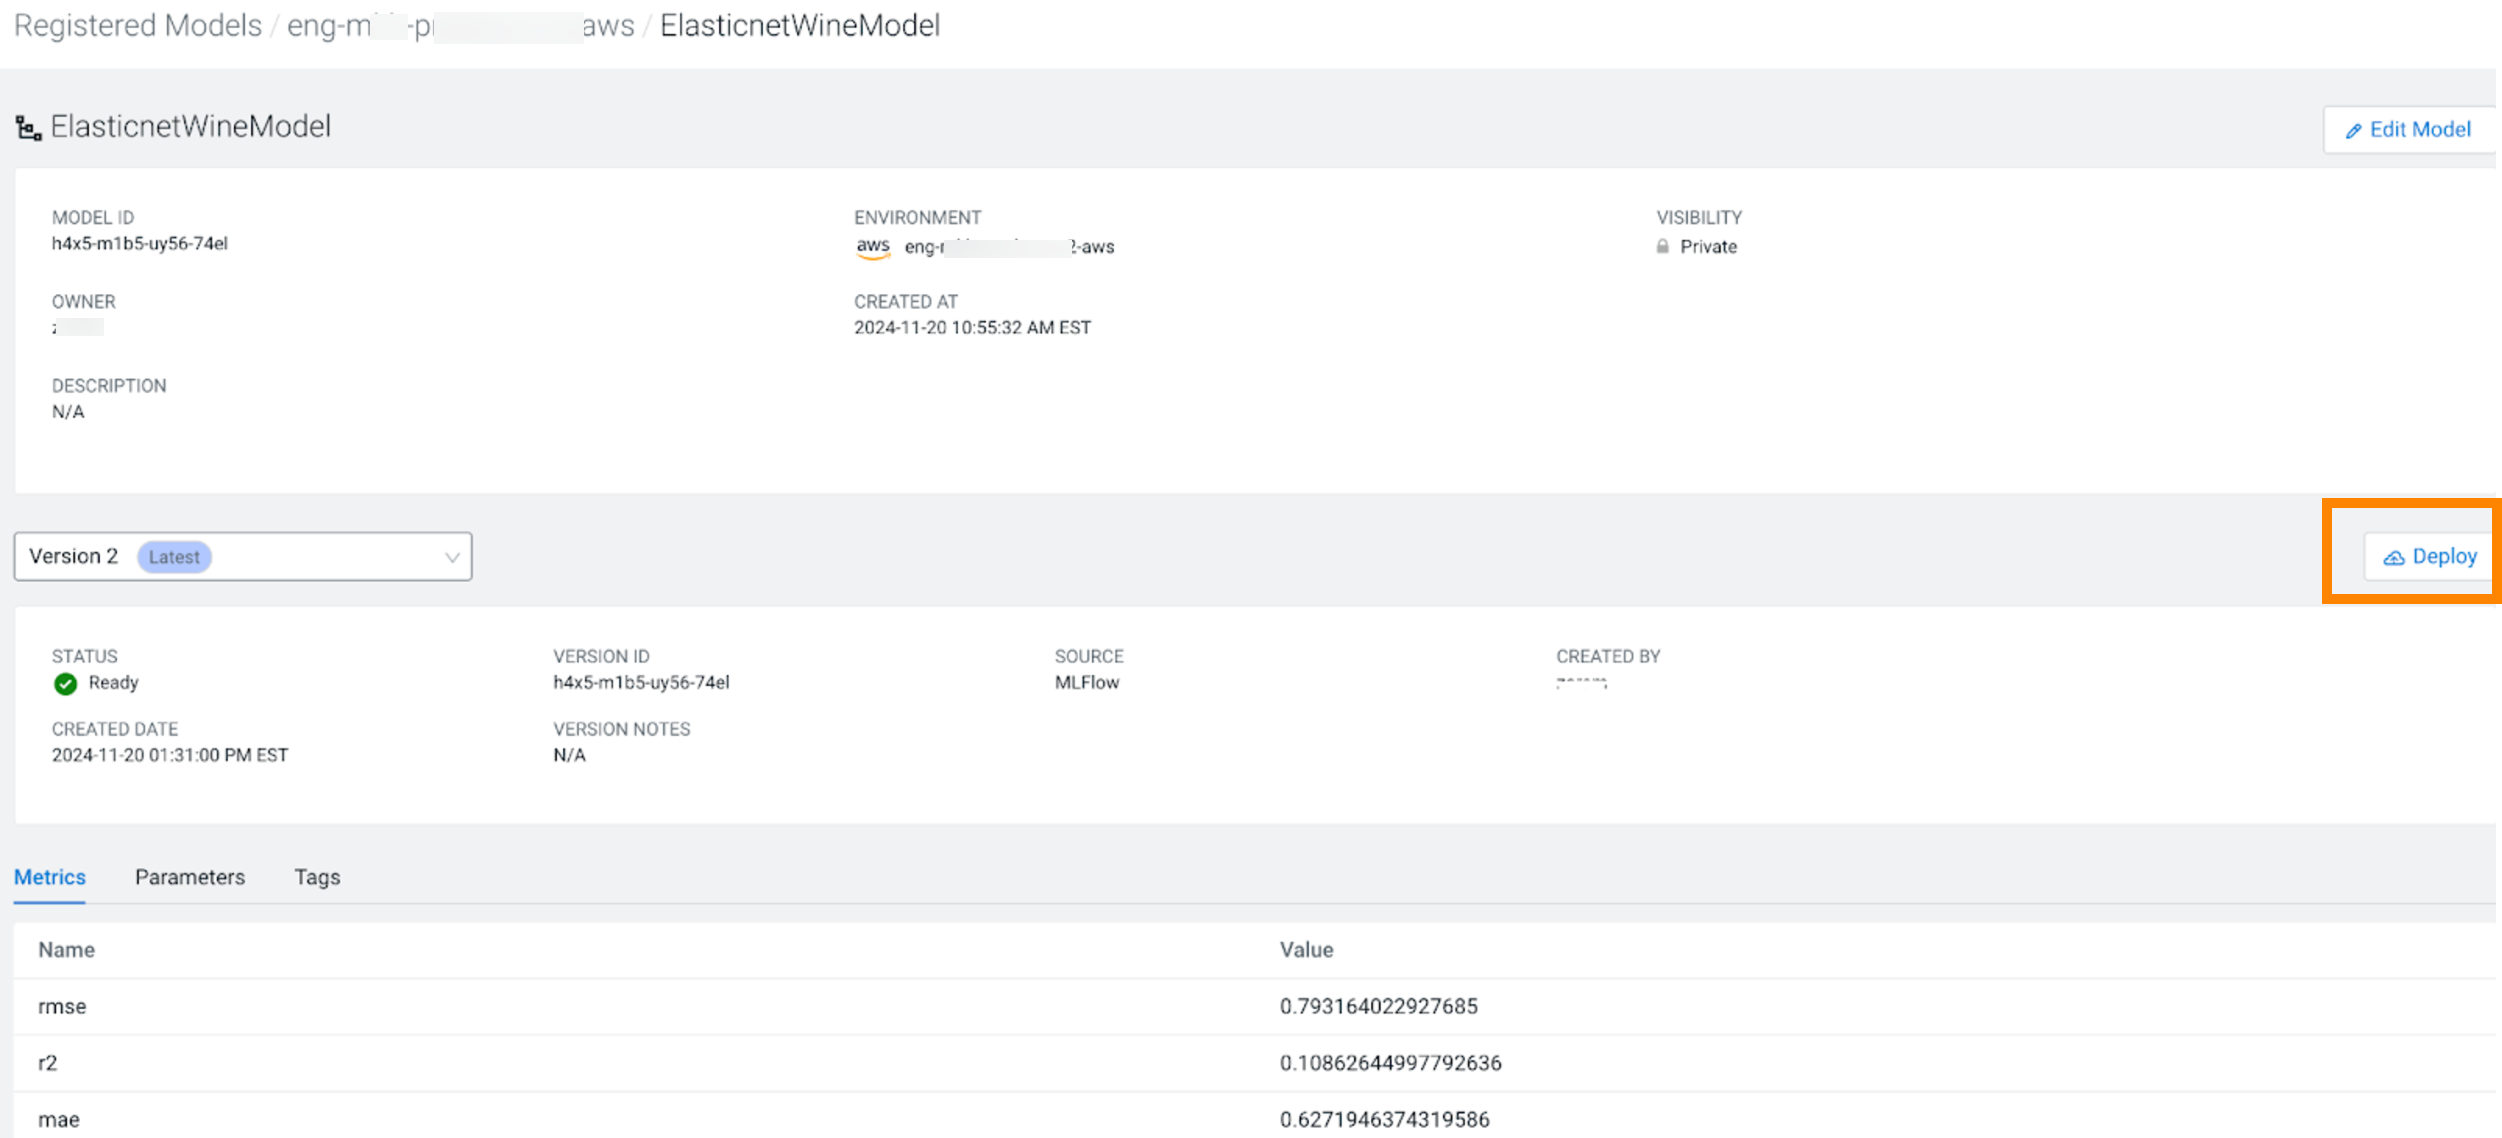
- Click Deploy. The model endpoint creation dialogbox is displayed.
-
Select the Cloudera AI Inference service cluster you wish to deploy it to,
and click Deploy.
The Create Endpoint page is displayed.
-
Create the model endpoint using UI or API.
Using UI
You can use the Create Model Endpoint page to select a specific Cloudera AI Inference service instance and a model version from Cloudera AI Registry to create a new model endpoint. For more information, see Creating a Model Endpoint using UI
Using API
$ cat deploy_wine_onnx.json{ "namespace": "serving-default", "name": "elasticnetwine", "source": { "registry_source": { "model_id": "<MODEL_ID>", "version": <VERSION> } }, "resources": { "req_cpu": "2", "req_memory": "2Gi" }, "instance_type": "m5.24xlarge", "autoscaling": { "min_replicas": "1", "max_replicas": "80", "autoscalingconfig": { "metric": "concurrency", "target": "100" } } } $ curl -XPOST -H "Authorization: Bearer ${CDP_TOKEN}" https://${DOMAIN}/api/v1alpha1/deployEndpoint -d @./deploy_wine_onnx.json -
When the model endpoint is in the Running state, you can interact with the
endpoint. The following is an example of a Python client application running on Cloudera AI Workbench:
$ cat examples/new-wine-input.json{ "parameters": { "content_type": "pd" }, "inputs": [ { "name": "fixed_acidity", "shape": [1, 1], "datatype": "FP32", "data": [9.4] }, { "name": "volatile_acidity", "shape": [1, 1], "datatype": "FP32", "data": [0.8000] }, { "name": "citric_acid", "shape": [1, 1], "datatype": "FP32", "data": [0] }, { "name": "residual_sugar", "shape": [1, 1], "datatype": "FP32", "data": [1.9] }, { "name": "chlorides", "shape": [1, 1], "datatype": "FP32", "data": [0.076] }, { "name": "free_sulfur_dioxide", "shape": [1, 1], "datatype": "FP32", "data": [11] }, { "name": "total_sulfur_dioxide", "shape": [1, 1], "datatype": "FP32", "data": [34] }, { "name": "density", "shape": [1, 1], "datatype": "FP32", "data": [0.9978] }, { "name": "pH", "shape": [1, 1], "datatype": "FP32", "data": [3.51] }, { "name": "sulphates", "shape": [1, 1], "datatype": "FP32", "data": [0.56] }, { "name": "alcohol", "shape": [1, 1], "datatype": "FP32", "data": [9.4] } ] } -
You can use the above inference input payload in your Python client code as in the
following example:
from open_inference.openapi.client import OpenInferenceClient, InferenceRequest
import httpx
import requests
import json

CDP_TOKEN = json.load(open("/tmp/jwt"))["access_token"]
BASE_URL = '<ENDPOINT_BASE_URL>'
MODEL_NAME = '<MODEL_ID>'
headers = {'Authorization': 'Bearer ' + CDP_TOKEN,
           'Content-Type': 'application/json'}

httpx_client = httpx.Client(headers=headers)
client = OpenInferenceClient(base_url=BASE_URL, httpx_client=httpx_client)

# Check that the server is live, and it has the model loaded
client.check_server_readiness()
metadata = client.read_model_metadata(MODEL_NAME)
metadata_str = json.dumps(json.loads(metadata.json()), indent=2)
# Uncomment the next line to see model server metadata, which
# includes model name, version, deep learning platform type, and
# the shape of the input/output tensors supported by the model server.
#print(metadata_str)

# Read the input payload
payload = json.load(open("new-wine-input.json"))["inputs"]
# Make an inference request
pred = client.model_infer(
    MODEL_NAME,
    request=InferenceRequest(
        inputs=payload
    ),
)

json_resp_str = json.dumps(json.loads(pred.json()), indent=2)
print(json_resp_str)

# Output
#{
#  "model_name": "h2hy-o8t4-jg0p-qvnx",
#  "model_version": "1",
#  "outputs": [
#    {
#      "name": "variable",
#      "shape": [
#        1,
#        1
#      ],
#      "datatype": "FP32",
#      "data": [
#        5.535987377166748
#      ]
#    }
#  ]
#}