Select a specific Cloudera AI Inference service instance and a model version
from Cloudera AI Registry to create a new model endpoint.
The following steps illustrate how to create a Llama 3.1 model endpoint.
In the Cloudera
console, click the Cloudera AI tile.
The Cloudera AI Workbenches page is
displayed.
Click Model Endpoints on the left navigation menu.
The Model Endpoints page is displayed.
Click Create Endpoint.
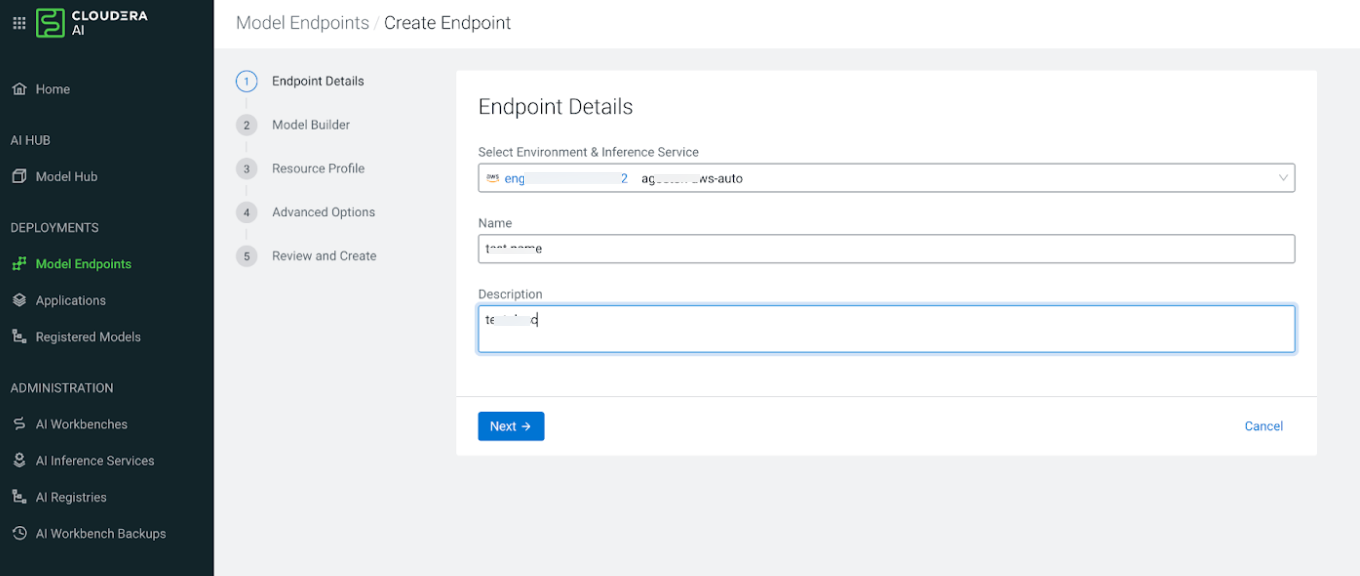
Configure the Endpoint Details.
Figure 1. Endpoint Details page
In the Select Environment & Inference Service field,
select your Cloudera environment and the Cloudera AI Inference service instance on which you want to create the model
endpoint.
Enter a unique Name for the model endpoint.
Optional: Provide a short Description of the model endpoint. The
description must be fewer than 5000 characters.
Click Next.
Specify the configuration on the Served Model Builder
page.
From the Model Name drop-down list, select the registered
model you want to deploy.
Select the specific Version of the model.
Specify the Traffic Allocation (%) between different model
versions that you deploy. This value is always set to 100% for the
first model version, which you cannot change.
Select a specific Task for this model, such as text
generation, embedding, or reranking. If left empty, the model will perform its default
task.
Click Next.
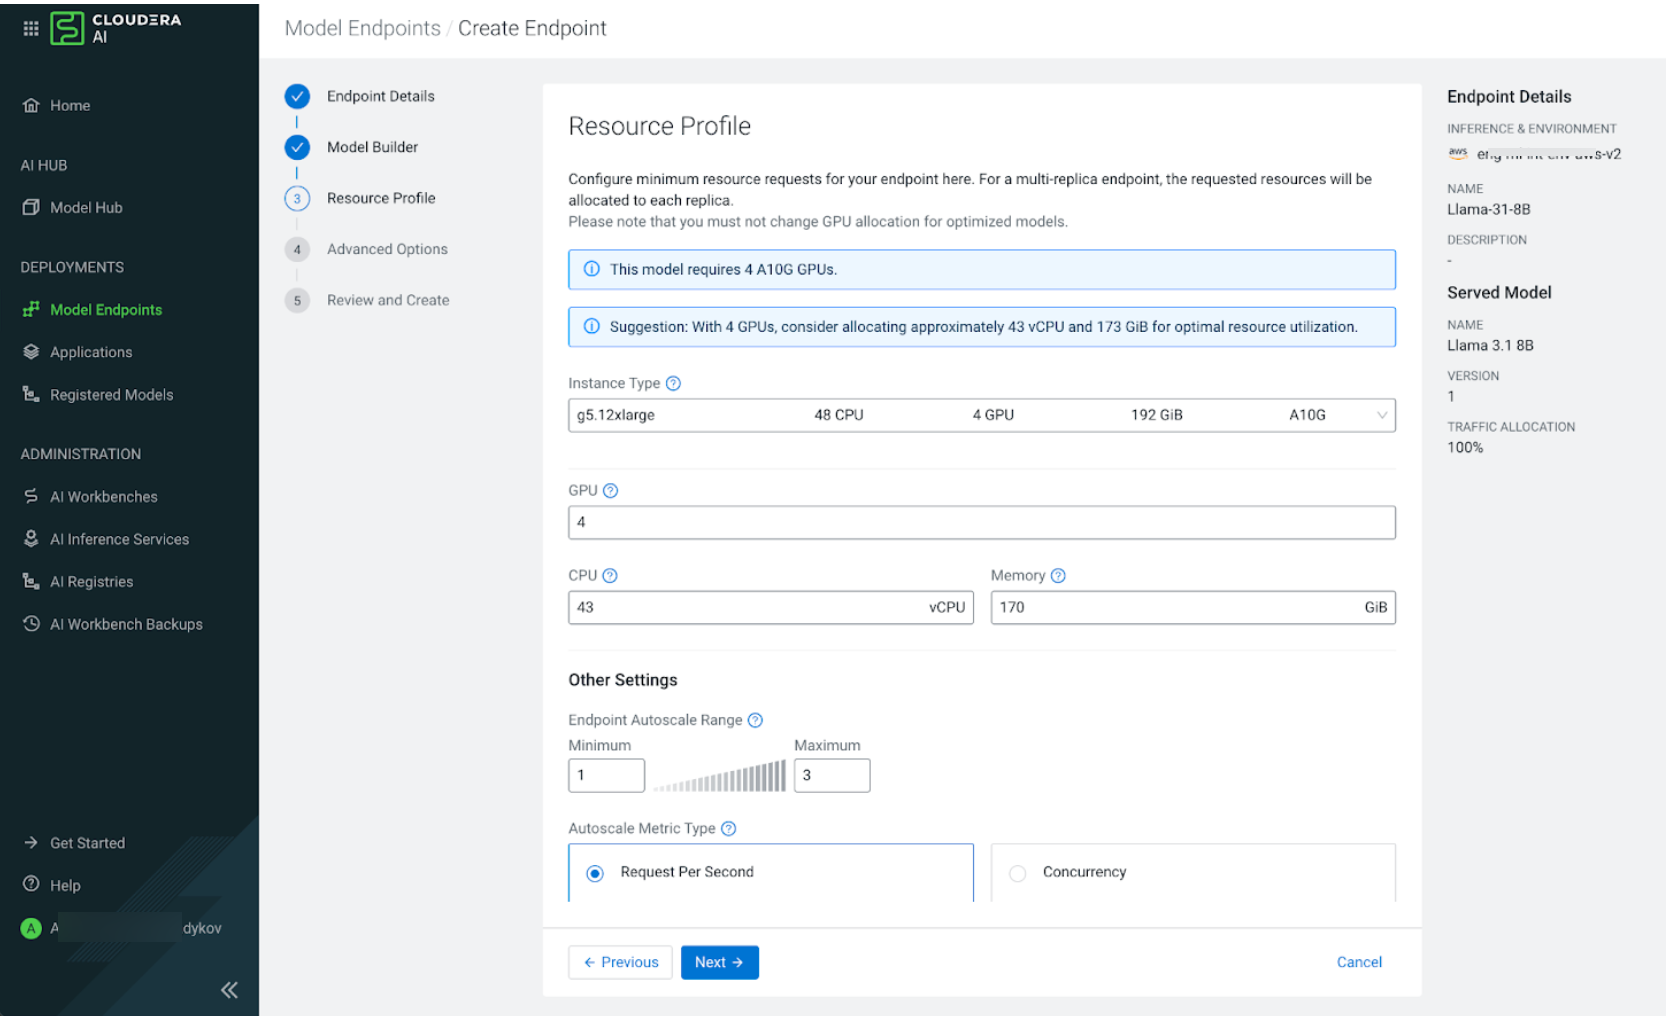
Configure the Resource Profile.
Select the
type of the instance from the Instance Type
drop down list. For NVIDIA NIM models this field is mandatory. The instance type you
select depends on the capabilities of the instance type and on what is required by the
NVIDIA NIM. The field is optional for normal predictive model endpoint.
Figure 2. Resource Profile page
Specify the required CPU in vCPU and Memory
in GiB. If using a GPU instance, also specify the
GPU count.
In the Endpoint Autoscale Range section, specify the
Minimum and Maximum number of replicas
for the model endpoint. Based on the selected autoscaling parameter, the system scales
the number of replicas to handle the incoming load.
Select one of the following Autoscale Metric Types:
Select Request Per Second (RPS) to scale based on the
number of requests per second per replica.
Select Concurrency to scales based on the number of
concurrent requests per replica.
If you select to scale as per RPS and the Target Metric
Value is set to 200, the system automatically adds a
new replica when a single replica is handling 200 or more requests per second. If the
RPS falls below 200, the system scales down the model endpoint by terminating a
replica.
In the Target Metric Value field enter the threshold that
triggers a scaling event.
Click Next.
Configure the Advanced Options.
Add required Environment Variables for the model.
Select a key, for example, NIM_LOG_LEVEL, form the
Name drop-down list and enter the corresponding
Value in the text field.
If your administrator has enabled Fine-grained Access
Control, you must define access levels for users or groups assigned the
MLUser or MLAdmin resource roles during endpoint creation. In the Access
Control section, select one of the following access levels:
Select View for the model endpoint to be displayed in the
model endpoints list and the listEndpoints API. Users can access model endpoint
metadata.
Select Access for the user or group to run inference on
the model endpoint.
Select Manage for the user or group to view the endpoint,
run inference, and modify or delete the endpoint.
In the Tags section, add any custom key and value pairs to
help organize your resources.
Click Next.
Review and Create the endpoint.
Verify all selected details, including the environment, model version, resource
allocation, and scaling range.
Click Create Endpoint to begin the deployment.
It can take tens of minutes for the model endpoint to become ready. The deployment
time depends on the following factors:
Whether a new node must be scaled into the
cluster.
The time required to pull the necessary container images.
The time required to download model artifacts to the cluster nodes from the
Cloudera AI Registry.
In this example, the model endpoint is for the instruct variant of
Llama 3.1 8B, which is optimized to run on two NVIDIA A10G GPUs per replica. Because
the AWS cluster node group consists of g5.12xlarge instances Because the AWS cluster node group consists of
g5.12xlarge instance types and no other available groups
contains A10G GPUs, the g5.12xlarge instance type is the only
choice. For NVIDIA NIM models that specify GPU models and count, the UI
automatically populates the GPU field on the resource
configuration page.