Creating a Team

Users who work together on more than one project and want to facilitate collaboration can create a Team. Teams enable you to efficiently manage the users assigned to projects.

Team projects are owned by the team, rather than an individual user. Team administrators can add or remove members at any time, assigning each member different permissions. A team cannot be deleted and at least one member must be there in the team.
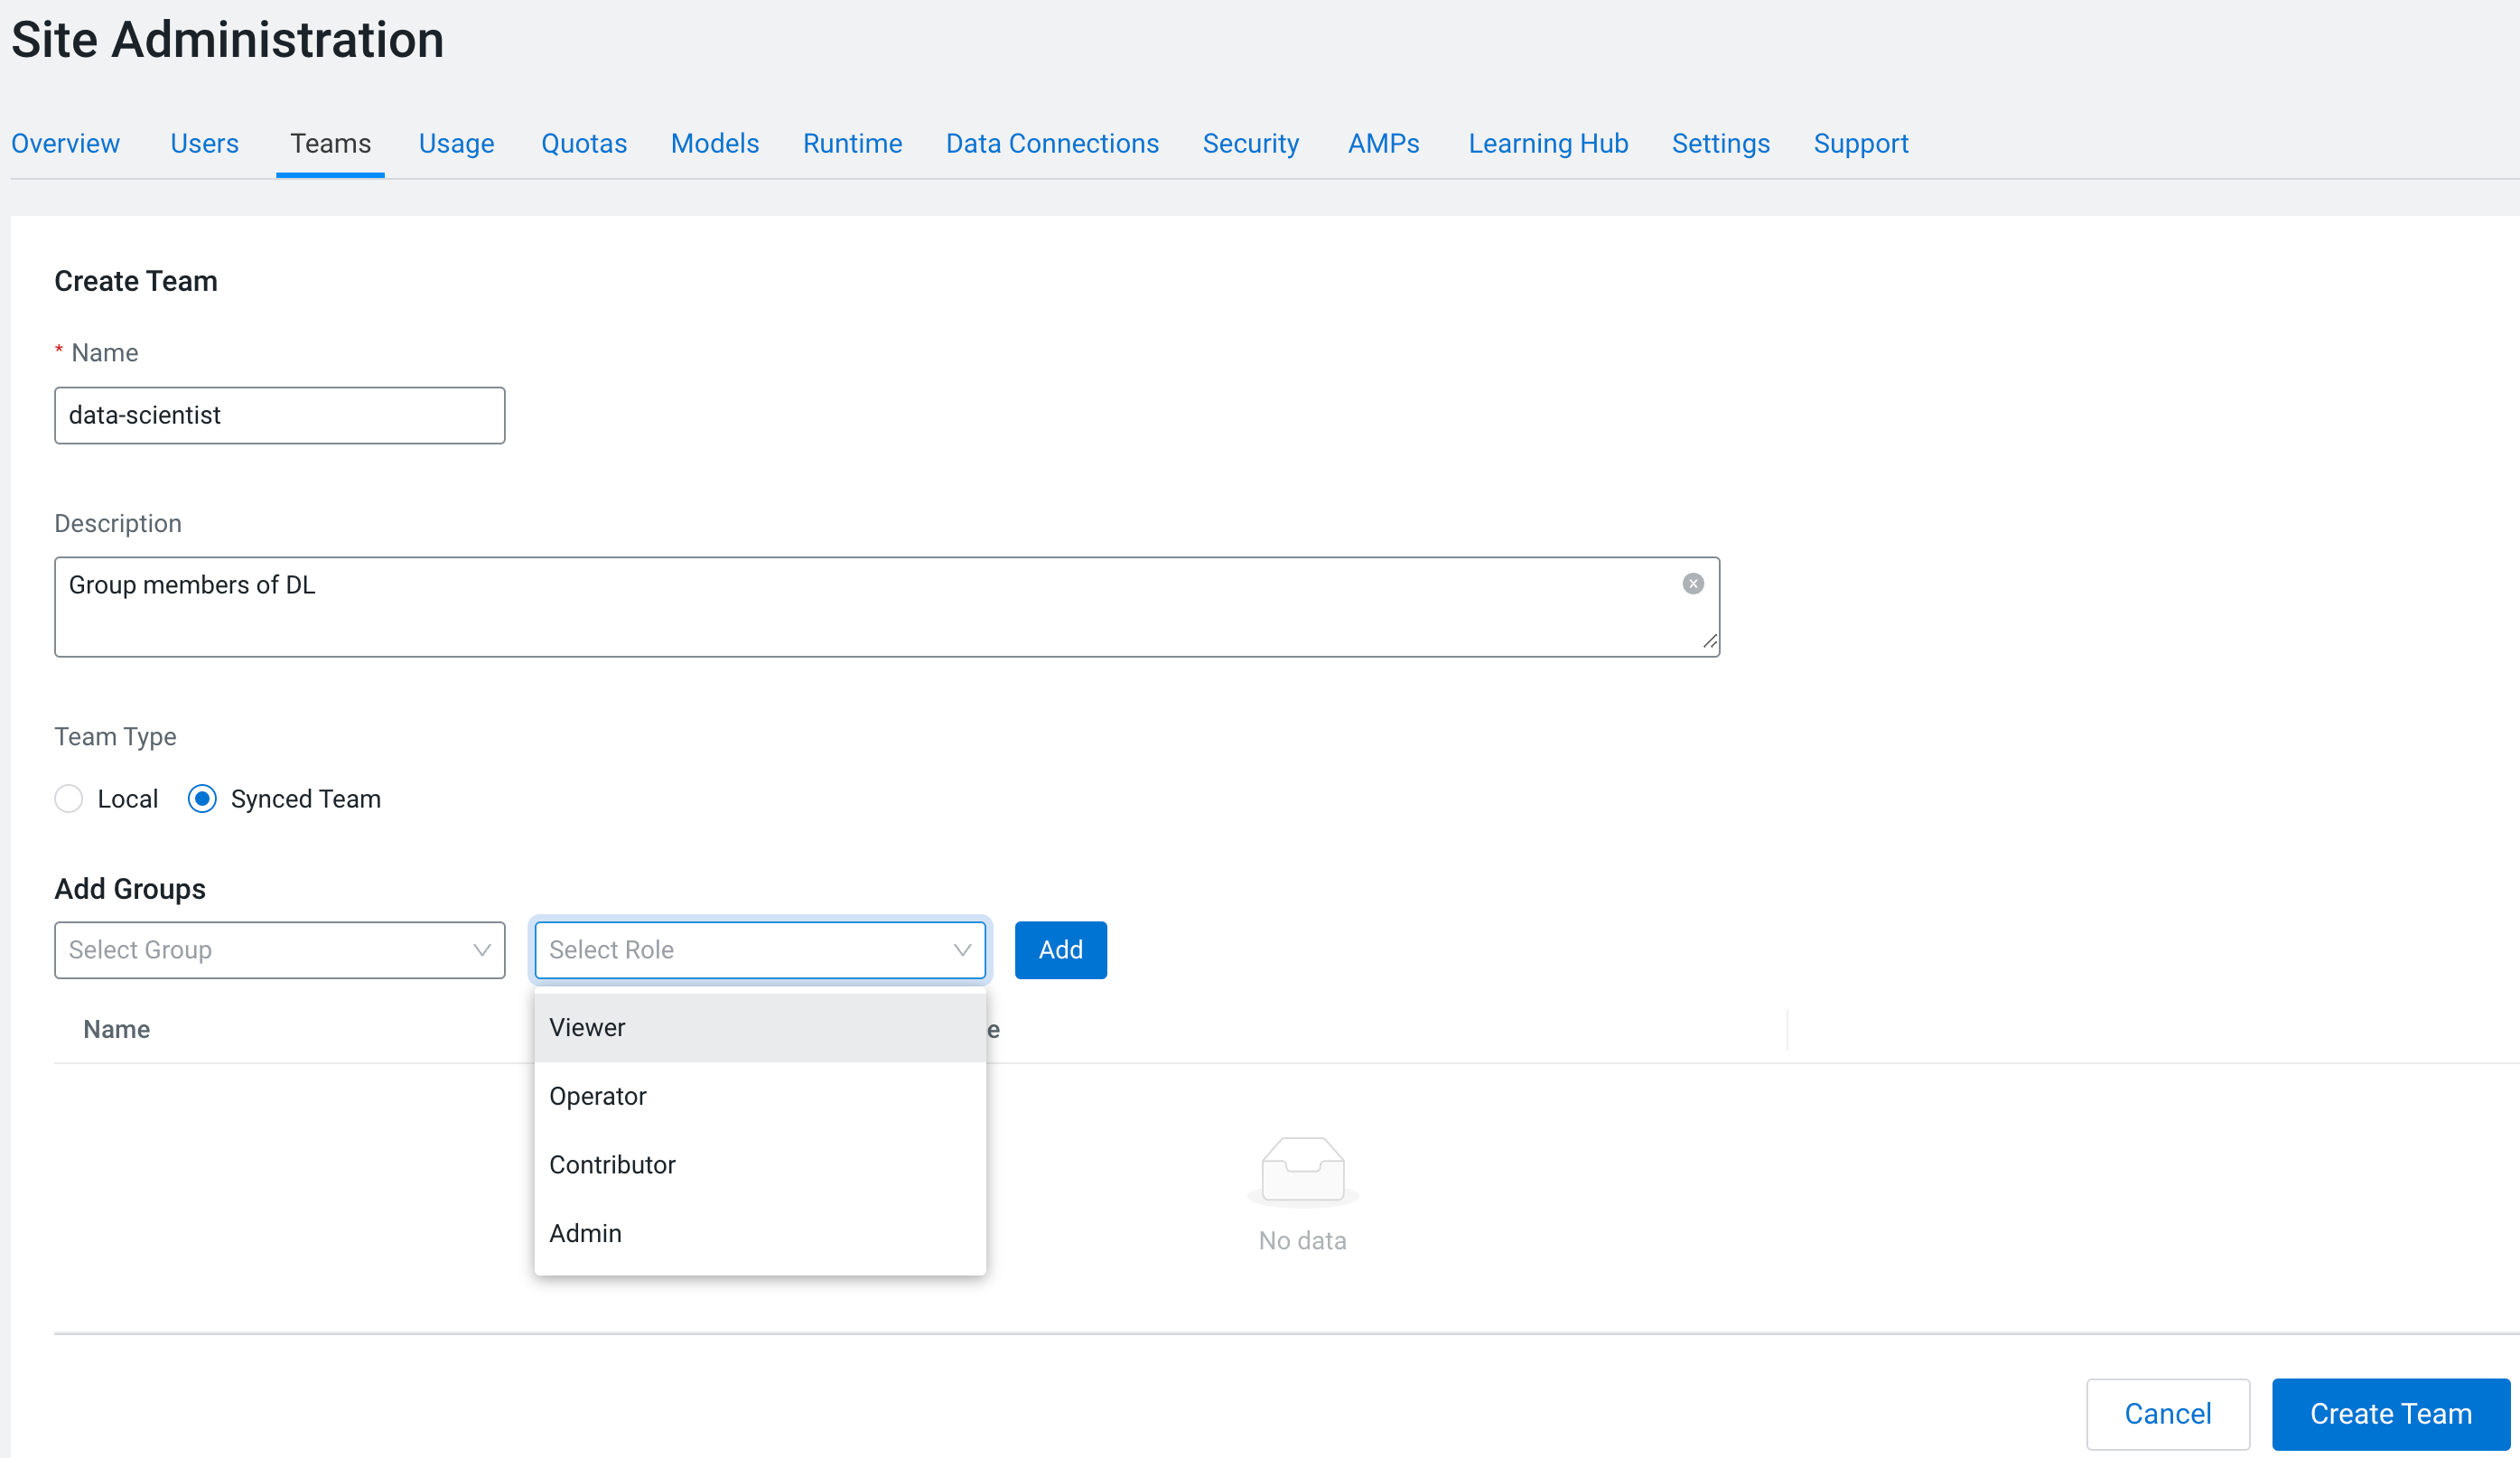


  1. In Site Administration > Teams, select New Team.
  2. Enter the name of the team.
  3. Select Local or Synced Team.
    Cloudera Data Platform manages the member data of a Synced Team. The members and information about the members of a Local team is not managed by Cloudera Data Platform.
  4. If Synced Team is selected, under Add Groups, select a group name and the role for the group and click Add. You can add multiple groups and roles using the Add option.
  5. Enter a Description, if needed.
  6. Add or invite team members. Team members can have one of the following privilege levels:
    • Viewer - The Viewer has read-only access to team projects. The Viewere cannot create new projects within the team but can be added to existing ones.
    • Operator - The Operator has read-only access to team projects. Additionally, Operators can start and stop existing jobs in the projects that they have access to.
    • Contributor - The Contributor has write-level access to all team projects to all team projects with Team or Public visibility. The Contributor can create new projects within the team. They can also be added to existing team projects.
    • Admin - The Administrator has complete access to all team projects, can add new team members, and modify team account information. The creator of the team is assigned the Administrator privilege, and can also assign other team members the Administrator privilege. Each team must have at least one Administrator user.
  7. Select Create Team.
  8. Select Sync Teams to update the teams with information in the Management Console.