Running an Experiment using MLflow
This topic walks you through a simple example to help you get started with Experiments in Cloudera AI.
Best practice: It is useful to display two windows while creating runs for your experiments: one window displays the Experiments tab and another displays the MLflow Session.
- From your Project window, click New Experiment and create a new experiment. Keep this window open to return to after you run your new session.
- From your Project window, click New Session.
- Create a new session using ML Runtimes. Experiment runs cannot be created from sessions using Legacy Engine.
- In your Session window, import MLflow by running the following code:
import mlflowThe ML Flow client library is installed by default, but you must import it for each session. - Start a run and then specify the MLflow parameters, metrics, models and artifacts to be
logged. You can enter the code in the command prompt or create a project. See Cloudera AI
Experiment Tracking through MLflow API for a list of functions you can use. For example:
mlflow.set_experiment(<experiment_name>)
mlflow.start_run()
mlflow.log_param("input", 5)
mlflow.log_metric("score", 100)
with open("data/features.txt", 'w') as f:
    f.write(features)
# Writes all files in "data" to root artifact_uri/states
mlflow.log_artifacts("data", artifact_path="states")
## Artifacts are stored in project directory under
/home/cdsw/.experiments/<experiment_id>/<run_id>/artifacts
mlflow.end_run()<
For information on using editors, see Using Editors for ML Runtimes.
- Continue creating runs and tracking parameters, metrics, models, and artifacts as needed.
- To view your run information, display the Experiments window and
select your experiment name. Cloudera AI displays the Runs table.
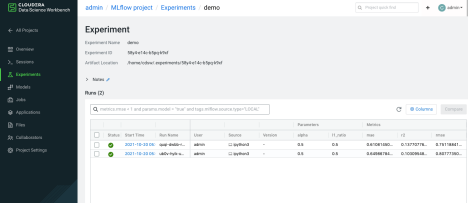
- Click the Refresh button on the Experiments window to display recently created runs
- You can customize the Run table by clicking Columns, and selecting the columns you want to display.
All artifacts generated in an MLflow experiment run are stored in the project filesystem under
the hidden folder: .experiments/<experiment_id>/<rundID>. To view these
artifacts, you can either visit the Artifacts section of that particular
experiment run page or navigate directly to the folder.