Cloudera AI upgrades using Backup/Restore (Legacy/Fallback)
Cloudera strongly recommends following the Cloudera AI release cadence by upgrading to every version soon after they are released. Following this process ensures that the Cloudera AI Workbench is up to date with the latest security and bug fixes as well to benefit from new feature development. This document will take you through some considerations to be aware of before performing an upgrade, options you have when performing the upgrade, and the steps to complete the upgrade.
Before you begin
If a Cloudera AI Workbench upgrade from a specific version could not be validated due to Kubernetes version EOL or is deemed risky, in-place upgrades will be disabled for these versions.
In-place upgrades will be disabled from Cloudera AI versions if the underlying Kubernetes versions are
deprecated or going to be deprecated very soon. In such cases, depending on the version of Cloudera AI
either the upgrade button is disabled or the in-place upgrade pre-flight check will fail, with a
failure message pops up that says: In-place upgrades from <existing_version> are not
supported. Follow the documentation for the backup based upgrade steps.
In this case, it is recommended to go with Cloudera AI Backup/Restore to upgrade to the latest Cloudera AI version, essentially performing a workbench upgrade with all your previous data in place. Since a restore always installs the latest Cloudera AI version, it essentially performs a workbench upgrade with all your existing workbench data intact. Backup/Restore is the recommended path to upgrade when a Cloudera AI Workbench cannot be reliably in-place upgraded from its current version.
Prerequisites
Backup/Restore on AWS
For AWS, Backup/Restore functionality is GA, and is usable from the UI and CDP CLI. The documentation is already available in Backing up Cloudera AI Workbenches. Refer to the documentation for prerequisites for using Backup/Restore on AWS.
Backup/Restore on Azure
Currently, Backup/Restore in Azure is available only through the CDP CLI.
Additionally, the Backup/Restore feature does not perform a backup of NFS.
Steps to upgrade workbenches using Backup/Restore
There are five major steps to go through to upgrade older workbenches to the current version. Make sure to go through the following steps in order.
Step 1 : Backing up the workbench
After Step 1, Backing up the workbench, you shall follow steps 2 through 5 in order to restore the workbench.
Backing up AWS workbench
For information on backing up workbenches, see Backing up Cloudera AI Workbenches.
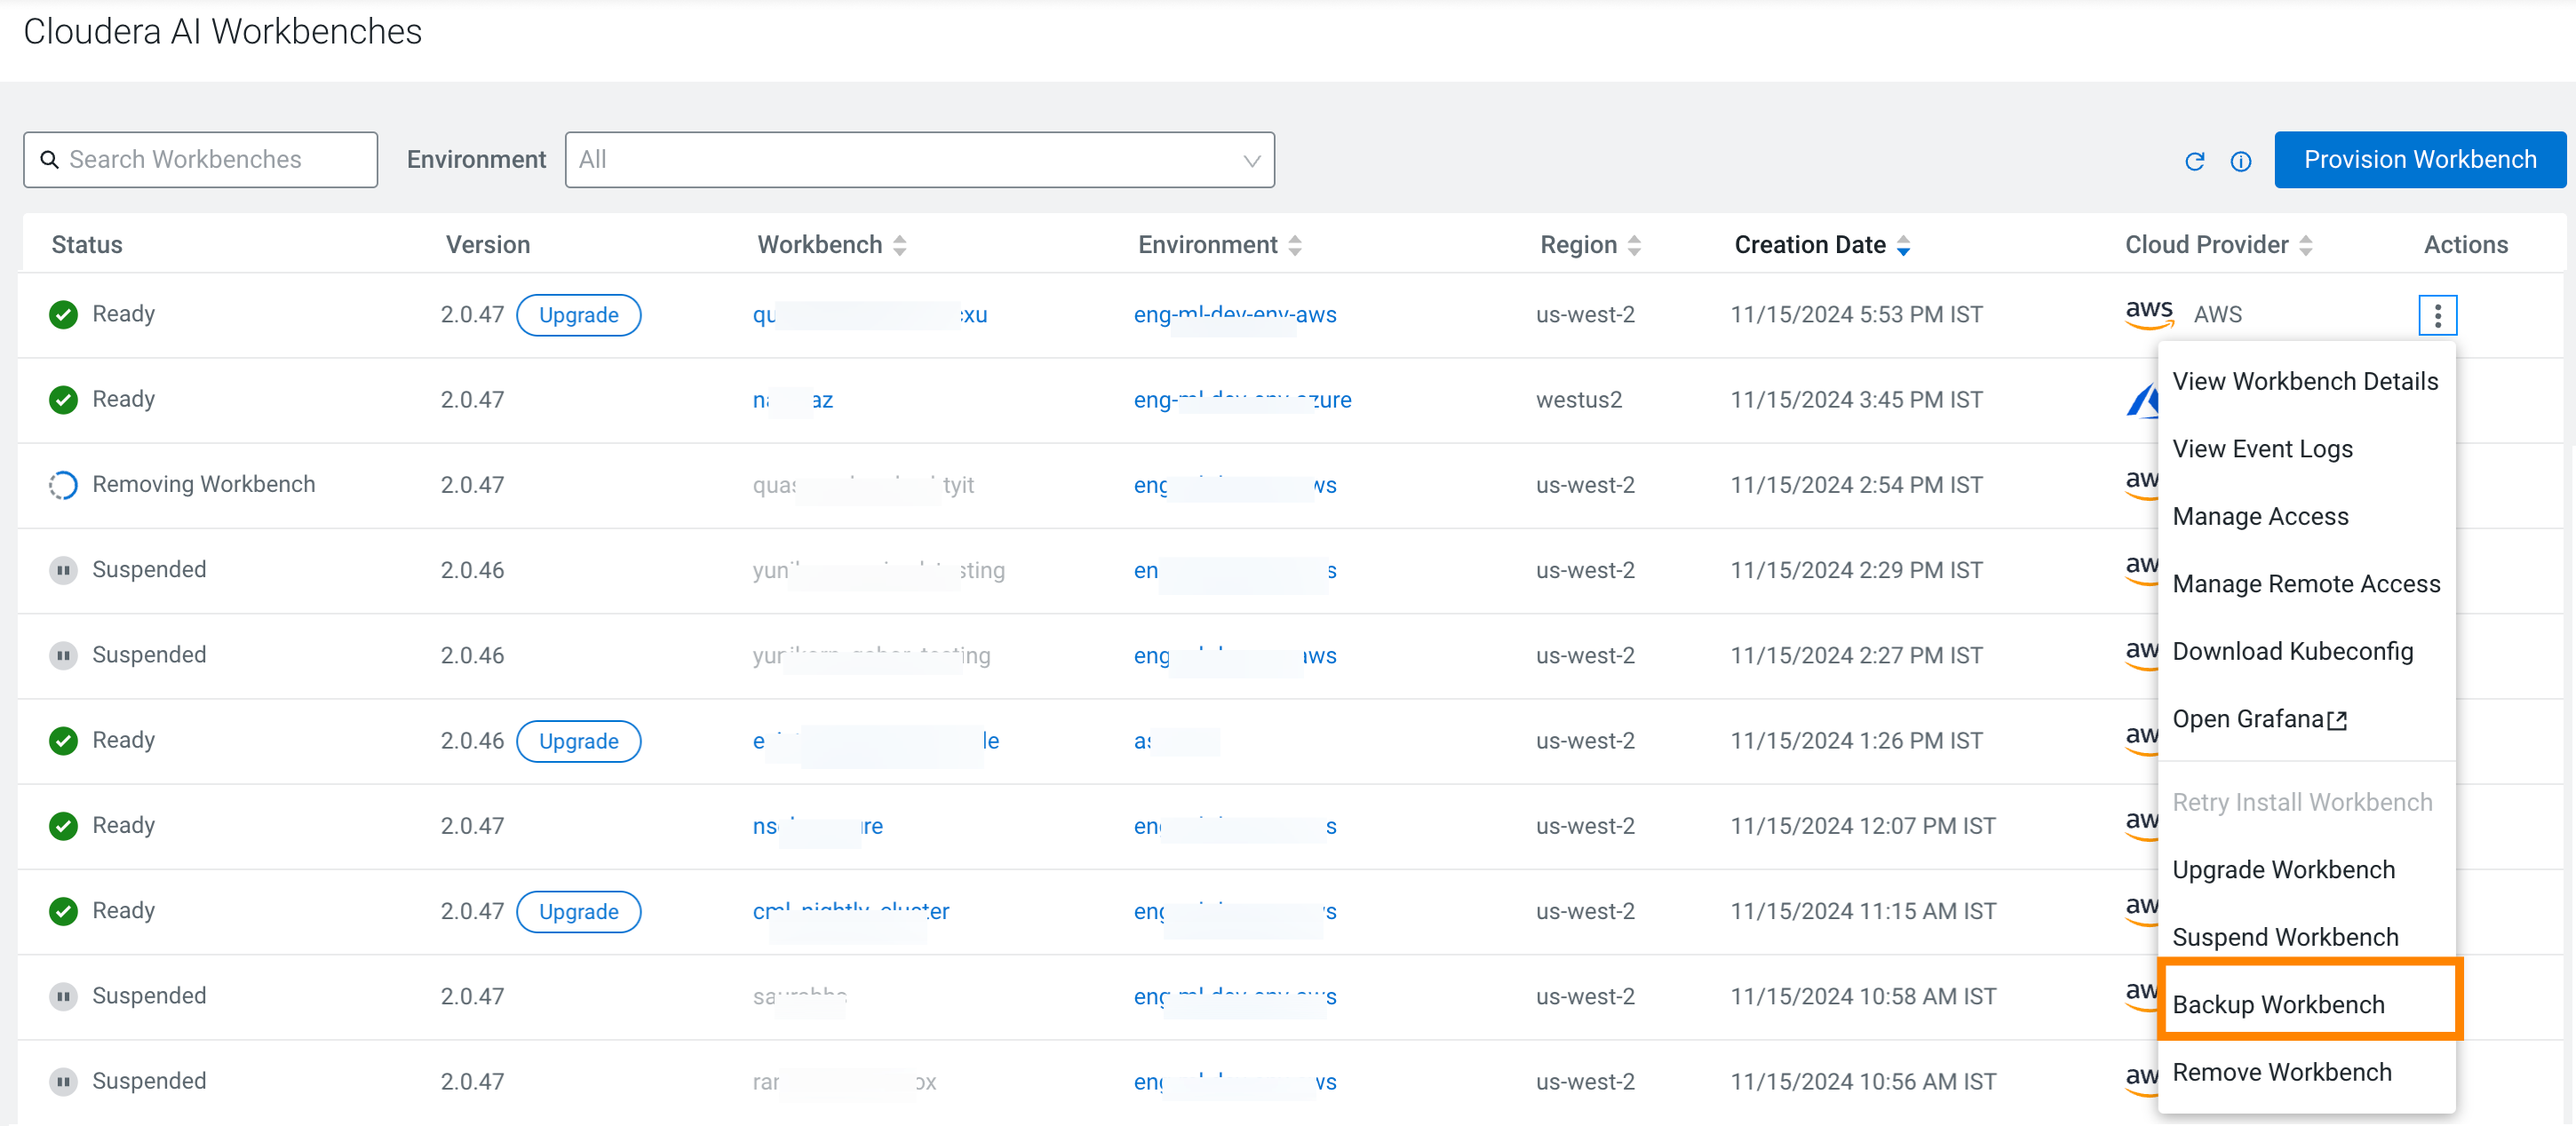
The time required to backup or restore AWS based workbenches mainly depends on the size of EFS (File System for projects storage) associated with the workbench. To get the EFS ID associated with the workbench, click on View Workbench Details from the UI and note the Filesystem ID. The size associated with the EFS can be retrieved from the AWS console using the Filesystem ID.
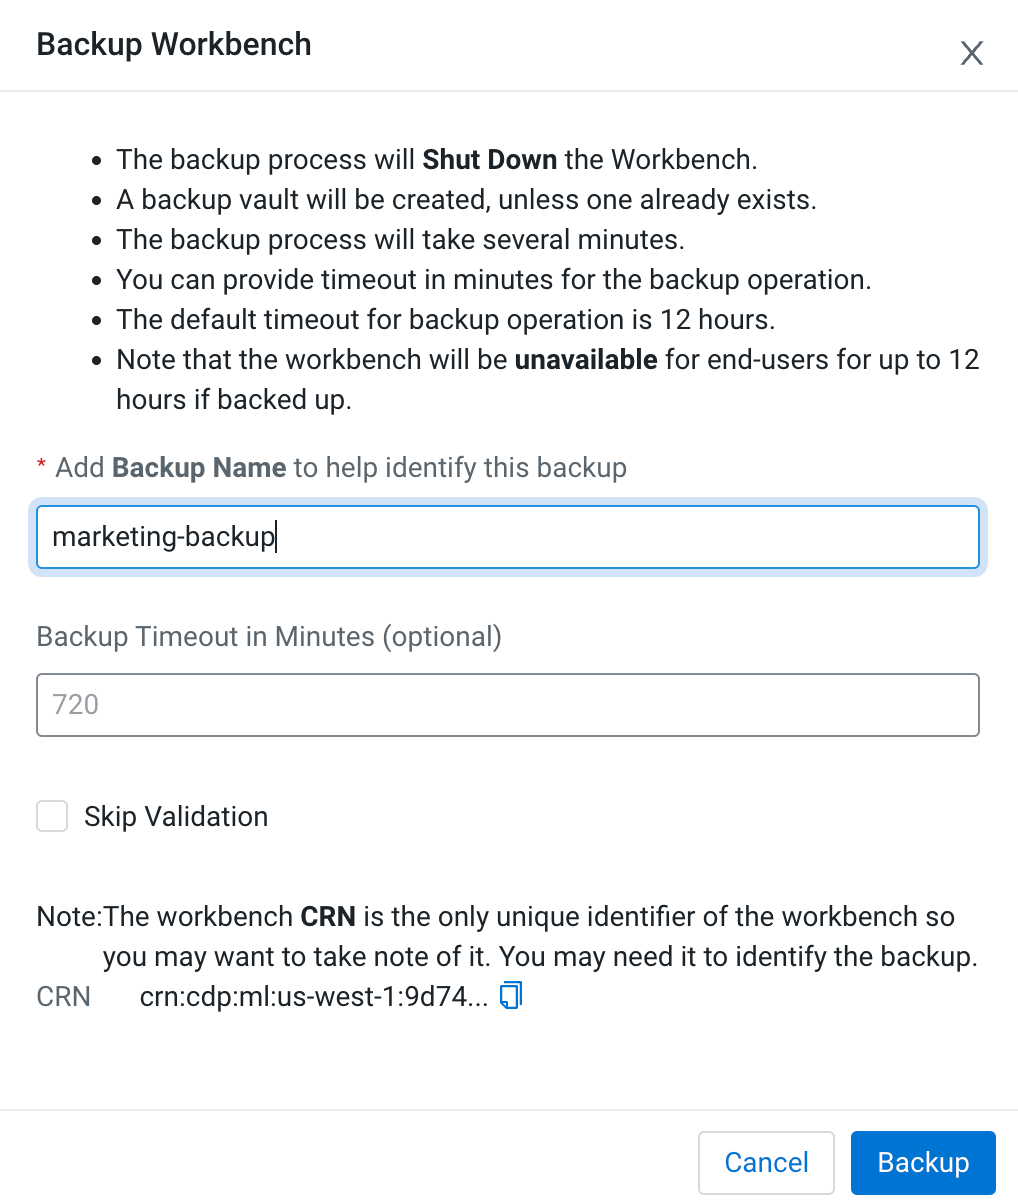
The Backup timeout for storage volumes (EFS and EBS) is by default set to 12 hours, but the user can customize the timeout. While clicking on the Backup Workbench , there will be an option to specify Backup Timeout (in minutes), to accommodate users with large EFS size.
Similarly, if the user suspects that the EFS is too large to be restored within the default 12 hours, custom restore timeouts can be set in the advanced settings during restoring an AWS workbench from a backup snapshot through the UI.
Tracking running backups on AWS
For AWS based backup jobs, Cloudera AI prints out backup job completion percentage for all backup jobs associated with a backup snapshot at an interval of 15 minutes as part of event logs. However, the completion percentage is an estimate returned by AWS APIs, and Cloudera AI just surfaces the same. Cloudera AI is not running any mechanisms/heuristics to calculate the completion percentage for a particular backup.
From our experience, we have seen that AWS-provided completion percentages can vary wildly, jump abruptly and can be downright misleading. Cloudera AI advises to take the percentage numbers with a grain of salt.

Canceling long running backups on AWS
Backups generally take a long time if you have lots of data in EFS. This is expected behavior. However if the backup is taking longer than expected, you can cancel the backup jobs from AWS dashboard and Cloudera AI will detect this in a while, and will fail the backup.
To cancel the corresponding AWS backup jobs from AWS dashboard:
- Go to and identify the running backups associated with the backup snapshot. The backups should have started at approximately the same time you triggered the backup from the Cloudera AI console.
- Abort all such backup jobs.
You can retry the backups again using the above mentioned steps for backing up the workbench.
Backing up Azure workbench
Prerequisites
There are a few prerequisites to Azure Backup/Restore:
- If your environment is configured with a pre-existing resource group, then Cloudera AI backup service would use the same resource group for taking snapshots of Azure Disks. Else, please ensure that you have a resource group created in your Azure Account with the nomenclature cml-snapshots-<azure_region> . For example, if your Azure workbench resides in the westus2 region, there should be a resource group present named cml-snapshots-westus2.
- Please refer to Azure documentation for roles needed to perform a backup: Use Azure role-based access control to manage Azure Backup recovery points.
Suspending the workbench
Suspend the workbench to ensure correctness of data in NFS on Azure during backup. Suspend the workbench by clicking on the Suspend Workbench option for the workbench and wait for the suspend operation to complete successfully.
Since the workbench is now in a suspended state, it is now guaranteed that no writes/mutations are happening on the NFS or Azure disks associated with the workbench.
Invoking Backup
Once you have the prerequisites sorted, please note the workbench CRN from the View Workbench Details page, and run the following command from ClouderaCLI to initiate workbench backup. Please replace the values in brackets with your own values.
$ cdp ml backup-workspace --workspace-crn <crn:cdp:ml:us-west-1:9d74eee4-1cad-45d7-b645-7ccf9edbb73d:workspace:792f8cfc-ba33-428d-9c80-b9bc6e799ce9> --backup-name <name-of-backup-for-upgrade>

    —-
    {
    "backupCrn": ""crn:cdp:ml:us-west-1:9d74eee4-1cad-45d7-b645-7ccf9edbb73d:workspace_backup:b6cee77e-9e38-4e30-9d72-481088f43de0""
    }
Please note the backup CRN returned from the CLI call, as it is the backup snapshot which will be used to restore into a new workbench.
Use these variables to restore into a new workbench:
- backupCRN: The CRN returned in the response of CLI call for backup-workbench
- existingNFS: The existing NFS server path can be retrieved from .
- existingNFSVersion: The existing NFS version can be retrieved from .
Step 2: Restoring into a new workbench with a different workbench URL/domain endpoint
Restore into a new workbench with useStaticSubdomain set to
false in the Cloudera CLI. This brings up a workbench with a different URL/domain
endpoint from the original workbench that was backed up. This step is needed to ensure that we
can safely validate that restoration of the workbench is successful before executing Step 4
below to delete the original workbench. If any of the following steps fail, please contact your
customer support representative.
Restore on AWS
For information on this step, see Restore an Cloudera AI Workbench.
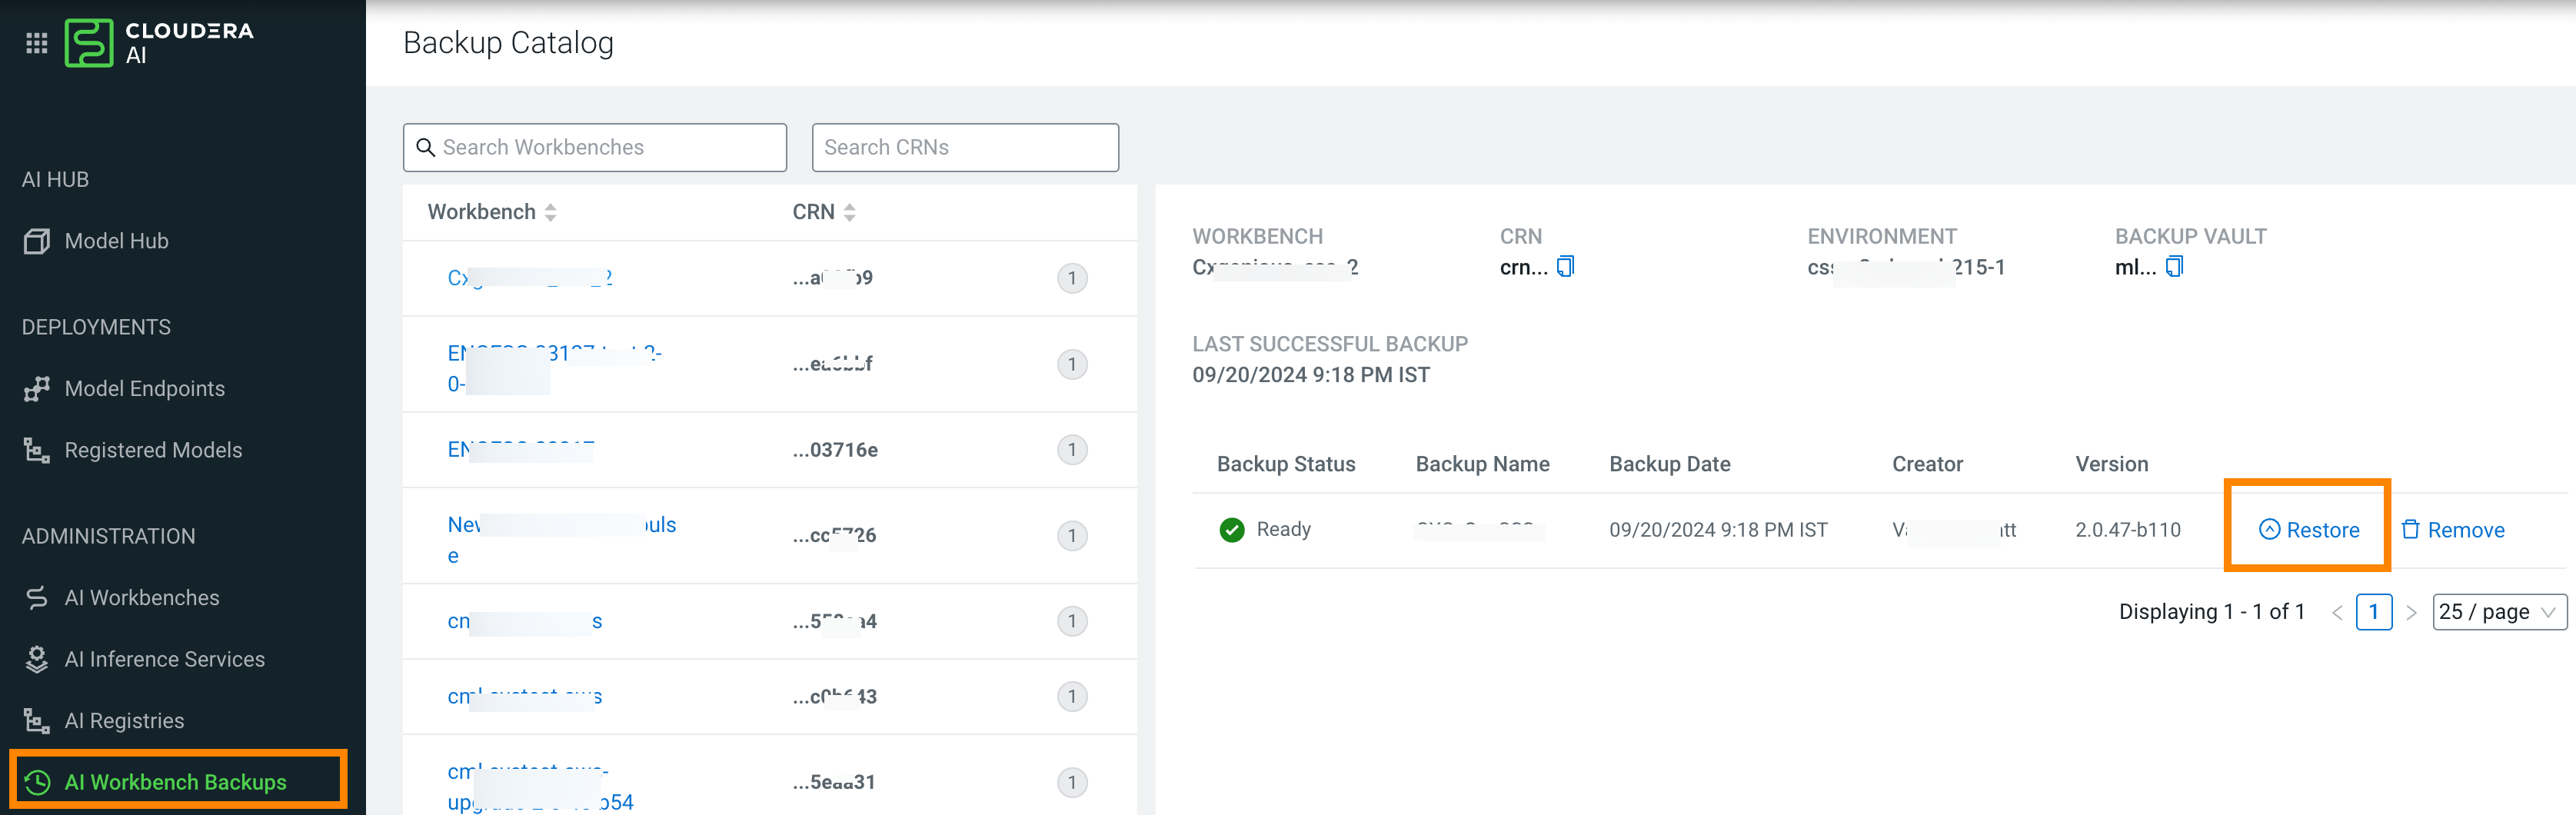
The UI for restore is quite similar to the Provision Workbench UI and shall be familiar.
Restore on Azure
To restore into a new workbench from the backup taken above, please run the following Cloudera CLI command. The workbench provisioning parameters of the request needs to be configured according to your needs. Please ensure that no “write operations” are undertaken on this restored workbench since we will be using the same NFS in Step 5. This is to ensure that there is no state mismatch between the restored Azure disks and the NFS.
$ cdp ml restore-workspace --cli-input-json ‘{
  "newWorkspaceParameters": {
    "environmentName": "eng-ml-dev-env-azure",
    "workspaceName": "new-workspace",
    "disableTLS": false,
    "usePublicLoadBalancer": false,
    "enableMonitoring": true,
    "enableGovernance": true,
    "enableModelMetrics": true,
    "whitelistAuthorizedIPRanges": false,
    "existingNFS": "<existingNFS>",
    "nfsVersion": "<existingNFSVersion>",
    "provisionK8sRequest": {
      "instanceGroups": [
        {
          "instanceType": "Standard_DS3_v2",
          "rootVolume": {
            "size": 128
          },
          "autoscaling": {
            "minInstances": 1,
            "maxInstances": 10
          }
        }
      ],
      "environmentName": "eng-ml-dev-env-azure",
      "tags": [],
      "network": {
        "topology": {
          "subnets": []
        }
      }
    },
  },
  "backupCrn": "<backupCRN>",
  "useStaticSubdomain": false
}
‘


—-
{
    "workspaceCrn": "crn:cdp:ml:us-west-1:9d74eee4-1cad-45d7-b645-7ccf9edbb73d:workspace:081ee5d2-4e82-487c-9404-2537a0ab4019"
}
Wait for the restore operation to succeed.
After restore, please login to the newly created workbench and verify that all projects from the original workbenches are available. Do not launch any sessions or applications, create new projects, or otherwise make any changes to the workbench, as that can make changes to the NFS file system that will be incompatible with what will be restored in step 4 below.
Step 3: Delete the backed-up workbench
If Step 2 completes successfully, then delete the old (original) workbench.
After all is validated, and you confirm that the projects are in place, delete the original backed up workbench. To do so, from the UI, select Remove Workbench .
Step 4: Restore into a new workbench with same URL/domain endpoint as backed up workbench
If Step 2 and 3 complete successfully, then restore into a new workbench with the same URL/endpoint as the backed-up workbench.
Since a restored workbench is a brand new workbench with data from an older workbench, a restored workbench gets a new subdomain by default. This means that any endpoints (for models, applications, etc.) that you were using from the old workbench is not valid.
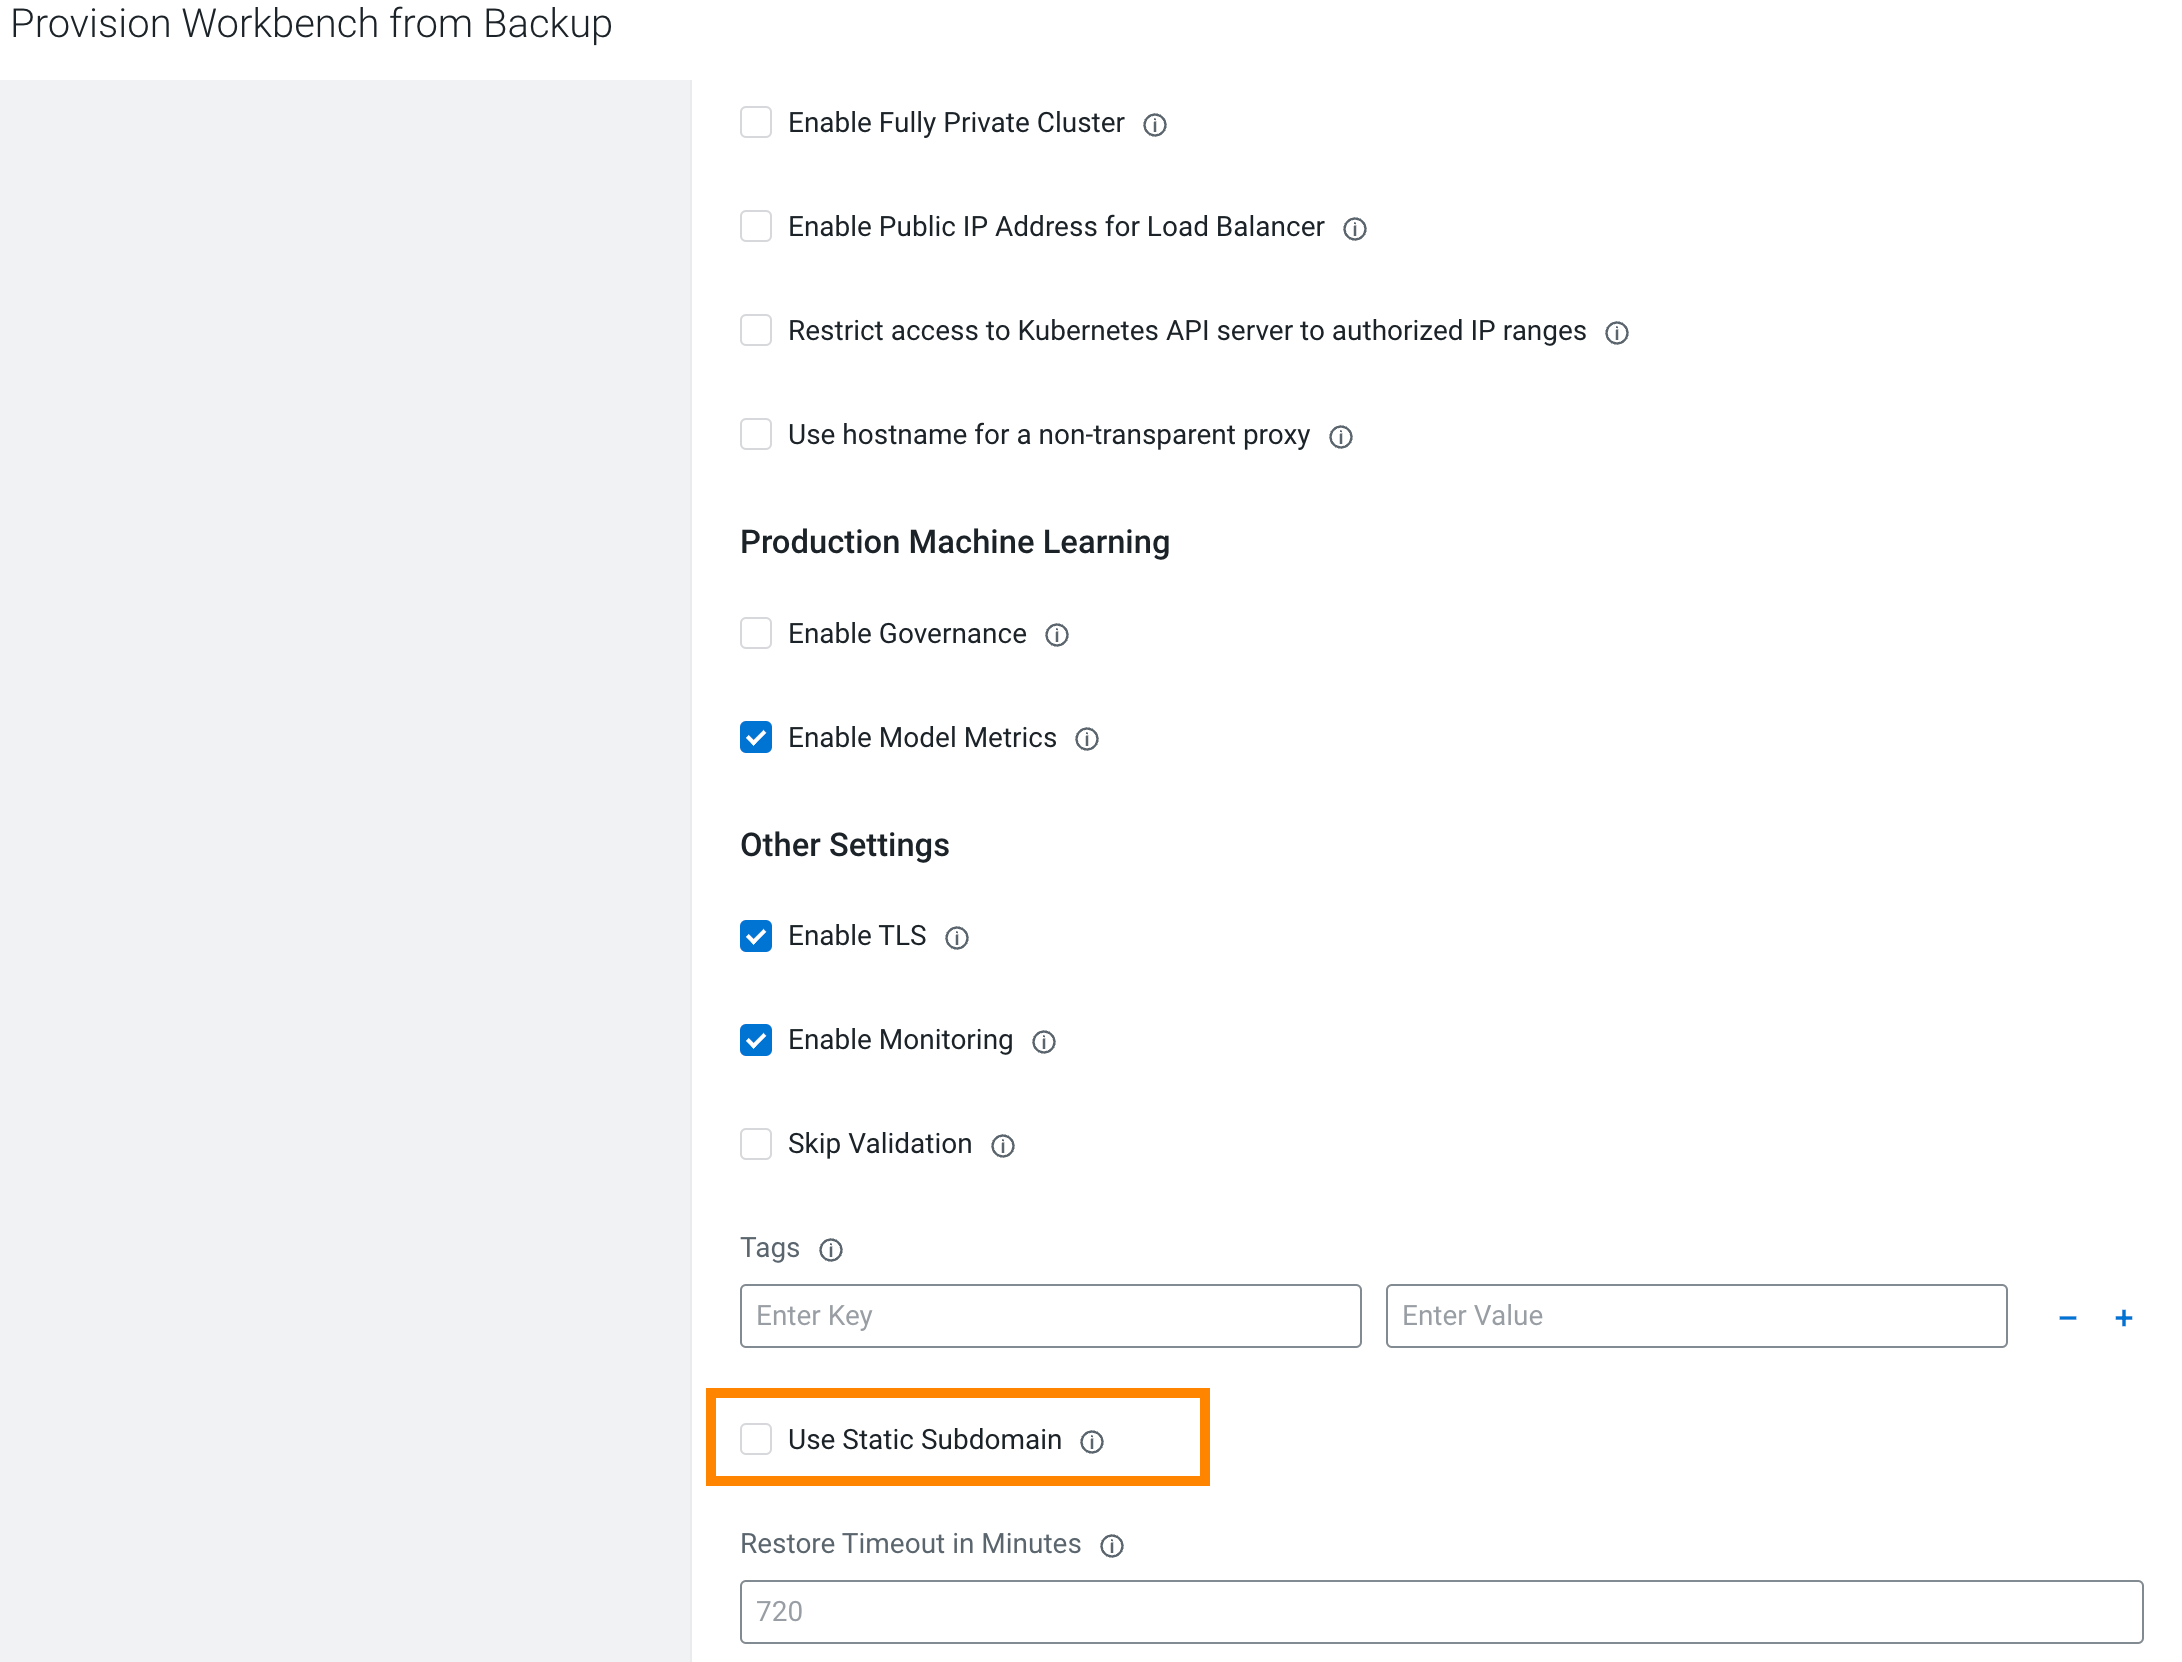
To maintain the endpoints that were configured with the older workbench, check the option useStaticSubdomain in the restore payload to provision the new restored workbench with the same URL as the older one. Additionally, Use Static Subdomain is also provided as a checkbox in the Restore UI.
Restore on AWS
To restore a workbench, see Restore as Cloudera AI Workbench. While restoring, please ensure that Use Static Subdomain is checked in the restore UI.
Restore on Azure
To restore into a new workbench from the backup taken above, please run the following Cloudera CLI command. You need to tune various parameters of the request to suit workbench configuration needs.
$ cdp ml restore-workspace --cli-input-json ‘{
  "newWorkspaceParameters": {
    "environmentName": "eng-ml-dev-env-azure",
    "workspaceName": "new-workspace",
    "disableTLS": false,
    "usePublicLoadBalancer": false,
    "enableMonitoring": true,
    "enableGovernance": true,
    "enableModelMetrics": true,
    "whitelistAuthorizedIPRanges": false,
    "existingNFS": "<existingNFS>",
    "nfsVersion": "<existingNFSVersion>",
    "provisionK8sRequest": {
      "instanceGroups": [
        {
          "instanceType": "Standard_DS3_v2",
          "rootVolume": {
            "size": 128
          },
          "autoscaling": {
            "minInstances": 1,
            "maxInstances": 10
          }
        }
      ],
      "environmentName": "eng-ml-dev-env-azure",
      "tags": [],
      "network": {
        "topology": {
          "subnets": []
        }
      }
    },
  },
  "backupCrn": "<backupCRN>",
  "useStaticSubdomain": true
}
‘


—-
{
    "workspaceCrn": "crn:cdp:ml:us-west-1:9d74eee4-1cad-45d7-b645-7ccf9edbb73d:workspace:081ee5d2-4e82-487c-9404-2537a0ab4019"
}
Step 5: Delete the interim restored workbench
The upgraded workbench which was restored from the backup, in order to check the sanity of the restored workbench in Step 2, can now be safely deleted. Please identify the workbench from your control plane UI and delete the same.
Frequently Asked Questions
Some frequently asked questions about upgrading workbenches with the Backup/Restore feature.
- How long does it take for a Cloudera AI Workbench to be backed-up and/ or restored?
- Cloudera AI relies on cloud provider’s native services for backup/ restore. Time consumed for backup and restore depends on multiple factors such as infrastructure, network latency, data size, file structure, number of files etc and can vary across workbenches. For internal test parameters, the backup of 600GB data took approximately 10 hours on AWS.
- What happens to customizations done on Kubernetes Clusters during Restore?
- Cloudera AI does not support applying customizations during Backup and Restore. All customizations will have to be applied through automation or manually post Cloudera AI Workbench Restore.