Use case for Fine Tuning Studio - Event ticketing support
To demonstrate the simplicity of building and deploying a production-ready application with Fine Tuning Studio, explore a complete example: fine-tuning a customer support agent for event ticketing.
The objective is to refine a compact, cost-efficient model capable of interpreting customer input and identifying the appropriate 'action' (such as an API call) for the downstream system to execute. The aim is to optimize a model that is lightweight enough to run on a consumer GPU while delivering accuracy comparable to that of a larger model.
-
Create the training prompt for both training and inference.
This prompt will provide the model with additional context for making accurate selections:
- Select Resources in the top navigation bar for Fine Tuning Studio and click Create Prompts.
- Name the prompt
better-ticketing. - Use the
bitextdataset as the base for its design. - Build a prompt template based on the features available in the dataset, using the Create Prompts page.
- Once the prompt is created, test it against the dataset to ensure it functions as expected.
-
After verifying that everything works correctly, select the Create Prompt button to activate the prompt for use across the tool.
Here is an example of our prompt template, which leverages the instruction and intent fields from the dataset:You are an event ticketing customer LLM chatbot responsible for generating a one-word, snake_case action, based on a customer input. Please provide the most relevant action based on the input from the customer below. ### CUSTOMER: {instruction} ### ACTION:Completion template:{intent}The completed form:
Figure 1. Completed form for Create prompt action 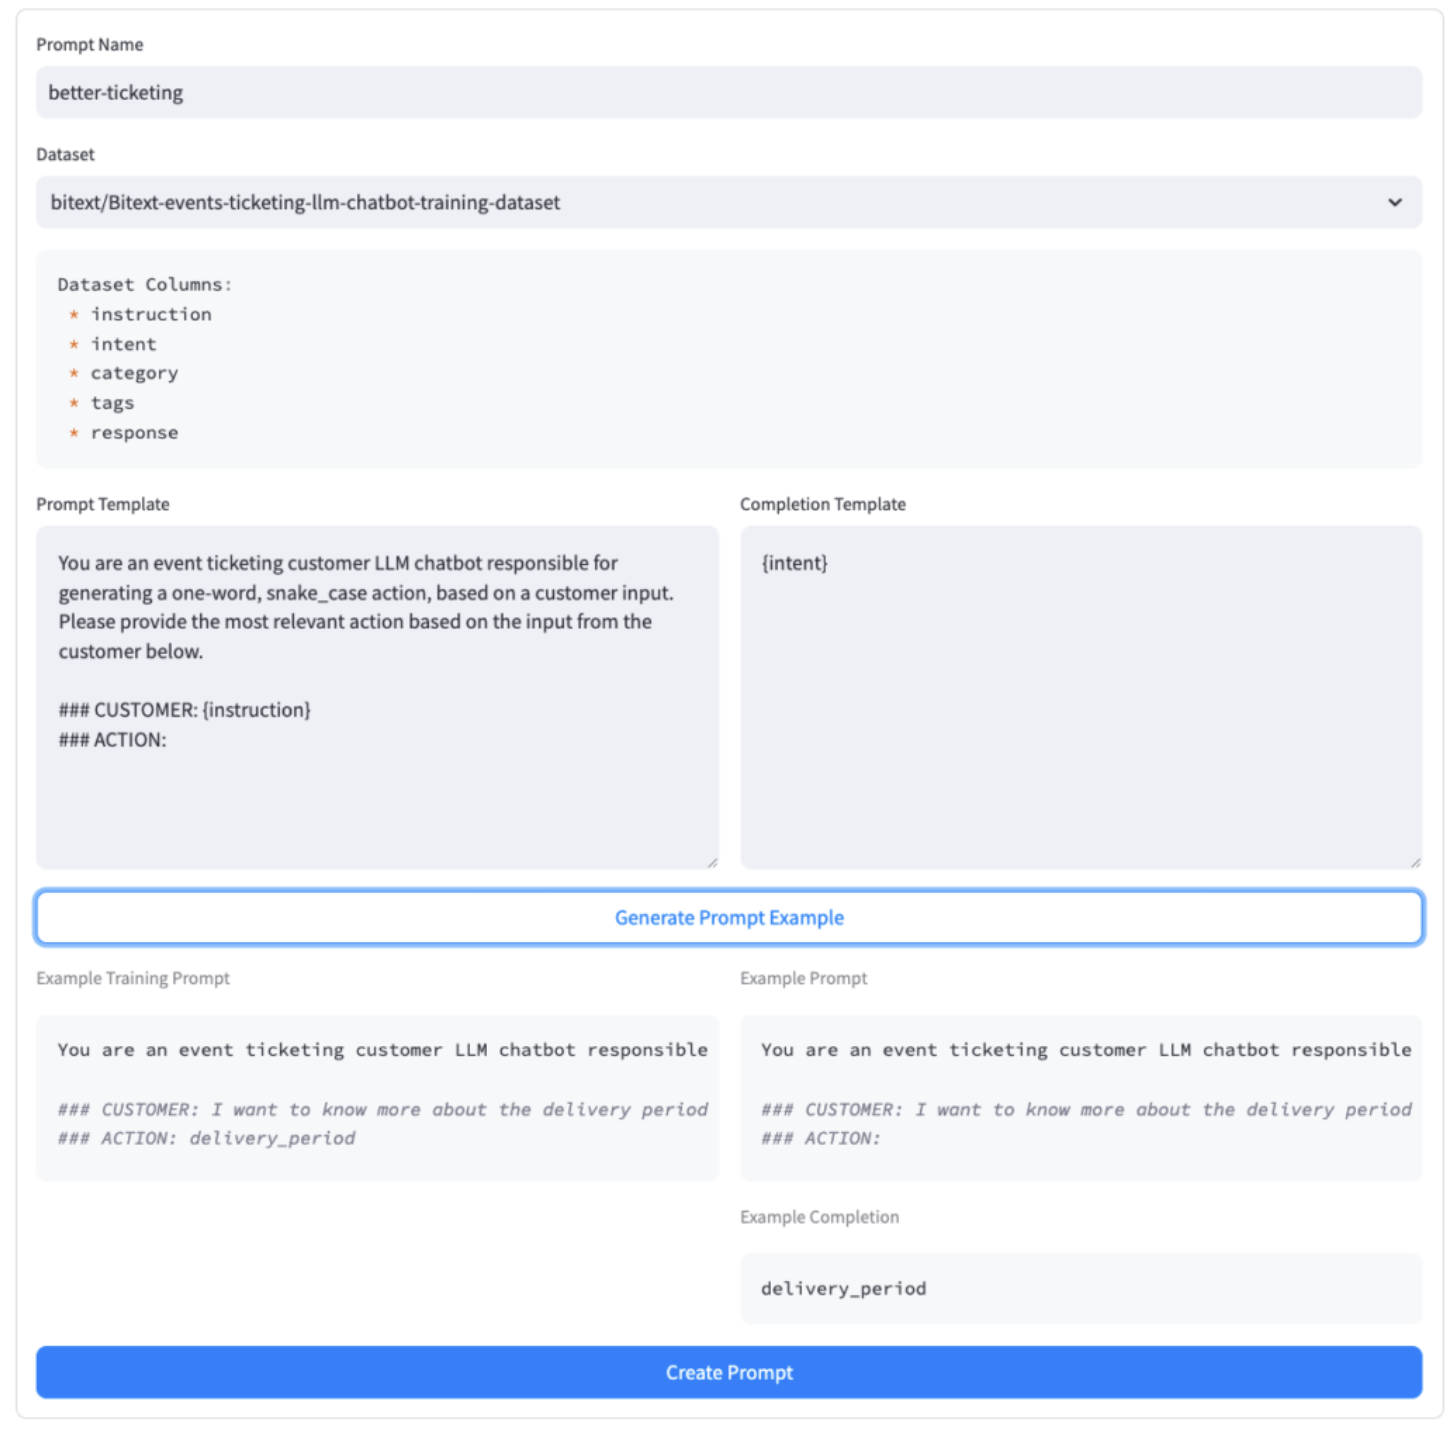
-
Select Experiments in the top navigation bar for Fine
Tuning Studio and click Local Adapter Comparison to check
the performance of the Adapter.
After the training job is complete, it is important to "spot check" the adapter's performance to ensure it was trained successfully.
For example, consider a simple customer input taken directly from the
bitextdataset: I have to get a refund, I need assistance. where the desired output action isget_refund. Comparing the output of the base model with that of the trained adapter clearly demonstrates that the training process significantly improved the adapter's performance.Figure 2. Inference Results 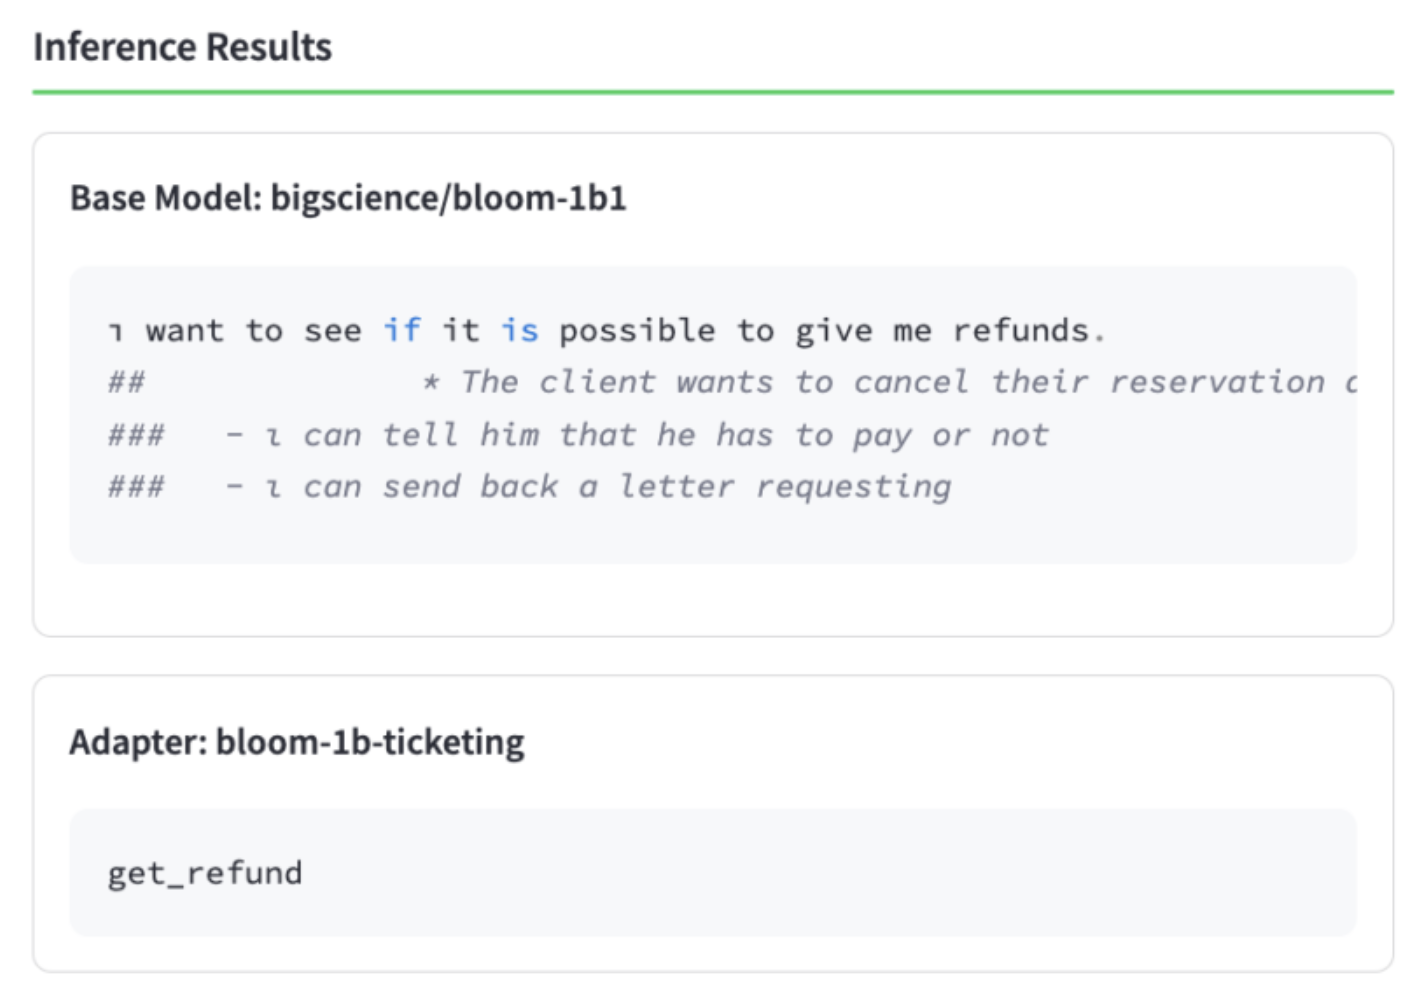
-
Select Experiments in the top navigation bar for Fine
Tuning Studio and click Run MLFlow Evaluation.
You can evaluate the performance against the “test” portion of the dataset. For this example, the performance of 1) the
bigscience/bloom-1b1base model 2) the same base model with our newly trainedbetter-ticketingadapter activated, and finally 3) a largermistral-7b-instructmodel are compared: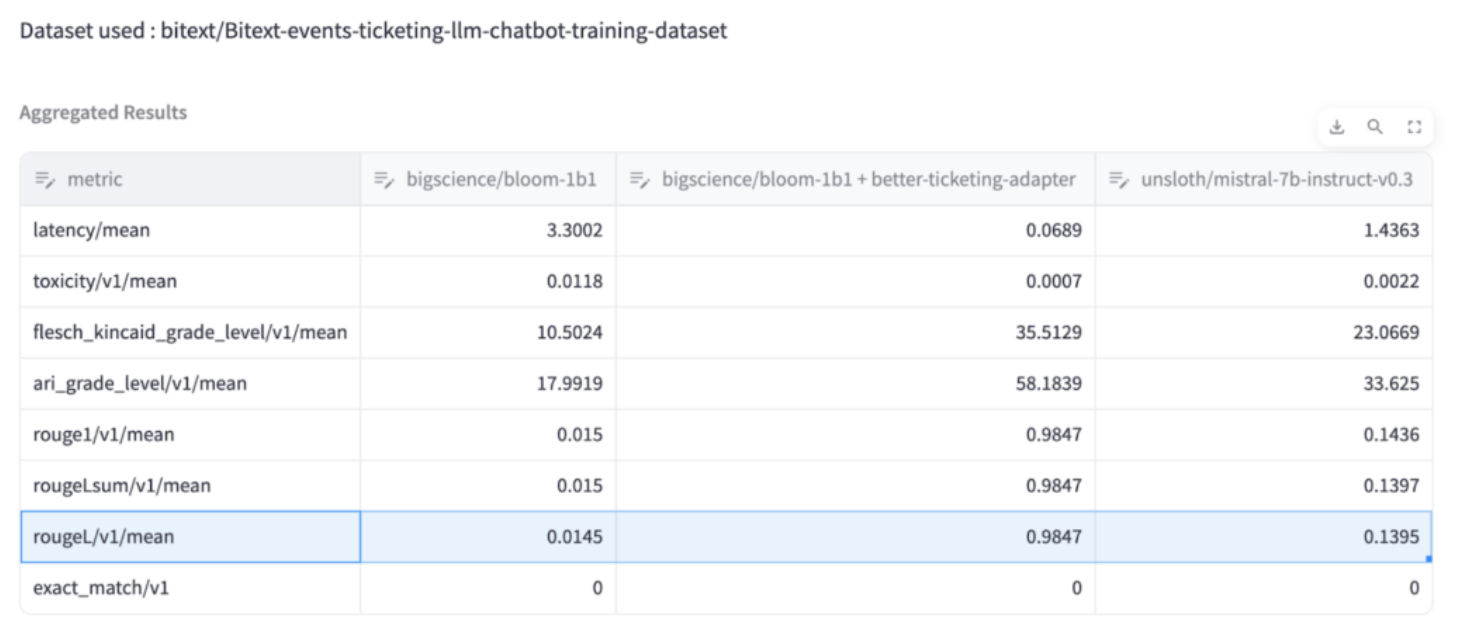
As demonstrated, the
rougeLmetric (a more complex variation of exact match) for the 1B model adapter is significantly higher than the same metric for an untrained 7B model. This highlights how successfully an adapter for a smaller, cost-effective model has been trained, which outperforms a much larger model.While the larger 7B model may excel at generalized tasks, it lacks fine-tuning on the specific 'actions' the model can take based on customer input. As a result, the non-fine-tuned 7B model would not perform as effectively as the fine-tuned 1B model in a production environment.