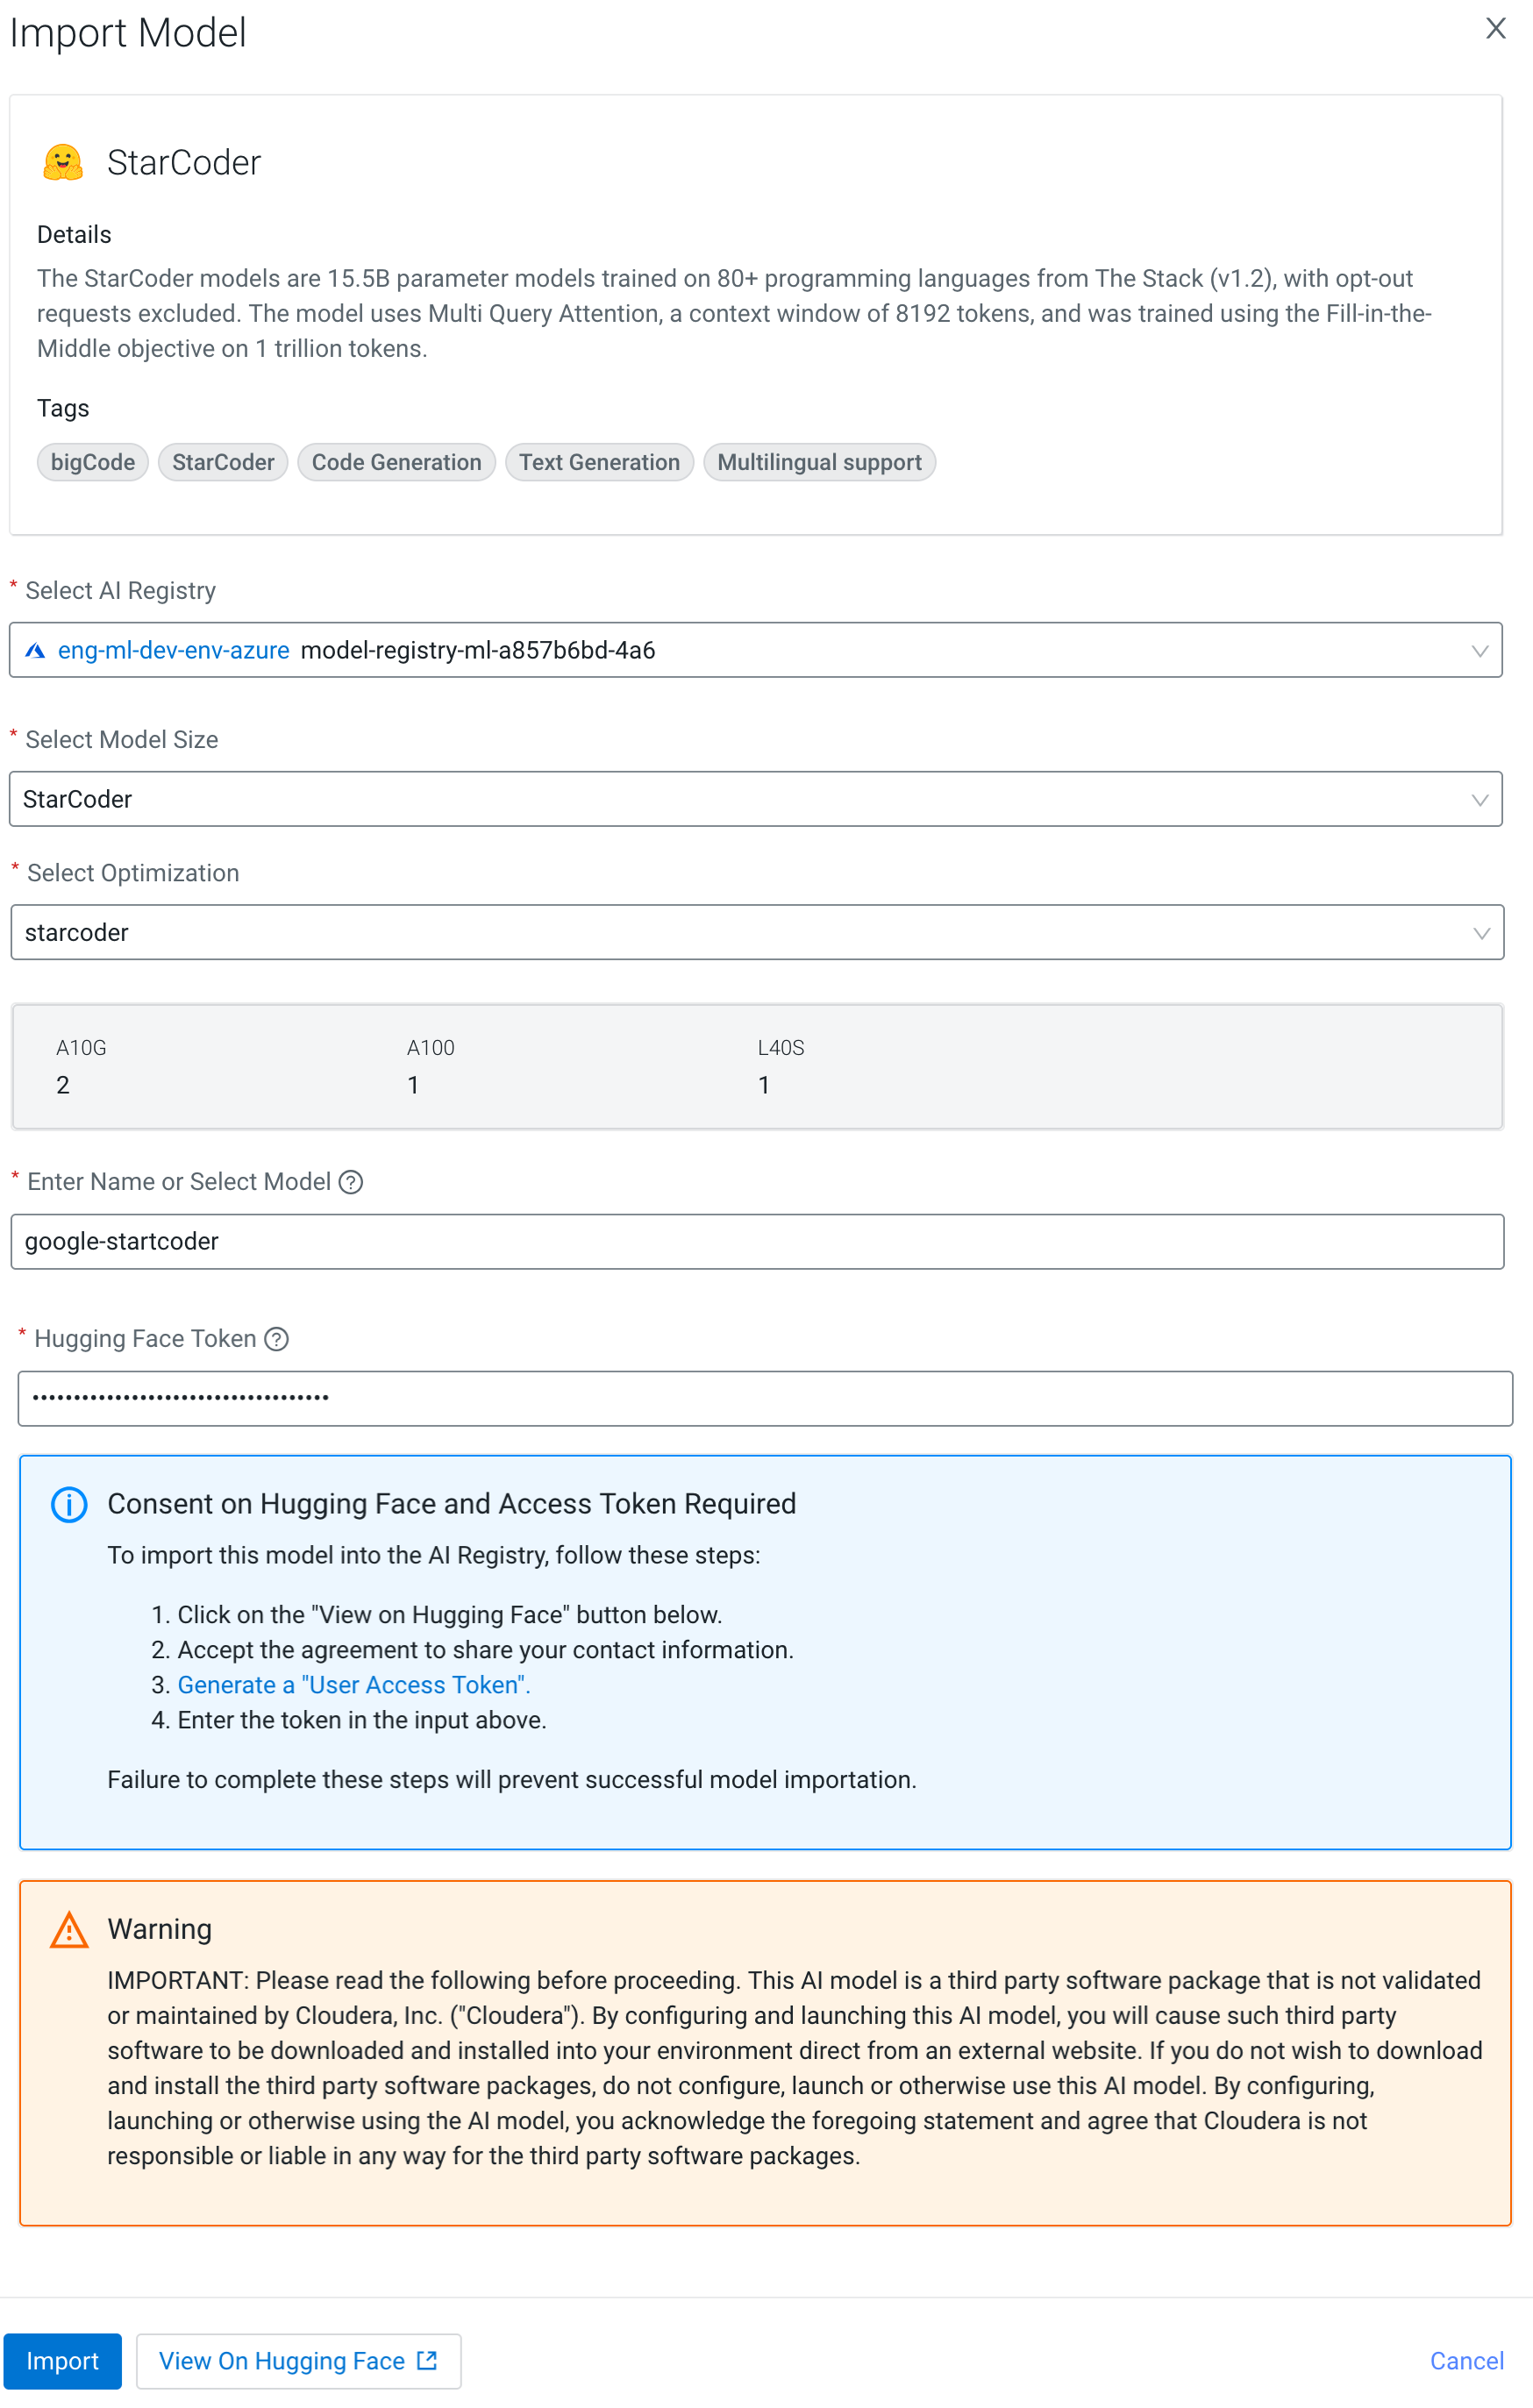
Importing models from Hugging Face (Technical Preview)

You can import the Hugging Face models listed on the Model Hub page into your Model Registry. If your preferred model is not listed on the Model Hub page, you can import it from the Registered Models page. After you import the model, the newly imported model will be listed on the Registered Models page.

  1. In the Cloudera console, click the Cloudera AI tile.
    The Cloudera AI Workbenches page displays.
  2. Click Model Hub under AI Hub in the left navigation menu.
    The Model Hub page displays. The page lists different models along with its source type, tags, and description.
  3. Click Import on the model you want to import.
    The Import Model page displays.
  4. In the Select AI Registry drop-down list, select the model registry to which you want to import the model.
  5. In the Select Model Size drop-down list, select the model size.
  6. In the Select Optimization drop-down list, select the optimization profile. It displays the recommended GPU counts for the specific GPU of the optimization profile.
  7. In the Enter Name or Select Model field, select a name from the existing list or enter a new name for the model you are importing.
  8. For the gated models of Hugging Face, an access token is required. The Hugging Face Token field is displayed only if it requires a token. Enter the access token obtained from the Hugging Face website if this field is displayed.
  9. Click Import. The Model Hub page displays a message that the model import has been triggered successfully along with a button to view the status of that import process.
You can click Model Registry in the left navigation menu to view the newly imported model.