Setting up a Custom Data Connection
Data connections that point to data sources outside of Cloudera or require custom configurations can be created and made available to end users with Custom Data Connections. These Python implementations of the Cloudera AI Data library are stored in the Data Connections Registry. Workbench users can track and connect to any data source and connection implementation a Cloudera AI Administrator makes available.
Consider the followings:
- Custom connections can only be created in projects created by the Administrator.
- The project source selection list in the Data Connection creation dialogue only displays projects created by the user.
- Team projects or projects with multiple collaborators will also not be displayed, only those directly created by the user.
- Custom connections at workbench level can only be edited by the creator, not other Administrator users. Attempts at editing workbench level custom connections will result in an error.
Before setting up a custom connection, you might want to create a dedicated Cloudera AI Team to collaborate on external connections. A good practice is to separate the connection code projects and and configure collaborators on the Team level to build and maintain the connection code.
-
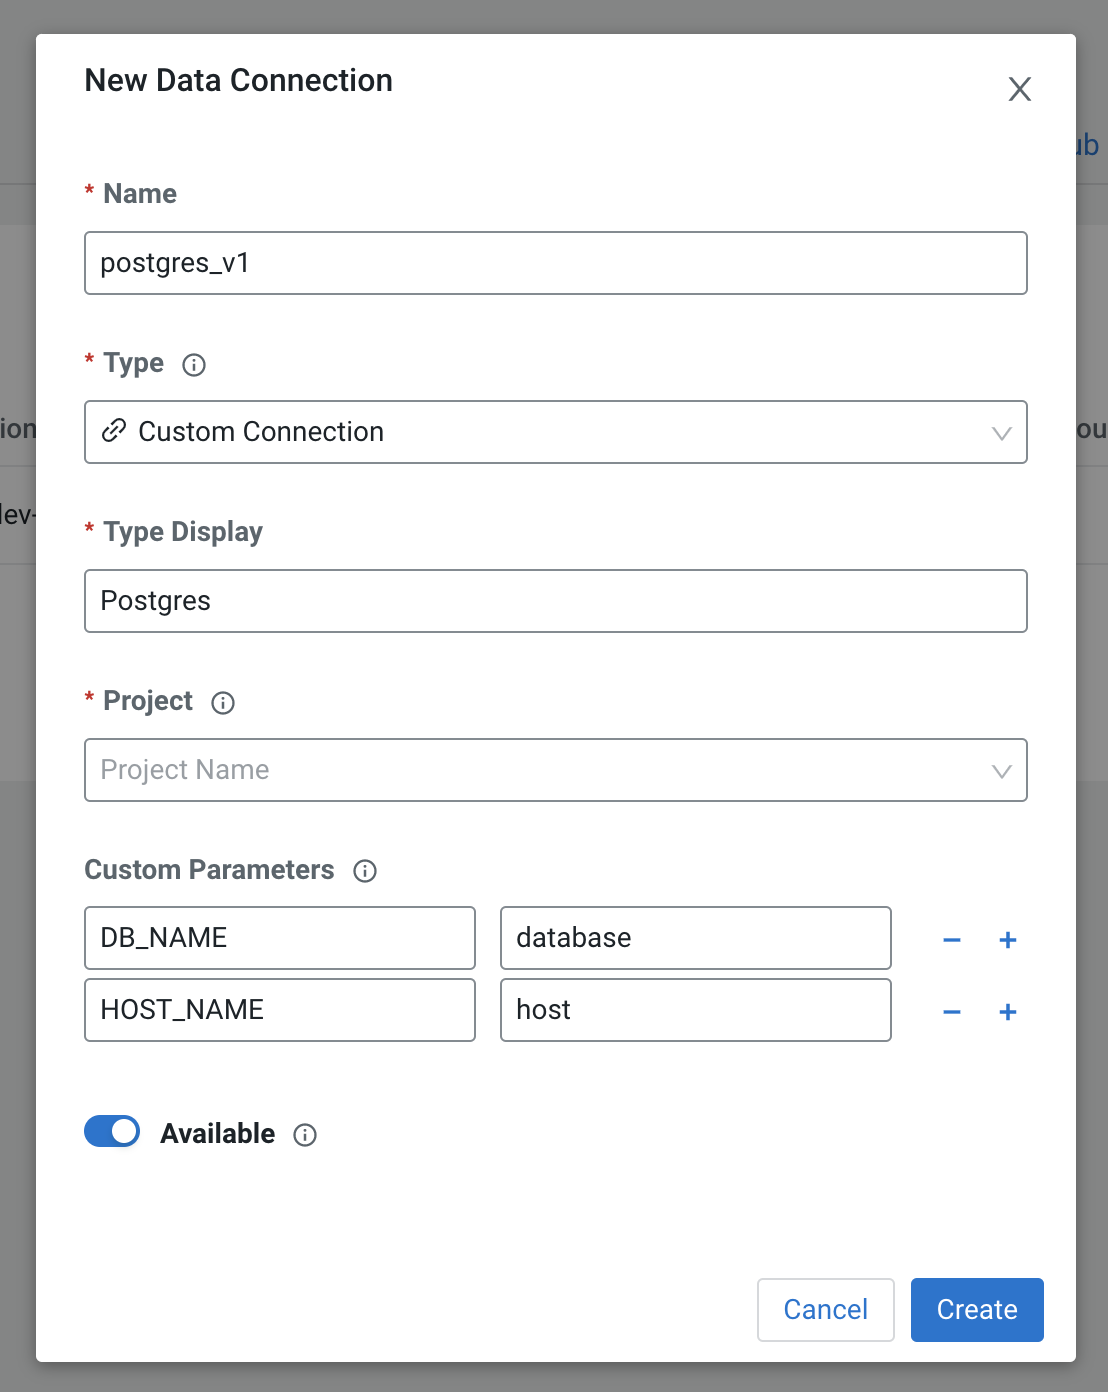
(Optional) Enter any custom parameters. These are available during a
session and can be validated or overridden depending on the interface
implementation for the custom data connection. Refer to the implementation of
your custom data connection for specific details on required keys and
values.