In the Cloudera console,
click the Cloudera AI tile.
The Cloudera AI Workbenches page displays.
Click on the name of the workbench.
The workbench Home page is displayed.
In the left navigation pane, click the AI Studios.
The AI Studios window is displayed.
Check the View on Github link for Agent Studio within the AI
Studios tile interface.
Ensure it points to the correct public repository:
https://github.com/cloudera/Agent-Studio-Runtime-Config. If the
link is incorrect, proceed to the manual steps outlined in the Launching when AI Studio mode
is disabled topic.
Click Launch in the Agent Studio tile to
initiate installation in runtime mode.
The Configure Studio: Agent Studio page is displayed.
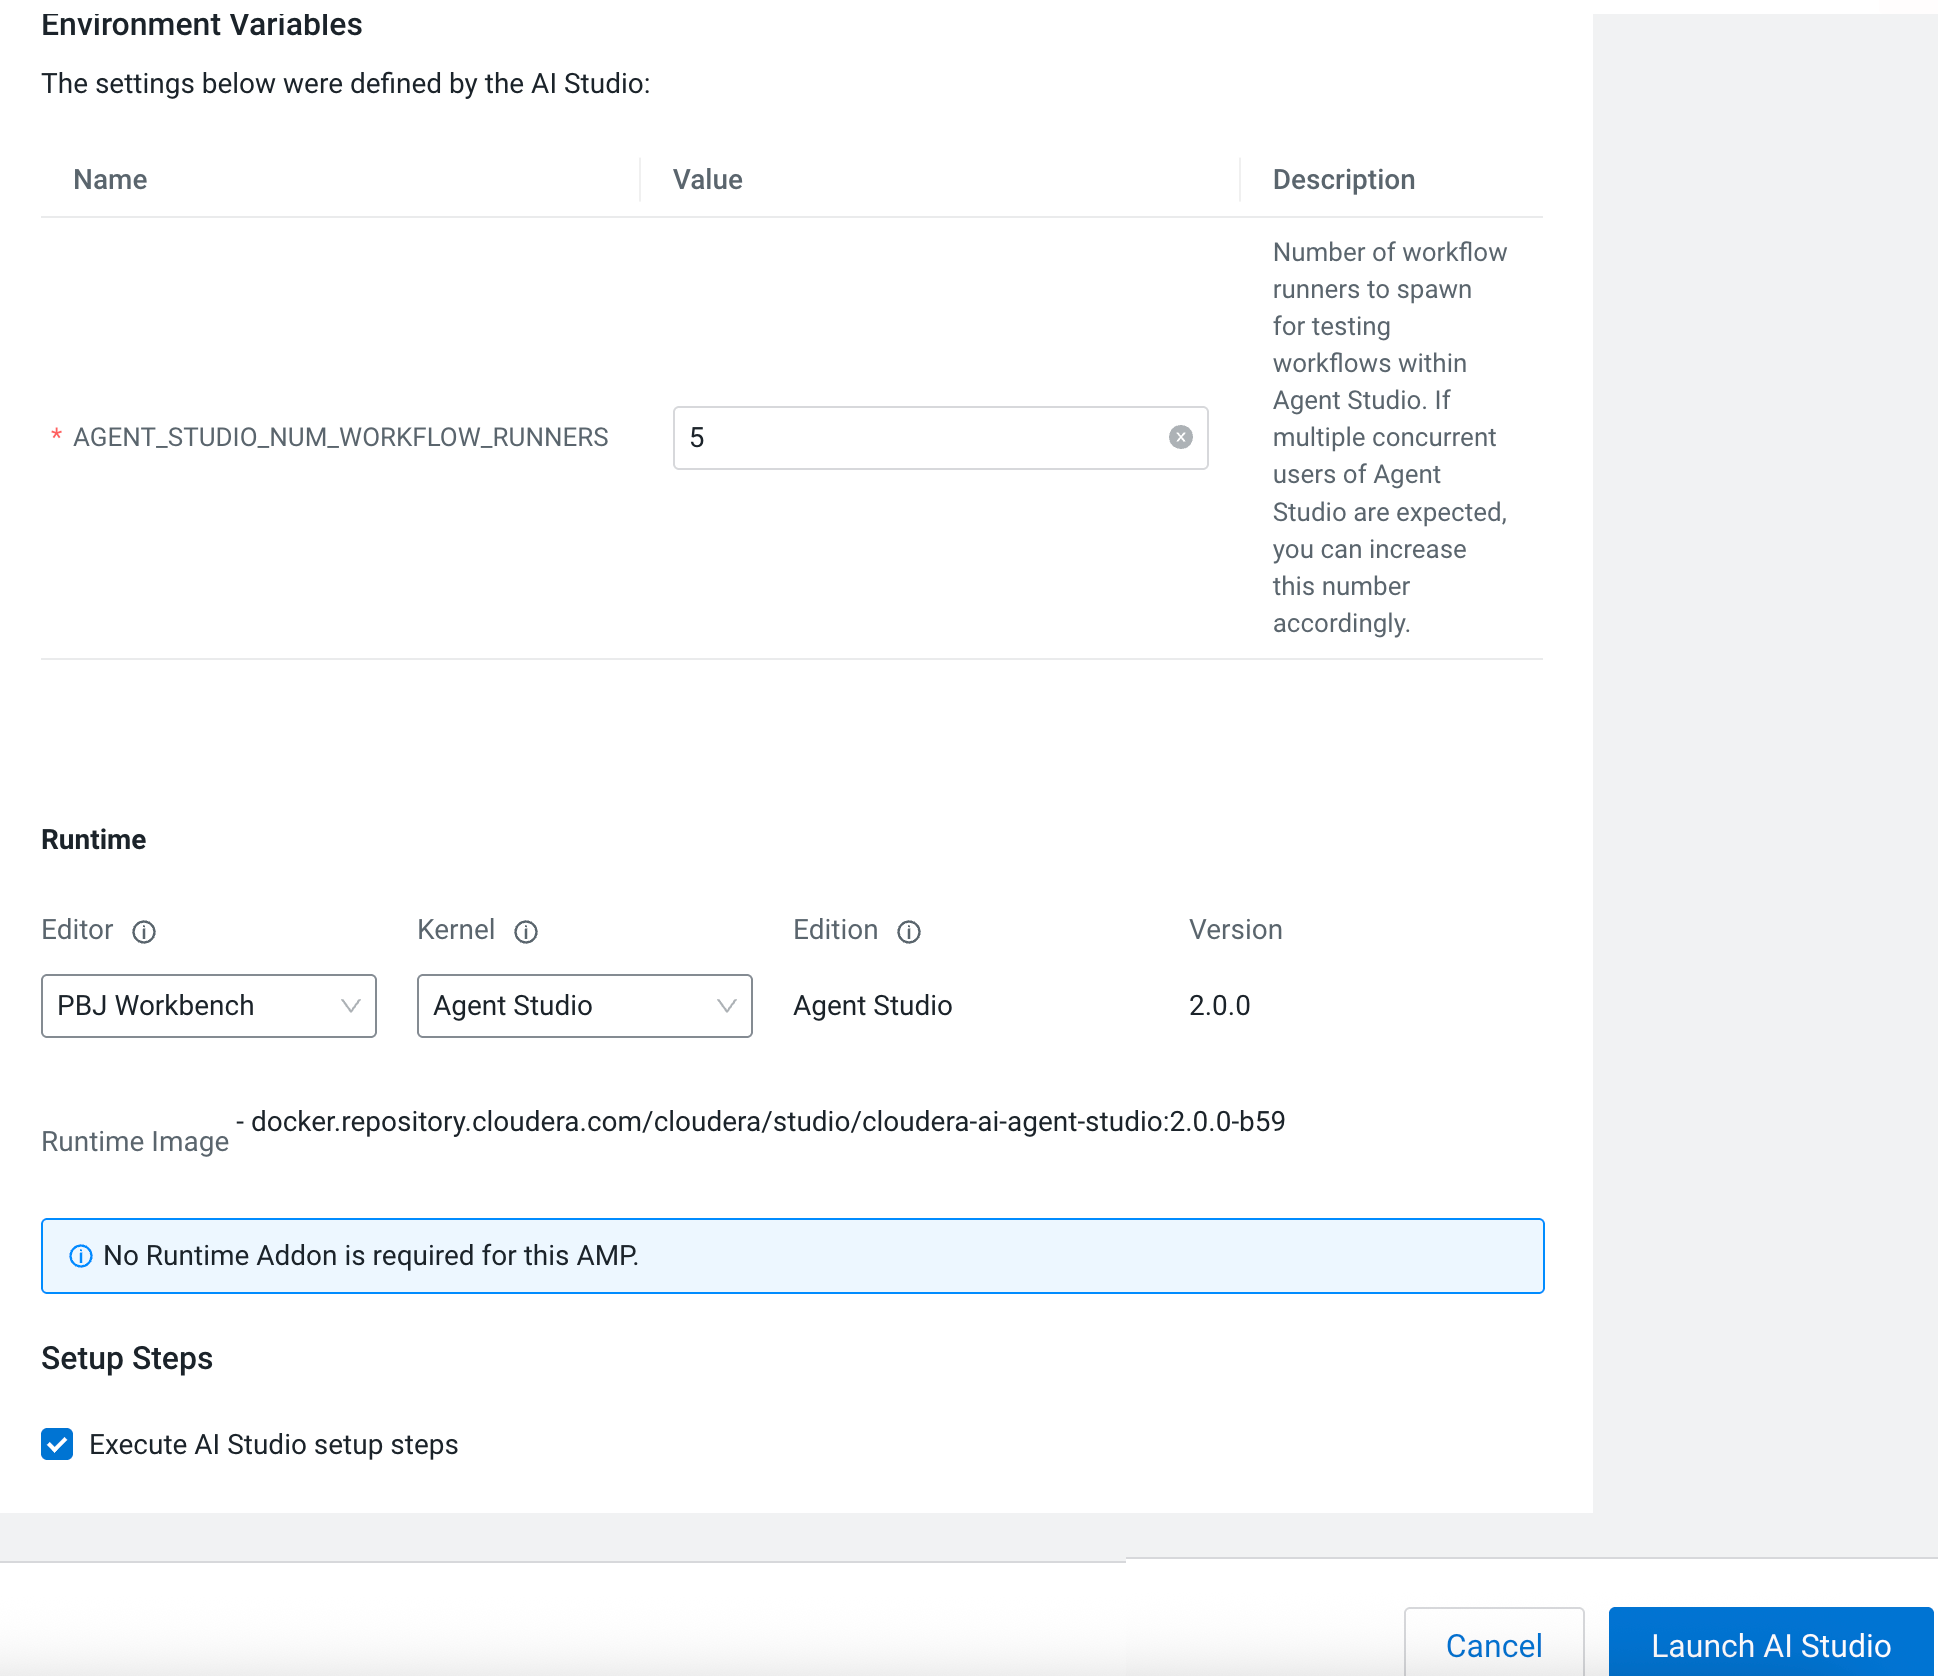
In the Configure Studio: Agent Studio perform the following
steps:
Set the environment variables for Agent Studio.
Select PBJ Workbench as the
Editor.
Select Agent Studio as the Kernel
under Runtime.
Figure 1. Configure Agent Studio window
Click Launch AI Studio.
The AI Studio Setup Steps page is displayed. After launching,
you can view the list of tasks running as part of the AI studio deployment. After
configuration, Agent Studio is displayed in the left navigation
pane under AI Studios.
Click Agent Studio and click Get Started
to orchestrate AI agents to collaborate on complex tasks, powered by custom tools and
seamless workflow automation.