Automating Cloudera Octopai Data Lineage metadata extractions with Microsoft Task Scheduler
Learn about automating Cloudera Octopai Data Lineage metadata extractions using Microsoft Task Scheduler on Windows, including task creation, configuration, and scheduling to streamline metadata updates efficiently.
Automating metadata extractions in Cloudera Octopai Data Lineage can greatly streamline data management processes. By utilizing Microsoft Task Scheduler, you can schedule the execution of the Cloudera Octopai BAT files, which are located by default in the C:\Program Files (x86)\Octopai\Service\BAT directory. Scheduling the execution of BAT files simplifies and streamlines the process, ensuring timely and accurate metadata updates. Leverage the power of Task Scheduler to enhance your Cloudera Octopai workflow and improve overall data management efficiency.
To successfully run the extractions you must have rights to log on as a batch job. For more information, see Log on as a batch job.
-
Launch the Microsoft Task Scheduler application on your Windows computer.
It can typically be found by searching for Task Scheduler in the Start menu.
Figure 1. Microsoft Task Scheduler application 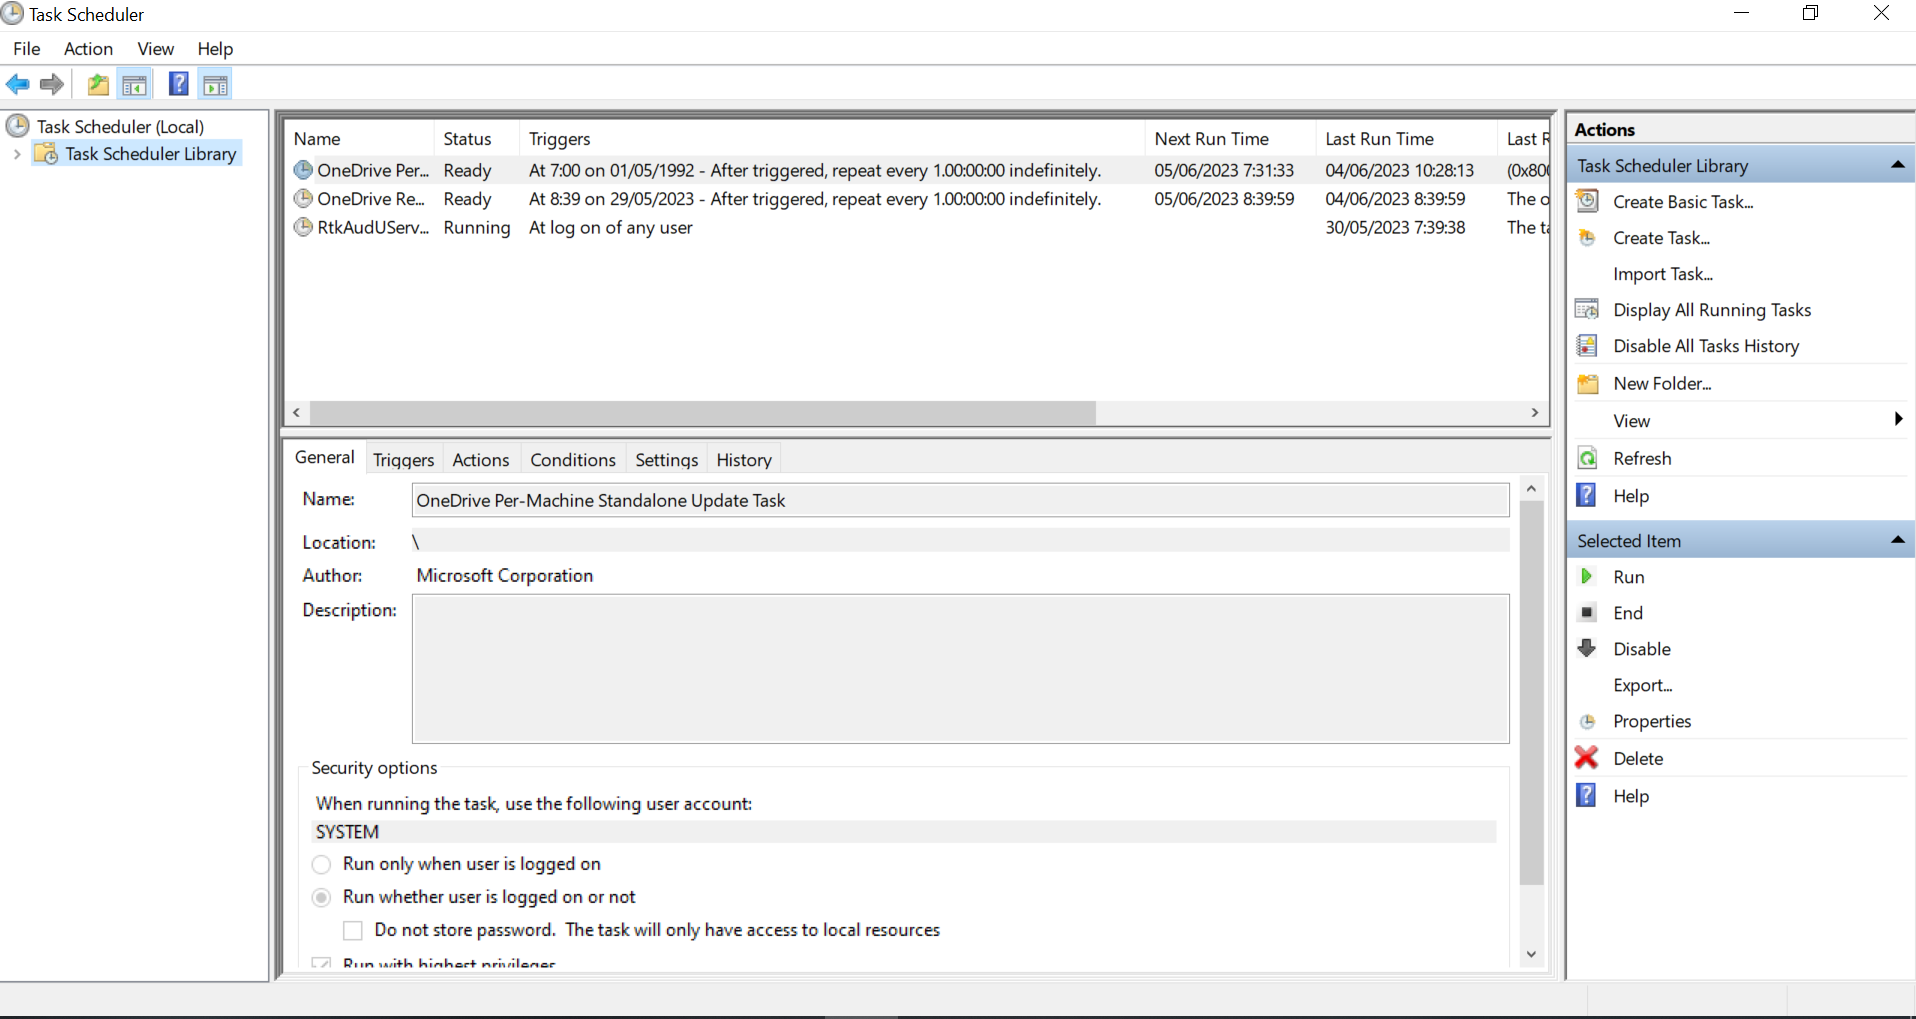
-
Create a new task.
-
Right-clicking on the Task Scheduler Library folder or the
desired folder where you want to save the Cloudera Octopai
schedule task and selecting the Create Task... action.
Figure 2. Create a task 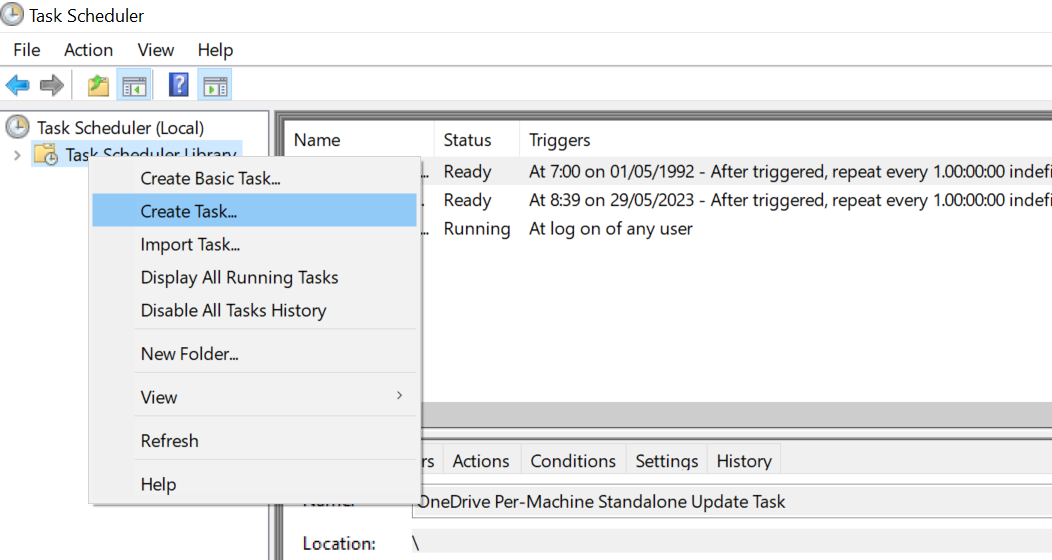
-
In the General tab of the Create Task
window, provide the necessary details.
Figure 3. Create a task General tab 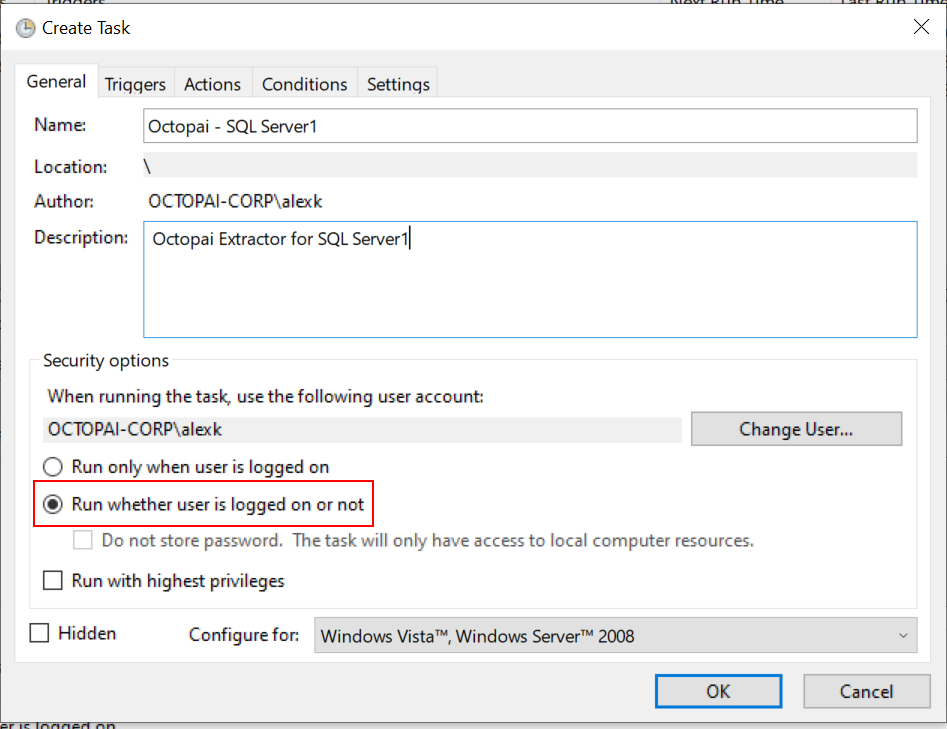
-
In the Triggers tab of the Create Task
window, click New to open the New Trigger
window and define the schedule recurrence. Cloudera Octopai
recommends setting it to once a week.
Figure 4. Create a task Triggers tab 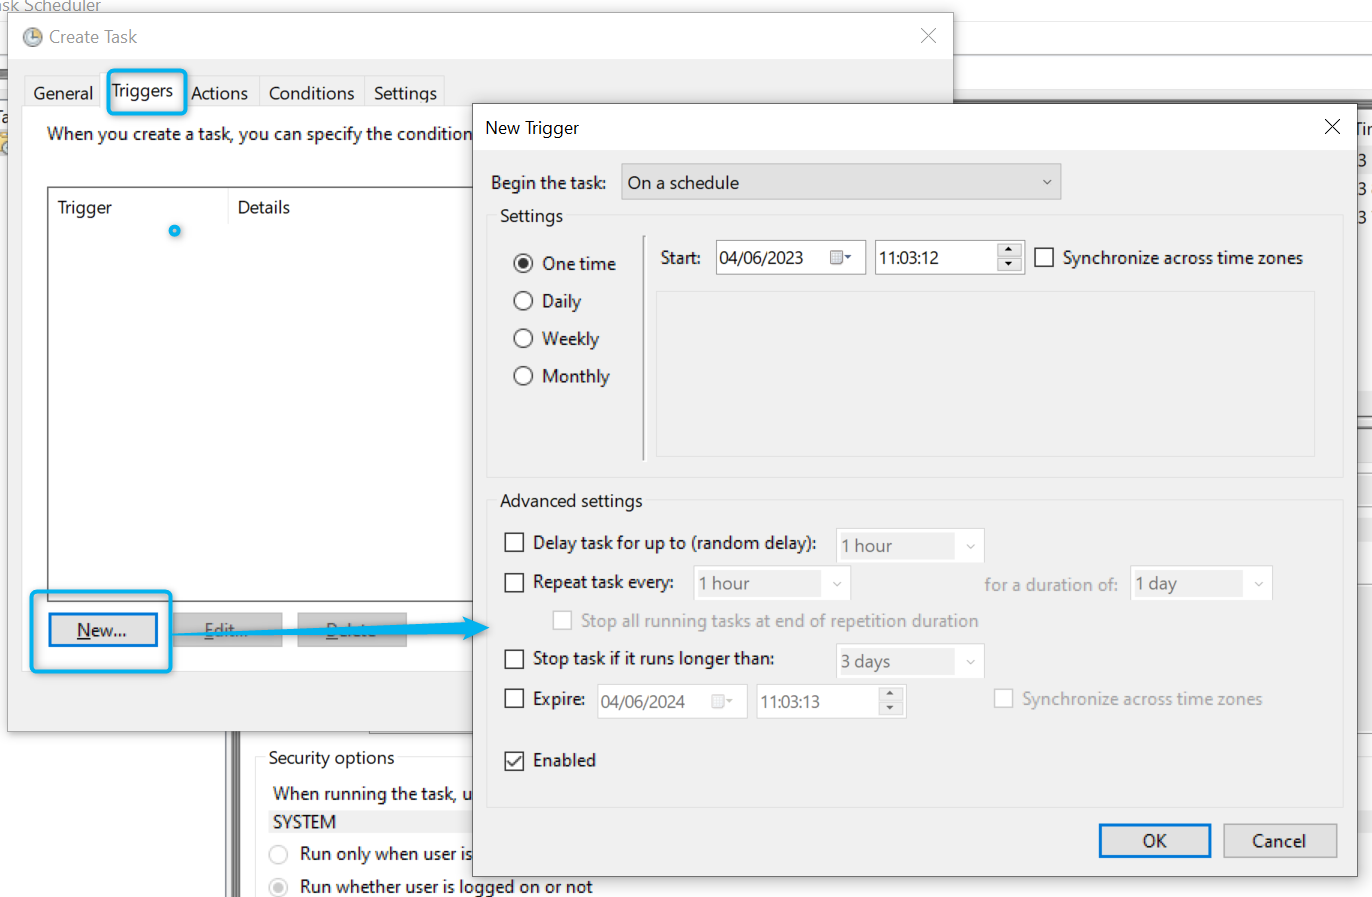
-
Configure actions.
- In the Actions tab of the Create Task window, click New to open the New Action window.
- Browse for the relevant BAT file by clicking Browse or manually entering the file path. The default location for BAT files is the folder where Cloudera Octopai Client is installed that is C:\Program Files (x86)\Octopai\Service\BAT by default.
- Select the file and click OK to save.
Figure 5. Create a task Actions tab 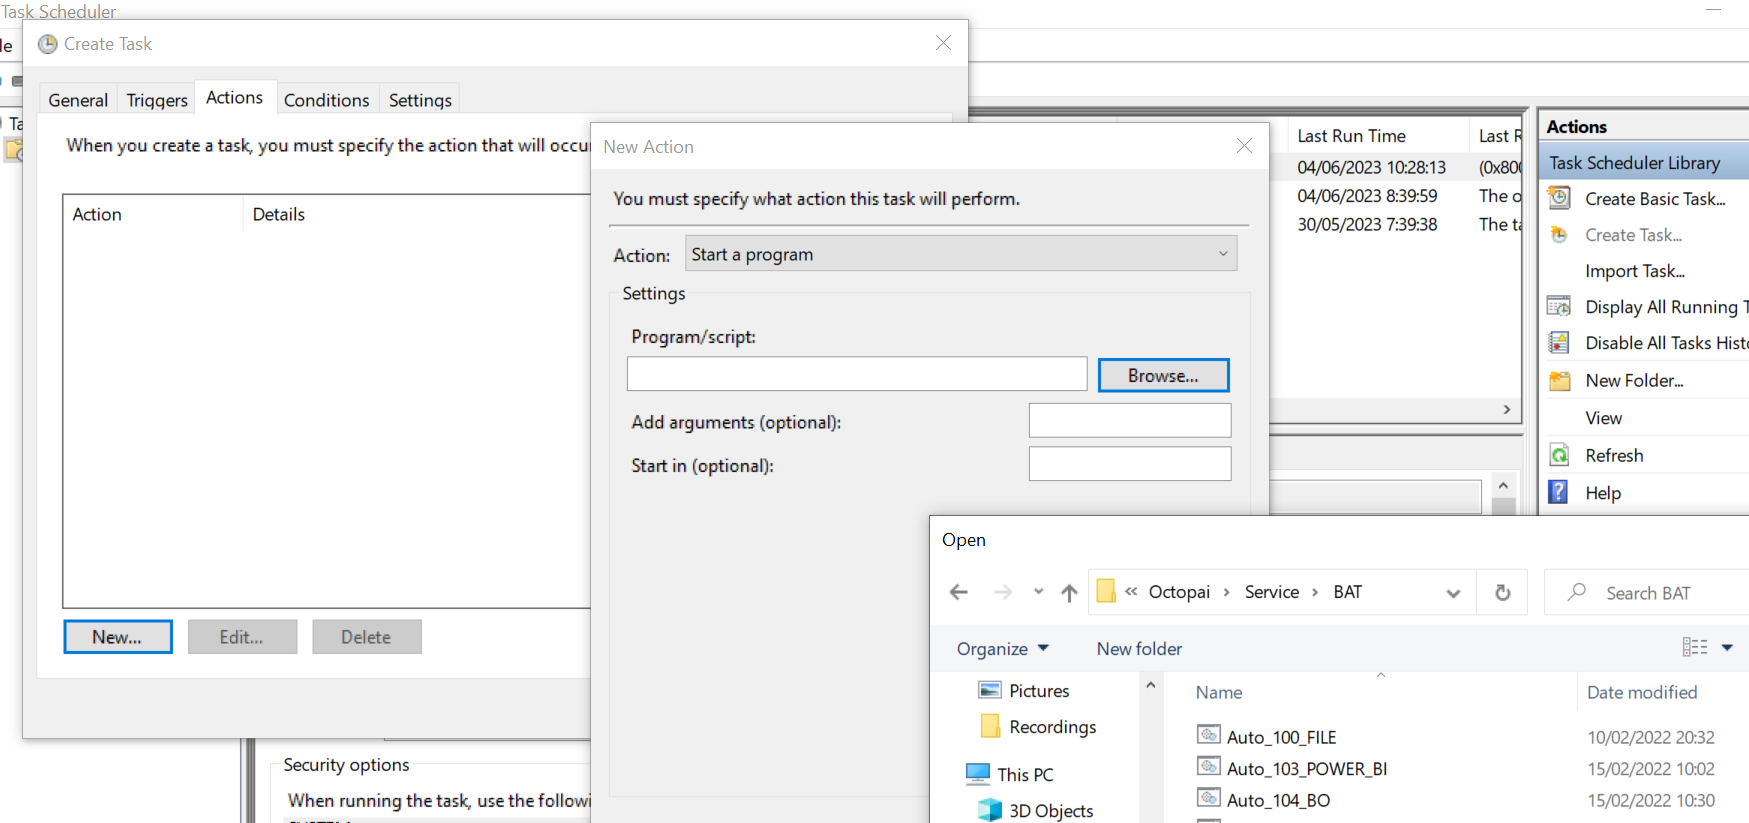
-
In the Conditions tab of the Create Task
window, select all the checkboxes in the Power section and go to
the Settings tab without clicking
OK.
Figure 6. Create a task Conditions tab 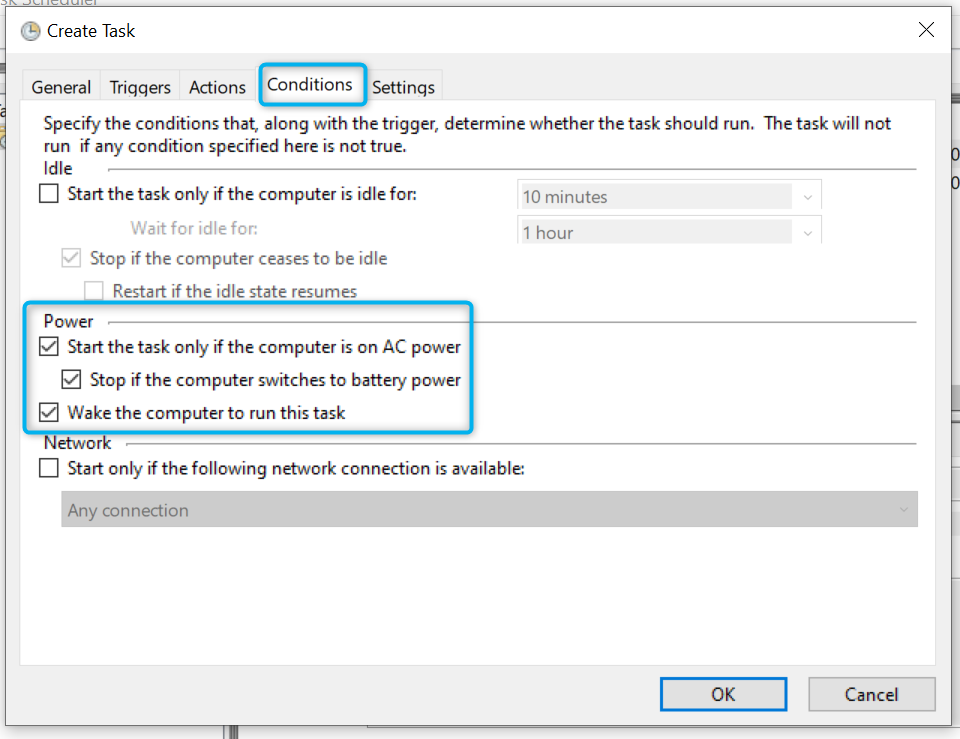
-
In the Settings tab of the Create Task
window, select the following checkboxes:
- Allow task to be run on demand
- Stop the task if runs longer than:
- If the running task does not end when requested, force it to stop
Figure 7. Create a task Settings tab 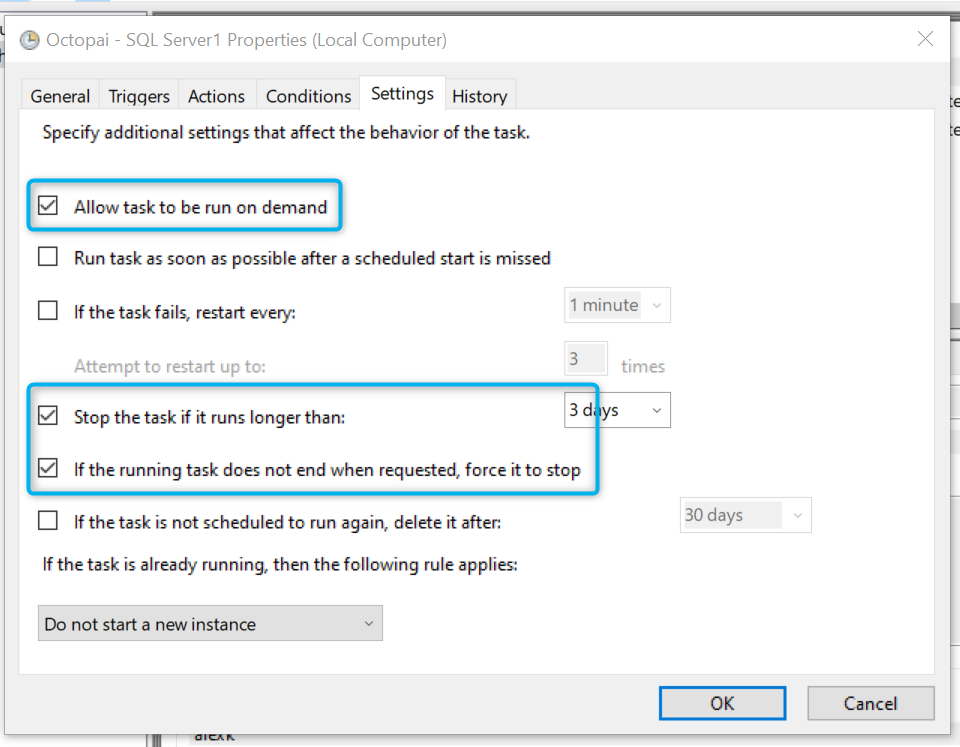
-
Right-clicking on the Task Scheduler Library folder or the
desired folder where you want to save the Cloudera Octopai
schedule task and selecting the Create Task... action.