When you deploy a cluster using Ambari, a Capacity Scheduler View instance is automatically created. If you do not need to reconfigure the Ambari-created cluster, proceed to the next section, Using the Capacity Scheduler View.
If you have deployed your cluster manually, or if you need to re-configure the Ambari-created Capacity Scheduler View, you can use the information in this section to create and configure a view instance.
Use the following steps to set up a Capacity Scheduler view instance.
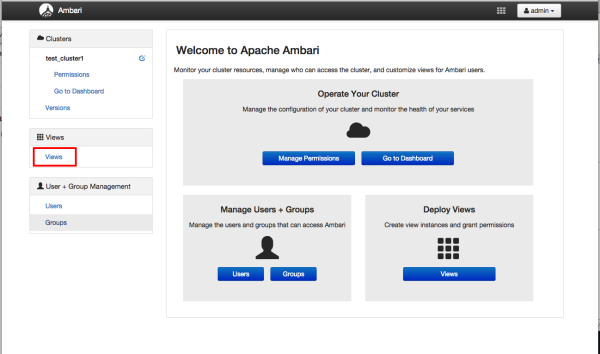
Select admin > Manage Ambari in the Ambari Web top menu.

On the Manage Ambari page, click Views.

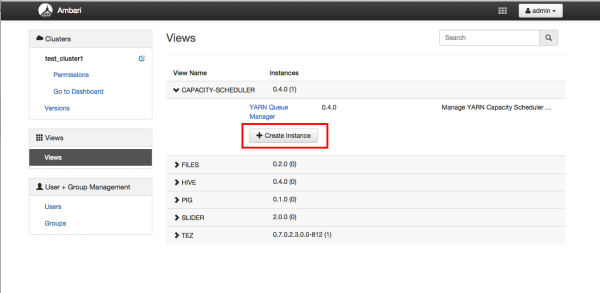
On the Views page, click CAPACITY-SCHEDULER, then click Create Instance.

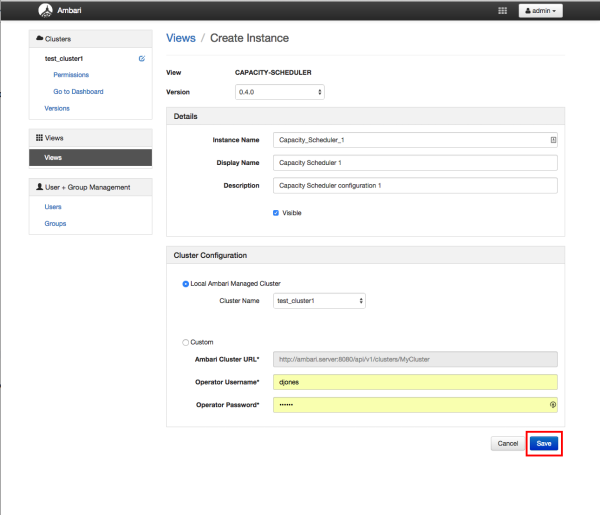
In the Details box on the Create Instance page, type in an instance name, display name, and a description for the view.
![[Note]](../common/images/admon/note.png)
Note The instance name cannot contain spaces or special characters.
In the Cluster Configuration box on the Create Instance page, configure the view to communicate with the HDP cluster.
For HDP clusters that are local (managed by the local Ambari Server), select the Local Ambari Managed Cluster option, then select the local cluster name.
To configure the view to work with HDP clusters that are remote (not part of this Ambari Server instance), select the Custom option, then specify the remote Ambari cluster API URL and the Ambari cluster user name and password.
Click Save at the bottom of the page.

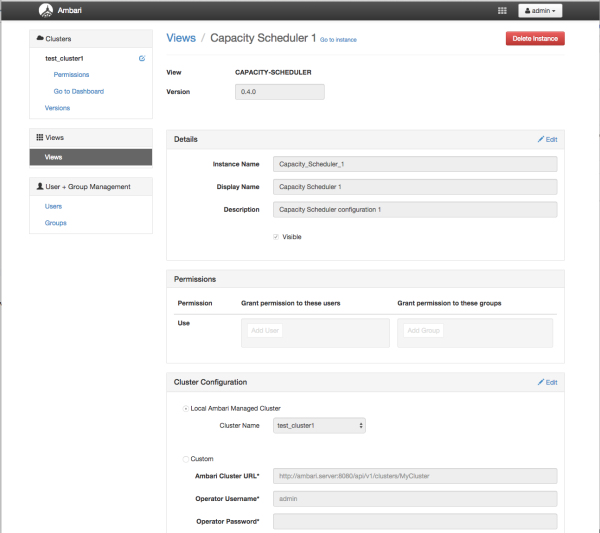
The Capacity Scheduler View instance is created, and the configuration page for the instance appears.


