Migrating Atlas Data
In HDP 3.1.5, Atlas uses the JanusGraph instead of Titan for data storage and processing. As part of the HDP 3.1.5 upgrade, data must be migrated from Titan to JanusGraph. Perform the following steps to migrate the Atlas metadata from Titan to JanusGraph.
Before upgrading HDP, use one of the following methods to determine the size of the Atlas metadata:
Click SEARCH on the Atlas web UI, then slide the green toggle button from Basic to Advanced. Enter the following query in the Search by Query box, then click Search.
Asset select count()Run the following Atlas metrics REST API query:
curl -g -X GET -u admin:admin -H "Content-Type: application/json" \
-H"Cache-Control: no-cache" \
"http://<atlas_server>:21000/api/atlas/admin/metrics"
Either of these methods returns the number of Atlas entities, which can be used to estimate the time required to export and import the Atlas metadata. This time varies depending on the cluster configuration. The following estimates are for a node with a 4 GB RAM quad-core processor with both the Atlas and Solr servers on the same node:
Estimated duration for export: 2 million entities per hour.
Estimated duration for import: 0.75 million entities per hour.
In the Ambari Web UI, click Atlas, then select Actions > Stop.
Make sure that HBase is Running. If it is not, in the Ambari Web UI, click HBase, then select Actions > Start.
SSH to the host where your Atlas Metadata Server is running.
![[Note]](../common/images/admon/note.png)
Note The Atlas migration should be performed as the atlas user (if cluster is kerberized). For example,
Switch identity to the atlas user.
su atlas
klist the atlas keytab to find the atlas kerberos service pricipal value.
 [atlas@kat-1 data]$ klist -kt /etc/security/keytabs/atlas.service.keytab
Keytab name: FILE:/etc/security/keytabs/atlas.service.keytab
KVNO Timestamp           Principal
---- ------------------- ------------------------------------------------------
   1 11/28/2018 06:40:24 atlas/kat-1.evilcorp.trade@EVILCORP.TRADE
   1 11/28/2018 06:40:24 atlas/kat-1.evilcorp.trade@EVILCORP.TRADE
kinit using the atlas keytab and the atlas kerberos service principal value.
  [atlas@kat-1 data]$ kinit -kt /etc/security/keytabs/atlas.service.keytab atlas/kat-
1.evilcorp.trade@EVILCORP.TRADE
Verify you have a valid ticket.
 [atlas@kat-1 data]$ klist
Ticket cache: FILE:/tmp/krb5cc_1005
Default principal: atlas/kat-1.evilcorp.trade@EVILCORP.TRADE
Valid starting       Expires              Service principal
11/29/2018 22:52:56  11/30/2018 22:52:56  krbtgt/EVILCORP.TRADE@EVILCORP.TRADE
    renew until 12/06/2018 22:52:56
Start exporting Atlas metadata, using the following command format:
python
              /usr/hdp/3.1.5.6091-<build_number>/atlas/tools/migration-exporter/atlas_migration_export.py
              -d <output directory>
For example, export the metadata to an output directory called
/atlas_metadata.
While running, the Atlas migration tool prevents Atlas use, and blocks all REST APIs and Atlas hook notification processing. As described previously, the time it takes to export the Atlas metadata depends on the number of entities and your cluster configuration. You can use the following command to display the export status:
tail -f /var/log/atlas/atlas-migration-exporter.log
When the export is complete, a file named atlas-migration-data.json is created in the output directory specified using the -d parameter. This file contains the exported Atlas entity data.
The HDP upgrade starts Atlas automatically, which initiates the migration of the uploaded HDP-2.x Atlas metadata into HDP-3.x. During the migration import process, Atlas blocks all REST API calls and Atlas hook notification processing. In order for this migration process to succeed, Atlas must be configured with the location of the exported data. Use the following steps to configure the atlas.migration.data.filename property.
In Ambari, select Services > Atlas > Configs > Advanced > Custom application-properties.
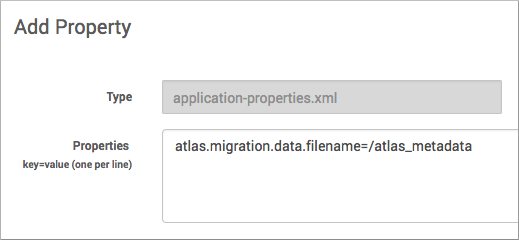
Click Add Property, and add the
atlas.migration.data.filenameproperty. Set the value to the location of the directory containing your exported Atlas metadata.For example:

Save the configuration.
Click Services > Atlas > Restart > Restart All Affected.
Since the configuration has been changed, you need to re-run the Atlas service check by clicking Actions > Run Service Check.
![[Note]](../common/images/admon/note.png) | Note |
|---|---|
During the HDP upgrade, you can use the following Atlas API URL to display the migration status:
The migration status is displayed in the browser window:
|
Next Steps

