Creating virtual clusters
In Cloudera Data Engineering, a virtual cluster is an individual auto-scaling cluster with defined CPU and memory ranges. These virtual clusters are linked to a specific Cloudera Data Engineering Service, which is, in turn, associated with an environment. You can create any number of virtual clusters, which allows you to execute jobs and other artifacts.
To create a virtual cluster, you must have an environment with Cloudera Data Engineering enabled.
- In the Virtual Clusters column, click
 at the top right to create a new virtual
cluster.If the environment has no virtual clusters associated with it, the page displays a Create a Virtual Cluster button that launches the same wizard.
at the top right to create a new virtual
cluster.If the environment has no virtual clusters associated with it, the page displays a Create a Virtual Cluster button that launches the same wizard.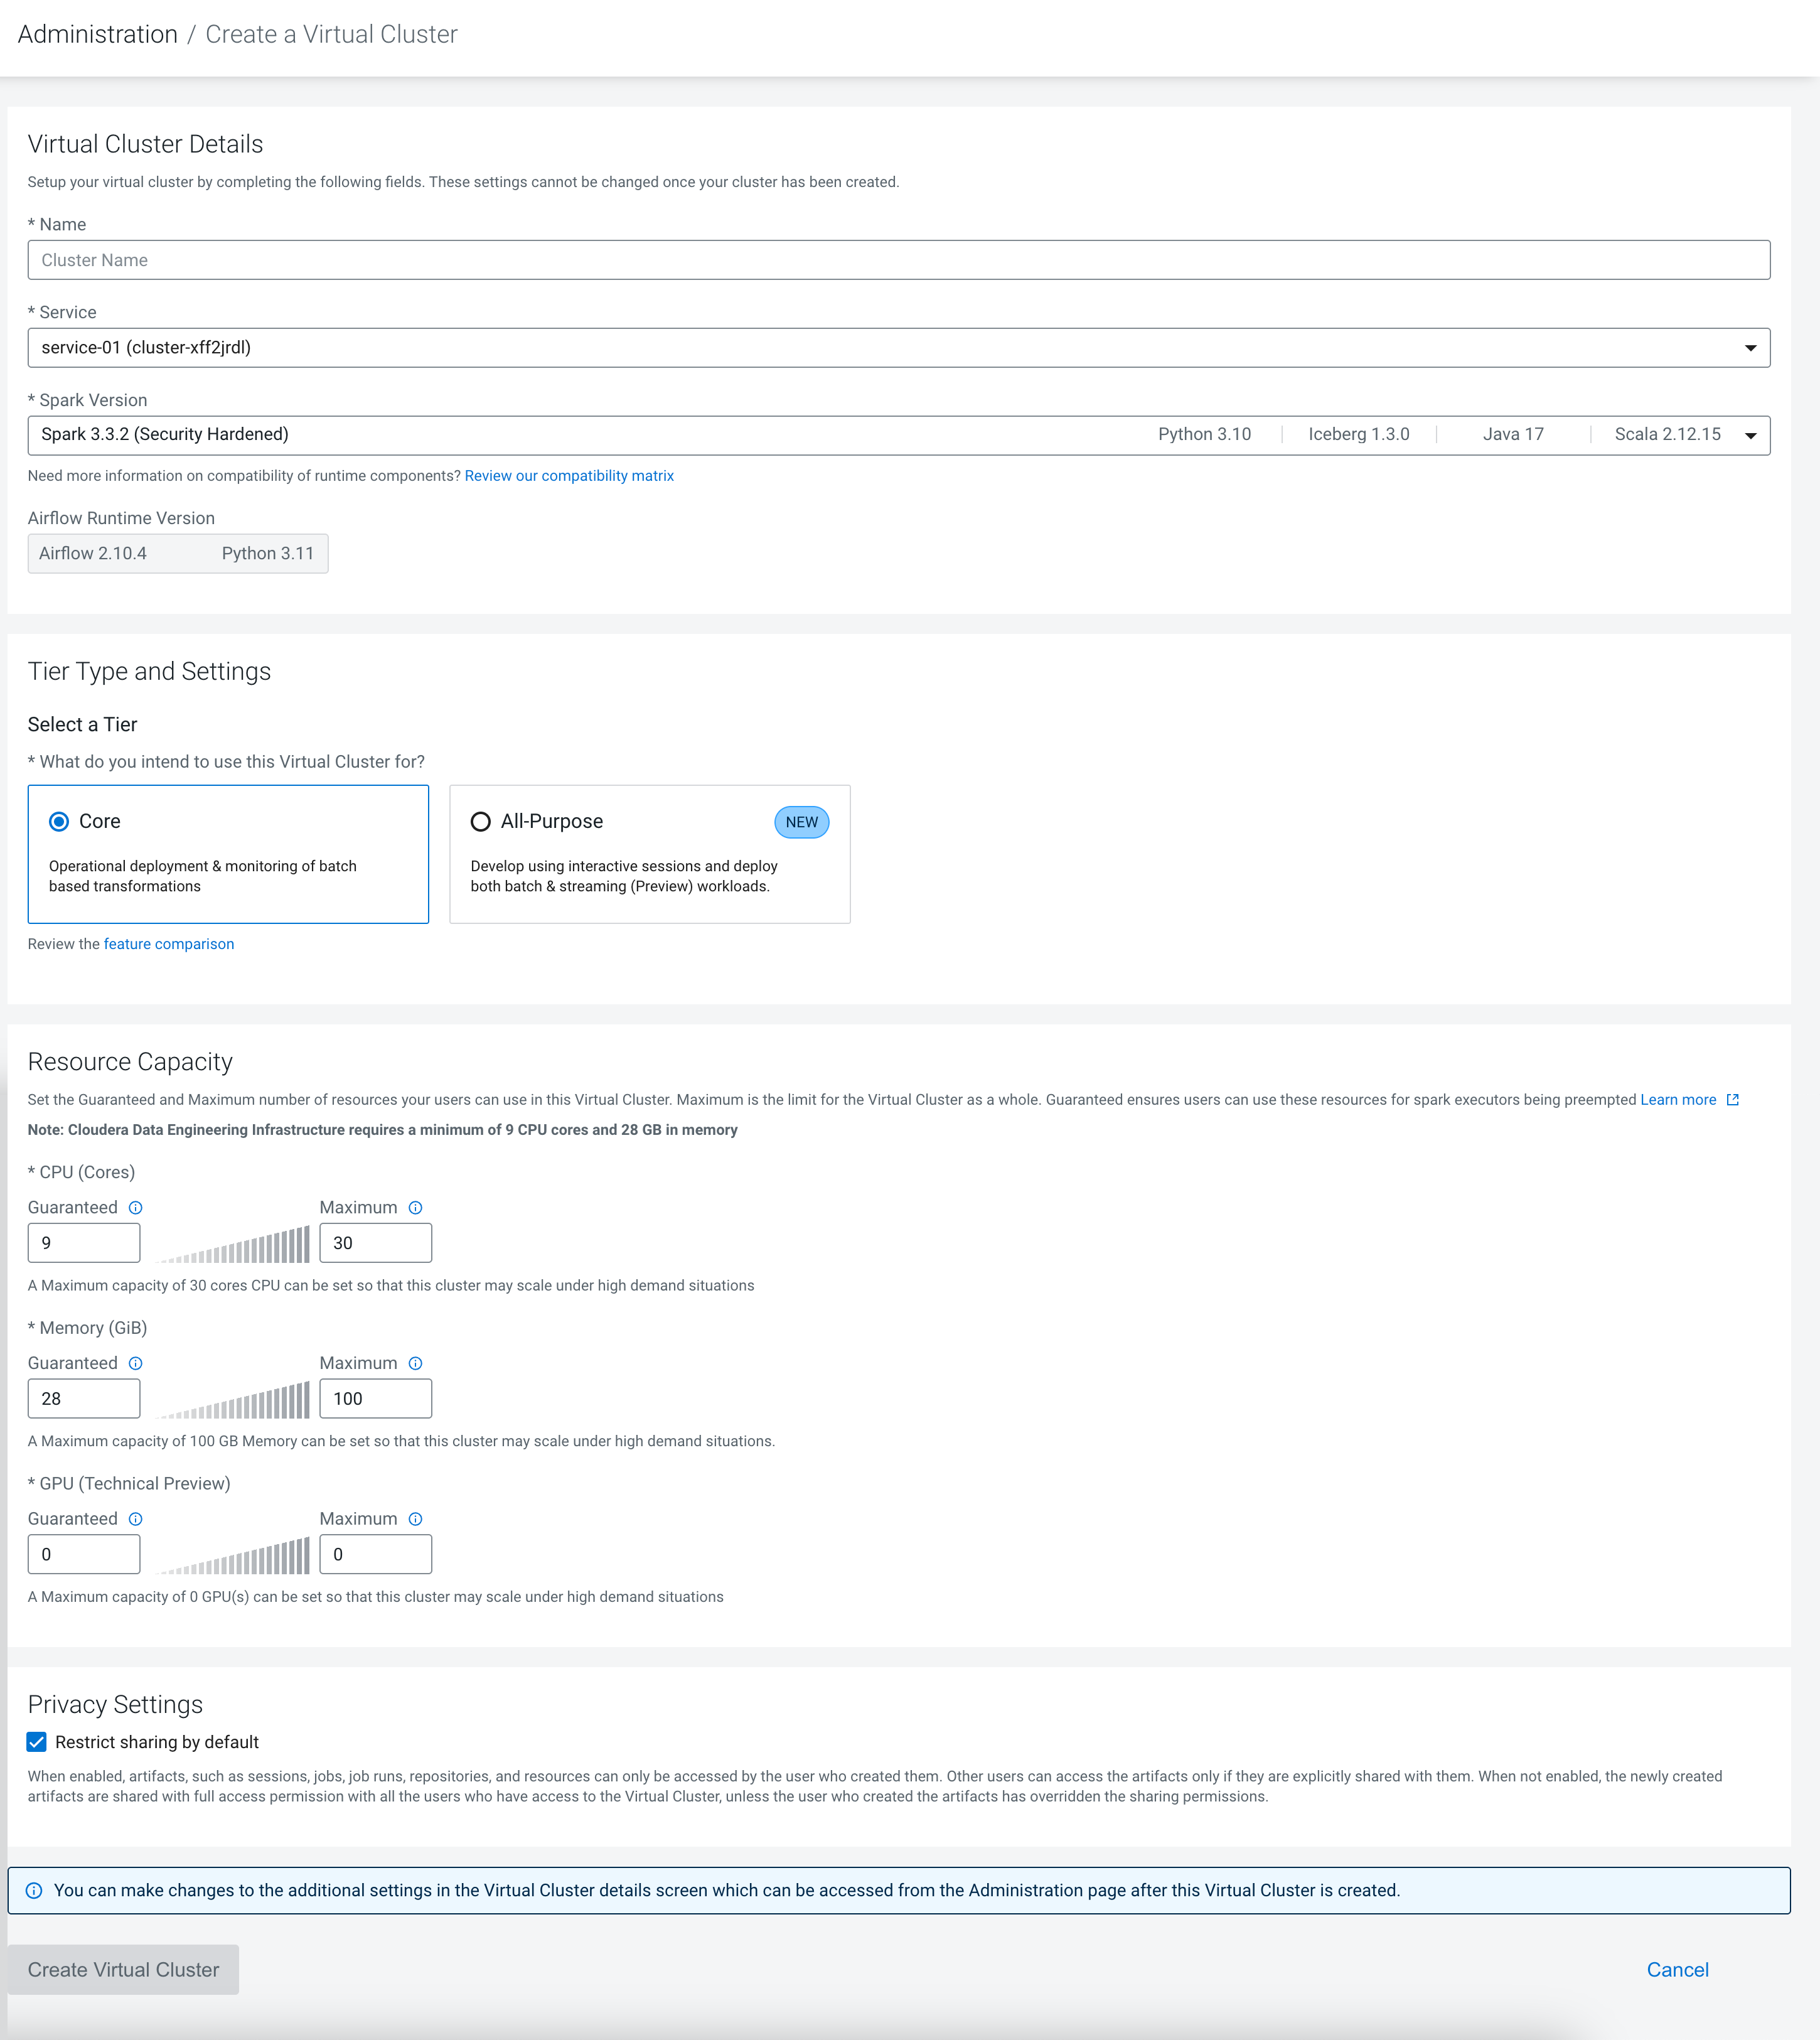
-
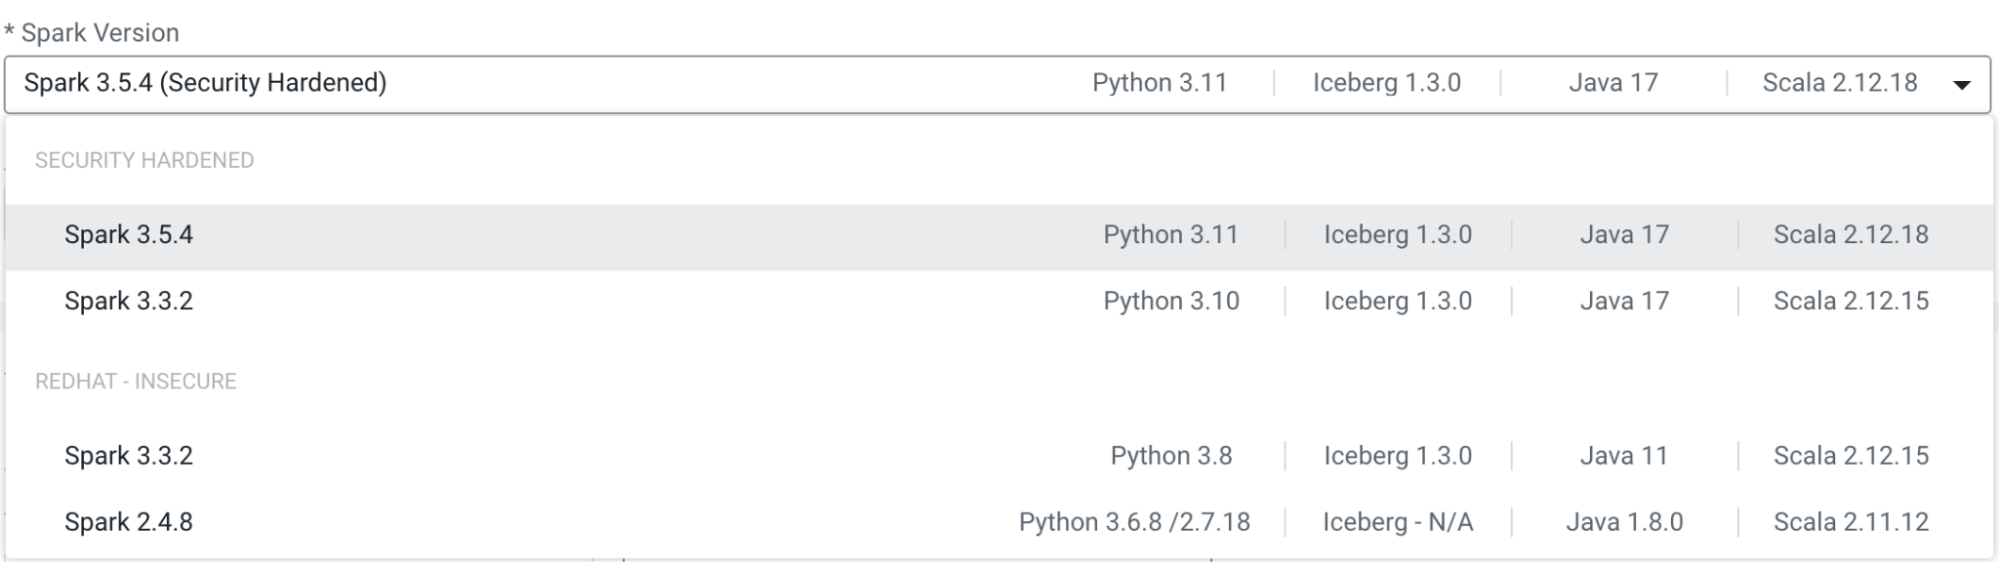
Select the Spark Version to use in the virtual cluster. You
cannot use Spark 2 and Spark 3 in the same virtual cluster, but you can have separate
Spark 2 and Spark 3 virtual clusters within the same Cloudera Data Engineering
service. While you can have virtual clusters with different Spark 3.x versions, a single
virtual cluster can only use one Spark version.
On the Cloudera Data Engineering UI, you can view the supported Apache Airflow runtime component version and Spark runtime component version on the VC creation and details pages.
The following screenshot illustrates creating a new Virtual Cluster, where you can select the required runtime component versions from a drop-down menu on the UI.
For more information, see Compatibility for Cloudera Data Engineering and Cloudera Runtime components.
-
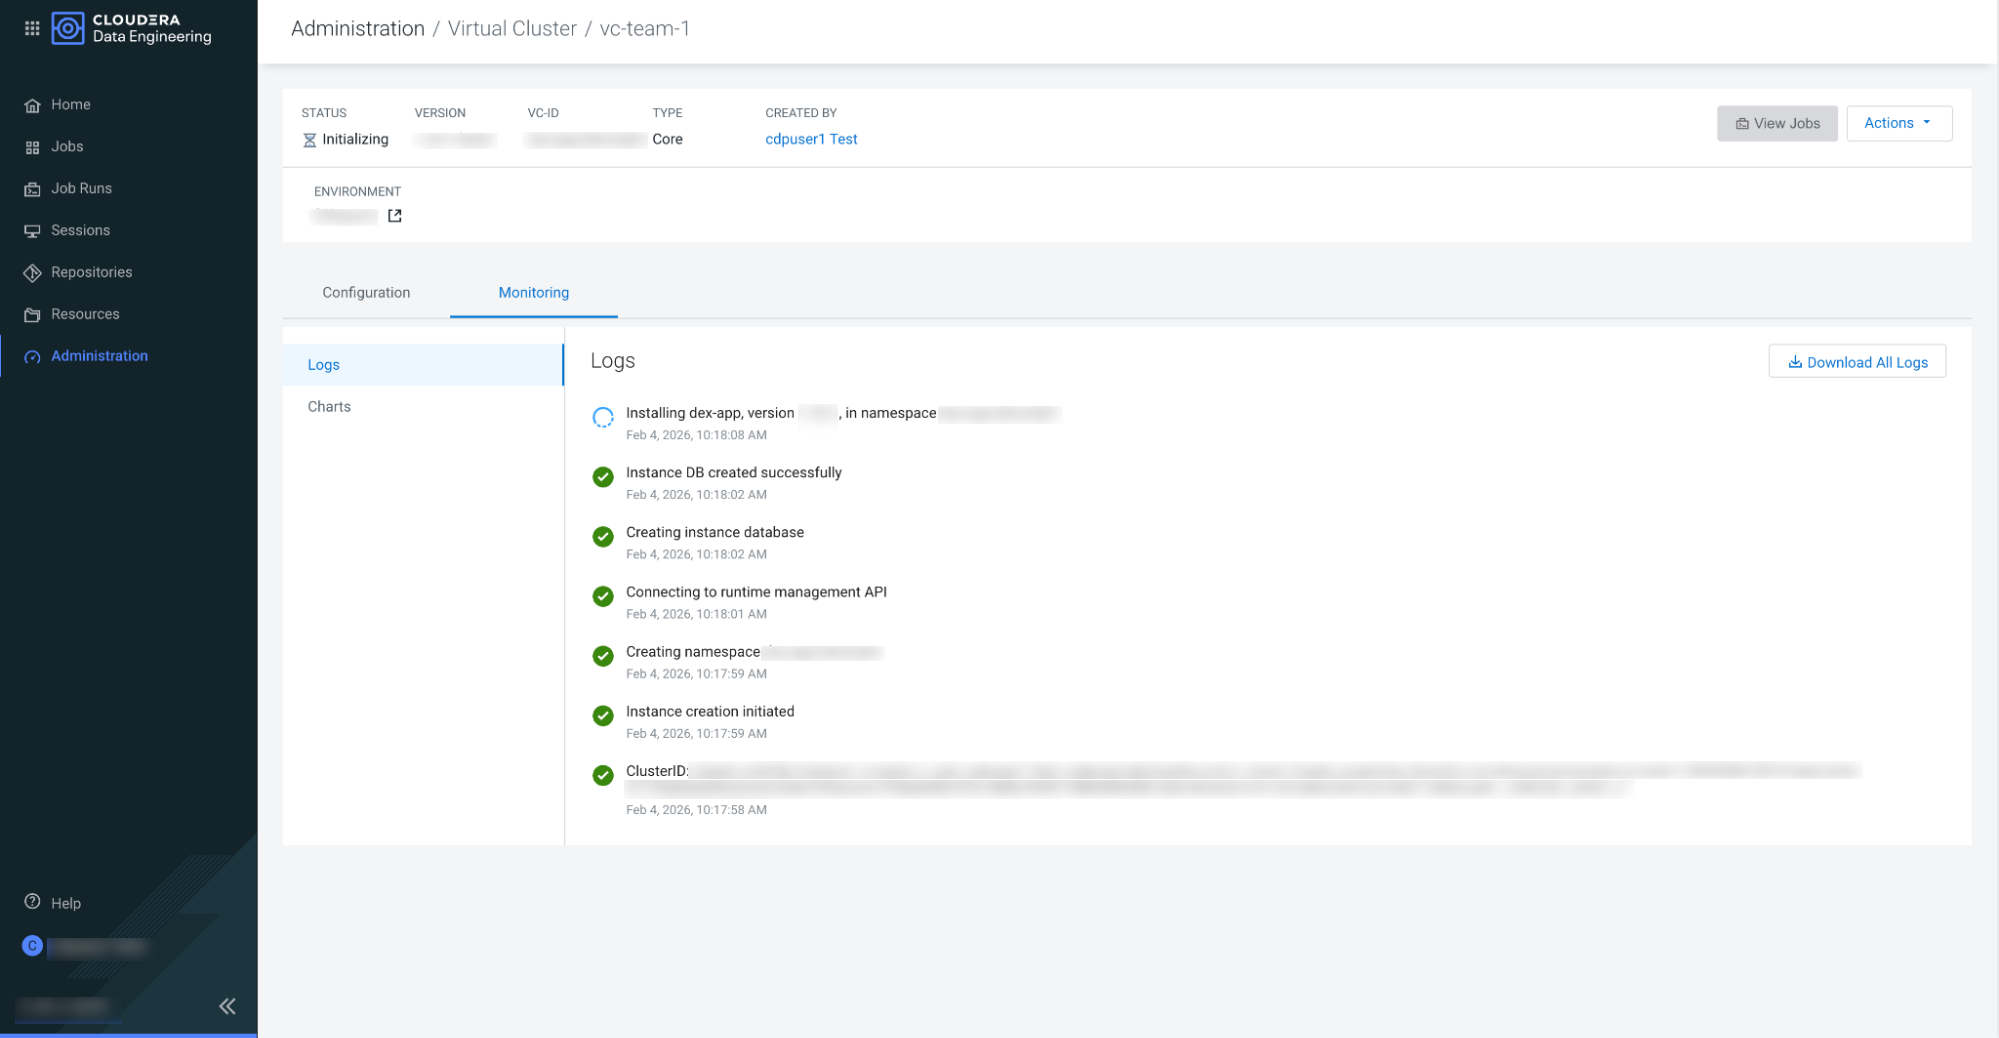
Click Create Virtual Cluster. This process takes 20 minutes
approximately. Monitor the progress by checking the logs and refreshing them every five
minutes. You can view logs for the virtual cluster by clicking on the vertical ellipsis
(three dots) menu, and then clicking View Logs.
dex-app-XXXX virtual cluster are running.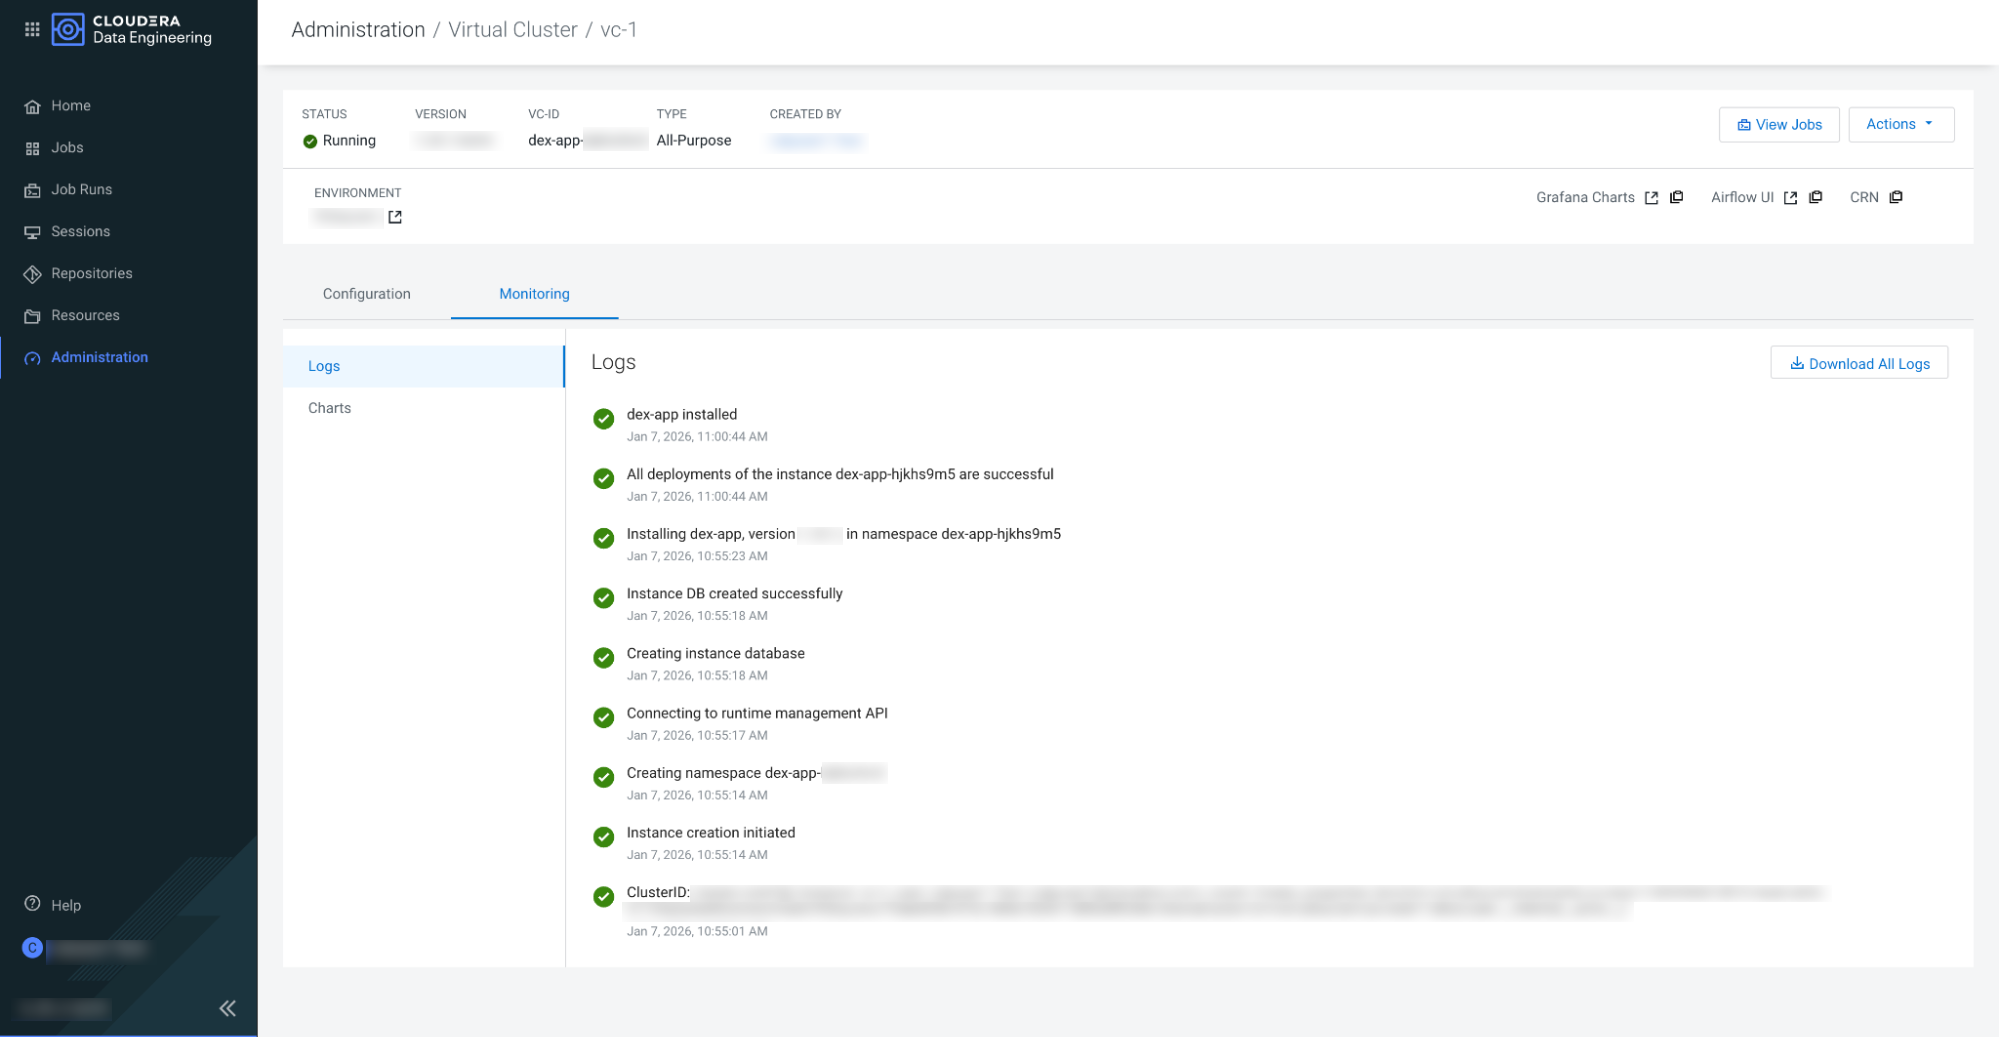
For more information about the virtual cluster, navigate to . Click on the Cloudera Data Engineering Service in which the
virtual cluster is created and click the ![]() icon
for the respective Virtual Cluster.
icon
for the respective Virtual Cluster.
- By default, Cloudera Data Engineering automatically sets up the virtual cluster with a self-signed certificate. To replace this with an updated certificate, see Updating the Control Plane certificates in Cloudera Data Engineering virtual clusters.
- To allow users or groups to access the virtual cluster , the required roles must be assigned. For more information, see User Access Management.
- (Optional) To configure email alerts for notifications,
do the following steps:
- In the Cloudera console, click the Data Engineering tile. The Cloudera Data Engineering Home page displays.
- Click Administration in the left navigation menu. The Administration page displays.
- In the Services column, select the environment containing the virtual cluster for which you want to configure the email alerts.
- In the Virtual Clusters column on the right, click
the
 icon for the virtual cluster
for which you want to configure the email alerts..
icon for the virtual cluster
for which you want to configure the email alerts.. - On the Configuration tab, select Enable Email
Alerts check box and provide the following email configuration information:
- Sender Email Address: Enter the email address to which you want to receive the alerts.
- SMTP Username: The username of the email user who will be logged into the mail server as the sender of the alert emails.
- SMTP Password: The password of the email user who will be logged into the mail server as the sender of the alert emails.
- SMTP Host: Your mail server hostname.
- Email Encryption: Select a secure connection method to be used when communicating with the SMTP server.
- SMTP Port: Your mail server port number.
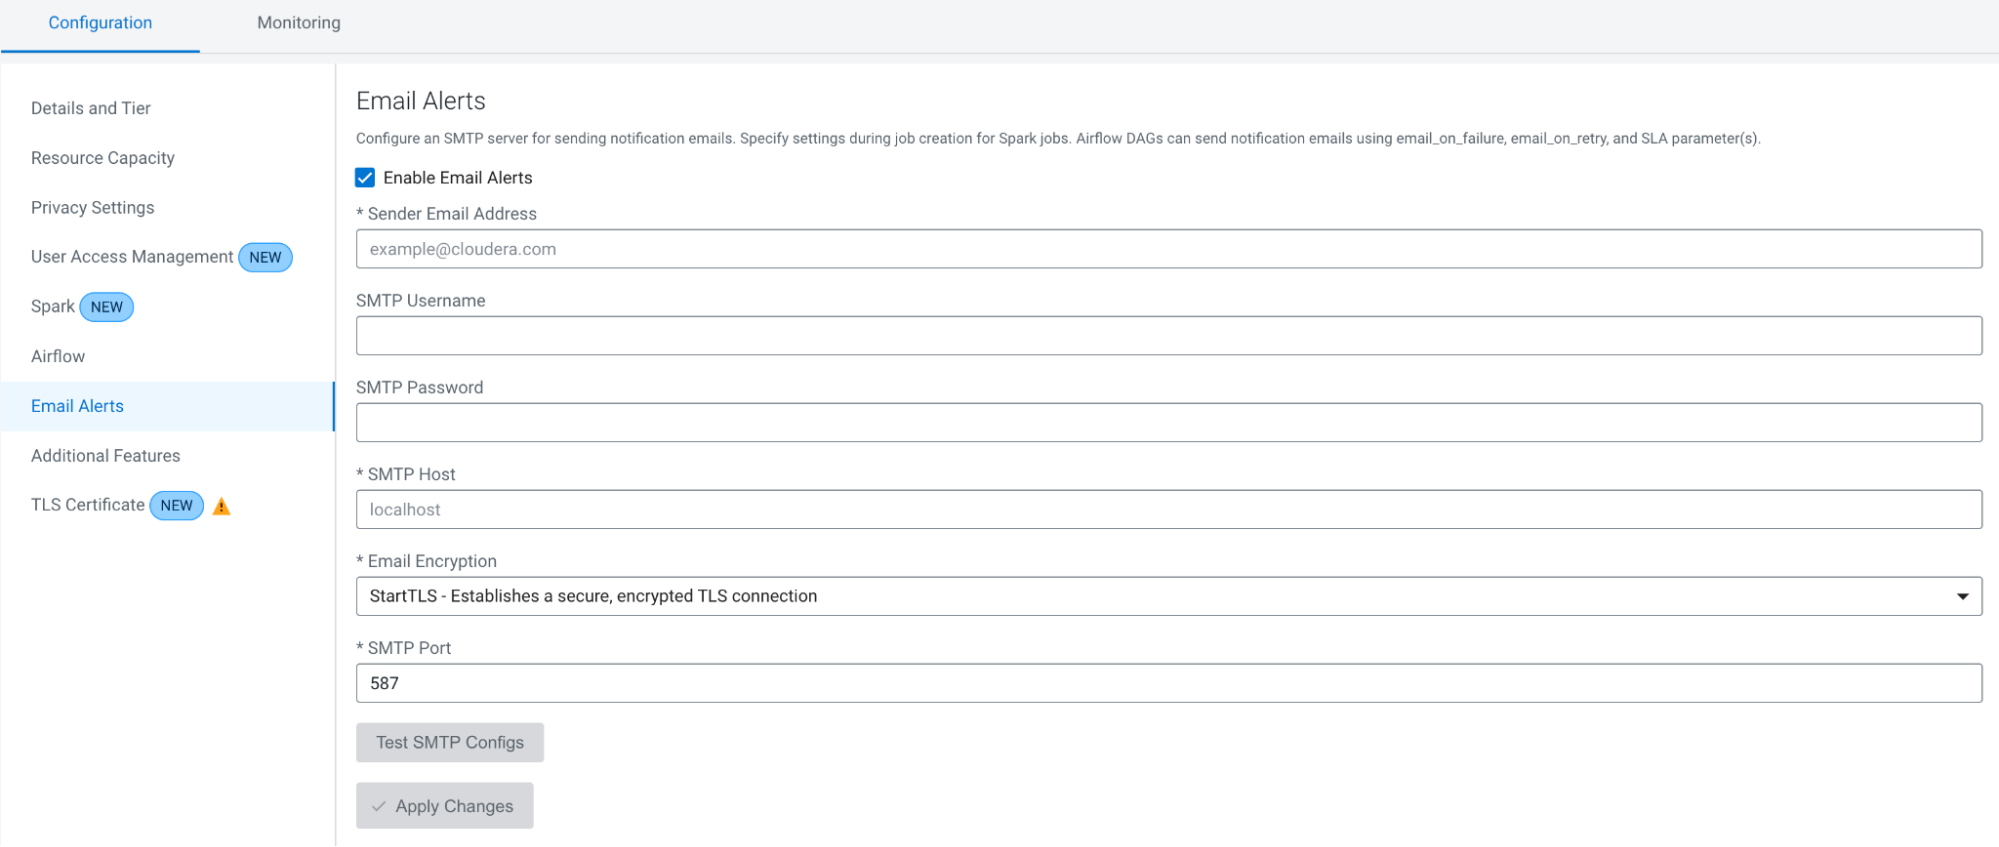
- Click Test SMTP Configs to test the configurations set for SMTP. This allows you to test the SMTP configuration before creating the cluster.
- (Optional) After successfully completing all the steps, you can load and run example jobs to verify the proper functioning of the system. For more information, see Cloudera Data Engineering example jobs and sample data.