Creating virtual clusters

In Cloudera Data Engineering (CDE), a virtual cluster is an individual auto-scaling cluster with defined CPU and memory ranges. Jobs are associated with virtual clusters, and virtual clusters are associated with an environment. You can create as many virtual clusters as you need. See Recommendations for scaling CDE ceployments linked below.

To create a virtual cluster, you must have an environment with Cloudera Data Engineering (CDE) enabled.

  1. In the Cloudera Data Platform (CDP) console, click the Data Engineering tile. The CDE Home page displays.
  2. Click Administration in the left navigation menu, select the environment you want to create a virtual cluster in.
  3. In the Virtual Clusters column, click at the top right to create a new virtual cluster.
    If the environment has no virtual clusters associated with it, the page displays a Create DE Cluster button that launches the same wizard.
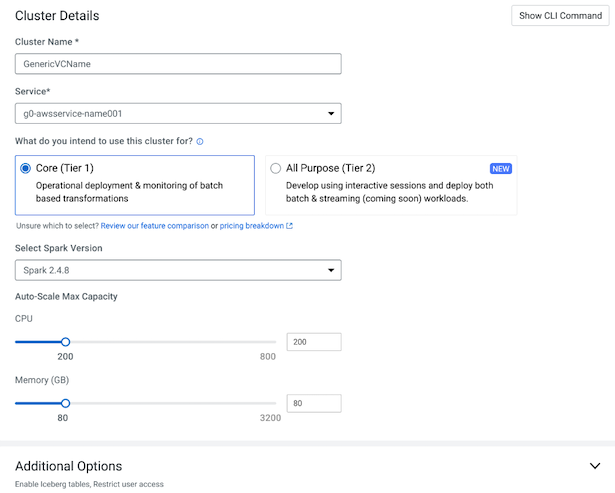
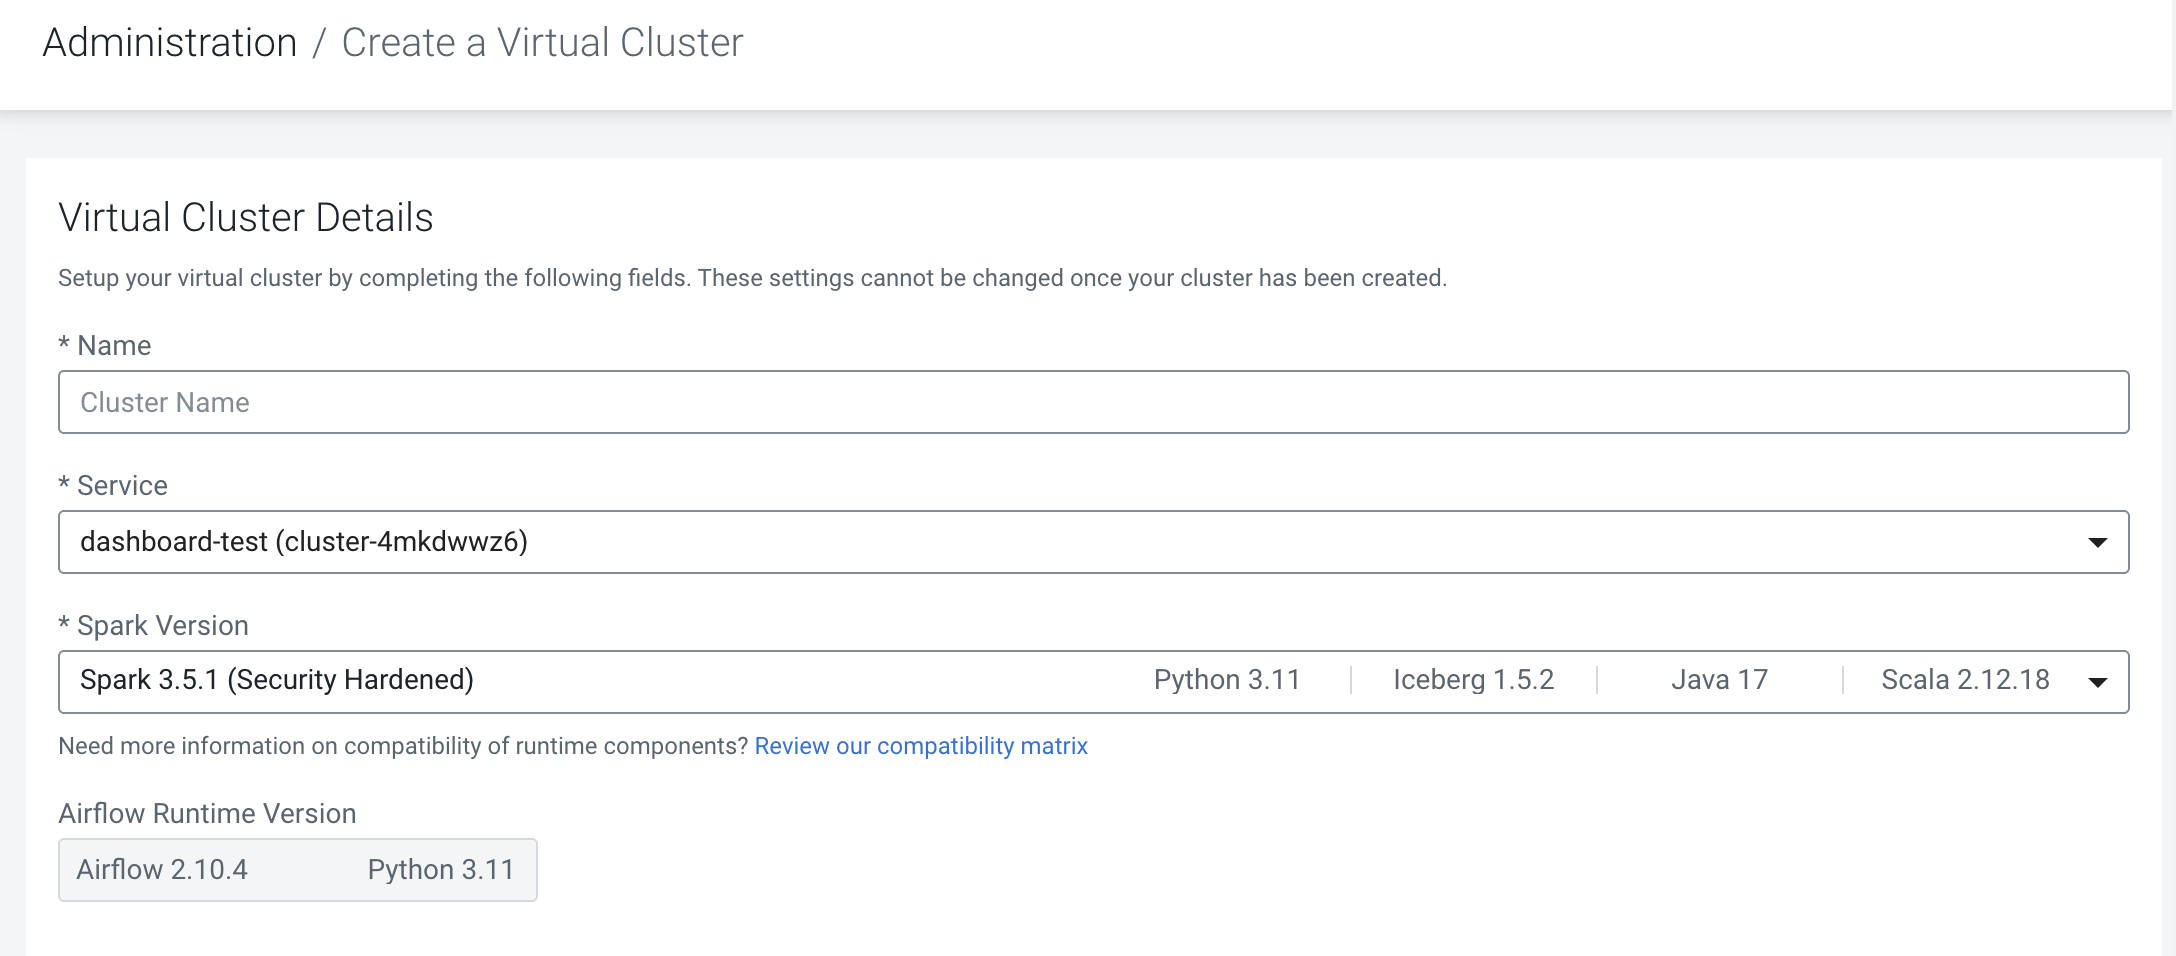
  4. Enter a Cluster Name.
    Cluster names must include the following:
    • Begin with a letter
    • Be between 3 and 30 characters (inclusive)
    • Contain only alphanumeric characters and hyphens
  5. Select the Service to create the virtual cluster in.
    The environment you selected before launching the wizard is selected by default, but you can use the wizard to create a virtual cluster in a different CDE service.
  6. Select one of the following CDE cluster types:
    • Core (Tier 1)
    • All Purpose (Tier 2)
  7. Select the Spark Version to use in the virtual cluster. You cannot use Spark 2 and Spark 3 in the same virtual cluster, but you can have separate Spark 2 and Spark 3 virtual clusters within the same CDE service. You can use multiple Spark 3.x in your virtual cluster.
  8. Use the Auto-Scale Max Capacity sliders to set the maximum number of CPU cores and the maximum memory in gigabytes. The cluster will scale up and down as needed to run the submitted Spark applications.
  9. Optional for spot instances enabled at the CDE service level: From the Driver and Executors will run on drop-down menu, select whether you want to run drivers and executors on spot instances or on-demand instances. By default, the driver runs on on-demand instances, and the executors run on spot instances. For SLA-bound workloads, select On-demand. For non-SLA workloads, Cloudera recommends leaving the default configuration to take advantage of the cost savings afforded by spot instances. For more information, see Cloudera Data Engineering Spot Instances.
  10. Optional: Select Restrict Access to add access control for the virtual cluster. You can search for users to add by name or email address. You can manage users using the Cloudera Data Platform Management Console. For more information, see Managing user access and authorization.
  11. Optional: Click Configure Email Alerting (Technical Preview) if you want to receive notification mails.The email configuration options appear.
    1. You must provide at least Sender Email Address and SMTP Host information.
    2. Test SMTP Configs: Click Test SMTP Configs to test the configurations set for SMTP. This helps you to test the SMTP configuration before creating the cluster.
  12. Click Create.
On the CDE Home page, select the environment to view the virtual cluster initialization status. You can also click the three-dot menu for the virtual cluster to view the logs.