Enabling RAZ manually
You might want to manually enable Ranger Authorization (RAZ) if you have a Cloudera Data Warehouse that predates the capability to enable RAZ for AWS S3. In this case, if you need Ranger authorization in Data Explorer, perform this task.
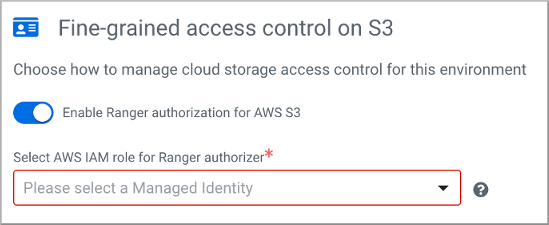
When you activate your environment in 1-6.3-b319 (released April 5, 2023) or later, you configure S3 access using the Fine-grained access control on S3 dialog in the Cloudera Management Console UI. If your Data Lake is RAZ-enabled (Enable Ranger authorization for AWS S3), Cloudera Data Warehouse is RAZ-enabled by default, and cannot be turned off. Cloudera Data Warehouse will be RAZ-enabled to provide authorization mainly in Data Explorer. There is nothing more you need to do.
-
Click the CloudFormation stack name.
This stack name is the one in this format: <cluster-ID>-dwx-stack. For example, if the cluster ID is env-6cwwgg, the CloudFormation stack name for this cluster is env-6cwwgg-dwx-stack.
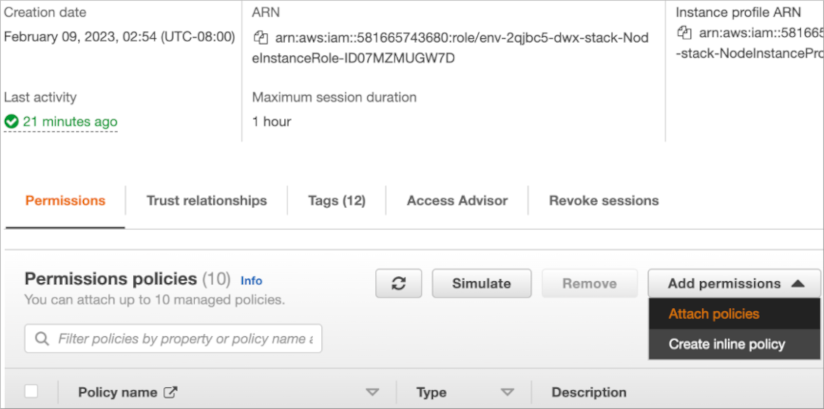
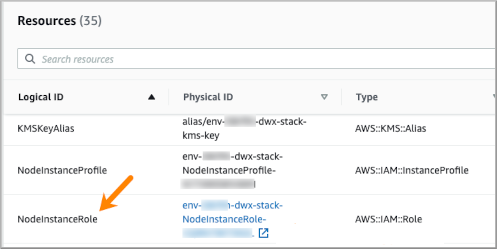
In CloudFormation stack details, in Resources, the NodeInstanceRole appears in the Logical ID column.
-
Click , and on the next page, in Permissions Policies, select the
policies from step 1.