Tutorial: MiNiFi to Cloudera Data Flow flow deployment
This tutorial walks you through creating an inbound connection endpoint in Cloudera Data Flow used by a flow deployment to receive data from one or more MiNiFi agents managed by Edge Flow Manager.
-
In a development NiFi environment, create a Controller Service of type
StandardRestrictedSSLContextService at the root
canvas level and name it Inbound SSL Context Service.
- In the Operate palette click Configuration > Controller Services > Create a new controller service
- Filter for ssl, select StandardRestrictedSSLContextService then click Add.
- Click Configure.
- On the Settings tab change the Name to Inbound SSL Context Service, then click Apply.
You do not need to make further configuration on this Controller Service; it acts as a placeholder and will be created with a managed SSL Context when deployed by Cloudera Data Flow.
-
Create a Process Group on the root canvas to hold your flow definition and give
it a name.
This tutorial uses the name ListenHTTP Flow.
- Enter the process group.
-
Inside the Process Group, add a listen processor.
This tutorial uses ListenHTTP.
-
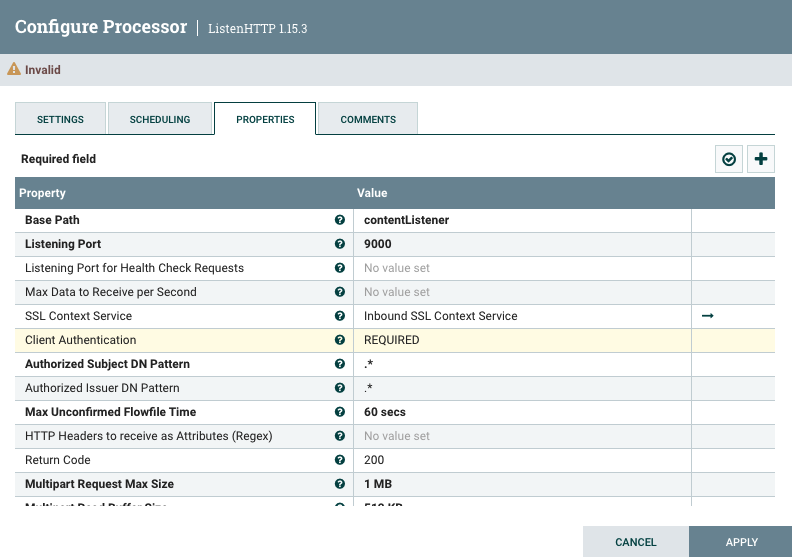
Configure the listen processor:
- Base Path
- This tutorial uses the default contentListener.
- Listening Port
- Define a value that is valid for your use case. This tutorial uses port 9000.
- SSL Context Service
- Select Inbound SSL Context Service.
- Client Authentication
- Select REQUIRED.
-
Connect the ListenHTTP processor to a downstream processor of your
choice.
This tutorial uses LogAttribute, where all relationships terminate.
- From the root canvas, right click on the Process Group and select Download flow definition > Without external controller services.
- Upload the flow definition JSON to the Flow Catalog of your Cloudera Data Flow deployment.
-
Deploy the flow.
-
At the NiFi Configuration step of the Deployment
wizard, select Inbound Connections > Allow NiFi to Receive Data to enable inbound connections.
Accept the automatically created endpoint hostname and automatically discovered port by clicking Next.
- At Parameters, click Next.
- At Sizing & Scaling select the Extra Small NiFi Node Size then click Next.
-
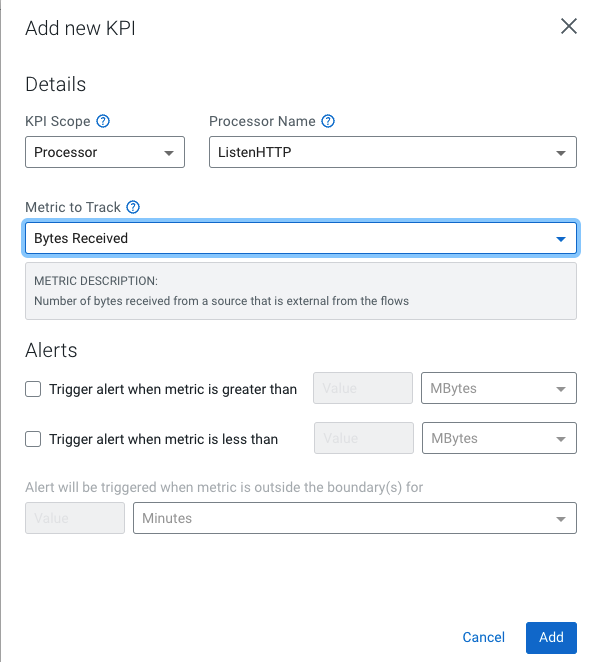
Add a KPI on the ListenHTTP processor to monitor how many bytes it is
receiving, by clicking Add new KPI.
Make the following settings:
- KPI Scope
- Processor
- Processor Name
- ListenHTTP
- Metric to Track
- Bytes Received
- Review the information provided and click Deploy.
Soon after the flow deployment has started, the client certificate and private key required for sending data to the NiFi flow become available for the flow deployment that is being created.
-
At the NiFi Configuration step of the Deployment
wizard, select Inbound Connections > Allow NiFi to Receive Data to enable inbound connections.
-
Collect the information required to configure your load balancer.
-
Once the deployment has been created successfully, select it in the Deployments view and click Manage Deployment.
-
In the Deployment Settings section, navigate to the NiFi Configuration tab to find information about the associated inbound connection endpoint.
-
Copy the endpoint hostname and port and download the certificate and private key.
-
-
Start designing your MiNiFi flow in EFM.
To design a flow for your MiNiFi C++ agent class:
-
Copy the downloaded client-private-key-encoded key and client-certificate-encoded.cer certificate files to the host with the running MiNiFi C++ agent, so they are accessible by filepath from the agent.
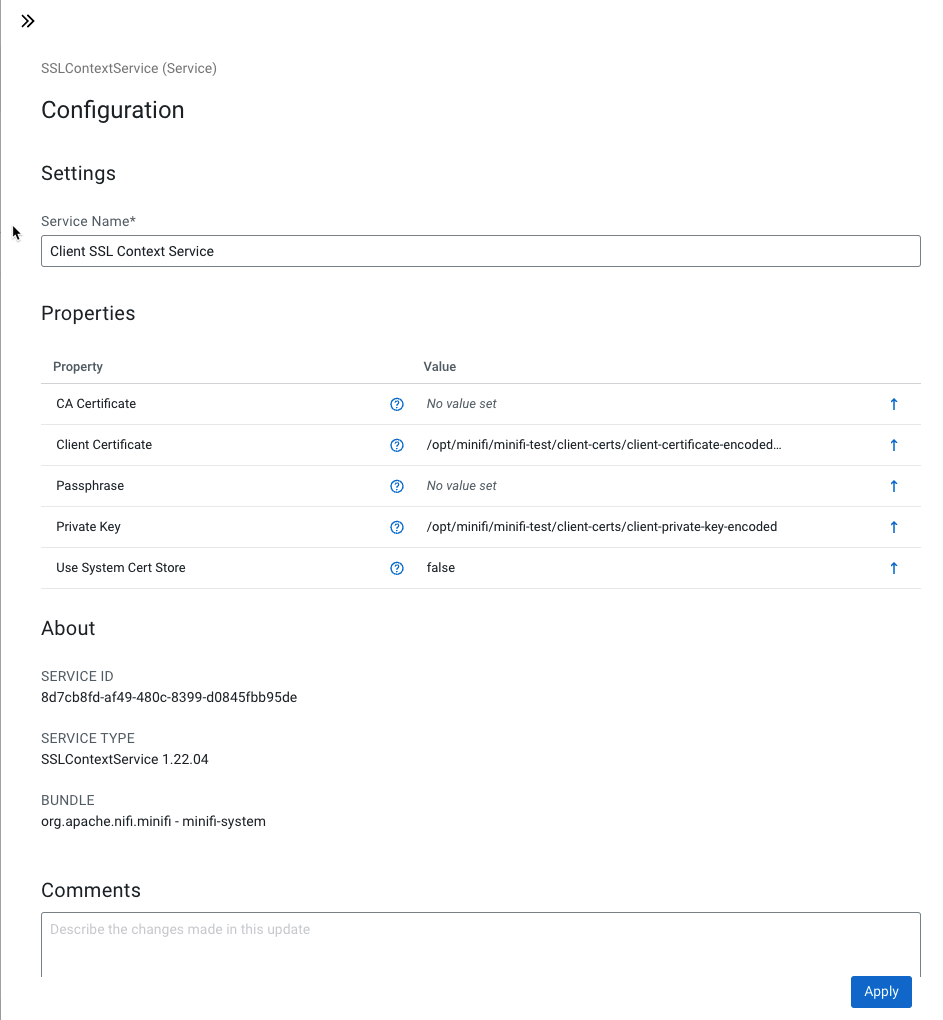
- Create a Service of type SSL Context
Service with the following configuration:
- Service Name
- Specify a name for this service. This tutorial uses Client SSL Context Service.
- CA Certificate
- Leave it empty. As Cloudera Data Flow uses Let's Encrypt as a Certificate Authority, the certificate will be accepted automatically, without additional configuration.
- Client Certificate
[***/PATH/TO/***]client-certificate-encoded.cerFor example, /opt/minifi/minifi-test/client-certs/client-certificate-encoded.cer.
- Passphrase
- Set no value.
- Private Key
[***PATH/TO/***]client-private-key-encodedFor example, /opt/minifi/minifi-test/client-certs/client-private-key-encoded
- Use System Cert Store
- Keep the default False value.
- Click Apply.
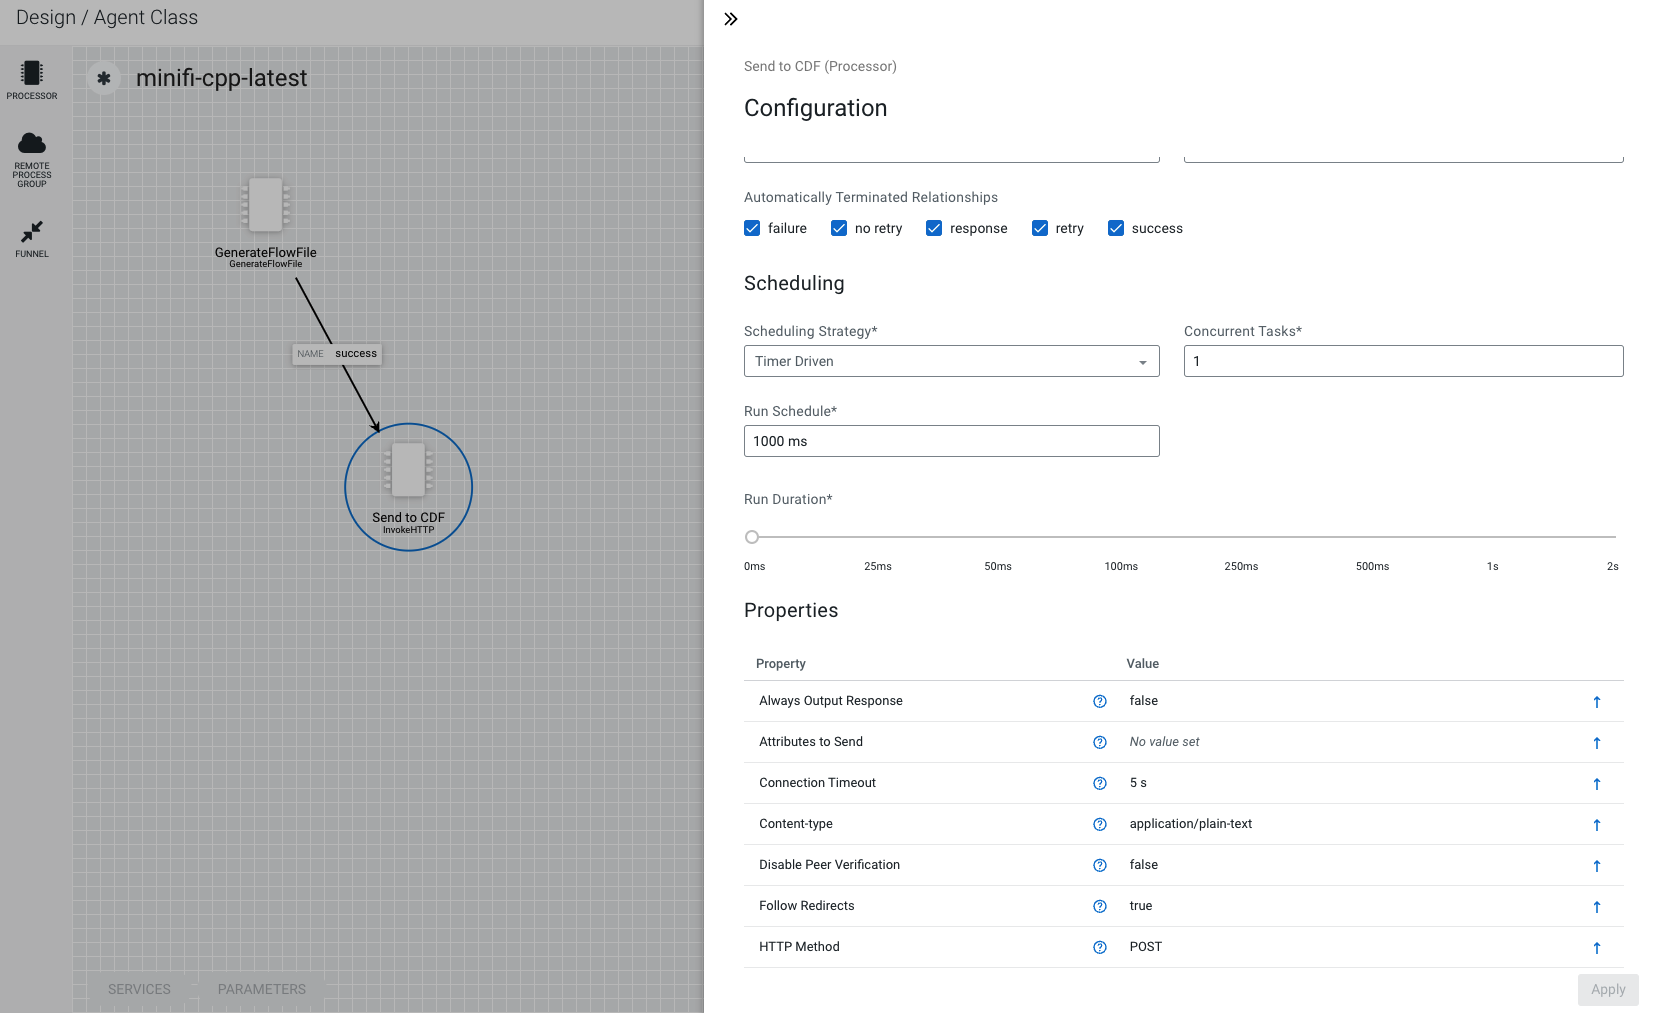
- Create an InvokeHTTP processor named Send to
CDF with the following configuration:
- Automatically Terminated Relationships
- Select all relationships.
- Content-type
- Depends on your flow file data type. This tutorial uses text/plain.
- HTTP Method
- POST
- Remote URL
- https://[***ENDPOINT HOSTNAME COPIED FROM
CLOUDERADATAFLOW FLOW DEPLOYMENT
MANAGER***]:9000/contentListener
For example,
https://my-flow.inbound.my-dfx.c94x5i9m.xcu2-8y8z.mycompany.test:9000/contentListener - SSL Context Service
- Client SSL Context Service
To design a flow for your MiNiFi Java agent class:
- Convert the downloaded
client-private-key-encodedkey andclient-certificate-encoded.cercertificate files to a JKS Keystore:-
Create a PKCS12 keystore:
openssl pkcs12 -export -in client-certificate-encoded -inkey client-private-key-encoded -out client-keystore.p12
-
Convert the PKCS12 keystore to a JKS keystore:
keytool -importkeystore -srckeystore client-keystore.p12 -srcstoretype pkcs12 -destkeystore client-keystore.jks
-
- Copy the resulting client-keystore.jks file to the host with the running MiNiFi Java agent, so they are accessible by filepath from the agent.
- Obtain the CA root cert and add it to truststore
client-truststore.jks, by running the following commands:wget https://letsencrypt.org/certs/isrgrootx1.pem keytool -import -file isrgrootx1.pem -alias isrgrootx1 -keystore client-truststore.jksMiNiFi Java requires you to specify an explicit truststore for inbound connections. Remember the password you used for creating
client-truststore.jks, as you will need it . - Create a Service of type Restricted SSL Context
Service with the following configuration:
- Service Name
- Specify a name for this service. This tutorial uses Client SSL Context Service.
- Keystore Filename
- [***/PATH/TO/***]client-truststore.jks
- Keystore Password
- [***THE PASSWORD YOU PROVIDED WHEN CREATING THE JKS STORE***]
- Key Password
- [***THE PASSWORD YOU PROVIDED WHEN CREATING THE JKS STORE***]
- Keystore Type
- JKS
- Truststore Filename
- client-truststore.jks
- Truststore Type
- JKS
- Truststore Password
- [***THE PASSWORD YOU PROVIDED WHEN CREATING THE CLIENT TRUSTSTORE***]
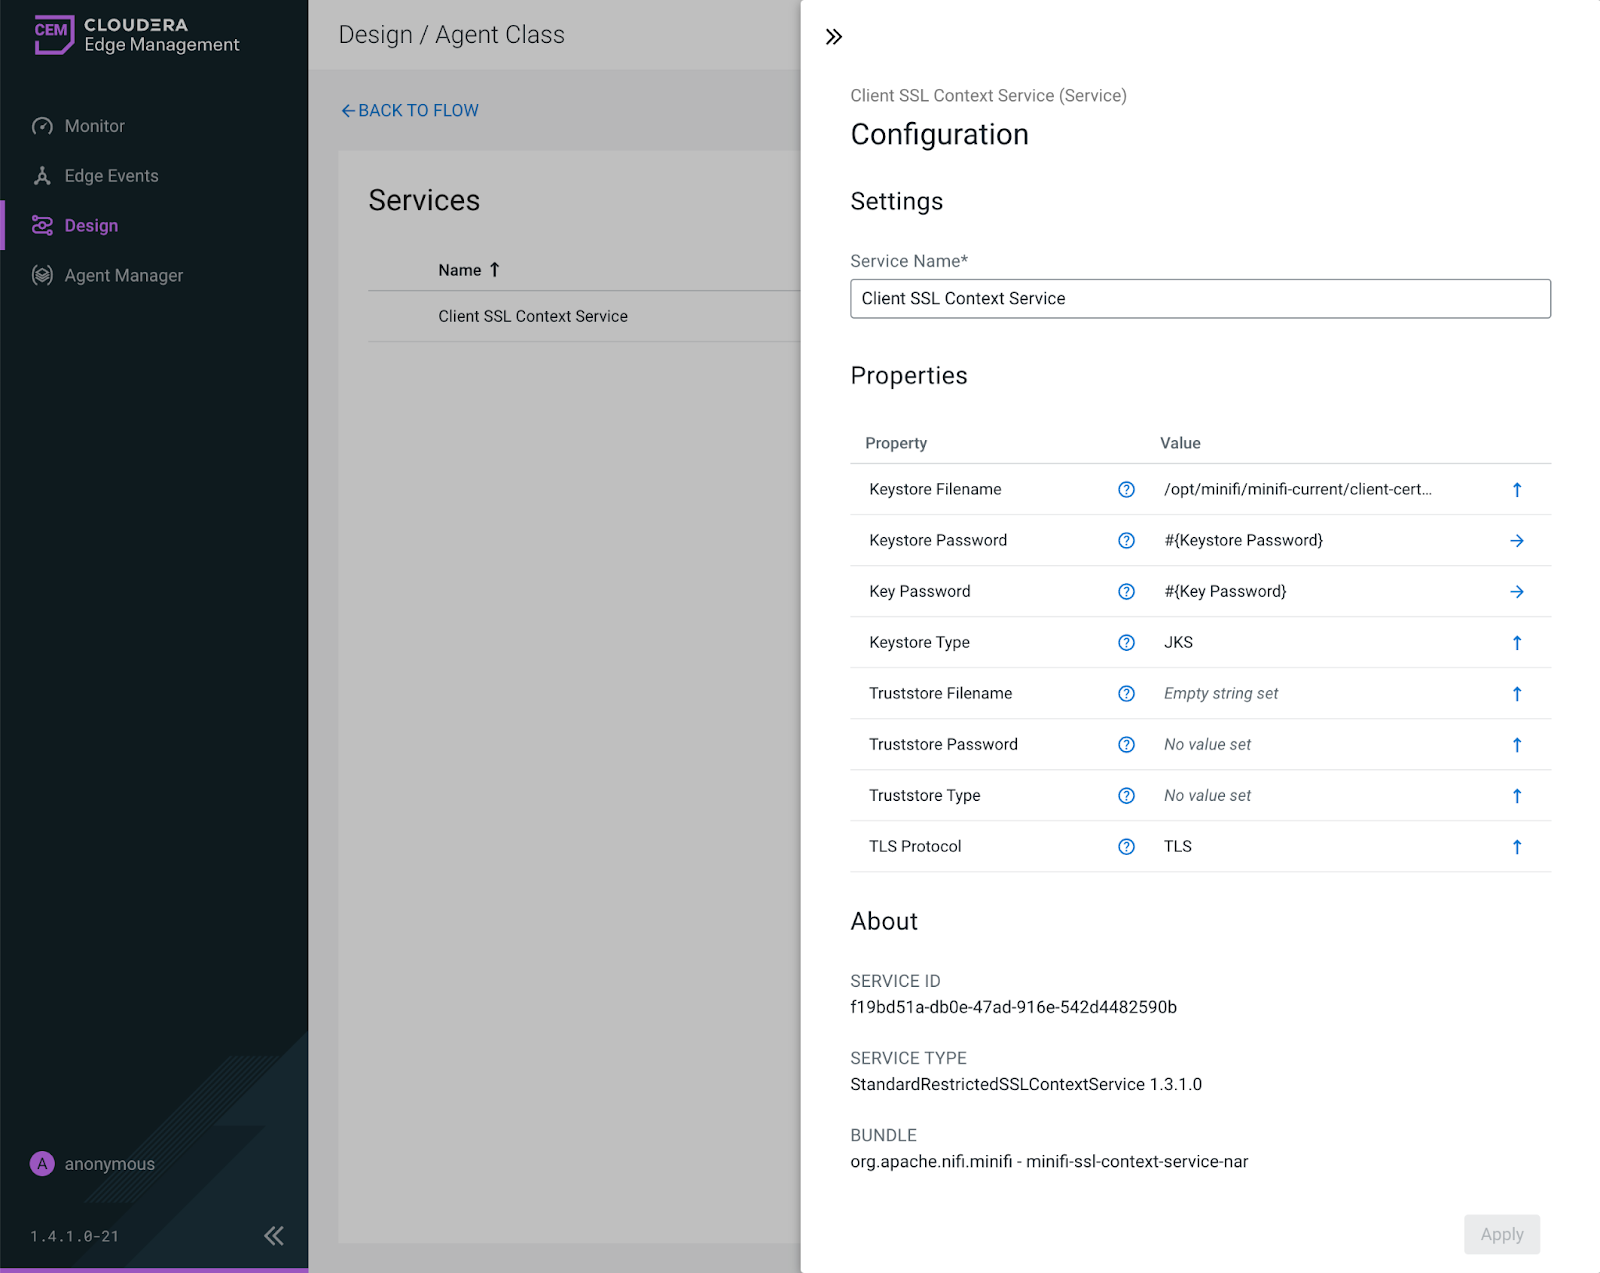
- Click Apply.
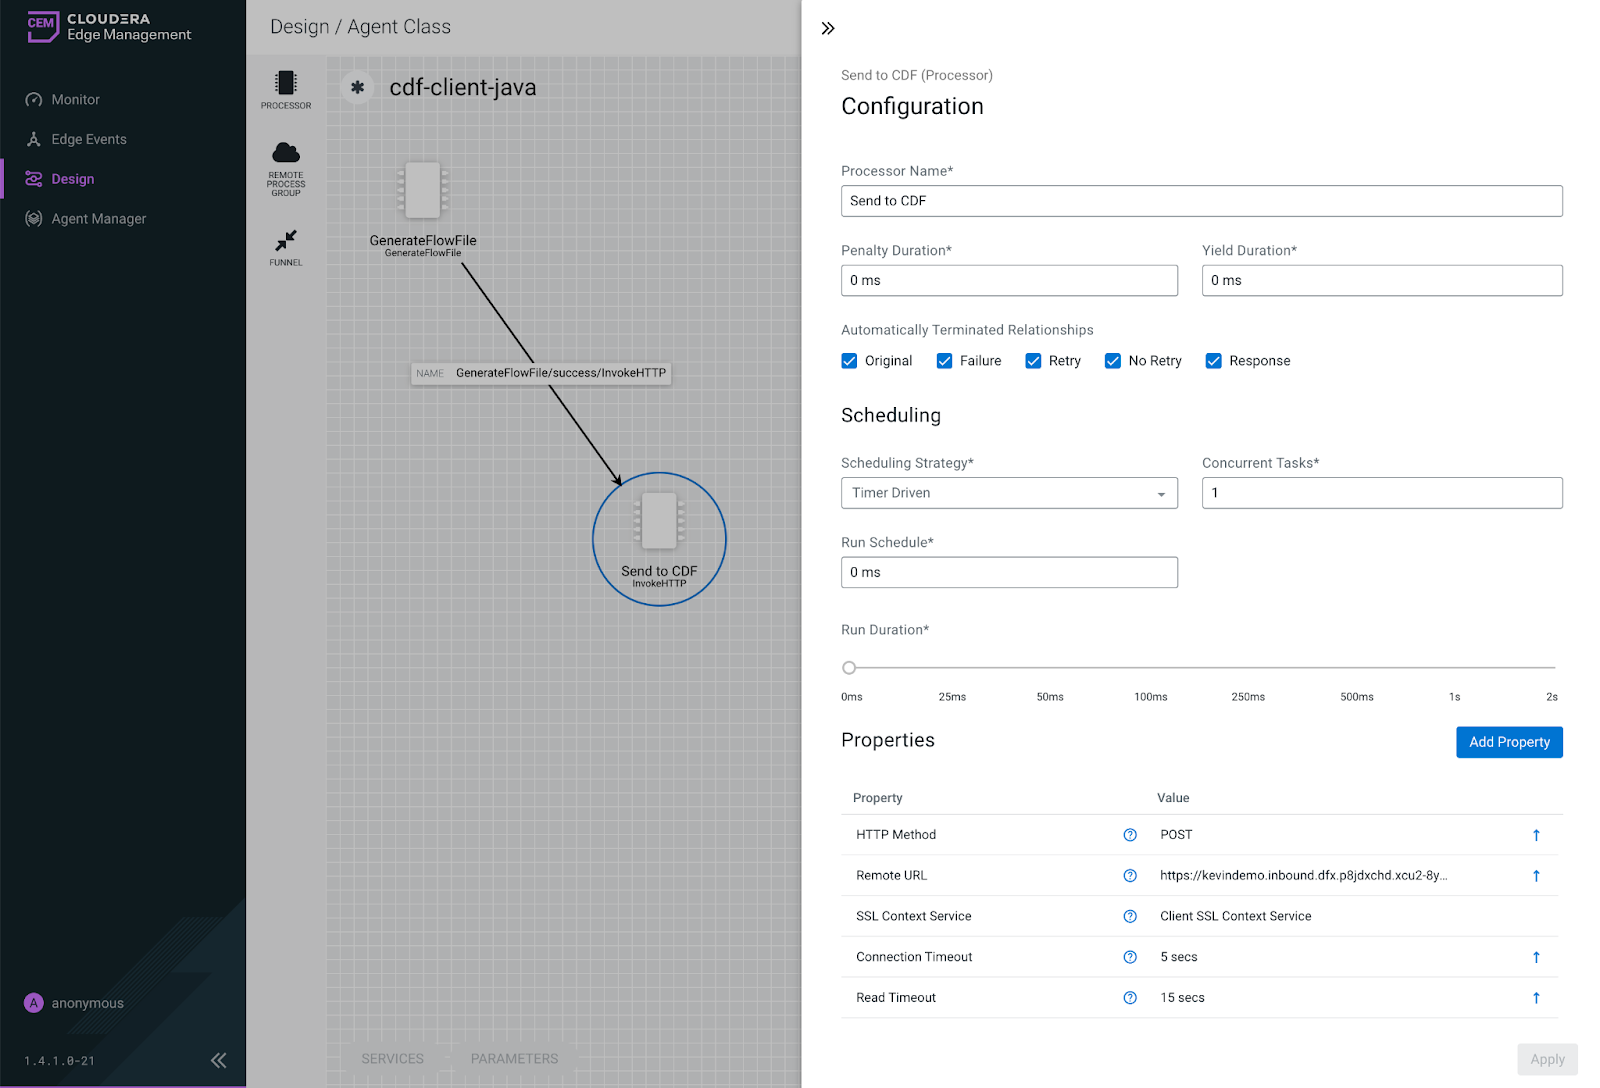
- Create an InvokeHTTP processor named Send to
CDF with the following configuration:
- Automatically Terminated Relationships
- Select all relationships.
- Content-type
- Depends on your flow file data type. This tutorial uses text/plain.
- HTTP Method
- POST
- Remote URL
- https://[***ENDPOINT HOSTNAME COPIED FROM
CLOUDERA DATAFLOW FLOW DEPLOYMENT
MANAGER***]:9000/contentListener
For example,
https://my-flow.inbound.my-dfx.c94x5i9m.xcu2-8y8z.mycompany.test:9000/contentListener - SSL Context Service
- Client SSL Context Service
-
-
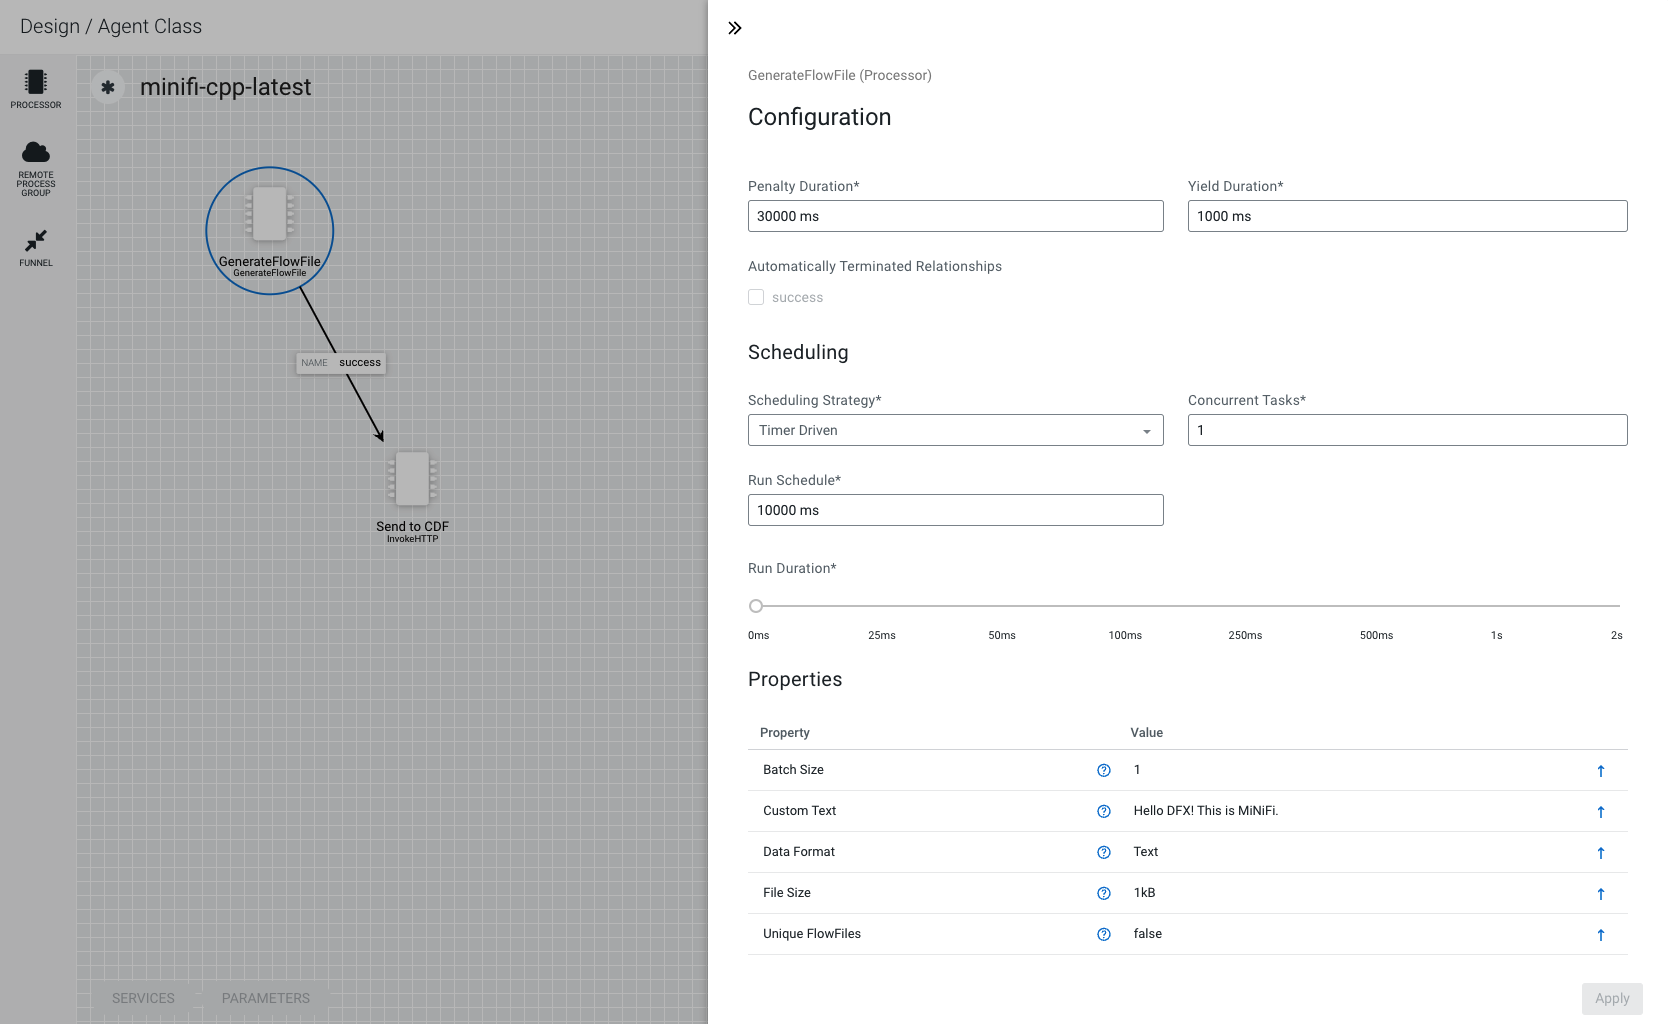
Build the rest of your data flow to read data and send to your Cloudera Data Flow flow deployment using InvokeHTTP. As a
simple example, this tutorial uses the GenerateFlowFile processor, with the
following settings:
- Run Schedule
- Set to 10000 ms (10 seconds).
- Custom Text
- The message you type here will be sent to the ListenHTTP Flow you have created, with the frequency specified by Run Schedule. For example, Hello DFX! This is MiNiFi.
- Data Format
- Set to Text.
- Unique FlowFiles
- Set to false.
-
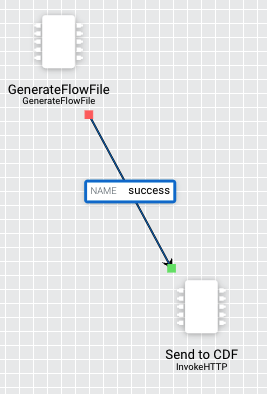
Connect the GenerateFlowFile processor to the InvokeHTTP processor.
- Click Actions > Publish...to publish the flow and start it on your MiNiFi agent.
-
Select your flow deployment in the Cloudera Data Flow
Dashboard and click KPIs.
Observe that your Cloudera Data Flow flow deployment is now receiving data from MiNiFi.
