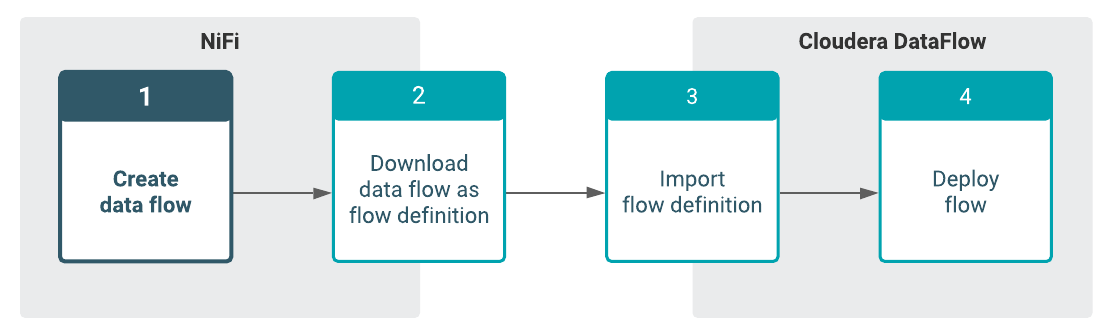
Before you can run a data flow in Cloudera Data Flow, you need to (1)
create the flow in Apache NiFi, (2) download the NiFi flow as a flow definition, (3) import it
to Cloudera Data Flow and finally, (4) deploy the flow. The flow definition acts
as a configuration logic for your flow deployments. It enables you to deploy your data flow
without the need to maintain cluster infrastructure. Also, you can deploy the same flow to
multiple environments in Cloudera Data Flow.
When you want to develop an Apache NiFi flow that you intend to use in Cloudera Data Flow, review and adjust your traditional NiFi flow development
process to make sure that you can create portable data flows that will work in the Cloudera Data Flow environment. Before you get started with flow development,
it is useful to understand where you need special attention and what adjustments you have to
make in your development workflow.
You can create and download flow definitions starting with version 1.11 of Apache NiFi. Cloudera provides the following Apache NiFi based
products:
Cloudera Data Flow for Cloudera Data Hub
Cloudera Flow Management 1.1.0 and higher
HDF 3.5
Cloudera recommends that you develop your flow definitions using Cloudera Data Hub Flow Management clusters. For more information on how to set
up a managed and secured Flow Management cluster in Cloudera on cloud, see Setting up your Flow Management
cluster.
For more information on planning and preparing your NiFi flows for Cloudera Data Flow, see Best Practices for Developing Flow
Definitions.
Create a process group that will contain your NiFi flow.
Drag and drop the process group icon onto the canvas.
Add a name for the process group.
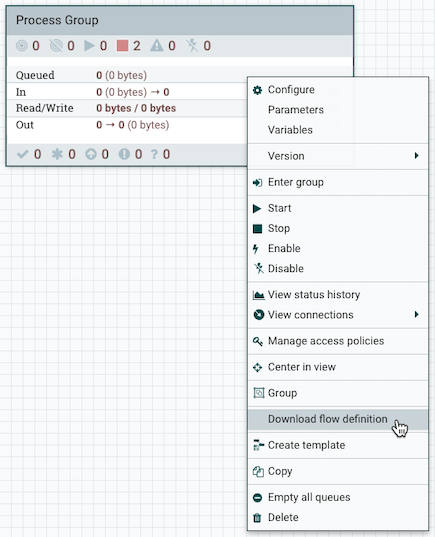
Once you have the new process
group available on the canvas, you can interact with it by right-clicking it and
selecting an option from the context menu. The available options vary depending on the
privileges assigned to you.
Enter the process group by double-clicking it.
Alternatively, you can
select the Enter group option from the context menu.
Add the appropriate flow components to the NiFi canvas.
You can add
processors and other components to build your data flow. To add a processor to your flow,
drag the processor icon to the canvas and select the name of the processor from the
list.
Configure the components in your data flow.
Make sure that you
externalize the component properties where values change depending on the environment in
which the data flow is running. For more information on parameterizing your processor
configurations, see Best Practices for Flow Definition
Development.
Create a parameter context for your data flow and add parameters to
it.
Using parameters for certain properties (for example, connection information,
truststores, or drivers) makes the flow portable. You can download your data flow
from NiFi and then import it to Cloudera Data Flow as a flow
definition. When you deploy the flow definition, you can specify values or upload
files for these parameters in the deployment wizard to adjust them to your
needs.
For instructions on how to set up your parameters, see Best Practices for
Flow Definition Development.
Create controller services for your flow.
If you want to add controller services to your flow that you will later use in Cloudera Data Flow, you must define the controller services in the
configuration of the process group that you will download as a flow definition. In
this case the services will be available to all processors in that process group and
will be available in Cloudera DataFlow as well, when you import your flow
definition.
For more information and instructions on how to set up your controller services,
see Best Practices for Flow Definition Development.
Configure each processor (and any other components) in your flow with the
required values by double-clicking it.
Alternatively, you can right-click
the processor and select the Configure option from the
processor’s context menu.
Parameterize component properties and use controller
services in the configuration where needed. You can use the parameters you
previously created or you can also create new parameters as you configure the
components in your flow. To create a new parameter for a property, select the
(Convert to Parameter) icon in the property’s
row.
After configuring the processors and other data flow components, click
Apply.
Connect the components in the data flow and configure the connections.
Check your data flow to make sure that configuration of all components and
connections is valid.
Your NiFi flow is ready to be downloaded as a JSON
file.Download the data flow as a flow definition from NiFi and
import it to Cloudera Data Flow.