Creating a new draft
Learn about creating a draft in Cloudera Data Flow Flow Designer.
- Make sure that you have DFDeveloper permission to perform this task. For information on account and resource roles, see Cloudera Data Flow Authorization.
- Open Cloudera Data Flowby selecting the DataFlow tile in the Cloudera sidebar.
-
Select
Flow Design in the left navigation pane.
You are redirected to the Flow Design page, where previously created drafts are displayed, one per row.
-
Select
Create Draft.
- Select the Target Workspace where you want to create the draft.
- Select the Target Project to which you want to assign the draft.
-
Provide a valid Draft Name.
Draft names must be unique within a workspace. If a draft with the provided name already exists, you need to provide a different name.
-
Select NiFi Major Version.
Depending on the NiFi version you select, the list of available processors will be different. Currently you cannot change the the NiFi major version of an existing draft.
-
Click Create.
Flow Designer creates a draft and a default Process Group with the Draft Name you provided and you are redirected to the Flow Design canvas. The Configuration pane on the right displays configuration options for the default Process Group.
-
Start building your draft by dragging components to the canvas from the
Components sidebar on the left.
The Configuration sidebar always displays configuration options for the highlighted component. To select a component for configuration, click on it.
-
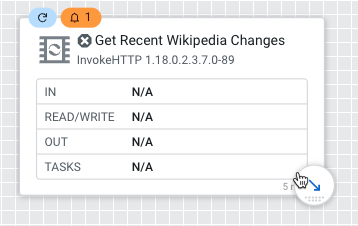
You can connect two processors by hovering the cursor over the lower-right
corner of the source processor, clicking the arrow that appears and dragging it
to the target processor.

-
To test your draft, start a Test Session by clicking Flow Options > Test Session > Start > Start Test Session.
This provisions a NiFi sandbox and allows you to validate your draft and work with live data by starting and stopping components.
-
Once you are confident that your flow design is ready for production, click Flow Options > Publish To Catalog > Publish.
This step turns your draft to a flow definition and adds it to the Catalog. From there, you can deploy your flow to any environment where you have DFFlowAdmin authorization.
