Azure quickstart (Deprecated)
If you've reached the Cloudera landing page for the first time, you've come to the right place! In this quickstart, we'll show you step-by-step how to connect Cloudera to your Azure subscription, so that you can begin to provision clusters and workloads.
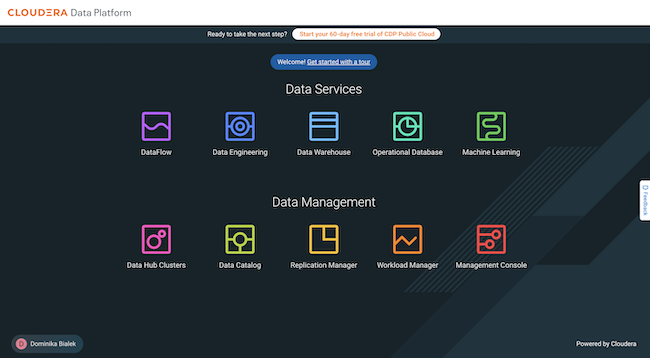
- The Cloudera console pictured above
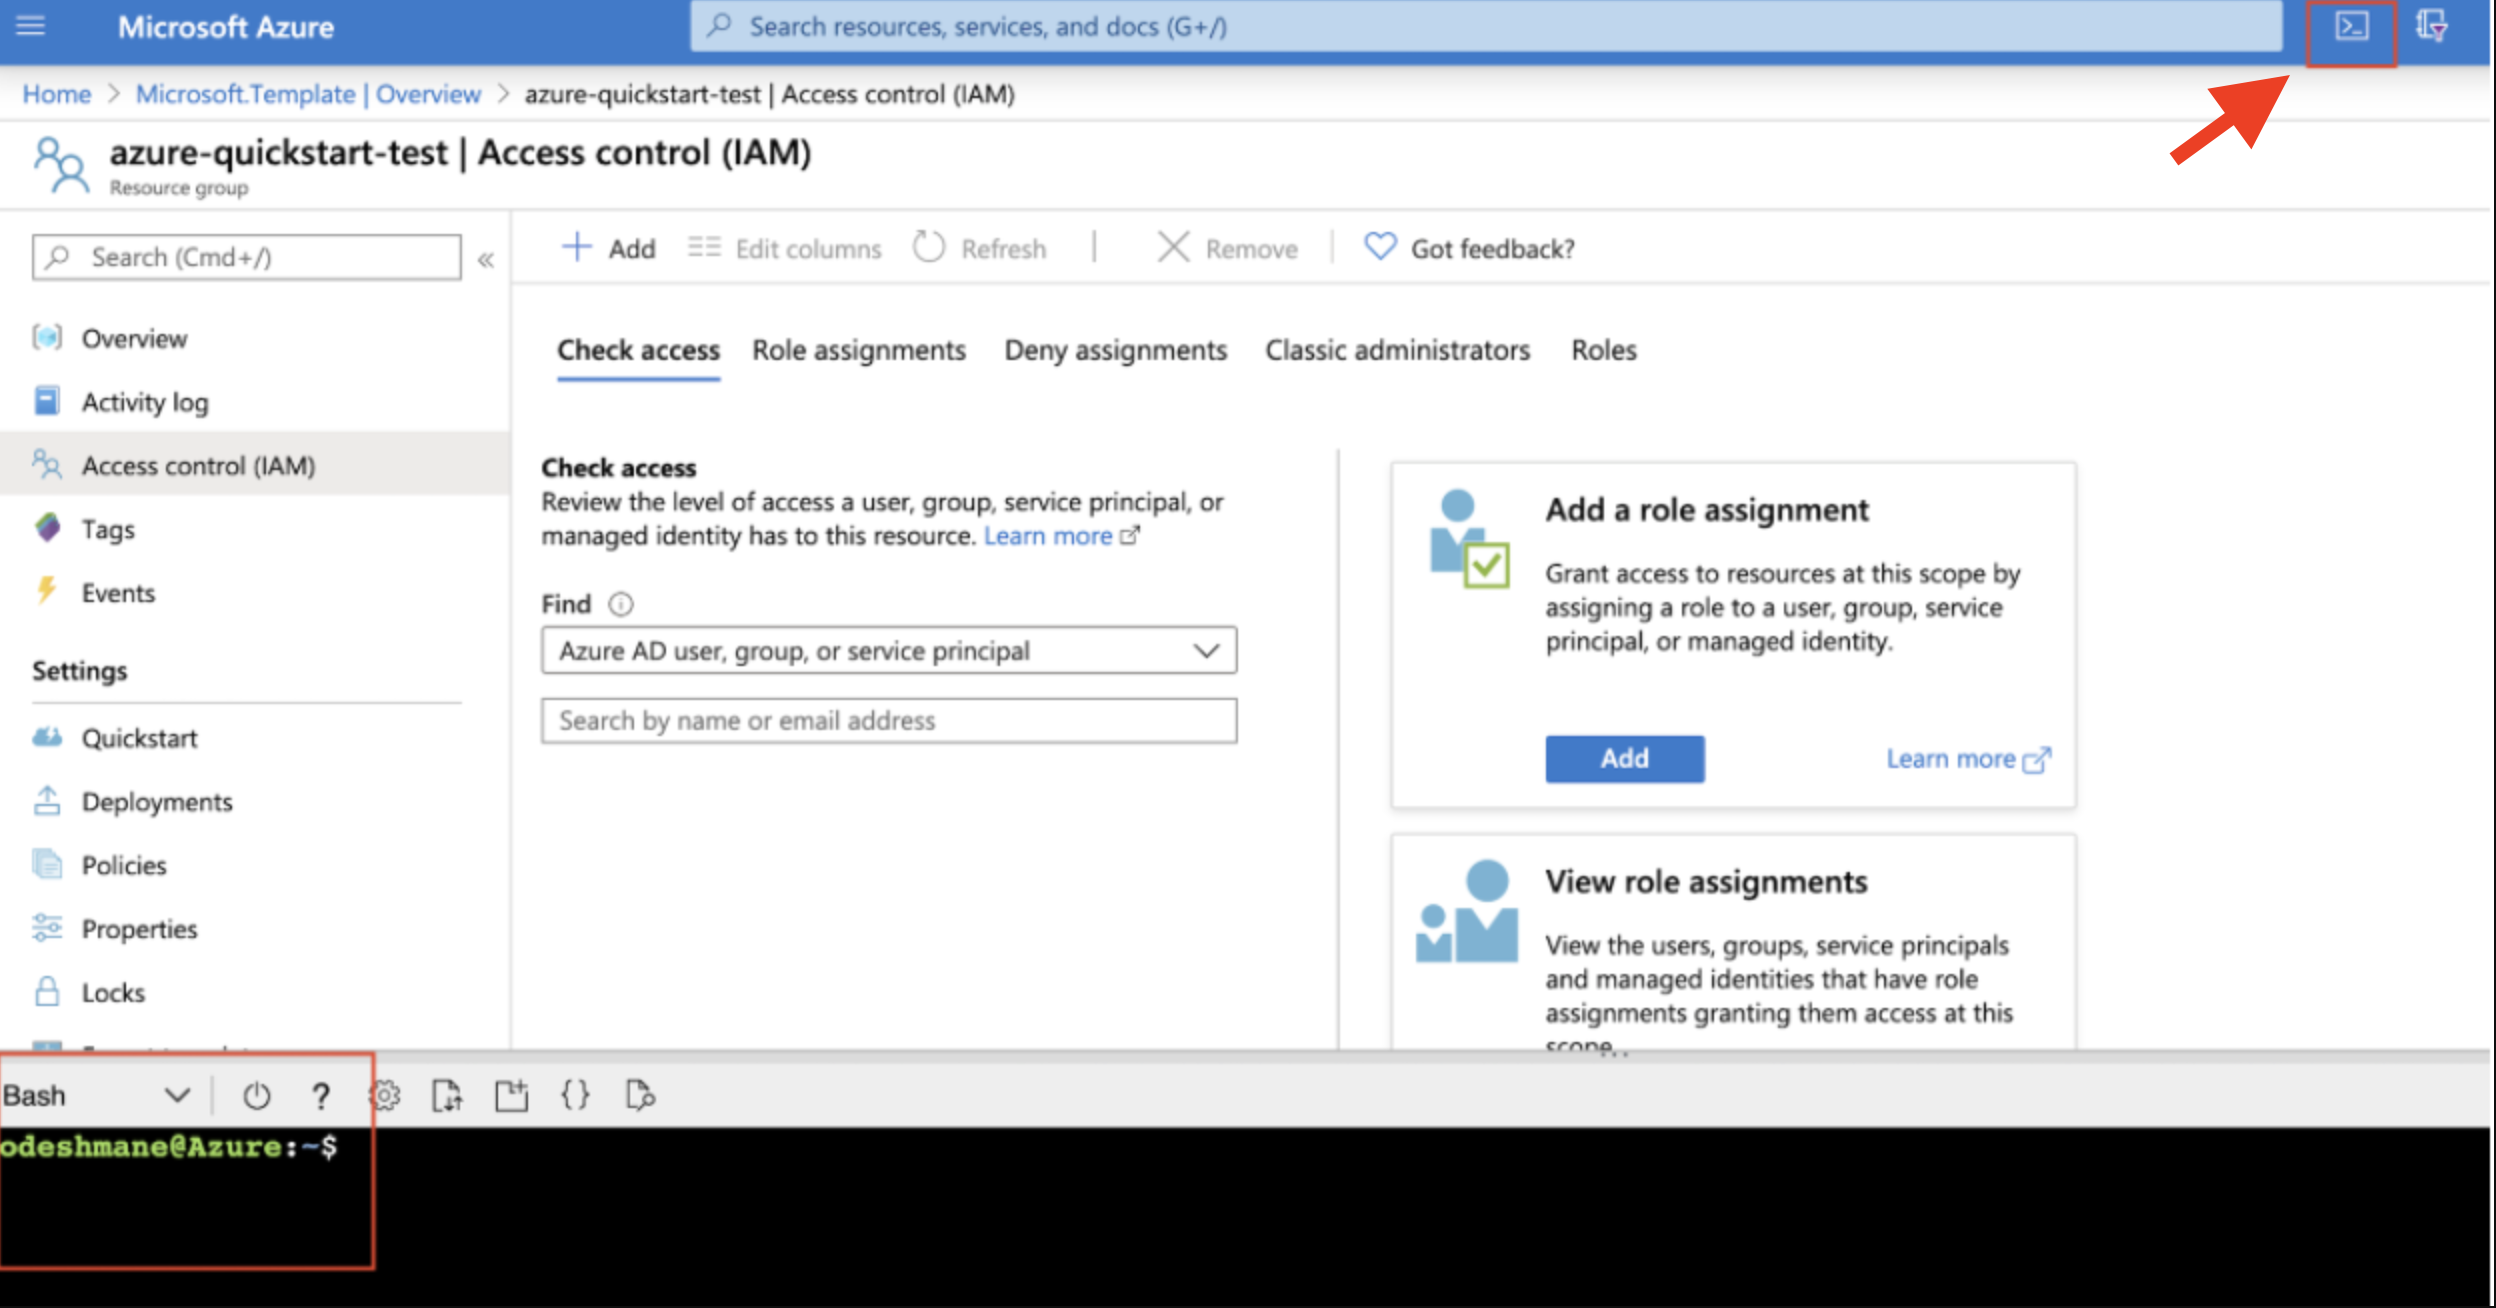
- The Azure console
- Azure Cloud shell

The steps that we will perform are:
Step 0: Verify the Azure prerequisites
Step 1: Create an Azure AD app
Step 2: Deploy the Azure quickstart template
Step 3: Assign roles
Step 4: Create or locate an SSH key
Step 5: Create a Cloudera credential
Step 6: Register a Cloudera environment
Verify Azure cloud platform prerequisites
Before getting started with the Azure onboarding quickstart, review and acknowledge the following:
- This Azure onboarding quickstart is intended for simple CDP evaluation deployments only. It may not work for scenarios where Azure resources such as VNet, security group, storage accounts, and so on, are pre-created or Azure accounts have restrictions in place.
- User running the Azure onboarding quickstart should have:
- Owner permissions on the Azure subscription that you would like to use for CDP.
- Rights to create Azure resources required by CDP. See list of Azure resources used by CDP.
- Rights to create an Azure AD application (service principal) and assign Contributor role at subscription level.
- CDP Admin role or Power User role in CDP subscription.
- This Azure onboarding quickstart uses an Azure ARM template that automatically creates the required resources such as storage accounts, containers, managed identities, resource groups, and so on.
- CDP Public Cloud relies on several Azure services that should be available and enabled in your region of choice. Verify if you have enough quota for each Azure service to set up CDP in your Azure account. See list of Azure resources used by CDP.
If you have more complex requirements than those listed here, contact Cloudera Sales Team to help you with CDP onboarding.
Create an Azure AD app
In the Azure portal, create an application in your Azure Active Directory tenant. This steps allows you to use the native Cloud Shell terminal and not have to set up Azure CLI.
-
Log in to the Azure portal and launch Cloud Shell.
-
Run the following command to return the subscription ID and tenant ID:
az account list|jq '.[]|{"name": .name, "subscriptionId": .id, "tenantId": .tenantId, "state": .state}'The output of this command is shown below:

Make a note of the subscriptionId and tenantId values. You will need them later.
- Run the command below to create an app in Azure AD and assign the "Contributor"
role at the subscription.
az ad sp create-for-rbac --name http://cloudbreak-app --role Contributor --scopes /subscriptions/{subscriptionId}The output of this command is shown below:

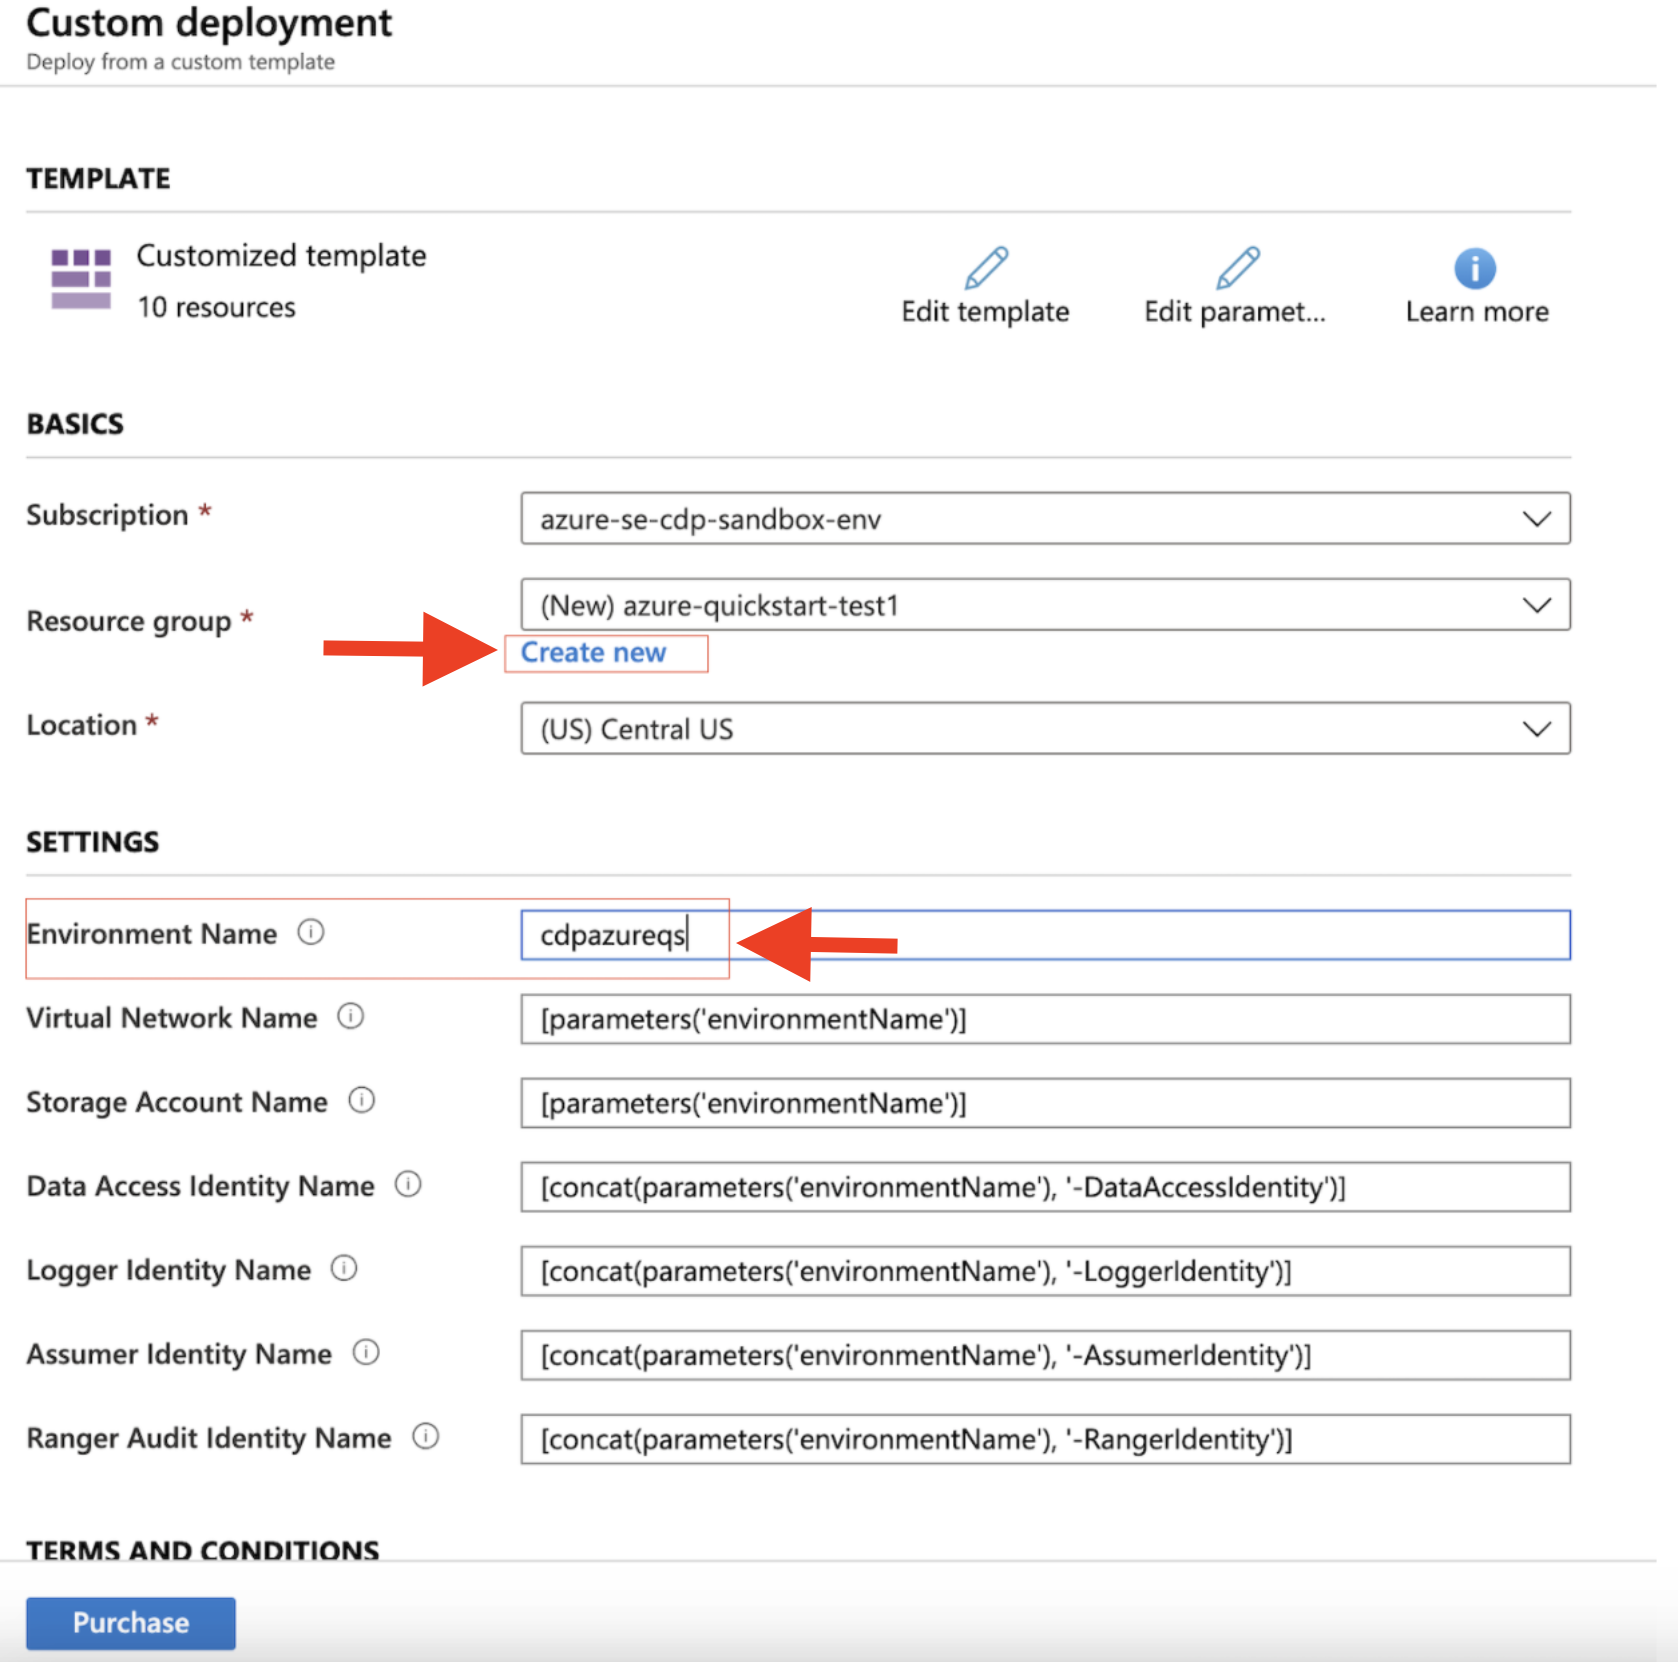
Deploy the Azure quickstart template
The Azure quickstart template is a customized ARM template that deploys essential Azure resources for the CDP environment.
-
Under Settings, provide an Environment Name in the
corresponding field.
Assign roles
Azure Resource Manager templates do not support role assignments at a scope other than resource groups. Perform the following role assignments through UI or CLI.
-
Replace the following values in the script with the values you have collected thus
far:
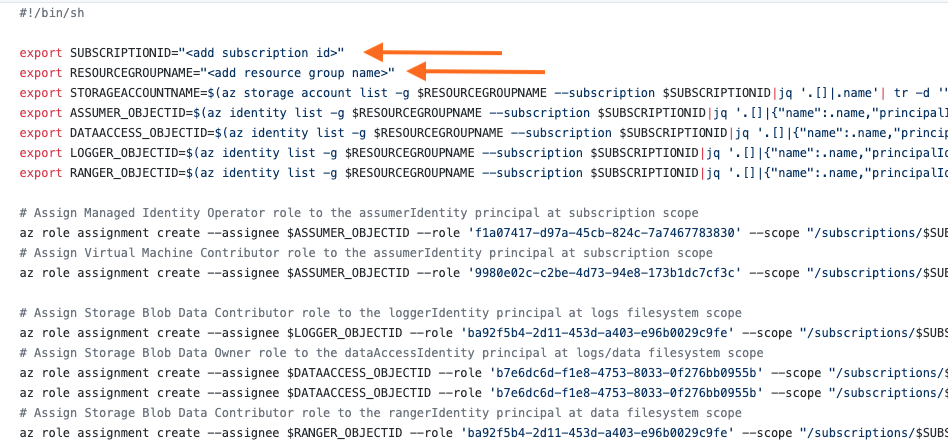
For example, your script should look similar to this:
#!/bin/sh

export SUBSCRIPTIONID="jfs85ls8-sik8-8329-fq0m-jqo7v06dk6sy"
export RESOURCEGROUPNAME="myCDPresourcegroup"
export STORAGEACCOUNTNAME=$(az storage account list -g $RESOURCEGROUPNAME --subscription $SUBSCRIPTIONID|jq '.[]|.name'| tr -d '"')
export ASSUMER_OBJECTID=$(az identity list -g $RESOURCEGROUPNAME --subscription $SUBSCRIPTIONID|jq '.[]|{"name":.name,"principalId":.principalId}|select(.name | test("AssumerIdentity"))|.principalId'| tr -d '"')
export DATAACCESS_OBJECTID=$(az identity list -g $RESOURCEGROUPNAME --subscription $SUBSCRIPTIONID|jq '.[]|{"name":.name,"principalId":.principalId}|select(.name | test("DataAccessIdentity"))|.principalId'| tr -d '"')
export LOGGER_OBJECTID=$(az identity list -g $RESOURCEGROUPNAME --subscription $SUBSCRIPTIONID|jq '.[]|{"name":.name,"principalId":.principalId}|select(.name | test("LoggerIdentity"))|.principalId'| tr -d '"')
export RANGER_OBJECTID=$(az identity list -g $RESOURCEGROUPNAME --subscription $SUBSCRIPTIONID|jq '.[]|{"name":.name,"principalId":.principalId}|select(.name | test("RangerIdentity"))|.principalId'| tr -d '"')

# Assign Managed Identity Operator role to the assumerIdentity principal at subscription scope
az role assignment create --assignee $ASSUMER_OBJECTID --role 'f1a07417-d97a-45cb-824c-7a7467783830' --scope "/subscriptions/$SUBSCRIPTIONID"
# Assign Virtual Machine Contributor role to the assumerIdentity principal at subscription scope
az role assignment create --assignee $ASSUMER_OBJECTID --role '9980e02c-c2be-4d73-94e8-173b1dc7cf3c' --scope "/subscriptions/$SUBSCRIPTIONID"
# Assign Storage Blob Data Contributor role to the assumerIdentity principal at logs filesystem scope
az role assignment create --assignee $ASSUMER_OBJECTID --role 'ba92f5b4-2d11-453d-a403-e96b0029c9fe' --scope "/subscriptions/$SUBSCRIPTIONID/resourceGroups/$RESOURCEGROUPNAME/providers/Microsoft.Storage/storageAccounts/$STORAGEACCOUNTNAME/blobServices/default/containers/logs"

# Assign Storage Blob Data Contributor role to the loggerIdentity principal at logs/backup filesystem scope
az role assignment create --assignee $LOGGER_OBJECTID --role 'ba92f5b4-2d11-453d-a403-e96b0029c9fe' --scope "/subscriptions/$SUBSCRIPTIONID/resourceGroups/$RESOURCEGROUPNAME/providers/Microsoft.Storage/storageAccounts/$STORAGEACCOUNTNAME/blobServices/default/containers/logs"
az role assignment create --assignee $LOGGER_OBJECTID --role 'ba92f5b4-2d11-453d-a403-e96b0029c9fe' --scope "/subscriptions/$SUBSCRIPTIONID/resourceGroups/$RESOURCEGROUPNAME/providers/Microsoft.Storage/storageAccounts/$STORAGEACCOUNTNAME/blobServices/default/containers/backups"
# Assign Storage Blob Data Owner role to the dataAccessIdentity principal at logs/data/backup filesystem scope
az role assignment create --assignee $DATAACCESS_OBJECTID --role 'b7e6dc6d-f1e8-4753-8033-0f276bb0955b' --scope "/subscriptions/$SUBSCRIPTIONID/resourceGroups/$RESOURCEGROUPNAME/providers/Microsoft.Storage/storageAccounts/$STORAGEACCOUNTNAME/blobServices/default/containers/data"
az role assignment create --assignee $DATAACCESS_OBJECTID --role 'b7e6dc6d-f1e8-4753-8033-0f276bb0955b' --scope "/subscriptions/$SUBSCRIPTIONID/resourceGroups/$RESOURCEGROUPNAME/providers/Microsoft.Storage/storageAccounts/$STORAGEACCOUNTNAME/blobServices/default/containers/logs"
az role assignment create --assignee $DATAACCESS_OBJECTID --role 'b7e6dc6d-f1e8-4753-8033-0f276bb0955b' --scope "/subscriptions/$SUBSCRIPTIONID/resourceGroups/$RESOURCEGROUPNAME/providers/Microsoft.Storage/storageAccounts/$STORAGEACCOUNTNAME/blobServices/default/containers/backups"
# Assign Storage Blob Data Contributor role to the rangerIdentity principal at data/backup filesystem scope
az role assignment create --assignee $RANGER_OBJECTID --role 'ba92f5b4-2d11-453d-a403-e96b0029c9fe' --scope "/subscriptions/$SUBSCRIPTIONID/resourceGroups/$RESOURCEGROUPNAME/providers/Microsoft.Storage/storageAccounts/$STORAGEACCOUNTNAME/blobServices/default/containers/data"
az role assignment create --assignee $RANGER_OBJECTID --role 'ba92f5b4-2d11-453d-a403-e96b0029c9fe' --scope "/subscriptions/$SUBSCRIPTIONID/resourceGroups/$RESOURCEGROUPNAME/providers/Microsoft.Storage/storageAccounts/$STORAGEACCOUNTNAME/blobServices/default/containers/backups"
Create or locate an SSH Key
CDP requires that you provide a public SSH key for admin access to VM instances.
You can find more information on SSH key requirement in the topic SSH key. If you need to create one, you can do
so by running ssh-keygen -t rsa.
When you complete this step, you have created all of the Azure resources required for this quickstart.
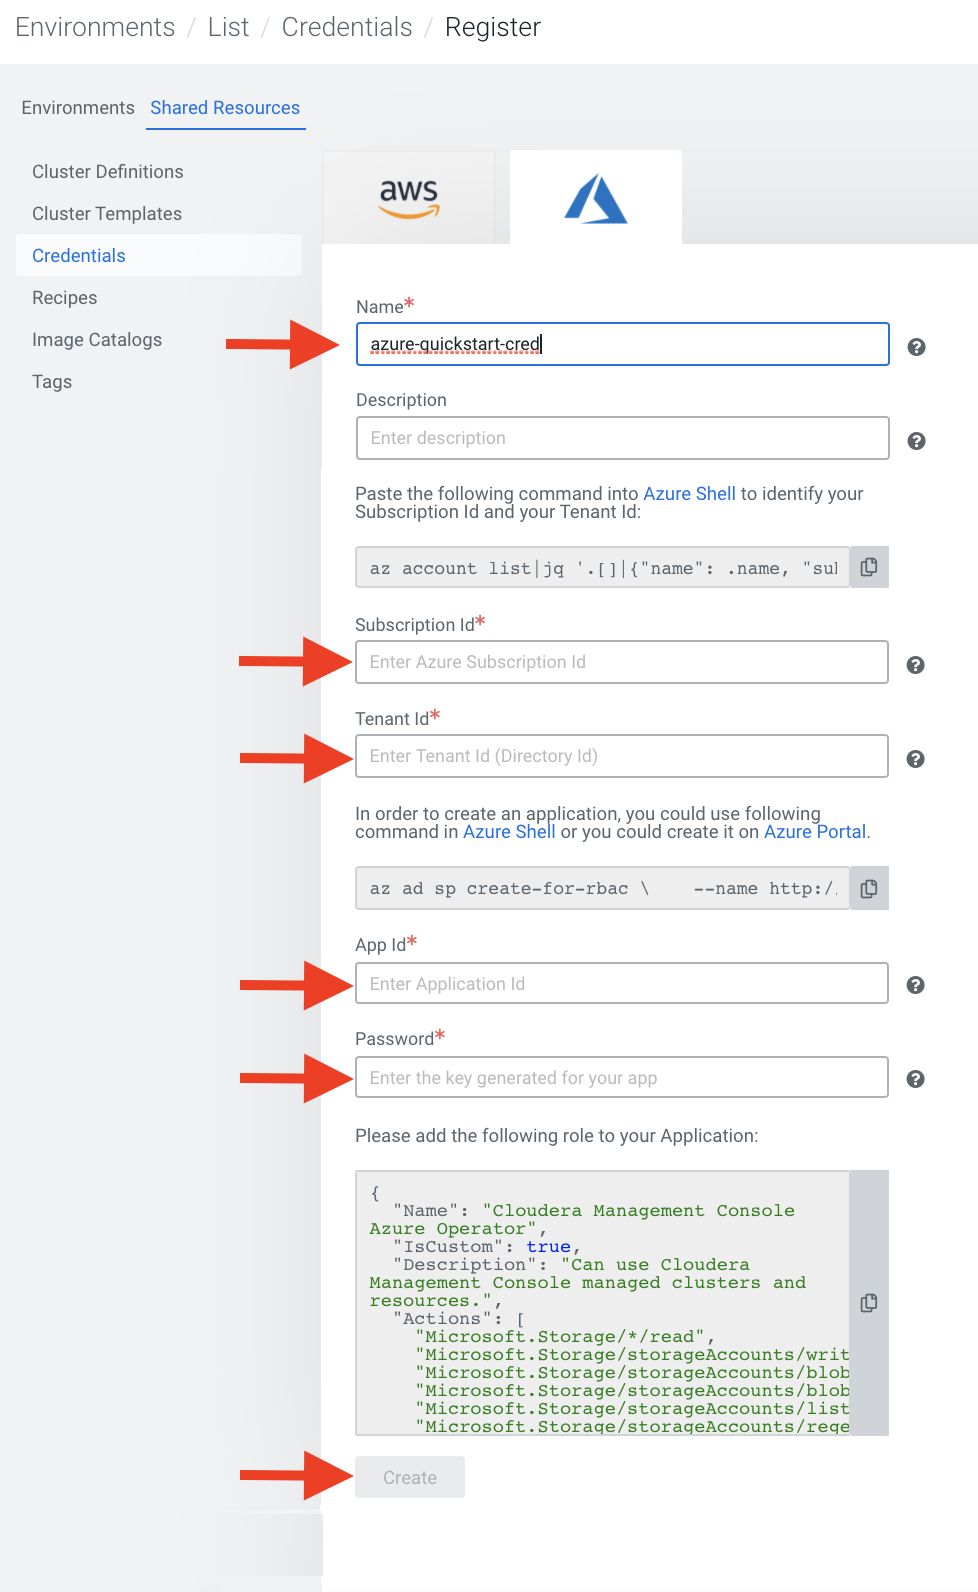
Create a CDP credential
In the CDP Console, the first step is to create a CDP credential. The CDP credential is the mechanism that allows CDP to create resources inside of your cloud account.
- Select the Azure tab, name your credential, and enter the values you previously
collected for subscription ID, app ID, and password.
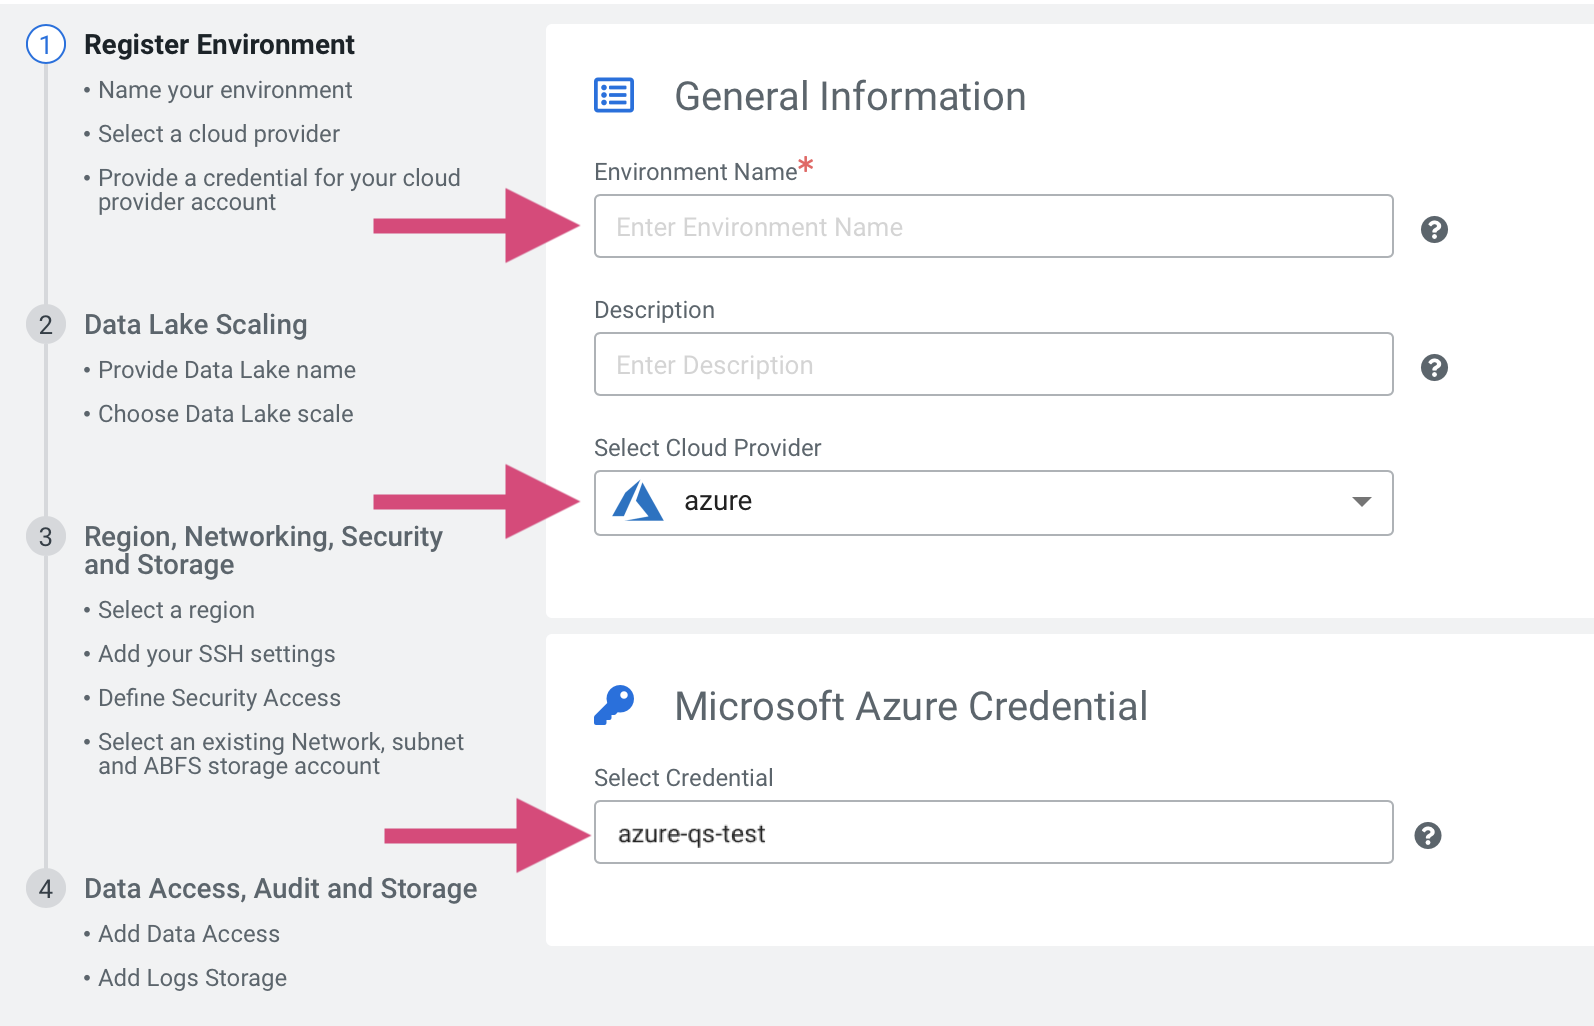
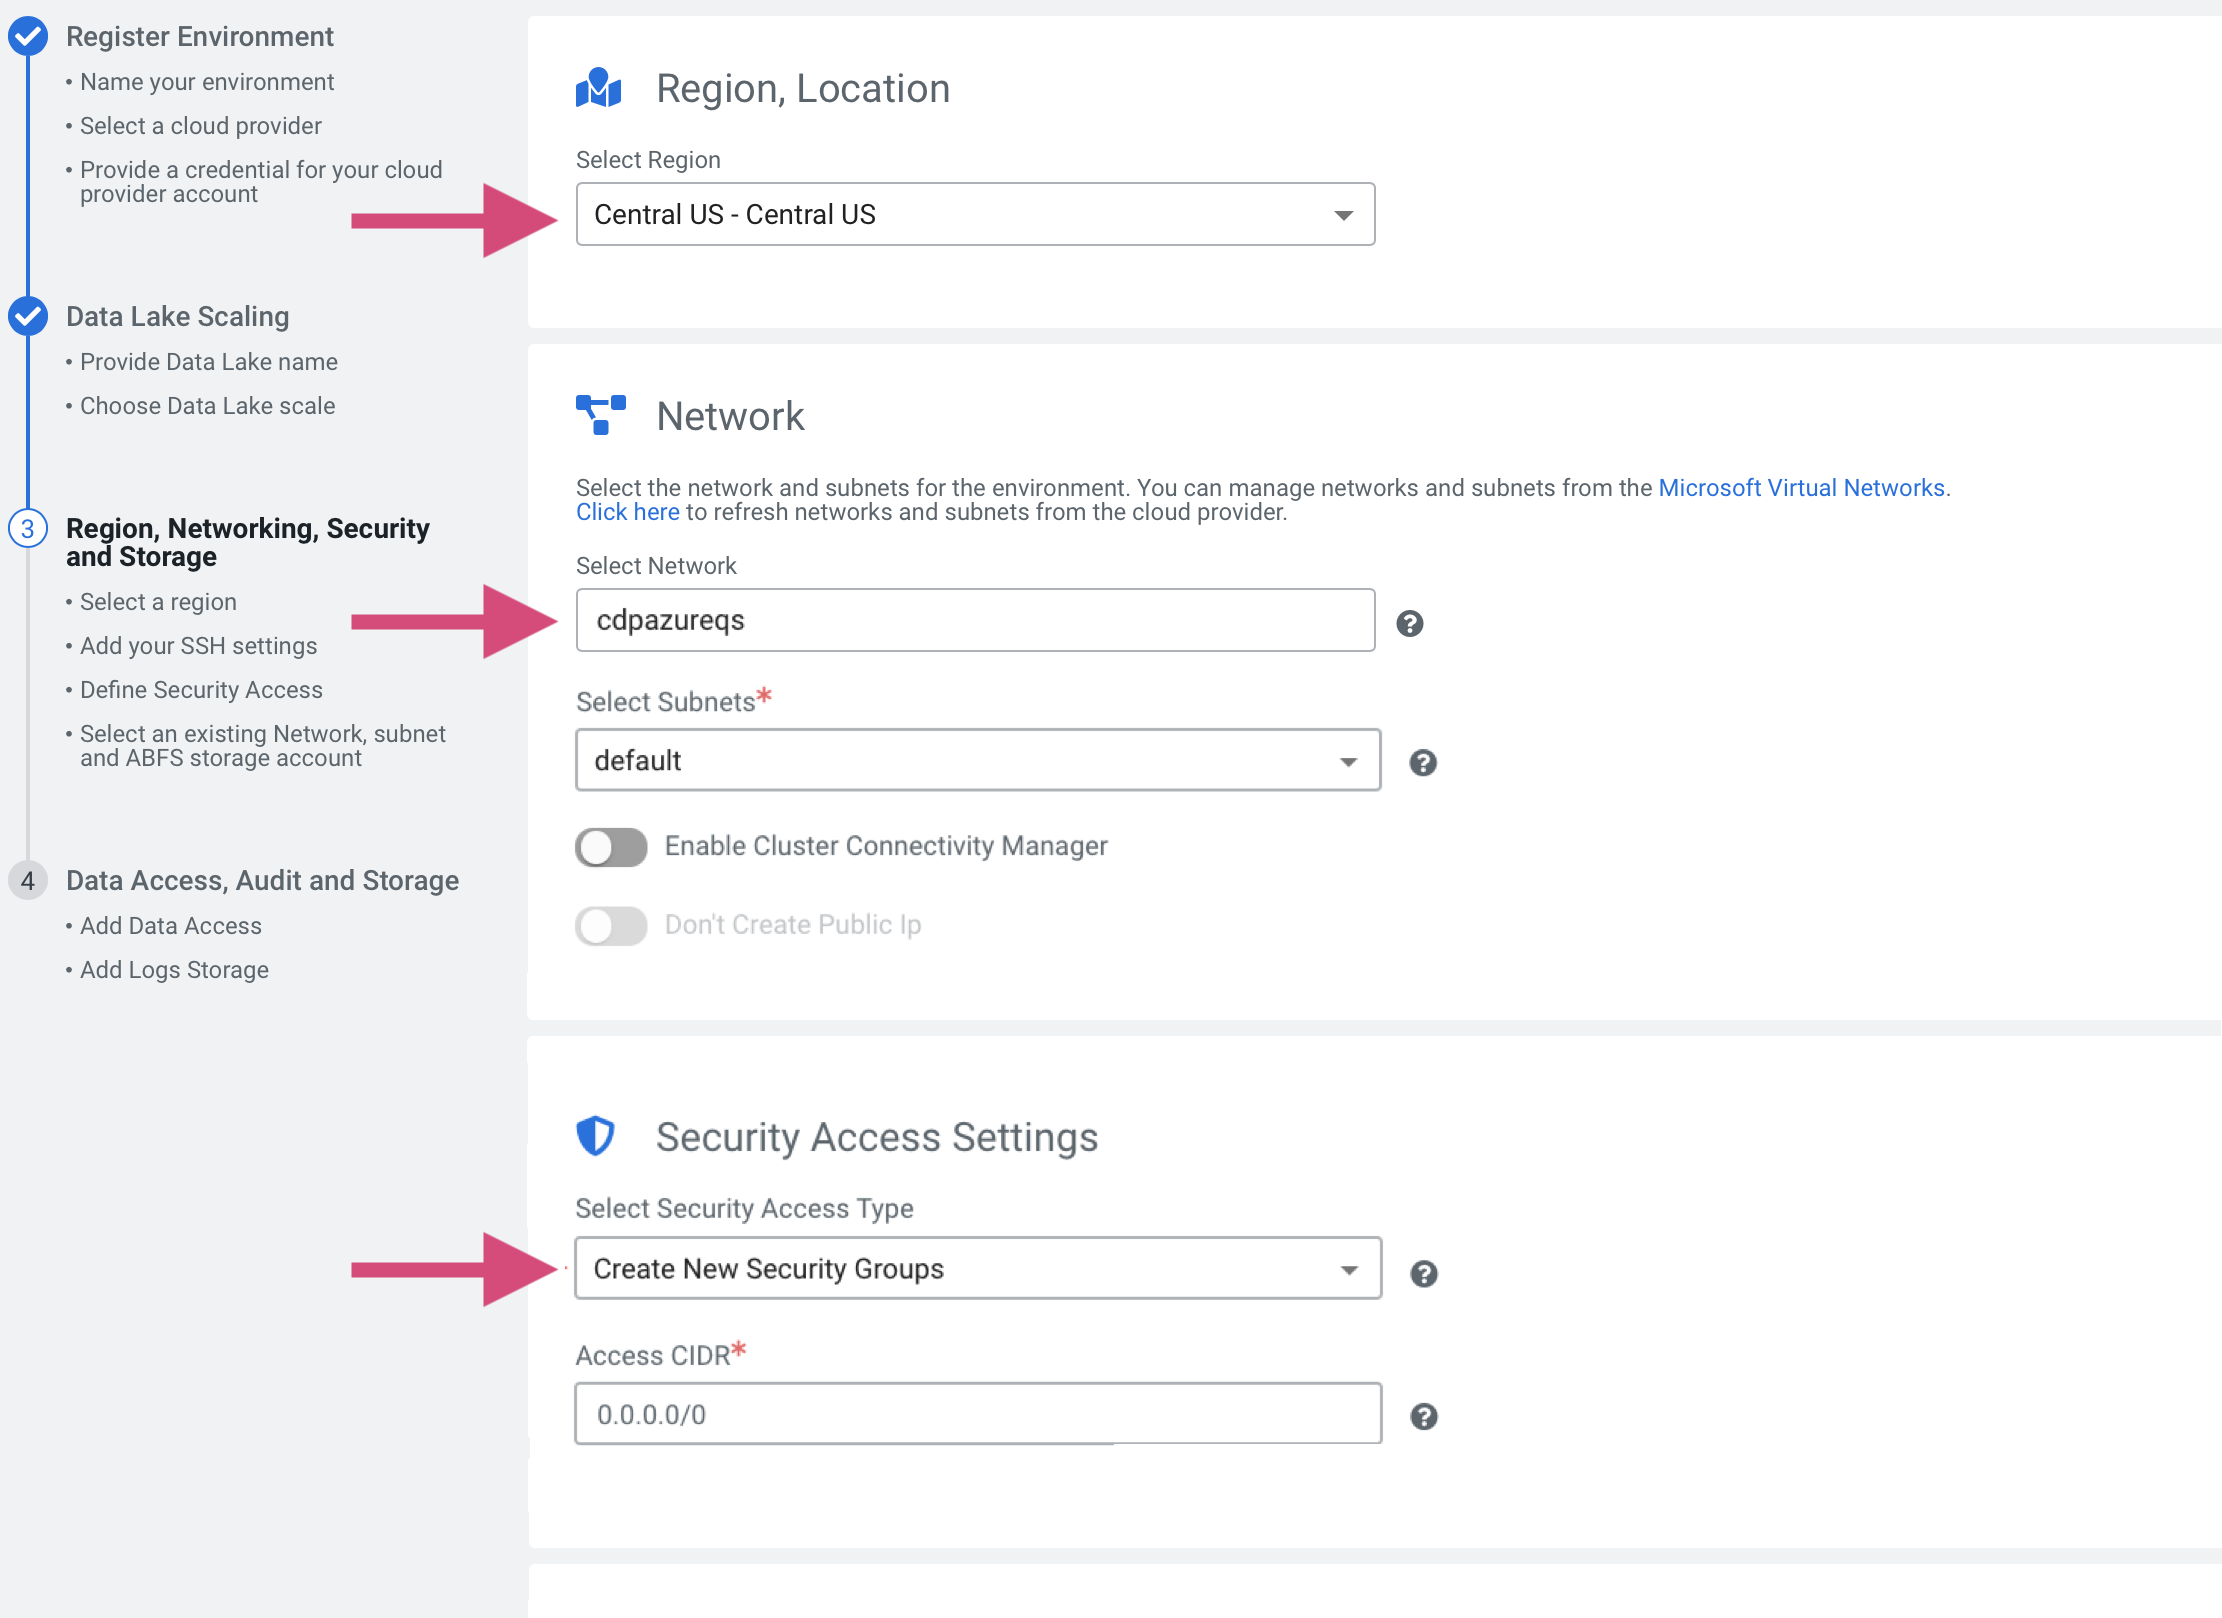
Register a CDP environment
When you register an environment, you set properties related to data lake scaling, networking, security, and storage. You will need your Azure environment name, resource group name, storage account name, and virtual network name from your resource group.
- Under Microsoft Azure Credential, choose the credential you
created in the previous task.
-
Under Data Access and Audit, choose the following:
- Assumer Identity:
<resourcegroup-name>-<envName>-AssumerIdentity - Storage Location Base:
data@<storageaccount-name> - Data Access Identity:
<resourcegroup-name>-<envName>-DataAccessIdentity - Ranger Audit Role:
<resourcegroup-name>-<envName>-RangerIdentity
For example:
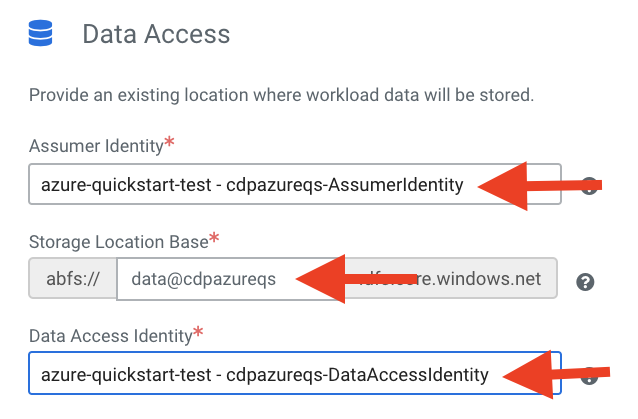
- Assumer Identity:
-
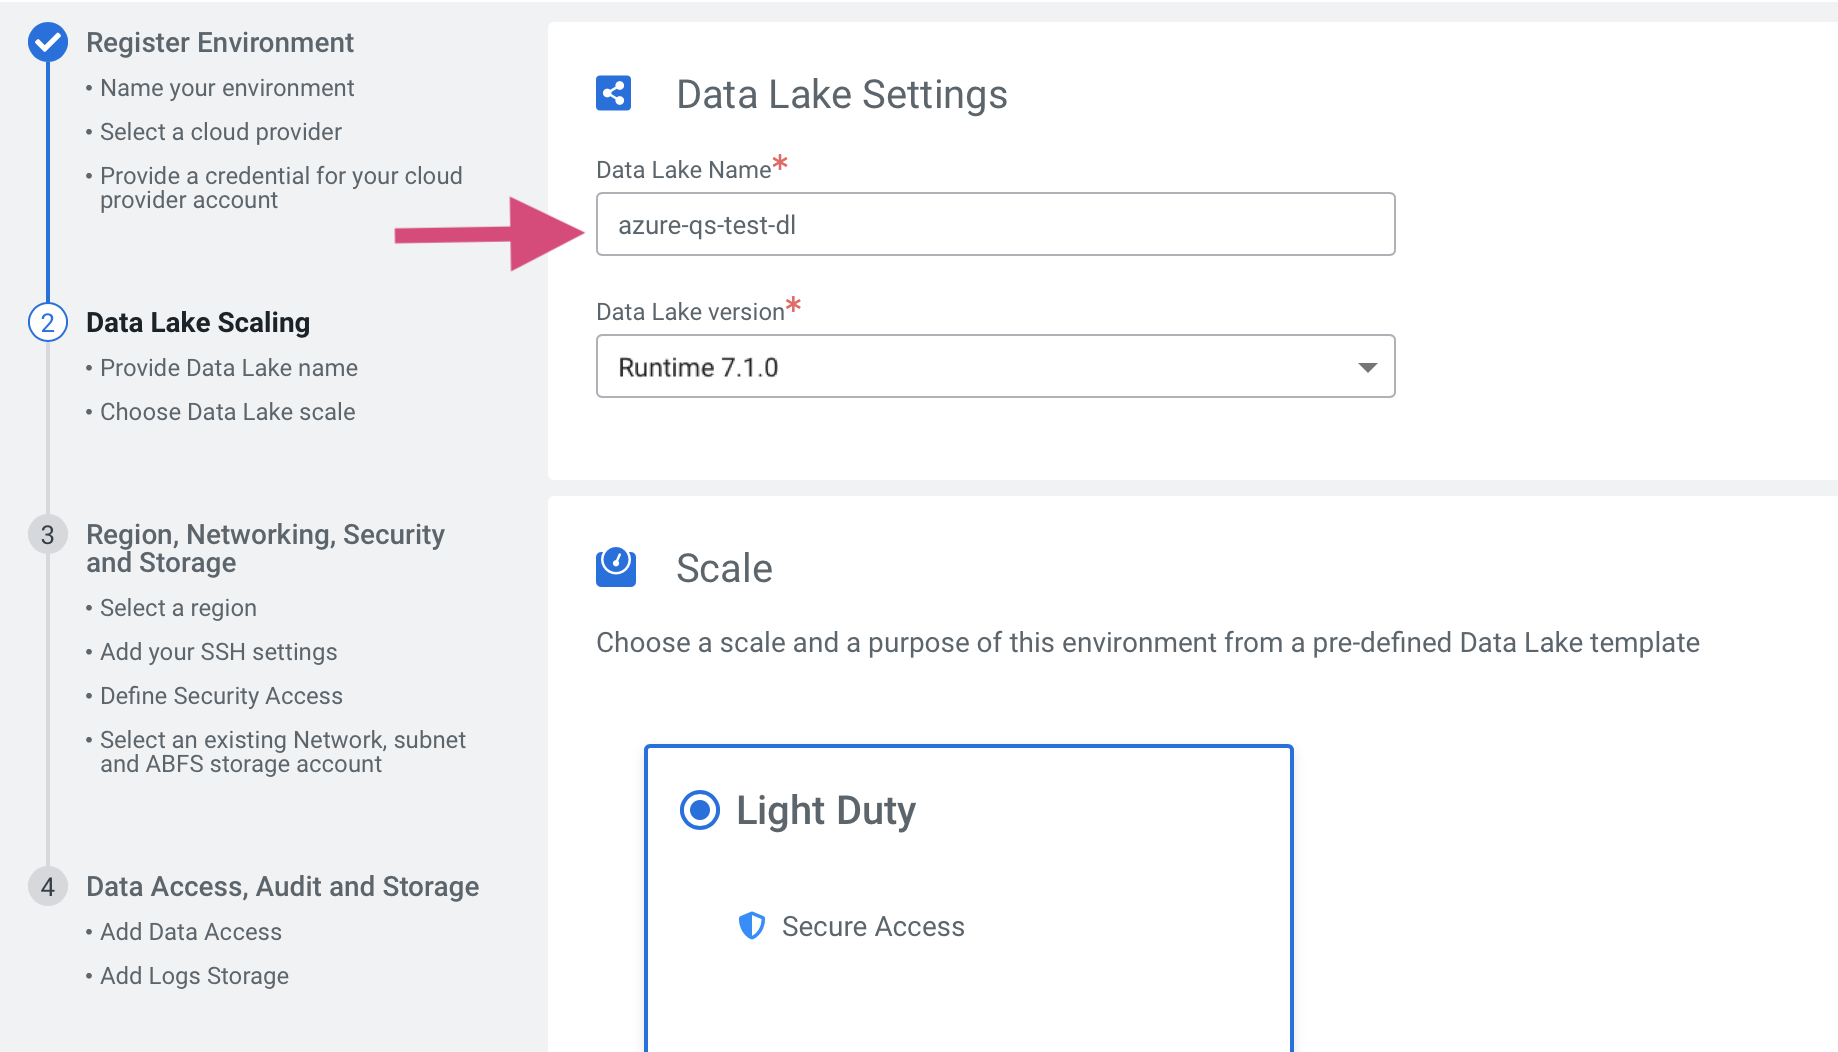
For Data Lake Scale, choose Light
Duty.
- Under Security Access Settings, select Create New
Security Groups for the Security Access Type.
-
Under Logs, choose the following:
- Logger Identity:
<resourcegroup-name>-<envName>-LoggerIdentity - Logs Location Base:
logs@<storageaccount-name> - Backup Location Base: backups@<storageaccount-name>
For example:

- Logger Identity: