Creating a cross-account access IAM role
To allow Cloudera to create resources in your AWS account, you create a cross-account access IAM role in your AWS account and grant Cloudera access to the role as a trusted principal by specifying a specific AWS account and an external ID.
The policy for the cross-account access IAM role must have the permissions enumerated in the documentation linked below. In addition, the IAM role must reference the specific AWS account ID and external ID provided in the Cloudera Management Console.
-
Select Policies on the IAM console and click
Create policy.
Figure 1. Create Policy 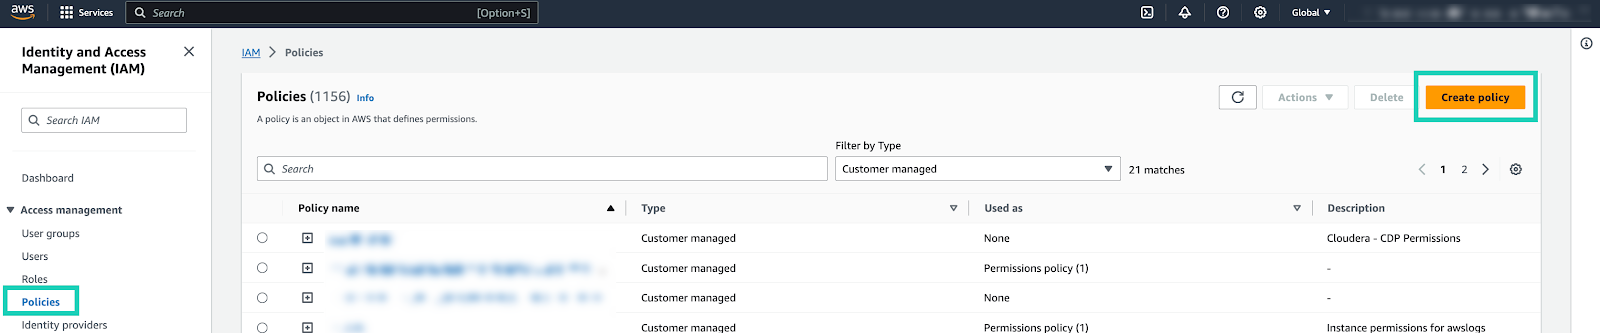
-
Select the JSON tab and paste the
Cross-account Access Policy to the
Policy editor.
Figure 2. Paste Cross-account Access Policy 
-
Enter a name for your policy in the Name field
of the Review policy page.
Figure 3. Enter policy name 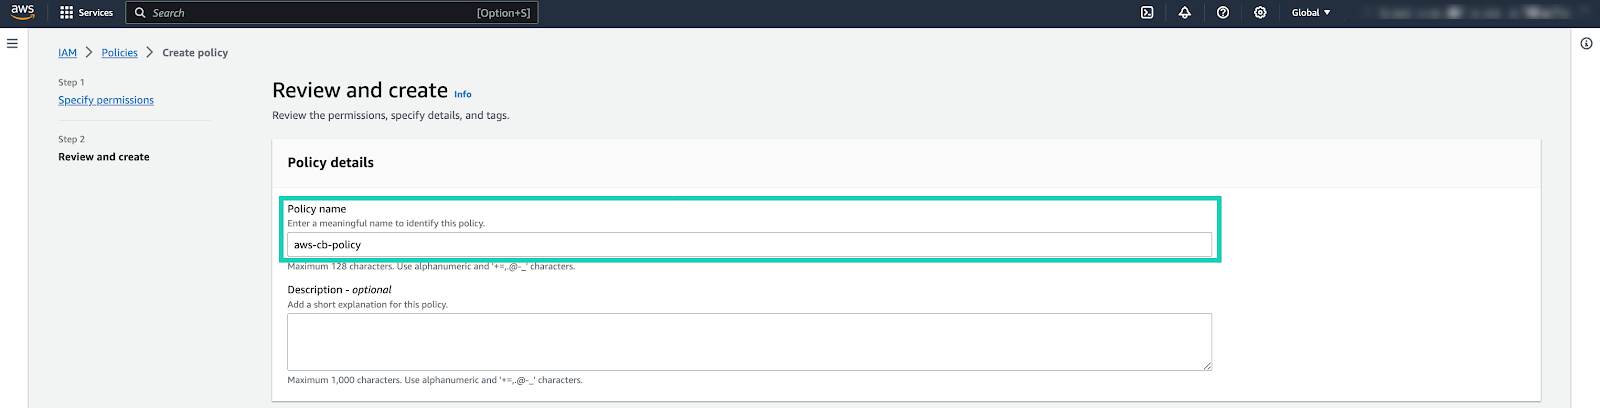
-
Select the JSON tab and paste the
Cross-account Access Policy to the
Policy editor.
-
Select Roles on the IAM console and click
Create role.
Figure 4. Create role 
-
Check another AWS account and provide the following information:
- Copy and paste your Account ID provided in Cloudera to the Accound ID field.
- Check Require external ID under Options.
- Copy and paste the External ID from Cloudera to the External ID field.
Figure 5. Select Trusted Entity 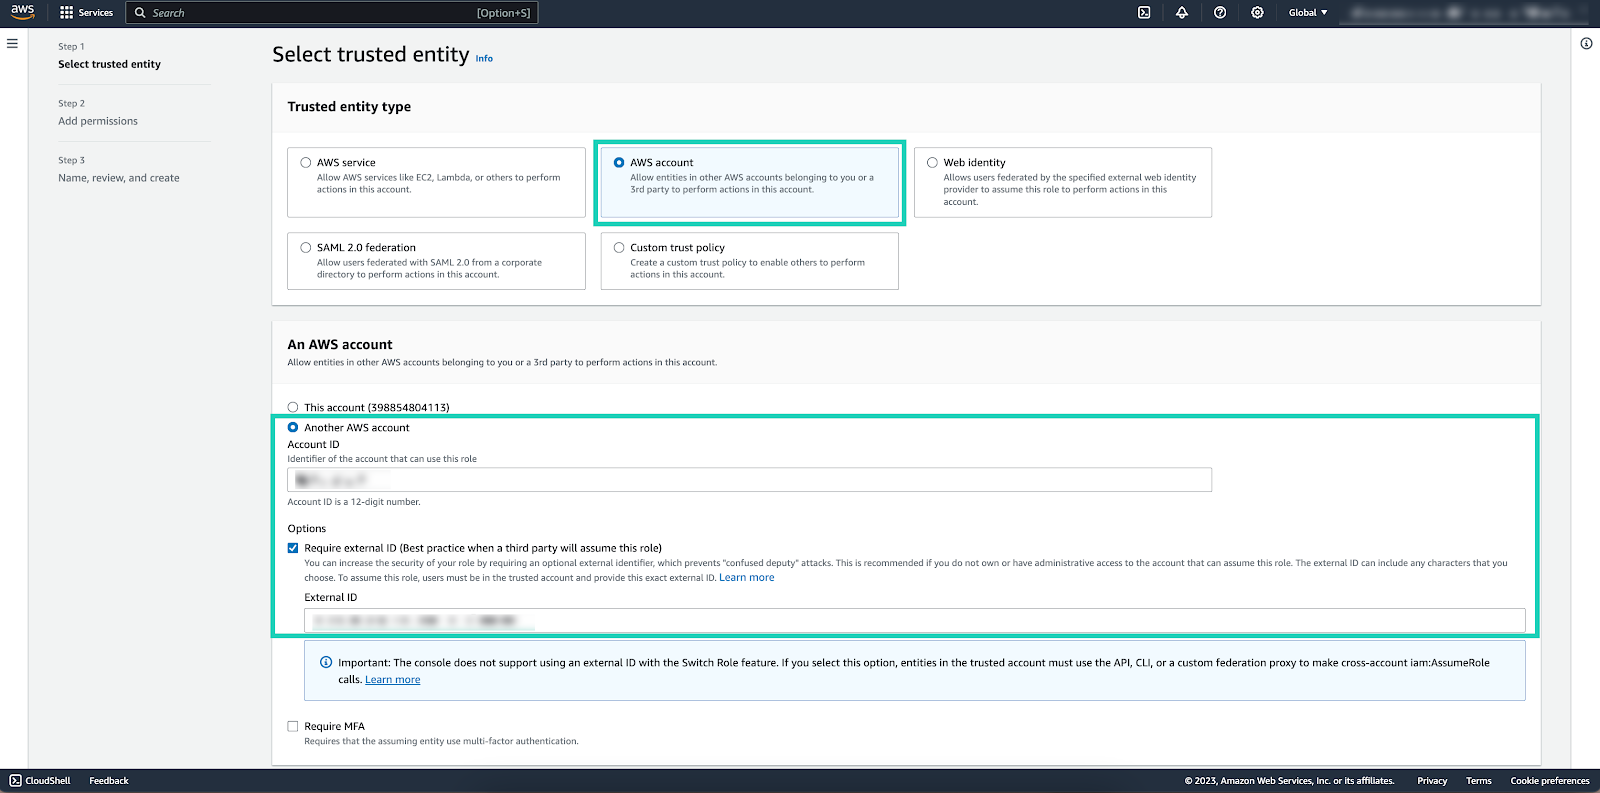
-
Search for the previously created policy, and add the permission to the role by
checking the box.
Figure 6. Add permissions 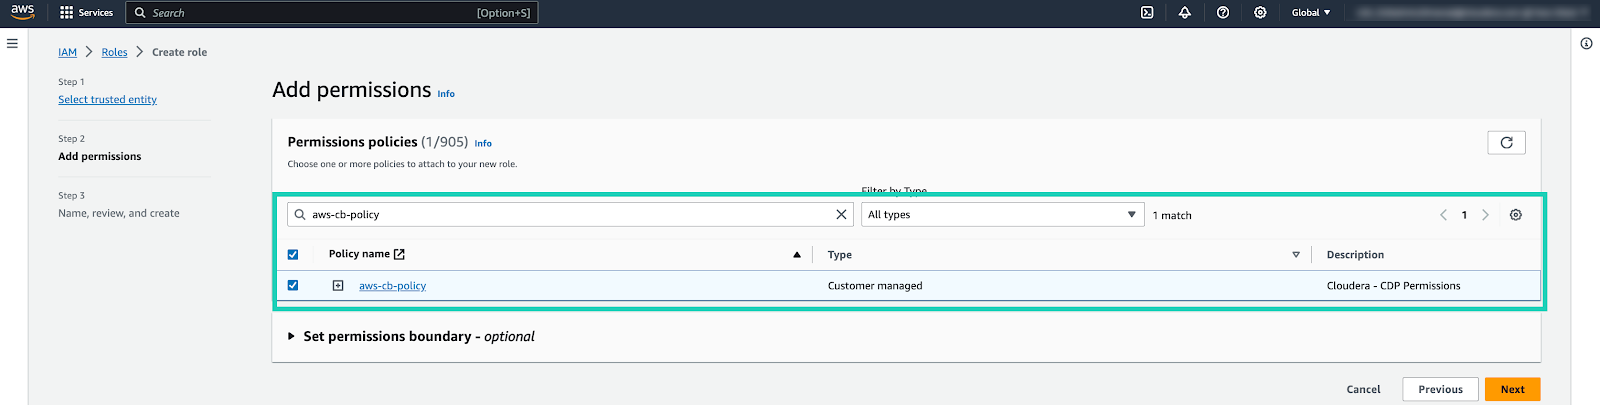
-
Enter a role name in the Role name field.
Figure 7. Name the role 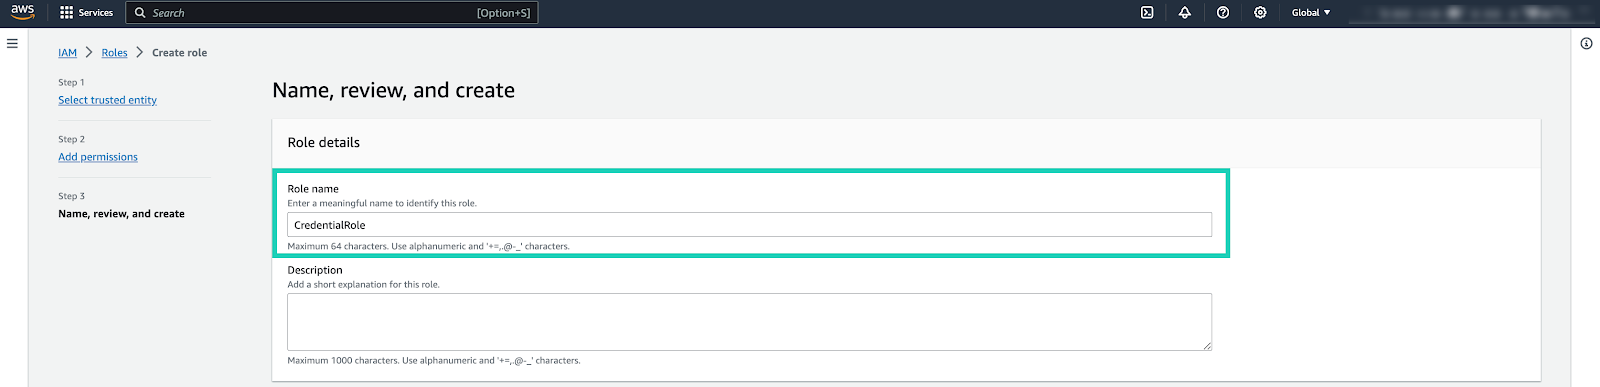
-
Search for the created role, and obtain the IAM Role ARN. You will need it to
create a role-based credential.
Figure 8. Locate the IAM role ARN 
