Creating a Data Share
Learn how resource owners or Data Share administrators can share Iceberg tables in Cloudera by registering external clients in Cloudera on cloud and configuring Ranger policies.
Resource owners or Data Share administrators who want to share their Iceberg tables in Cloudera with external clients must first register the client in the Cloudera on cloud environment. After that, the resource owner needs to configure Ranger policies to allow access for the external client. By creating Ranger groups for your registered users and connecting Ranger policies to these for the tables to be shared, you create a logical unit called a Data Share.
Registering external clients in Cloudera on cloud
Learn how to register external clients in Cloudera on cloud to provision a CLIENT_ID and
CLIENT_SECRET.
- Share Admin user and password
- Username and password of the Cloudera Administrator. For more information, see Cloudera account administrator.
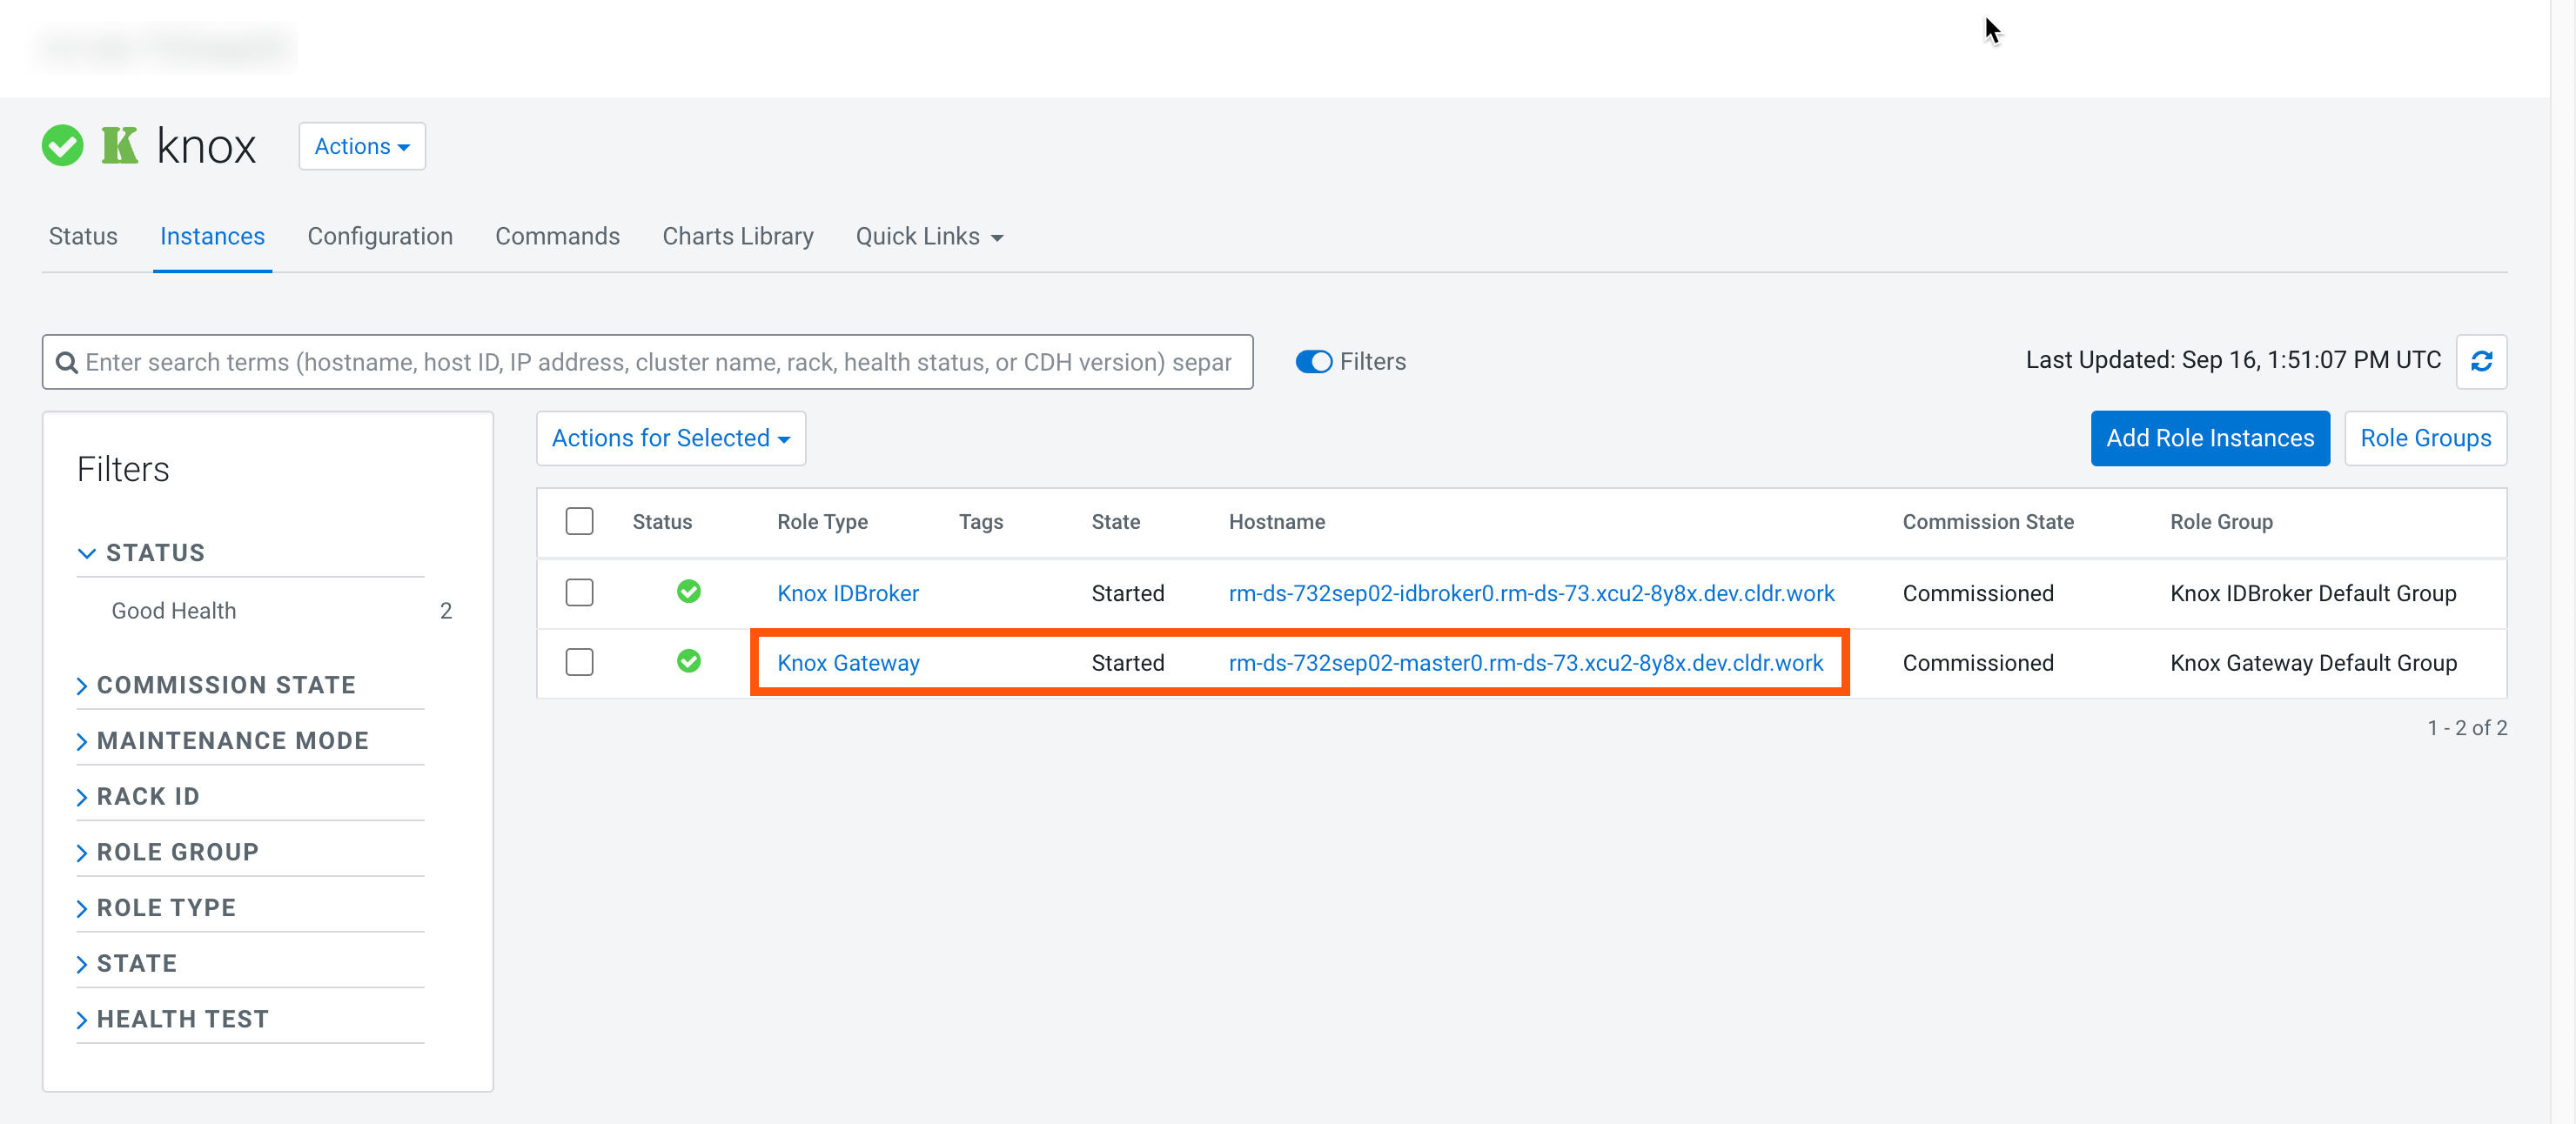
- Knox hostname
- To get the Knox hostname, go to , and copy the hostname for the Knox Gateway role.
-
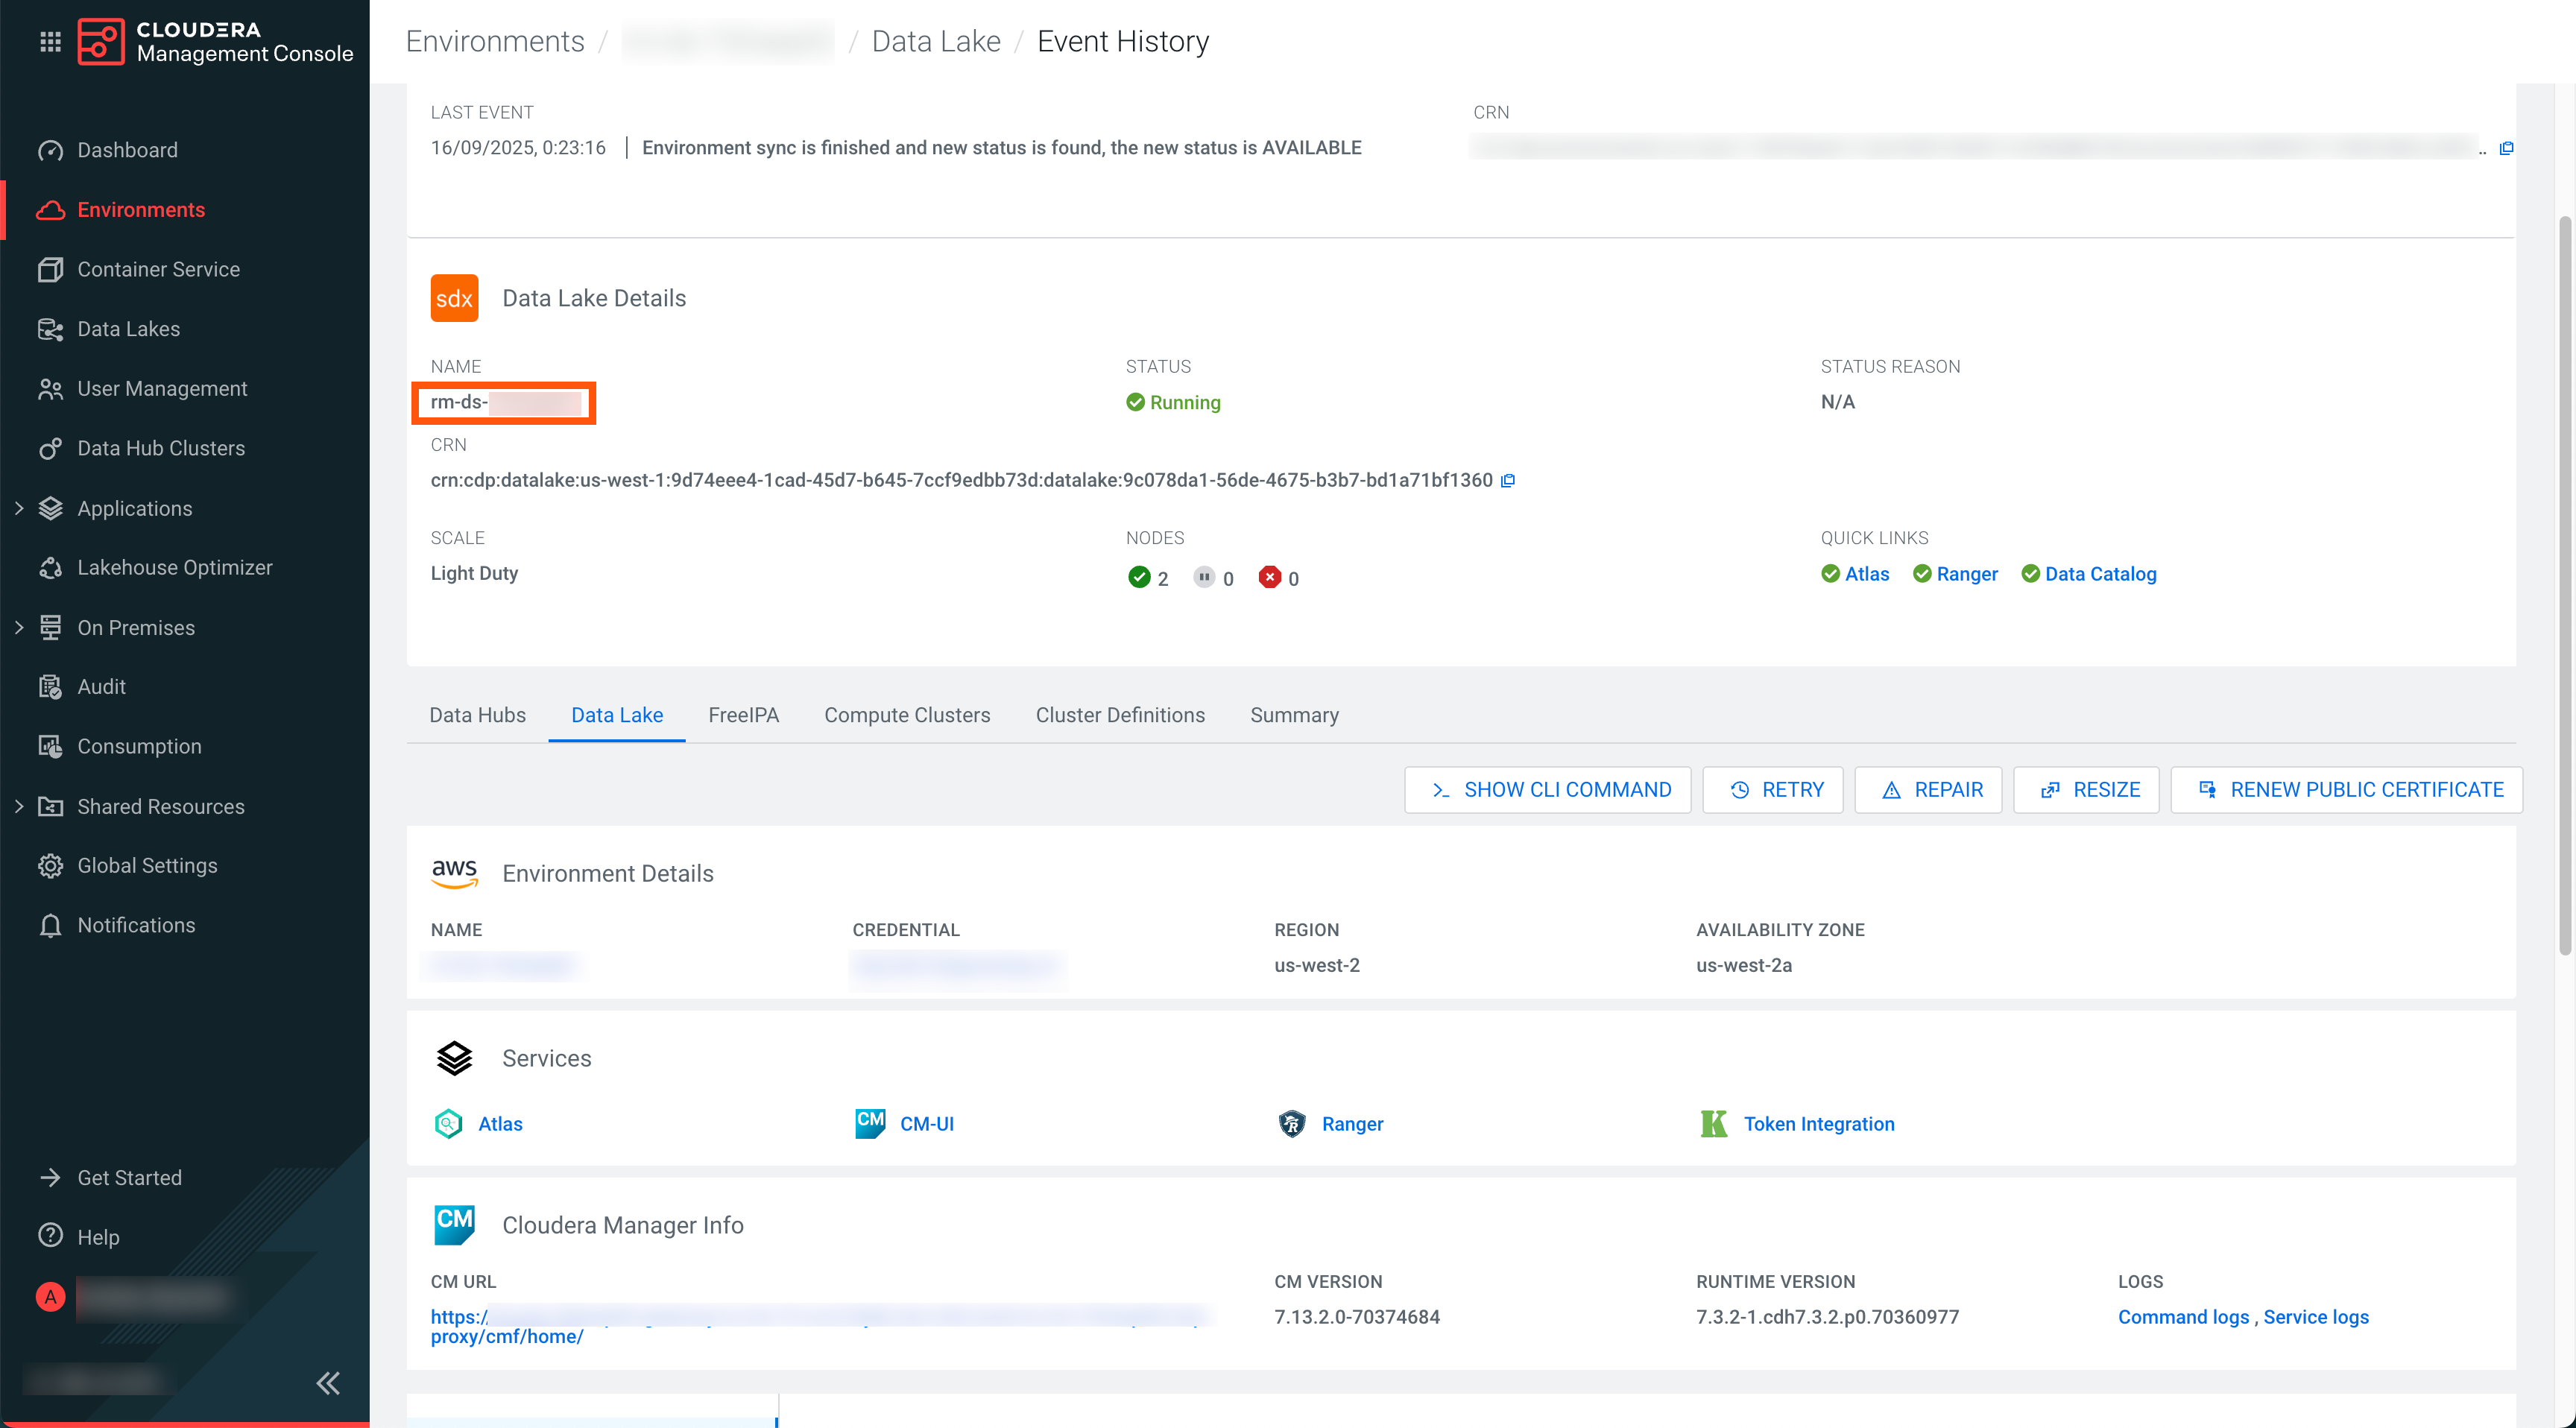
- Data Lake name
- Go to and copy and make a note of the Data Lake name.
-
-
Create a new Role and add the created Group to the Role in Ranger with the
following command:
curl -k -u [***CLOUDERA_ADMIN_USER***]:"[***PASSWORD***] -H "Accept: application/json" -H "Content-Type: application/json" -X POST "https://[***RANGER-HOST-NAME***]:8443/[***DATALAKE-NAME***]/cdp-share-management/ranger/service/public/v2/api/roles/" -d '{ "name": "***CLIENT_ROLE***", "description": "***CLIENT_ROLE DESCRIPTION******", "groups": [ { "name": "***CLIENT_ID CREATED***", "isAdmin": false } ] }'curl -k -u [***CLOUDERA_ADMIN_USER***]:"[***PASSWORD***] -H "Accept: application/json" -H "Content-Type: application/json" -X POST "https://my-ranger-hostname.int.cldr.work:8443/my-datalake-name/cdp-share-management/ranger/service/public/v2/api/roles/" -d '{ "name": "SalesDeptRole", "description": "SalesRole description", "groups": [ { "name": "462babd3-fe5a-4abf-8b47-526897677ad5", "isAdmin": false } ] }'By Enterprise Data Lakes and, use the following command:curl -k -u [***CLOUDERA_ADMIN_USER***]:"[***PASSWORD***] -H "Accept: application/json" -H "Content-Type: application/json" -X POST "https://[***GATEWAY-HOST-NAME***]/[***DATALAKE-NAME***]/cdp-share-management/ranger/service/public/v2/api/roles/" -d '{ "name": "***CLIENT_ROLE***", "description": "***CLIENT_ROLE DESCRIPTION***", "groups": [ { "name": "***CLIENT_ID CREATED***", "isAdmin": false } ] }'curl -k -u [***CLOUDERA_ADMIN_USER***]:[***PASSWORD***] -H "Accept: application/json" -H "Content-Type: application/json" -X POST "https://my-gateway-hostname.int.cldr.work:8443/my-datalake-name/cdp-share-management/ranger/service/public/v2/api/roles/" -d '{ "name": "TestRole1", "description": "TestRole1 description", "groups": [ { "name": "test-group1", "isAdmin": false } ] }'After running the commands, you can see the roles in Ranger:
Figure 1. 
The registration process results in provisioning a CLIENT_ID and
CLIENT_SECRET followed by creating Ranger ROLE
and adding CLIENT_ID as a Group to the ROLE. You
can verify the creation of your Ranger groups and users in
Managing Ranger policies
Learn how to manage your Ranger policies to authenticate your external users.
The Ranger Administrator must maintain policies for the set of databases and tables for the Ranger role and group to enable read access for these assets.
- In the Allow Conditions, a
SELECTandSHOWpermission has to be maintained for the databases or tables to be shared to provide a READ-only access. - Go to and create a policy for the assets to be shared.
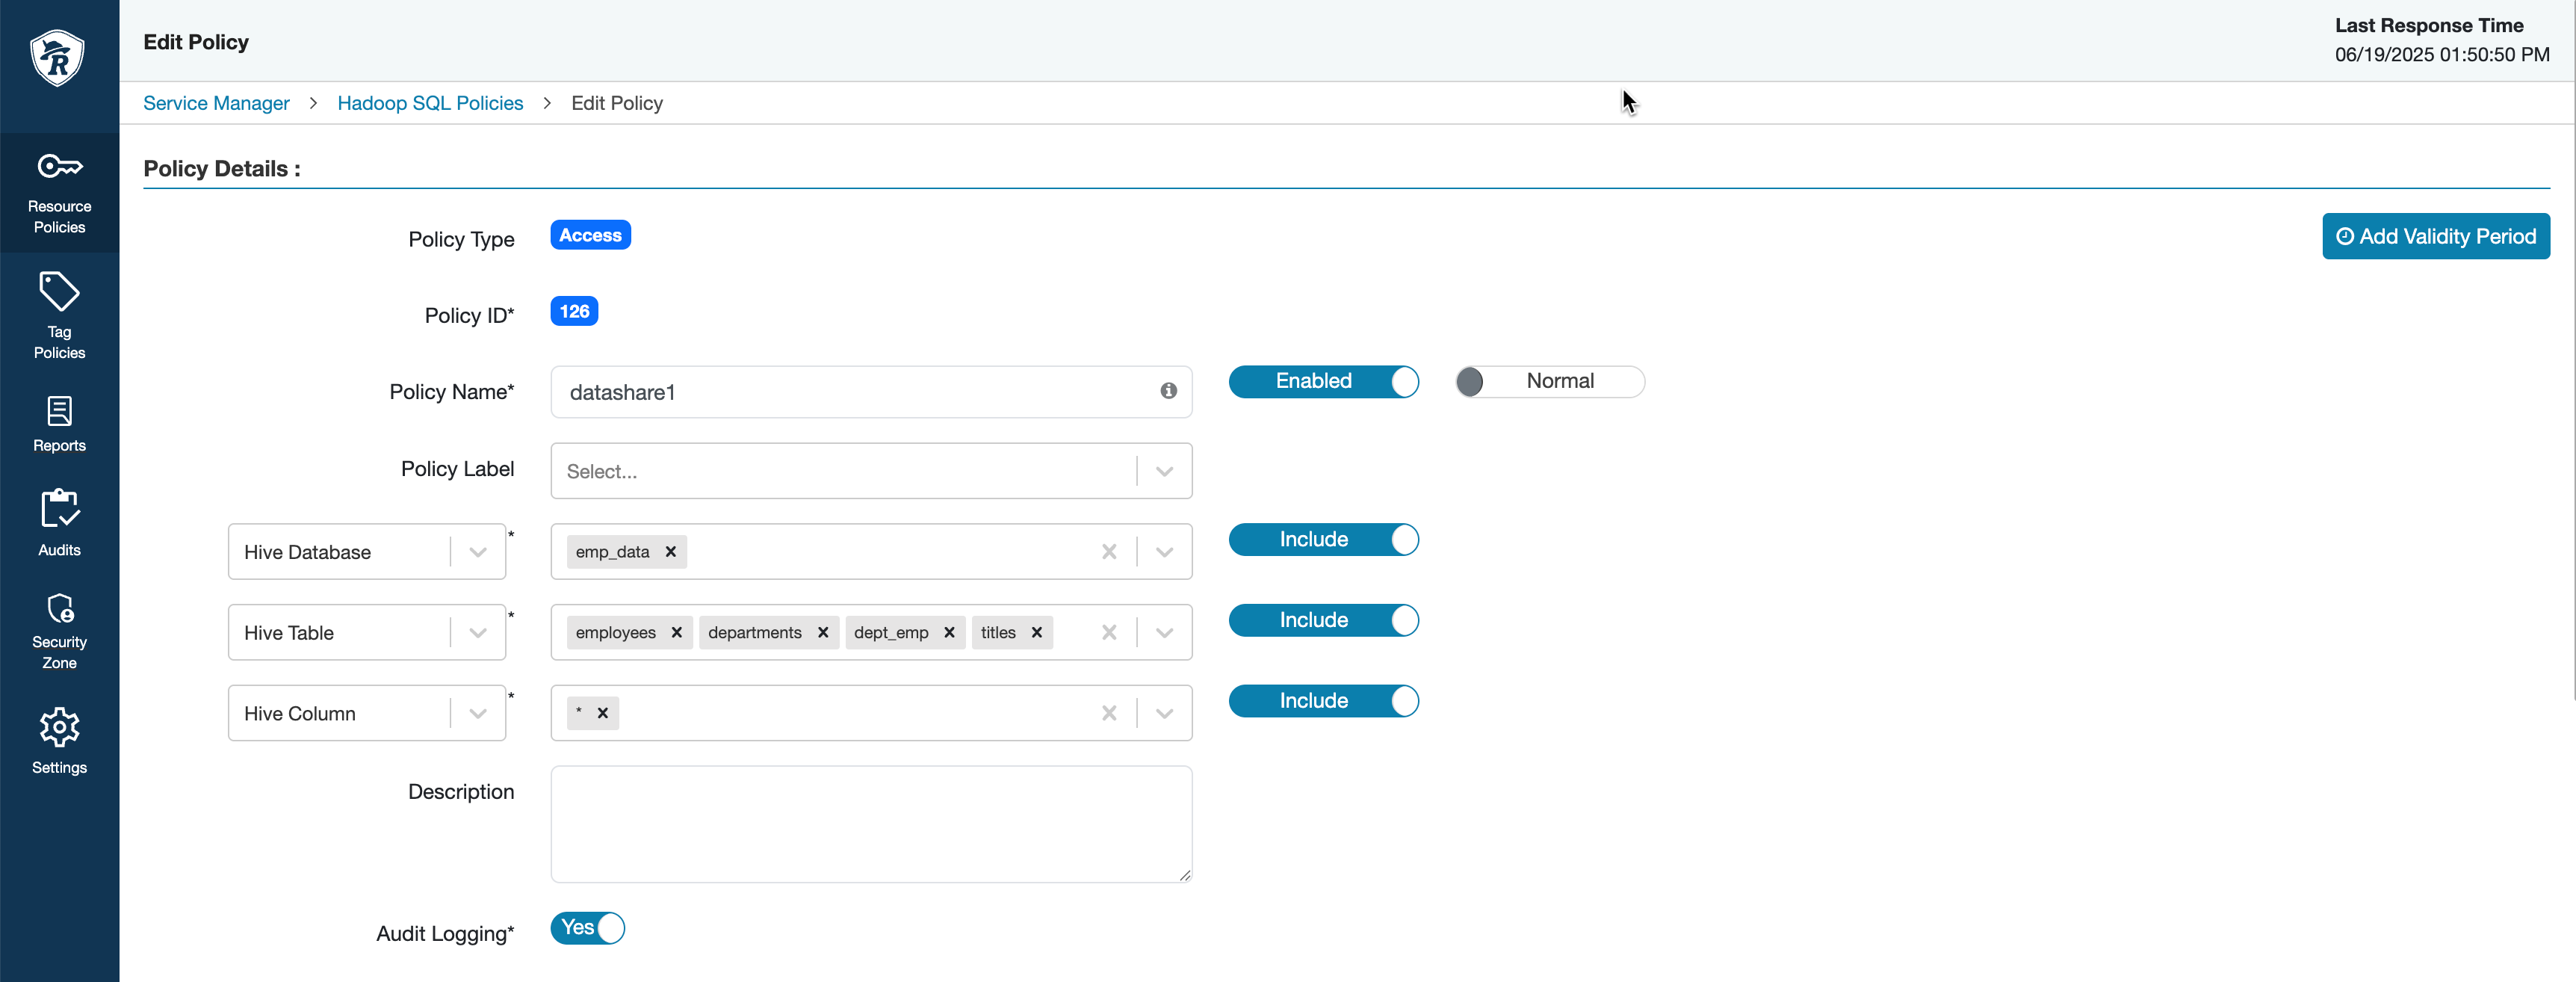
curl -k -u [***CDP_ADMIN_USER***]:[***PASSWORD***] -H "Accept: application/json" -H "Content-Type: application/json" -X POST "https://[***RANGER-HOST-NAME***]:8443/[***DATALAKE-NAME***]/cdp-share-management/ranger/service/public/v2/api/policy/" -d '{"service":"hive_service_name", "policyType": 0, "name": "Iceberg Table Policy", "description": "Policy for SELECT access to an CLIENT_ID", "isEnabled": true, "resources": { "database": { "values": "[***DATABASE_NAME***]" }, "table": { "values": "[***TABLE_NAME***]" } ,"column": { "values": ["*"] } } , "policyItems": [ { "accesses": [ { "type": "select" } ], "users": [], "groups":[], "roles": "[***CLIENT_ROLE***]", "conditions": [] } ] }'curl -k -u [***CDP_ADMIN_USER***]:[***PASSWORD***] -H "Accept: application/json" -H "Content-Type: application/json" -X POST "https://dldanew-vxtt5w-master0.dldanew.svbr-nqvp.int.cldr.work:8443/dldanew-vxtt5w/cdp-share-management/ranger/service/public/v2/api/policy/" -d '{"service":"cm_hive", "policyType": 0, "name": "Hive Table Policy", "description": "Policy for SELECT access to an exteral user", "isEnabled": true, "resources": { "database": { "values": ["emp_data"] }, "table": { "values": ["employees"] } ,"column": { "values": ["*"] } } , "policyItems": [ { "accesses": [ { "type": "select" } ], "users": [], "groups":[], "roles": ["testrole13"], "conditions": [] } ] }'