Managing Cloudbreak Credentials
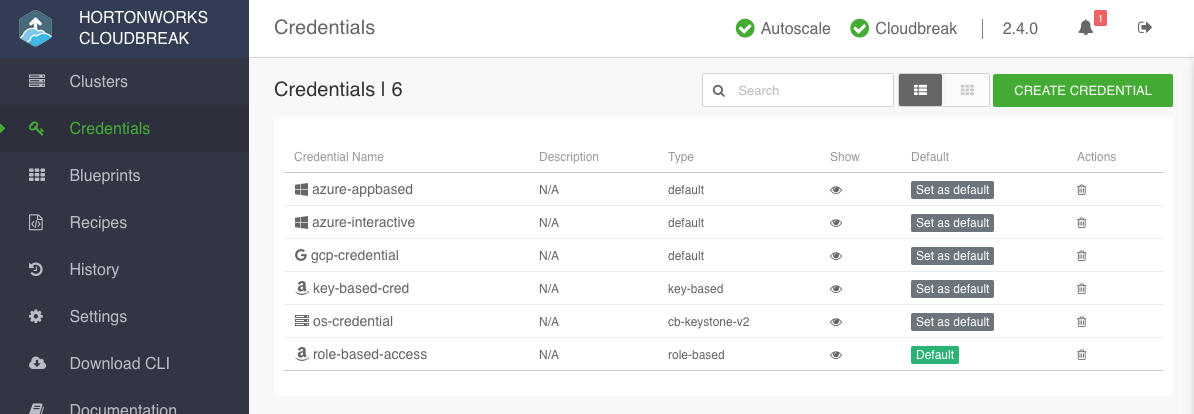
You can view and manage Cloudbreak credentials in the Credentials tab by clicking Create credential and providing required parameters. You must create at least one credential in order to be able to create a cluster.
Create Cloudbreak Credential
For steps, refer to:
- Create Credential on AWS
- Create Credential on Azure
- Create Credential on GCP
- Create Credential on OpenStack
View Credential Details
To view credential details, follow these steps.
Steps
- In the Cloudbreak UI, select Credentials from the navigation pane.
- Click on the name of a credential.
Details for AWS Credentials
The following information is available for previously created AWS credentials:
- Credential Name
- Description
- Selector: One of key-based or role-based, depending on credential type
Sensitive information such as AWS access key and secret key (in case of a key-based credential) or role ARN (in case of a role-based credential) are not displayed.
Details for Azure Credentials
The following information is available for previously created Azure credentials:
- Credential Name
- Description
- Tenant Id: The
Directory IDfrom your Azure Active Directory - Subscription Id: Your Azure
Subscription ID
In case of the interactive credential, the following are also displayed:
- Sp Display Name: Service principal name
- Role Type: role selected during credential creation
In case of the app-based credential, the Application ID and key that you provided when creating the credential are not displayed.
Details for GCP Credentials
The following information is available for previously created GCP credentials:
- Credential Name
- Description
- Service Account Id
- Project Id
The P12 key that you attached when creating the credential is not displayed.
Details for OpenStack Credentials
The following information is available for previously created OpenStack credentials:
- Credential Name
- Description
- Facing: "internal" or "public", as specified under "Api Facing"
- Endpoint
- Selector: "cb-keystone-v2" or "cb-keystone-v3"
- Keystone Version: "cb-keystone-v2" or "cb-keystone-v3"
- User Name
- Tenant Name
The password parameter is not displayed.
Set a Default Credential
If using multiple Cloudbreak credentials, you can select one credential and use it as default for creating clusters. This default credential will be pre-selected in the create cluster wizard.
Steps
- In the Cloudbreak UI, select Credentials from the navigation pane.
- Click Set as default next to the credential that you would like to set as default.
- Click Yes to confirm.
Delete a Credential
To delete a credential, follow these steps.
Steps
- In the Cloudbreak UI, select Credentials from the navigation pane.
- Select one or more credentials by checking their corresponding checkboxes.
- Click Delete.
- Click Yes to confirm.
