Blueprints
Ambari blueprints are your declarative definition of your HDP cluster, defining the host groups and which components to install on which host group. Ambari uses them as a base for your clusters.
You have two options concerning using blueprints with Cloudbreak:
- Use one of the pre-defined blueprints.
- Add your custom blueprint by uploading a JSON file or pasting the JSON text.
We recommend that you review the default blueprints to check if they meet your requirements. You can do this by selecting Blueprints from the navigation pane in the Cloudbreak web UI or by reading the documentation below.
Using Default Blueprints
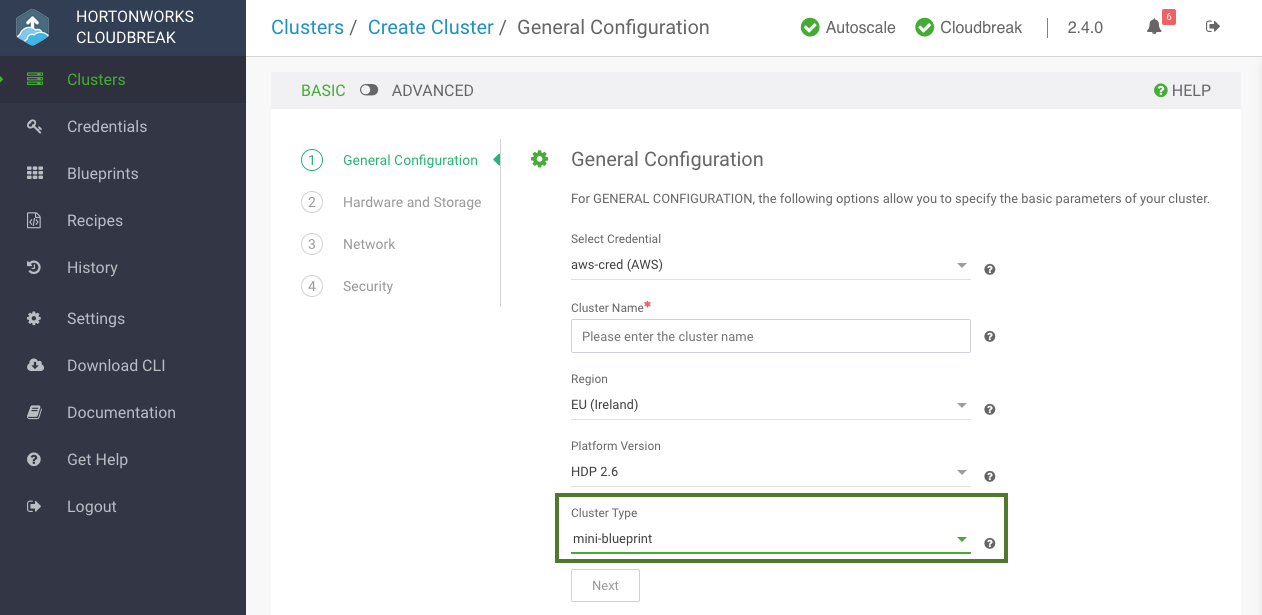
To use one of the default blueprints, simply select them when creating a cluster. The option is available on the General Configuration page. First select the Stack Version and then select your chosen blueprint under Cluster Type.
Default Blueprints
Cloudbreak includes the following default HDP cluster blueprints:
Platform Version: HDP 2.6
| Cluster Type | Main Services | Description | List of All Services Included |
|---|---|---|---|
| Data Science | Spark 2, Zeppelin |
Useful for data science with Spark 2 and Zeppelin. | HDFS, YARN, MapReduce2, Tez, Hive, Pig, Sqoop, ZooKeeper, Ambari Metrics, Spark 2, Zeppelin |
| EDW - Analytics | Hive 2 LLAP, Zeppelin |
Useful for EDW analytics using Hive LLAP. | HDFS, YARN, MapReduce2, Tez, Hive 2 LLAP, Druid, Pig, ZooKeeper, Ambari Metrics, Spark 2 |
| EDW - ETL | Hive, Spark 2 |
Useful for ETL data processing with Hive and Spark 2. | HDFS, YARN, MapReduce2, Tez, Hive, Pig, ZooKeeper, Ambari Metrics, Spark 2 |
The following configuration classification applies:
- Stable configurations are the best choice if you want to avoid issues and other problems with launching and using clusters.
- If you want to use a Technical Preview version of a component in a release of HDP, use these configurations.
- These are the most cutting edge of the configurations, including Technical Preview components in a Technical Preview HDP release.
Using Custom Blueprints
This option allows you to create and save your custom blueprints.
Creating a Blueprint
Ambari blueprints are specified in the JSON format. A blueprint can be exported from a running Ambari cluster and can be reused in Cloudbreak after slight modifications. When a blueprint is exported, it includes some hardcoded configurations such as domain names, memory configurations, and so on, that are not applicable to the Cloudbreak cluster. There is no automatic way to modify an exported blueprint and make it instantly usable in Cloudbreak, the modifications have to be done manually.
In general, the blueprint should include the following elements:
"Blueprints": {
    "blueprint_name": "hdp-small-default",
    "stack_name": "HDP",
    "stack_version": "2.6"
  },
  "settings": [],
  "configurations": [],
  "host_groups": [
  {
      "name": "master",
      "configurations": [],
      "components": []
    },
    {
      "name": "worker",
      "configurations": [],
      "components": [ ]
    },
    {
      "name": "compute",
      "configurations": [],
      "components": []
    }
   ]
  }
For correct blueprint layout and other information about Ambari blueprints, refer to the Ambari cwiki page.
Creating Blueprints for Ambari 2.6.1+
Ambari 2.6.1 or newer cannot install the mysqlconnector, as the connector is released under version 2 of the GNU General Public License. Therefore, when creating a blueprint for Ambari 2.6.1 or newer you should not include the MYSQL_SERVER component for Hive Metastore in your blueprint. Instead, you have two options:
- Configure an external RDBMS instance for Hive Metastore and include the JDBC connection information in your blueprint. If you choose to use an external database that is not PostgreSQL (such as Oracle, mysql) you must also set up Ambari with the appropriate connector; to do this, create a pre-ambari-start recipe and pass it when creating a cluster.
- If a remote Hive RDBMS is not provided, Cloudbreak installs a Postgres instance and configures it for Hive Metastore during the cluster launch.
For information on how to configure an external database and pass your external database connection parameters, refer to Ambari blueprint documentation.
If you still include MYSQL_SERVER in your blueprint, then depending on your chosen operating system, MariaDB or MySQL Server will be installed.
Cloudbreak requires you to define an additional element in the blueprint called "blueprint_name". This should be a unique name within Cloudbreak list of blueprints. For example:
"Blueprints": {
    "blueprint_name": "hdp-small-default",
    "stack_name": "HDP",
    "stack_version": "2.6"
  },
  "settings": [],
  "configurations": [],
  "host_groups": [
  ...
The "blueprint_name" is not included in the Ambari export.
After you provide the blueprint to Cloudbreak, the host groups in the JSON will be mapped to a set of instances when starting the cluster, and the specified services and components will be installed on the corresponding nodes. It is not necessary to define a complete configuration in the blueprint. If a configuration is missing, Ambari will use a default value.
Here are a few blueprint examples. You can also refer to the default blueprints provided in the Cloudbreak UI.
Related Links
Blueprint Examples (Hortonworks)
Ambari cwiki (External)
Upload a Blueprint
Once you have your blueprint ready, perform these steps.
Steps
- In the Cloudbreak UI, select Blueprints from the navigation pane.
-
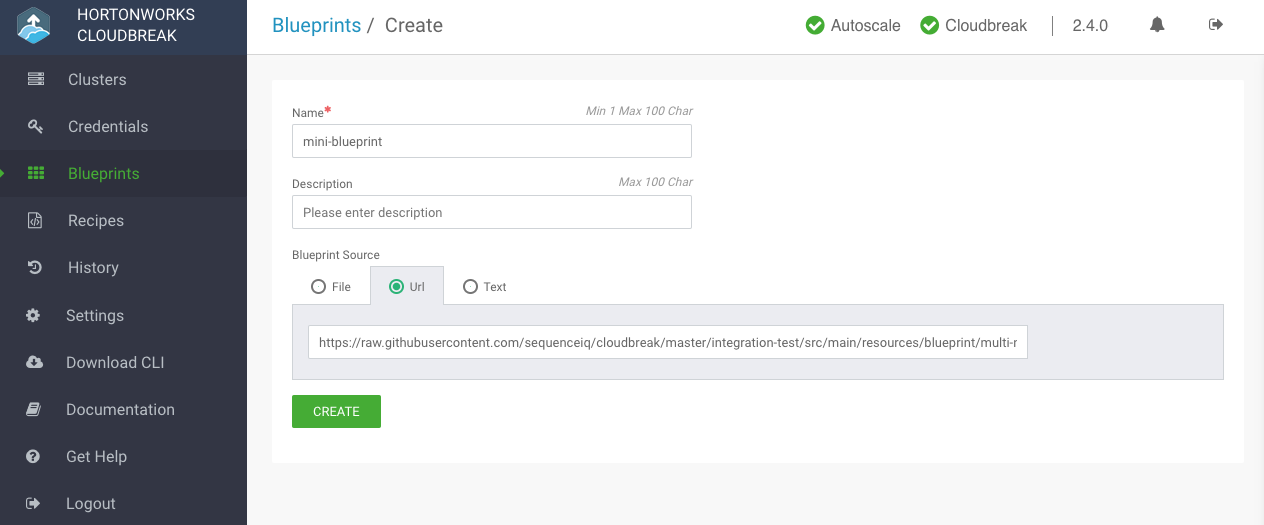
To add your own blueprint, click Create Blueprint and enter the following parameters:
Parameter Value Name Enter a name for your blueprint. Description (Optional) Enter a description for your blueprint. Blueprint Source Select one of:
- Text: Paste blueprint in JSON format.
- File: Upload a file that contains the blueprint.
- URL: Specify the URL for your blueprint.
-
To use the uploaded blueprints, select it when creating a cluster. The option is available on the General Configuration page. First select the Platform Version and then select your chosen blueprint under Cluster Type.
View Blueprint Details
Once a blueprint has been registered in Cloudbreak, you can access its details in the Cloudbreak UI.
Steps
-
In the Cloudbreak UI, select Blueprints from the navigation pane.
-
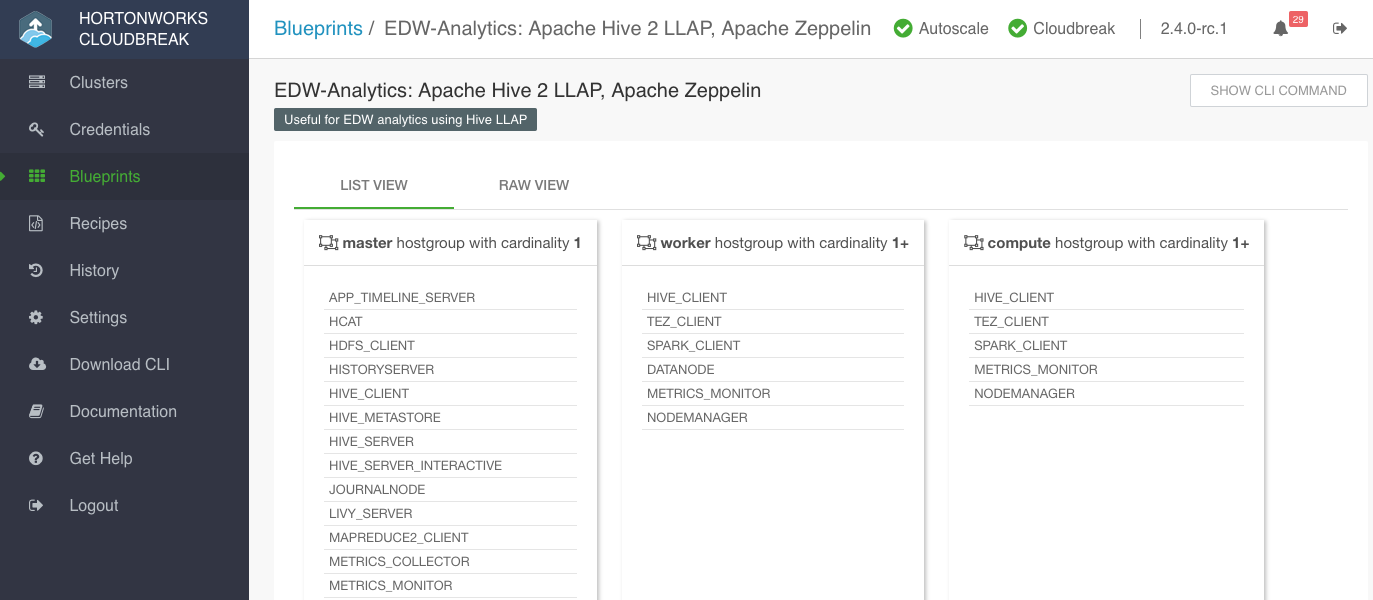
Click on an entry to navigate to details.
You can view blueprint details using the List View and Raw View:
Delete Blueprint
To delete a default or custom blueprint, perform these steps.
Steps
-
In the Cloudbreak UI, select Blueprints from the navigation pane.
-
Click on an entry to navigate to details.
-
Click Delete.
-
Confirm delete.


