

Upgrade roadmap
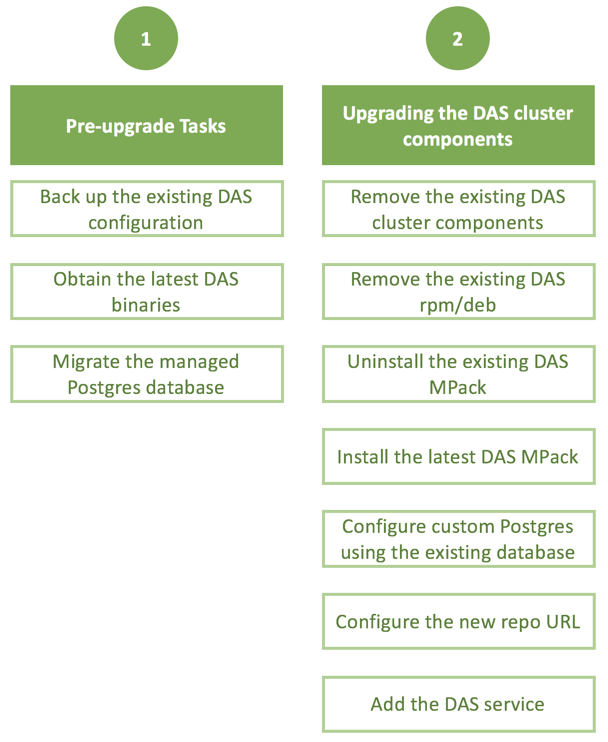
Review the flowchart and the roadmap for an overview of the upgrade process.
| No. | Task | Description |
|---|---|---|
| Pre-upgrade tasks | ||
| 1 | Back up the existing DAS configuration. | The upgrade procedure involves deleting the DAS service from the Ambari UI. Therefore, back up all the configuration information before you proceed. For the list of items to back up, see Backing up the configuration. |
| 2 | Obtain the latest DAS binaries. | Obtain the latest DAS binaries and create and set up a local repository. See Obtaining the latest DAS binaries. |
| 3 | Migrate the managed Postgres database. | If you have configured a managed PostgreSQL database for production use, you can migrate the existing setup either by retaining the existing database and the data, or by creating a new, custom Postgres server, and configuring DAS to use it. See Migrating the managed Postgres database. |
| Upgrading DAS cluster components | ||
| 4 | Remove the DAS cluster components. | Delete the DAS cluster components from the Ambari UI. This removes the DAS Webapp and the DAS Event Processor. See Removing the DAS cluster components. |
| 5 | Remove the existing DAS rpm/deb from the DAS host. | See Removing DAS rpm/deb. |
| 6 | Delete the /usr/das/current directory. | See Deleting the /usr/das/current directory. |
| 7 | Uninstall the existing DAS Mpack. | Remove the existing DAS MPack from the Ambari console. See Uninstalling the existing DAS Mpack. |
| 8 | Install the latest DAS Mpack on the Ambari server. | See Installing the latest DAS MPack. |
| 9 | Configure custom Postgres database using the existing, managed database. | See Configuring custom Postgres using an existing database and data. |
| 10 | Configure the new Repo URL. | See Configuring the new Repo URL. |
| 11 | Add the DAS service. | Use the same configurations while adding the new DAS service through the Ambari UI. See Adding the DAS service. |