Creating an app registration and assigning a role to it
Create a provisioning credential for Azure.
-
Click + New Registration
Figure 1. App Registration on the Azure portal 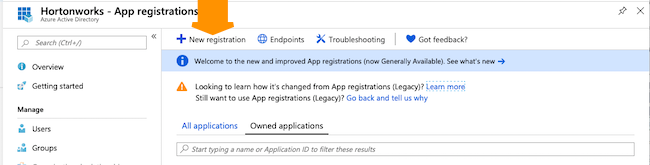
-
Register a new application.
- Enter the user-facing display name.
- Select the supported account type.
- Enter the optional redirect URI.
- Click Register.
Figure 2. Register a new application 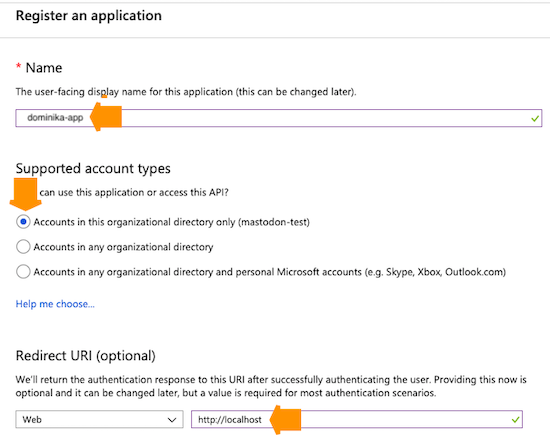 You are redirected to the app registration overview page.
 -
Copy and save the
Application IDbefore closing this page. You will need to provide it to Cloudera when Creating a provisioning credential for Azure.Figure 3. Copy and save the Application ID 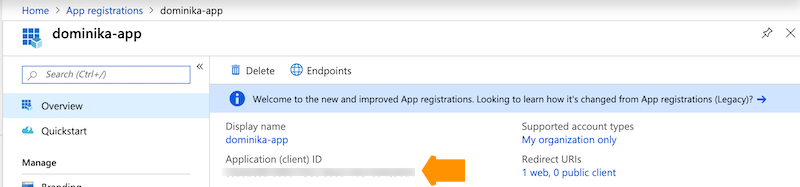
-
Go to Certificates & secrets and generate a new
secret.
- Clik + New client secret.
- Enter a description and expiration time.
- Click Add.
Figure 4. Generate a new secret 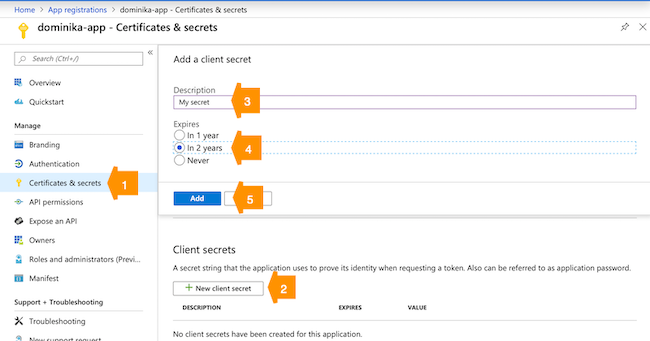
-
Click and then assign the Contributor role or the custom role to
your newly created application.
- Under Role, select Contributor or the custom role.
- Under Select, enter your app name, and then select it.
Figure 5. Add Role assignment 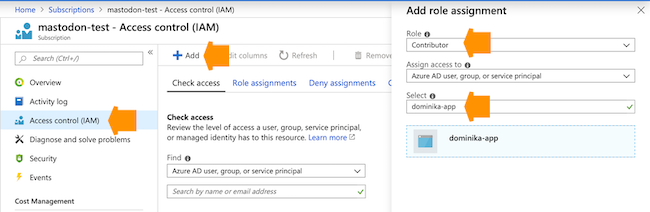
Once you have this setup ready, you can Create a provisioning credential for Azure in Cloudera.
