Create and configure a Workflow Manager View instance
Use Ambari Admin to create a Workflow Manager view instance.
- Click Manage Ambari to open the Ambari Admin user interface.
- Click Views, expand the Workflow_Manager View, and click Create Instance.
-
On the Create Instance page, select the Version.
If multiple View versions exist, choose one.
- Enter the following view instance Details:
Table 1. Workflow Manager View Instance Details Property Description Example Value Instance Name This is the Workflow Manager View instance name and must be unique for all instances you create. The instance name cannot be modified after the instance is created. wfm_local_instance
This value cannot contain spaces or special characters other than an underscore.
Display Name This is the name of the view link displayed to the user in Ambari Web. The display name can be modified after the instance is created. WFM View
This value can contain spaces and underscores, but no other special characters.
Description This is the description of the view displayed to the user in Ambari Web. Local instance of WFM Visible This checkbox determines whether the view is displayed to users in Ambari Web. Visible or Not Visible - In Cluster Configuration, select the Local Cluster or Remote Clusterinstance type and select the cluster name.
-
Review the remaining settings and make changes as desired.
The Settings and Cluster Configuration options depend on a few cluster and deployment factors in your environment. Typically, you can accept the default Settings unless you are using the Workflow Manager View with a Kerberos-enabled cluster.
-
Click Save.
The instance is created and a success message displays.
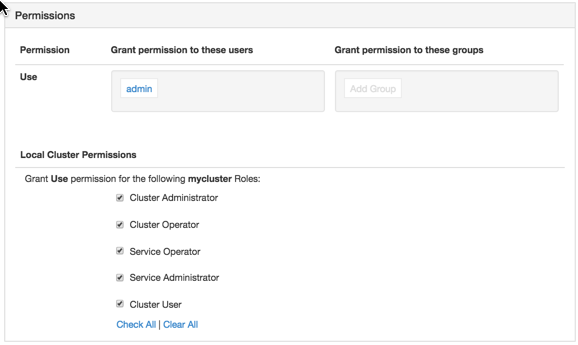
- Scroll to the Permissions section at the bottom of the Views configuration form.
-
Grant permission on the Workflow Manager View for the set of users and groups who
can access the view instance.


