
Use case 1: Use Cloudera Manager to generate internal CA and corresponding certificates
Use Cloudera Manager to create and manage its own Certificate Authority.
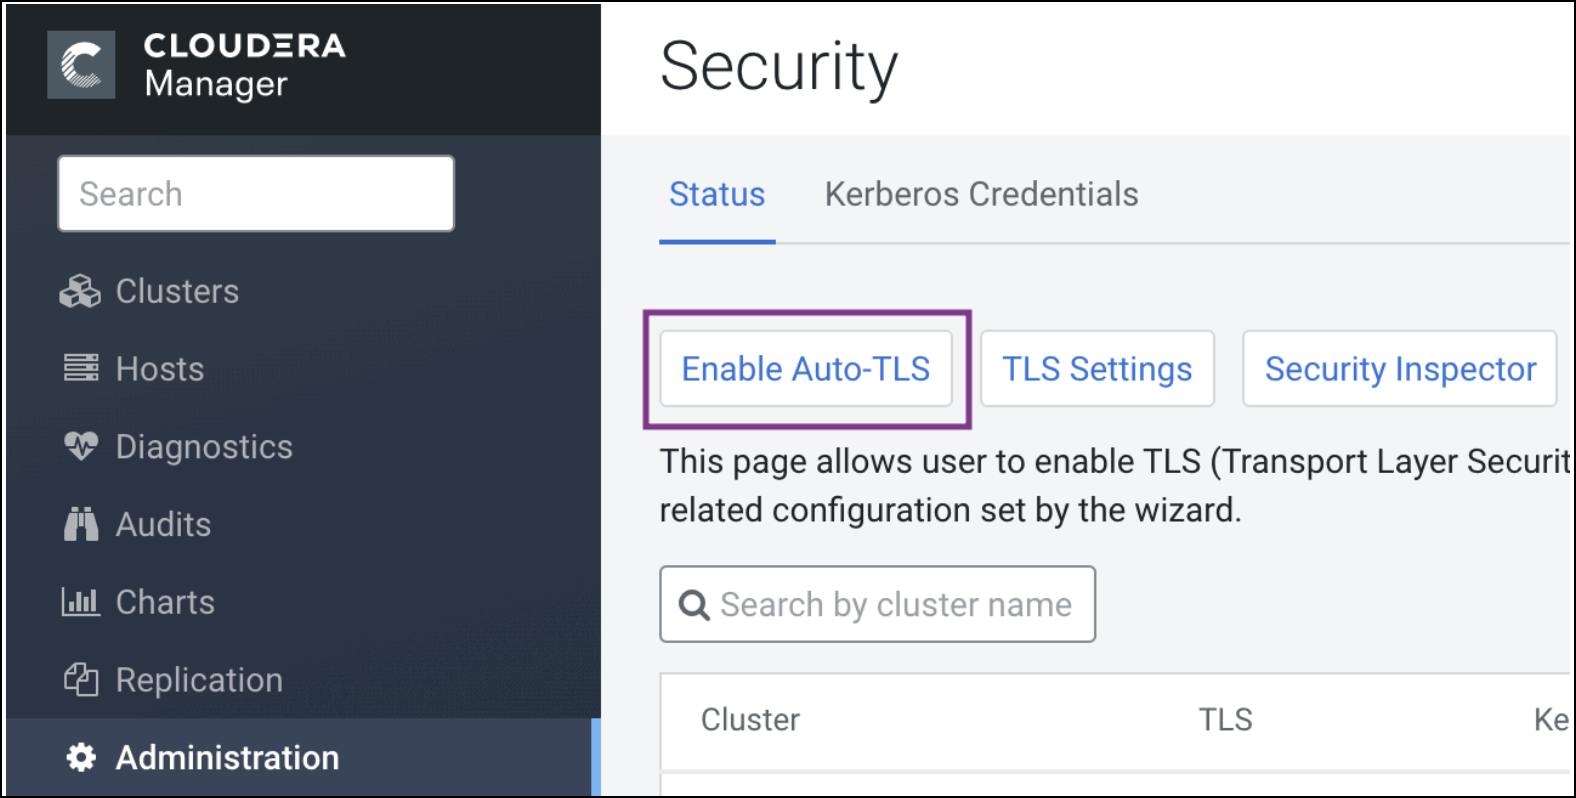
- To choose this option, from Cloudera Manager go to . The Enable Auto-TLS page comes up.
- In the Trusted CA Certificates Location field in the
Generate CA section, enter the path to a PEM file on the Cloudera
Manager host which contains a list of root CA certificates that should be imported into
the truststores of all hosts. This is an optional field.
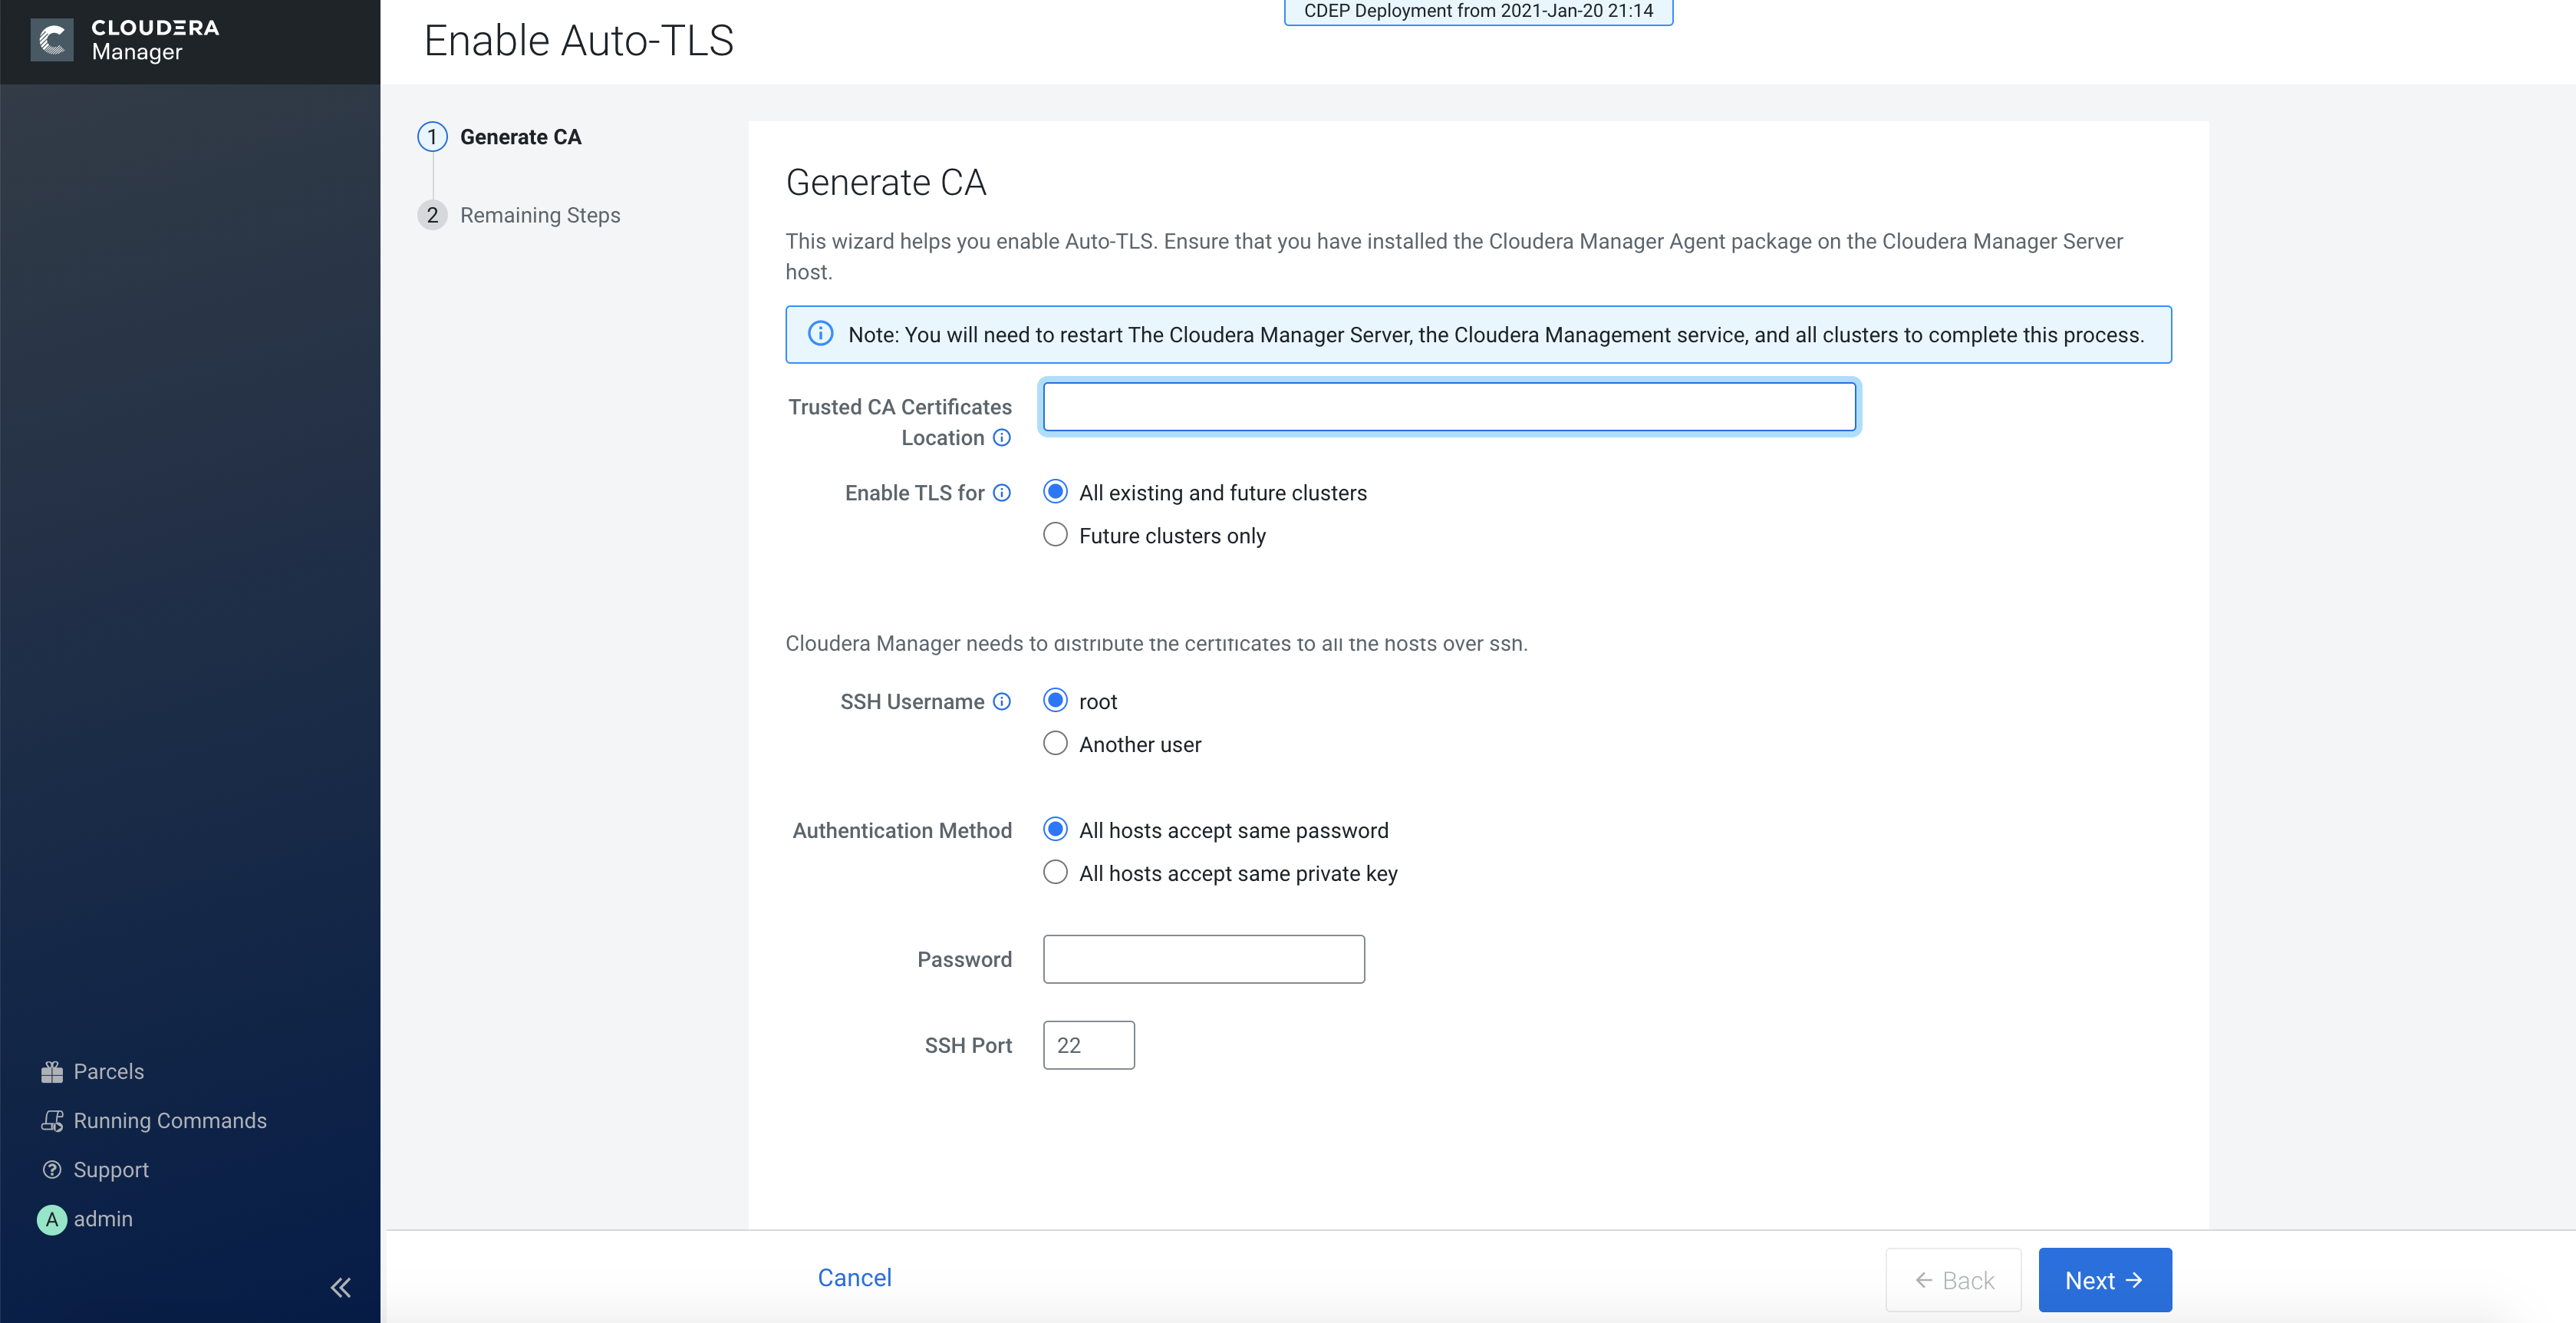
- From the Enable TLS for: options, select All existing and future clusters to enable Auto-TLS for all existing and future clusters, or select Future clusters only to enable Auto-TLS for future clusters only.
- Select the required SSH Username option. The available options are root and Another user.
- Select the required Authentication Method. You can either enable all hosts to accept the same password or you can enable all hosts to accept the same private key.
- Enter the password in the Password field and verify the SSH Port number.
- Click Next.
Rotate Auto-TLS Certificate Authority and Host Certificates
Your cluster security requirements may require that you rotate the Auto-TLS CA and
certificates.
- Navigate to Administration > Security.
- Click the Rotate Auto-TLS Certificates button to launch the wizard.
- Complete the wizard.
