Managing Cloudera Data Science Workbench Users
User Contexts
The Cloudera Data Science Workbench UI uses the notion of contexts to separate your personal account from any team accounts you belong to. Depending on the context you are in, you will be able to modify settings for either your personal account, or a team account, and see the projects created in each account. Shared personal projects will show up in your personal account context.
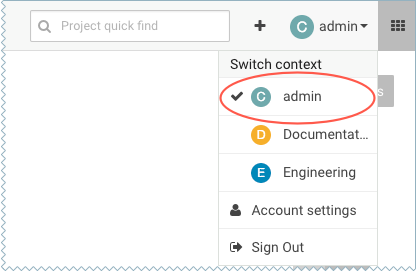
Context changes in the UI are subtle, so if you're wondering where a project or setting lives, first make sure you are in the right context. The application header will tell you which context you are currently in. You can switch to a different context by going to the drop-down menu in the upper right-hand corner of the page.
- Personal
- Your personal context can be used to work on private projects, experiments, and so on. For related management tasks, see Managing your Personal Account.
- Team
- Teams allow streamlined administration of projects. If you are going to collaborate with teammates on more than one project, you should create a team account and work on shared projects under the team context. For related tasks, see Managing Team Accounts.
User Roles
Currently, Cloudera Data Science Workbench has only one deployment-wide specialised user role: site administrator. All other roles are created within the scope of a particular team or project and do not affect the rest of the deployment.
- Site Administrators
- Site administrators are superusers who have complete access to all activity on the deployment. By default, the first user account that signs up for Cloudera Data Science Workbench becomes a site administrator. They can add/invite more users, disable existing users, assign site administrator privileges to others, and so on. For instructions, see Managing Users as a Site Administrator.
- Roles within Teams and Projects
- Within the context of each team and project, users can be assigned Viewer, Operator, Contributor, or Admin roles. These roles are only applicable within the limited scope of the team/project. More details on the privileges associated with each of these roles are included in the Creating Teams and Project Collaborators topics respectively.
Managing your Personal Account
To manage your personal account settings:
- Sign in to Cloudera Data Science Workbench.
- From the upper right drop-down menu, switch context to your personal account.
- Click Settings.
- Profile
- You can modify your name, email, and bio on this page.
- Teams
- This page lists the teams you are a part of and the role assigned to you for each team.
- SSH Keys
- Your public SSH key resides here. SSH keys provide a useful way to access to external resources such as databases or remote Git repositories. For instructions, see SSH Keys.
- Hadoop Authentication
- Enter your Hadoop credentials here to authenticate yourself against the cluster KDC. For more information, see Hadoop Authentication with Kerberos for Cloudera Data Science Workbench.
Managing Team Accounts
Users who work together on more than one project and want to facilitate collaboration can create a Team. Teams allow streamlined administration of projects. Team projects are owned by the team, rather than an individual user. Team administrators can add or remove members at any time, assigning each member different permissions.
Creating a Team
To create a team:
- Click the plus sign (+) in the title bar, to the right of the Search field.
- Select Create Team.
- Enter a Team Name.
- Click Create Team.
- Add or invite team members. Team members can have one of the following privilege levels:
- Viewer - Read-only access to team projects. Cannot create new projects within the team but can be added to existing ones.
- Operator - Read-only access to team projects. Cannot create new projects within the team but can be added to existing ones. Additionally, Operators can start and stop existing jobs in the projects that they have access to.
- Contributor - Write-level access to all team projects to all team projects with Team or Public visibility. Can create new projects within the team. They can also be added to existing team projects.
- Admin - Has complete access to all team projects, can add new team members, and modify team account information.
- Click Done.
Modifying Team Account Settings
- From the upper right drop-down menu, switch context to the team account.
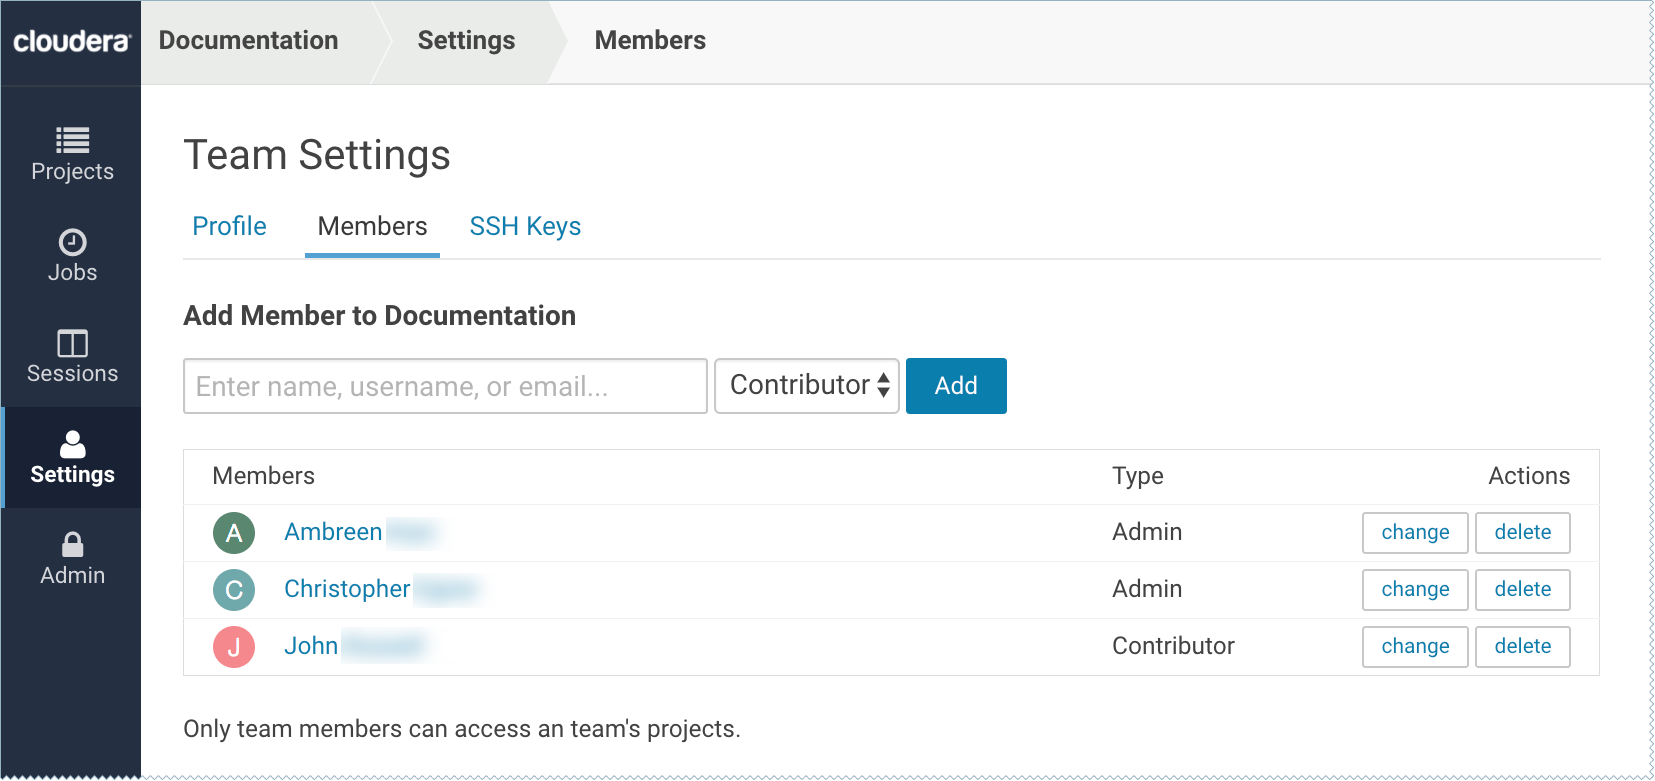
- Click Settings to open up the Account Settings dashboard.
- Profile
- Modify the team description on this page.
- Members
- You can add new team members on this page, and modify privilege levels for existing members.
- SSH Keys
- The team's public SSH key resides here. Team SSH keys provide a useful way to give an entire team access to external resources such as databases. For instructions, see SSH Keys. Generally, team SSH keys should not be used to authenticate against Git repositories. Use your personal key instead.
Managing Users as a Site Administrator
Required Role: Site Administrator
- Go to the Cloudera Data Science Workbench web application (http://cdsw.company.com) and log in as a site administrator.
- On the left sidebar, click Admin. You will see an array of tabs for all the tasks you can perform as a site administrator.
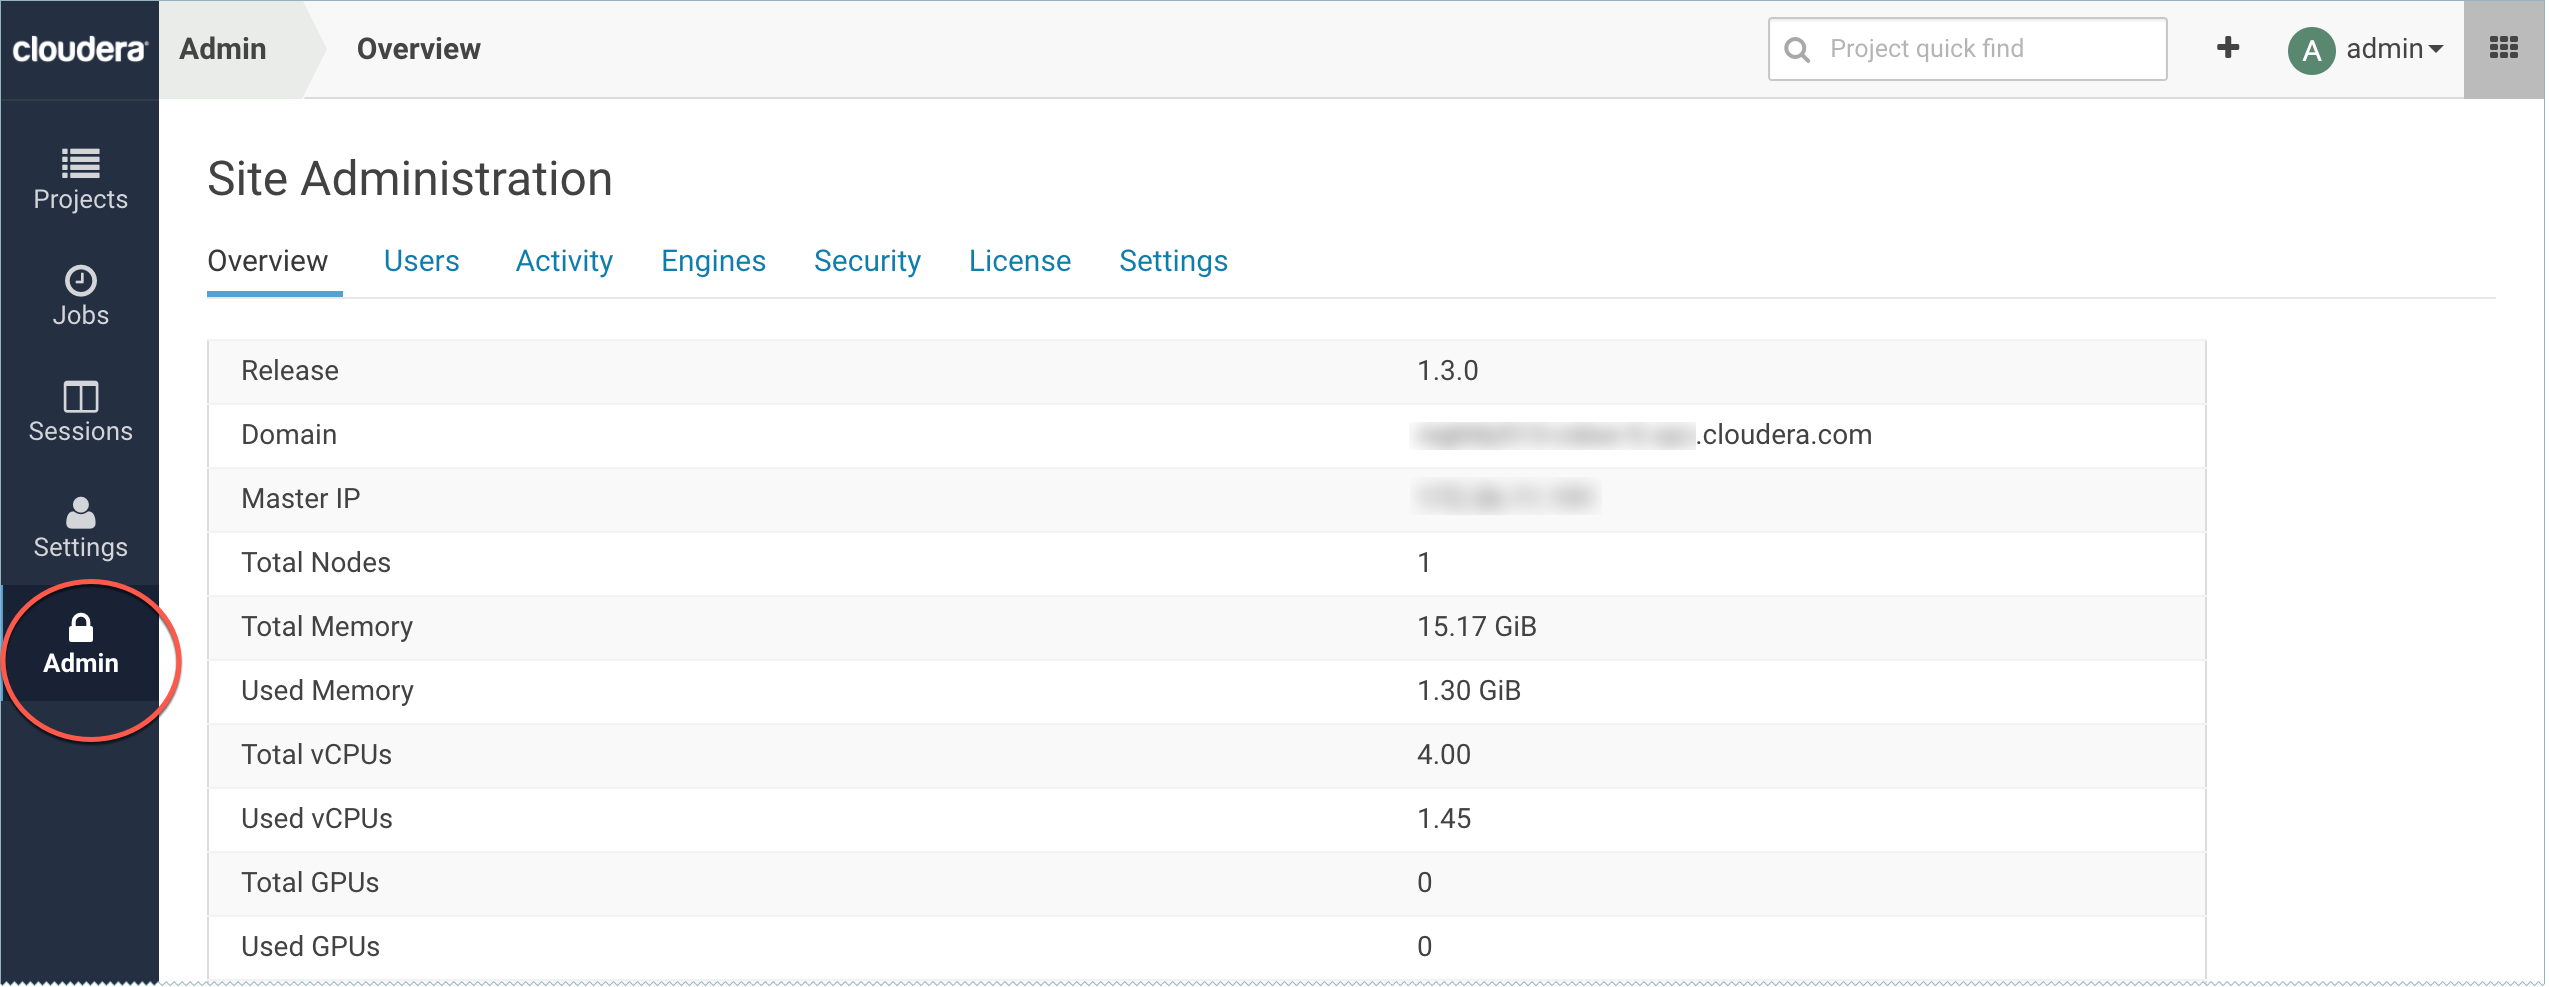
As a site administrator you can add new users, assign or modify privileges for existing users, and monitor user activity on the Cloudera Data Science Workbench
deployment.
Adding New Users
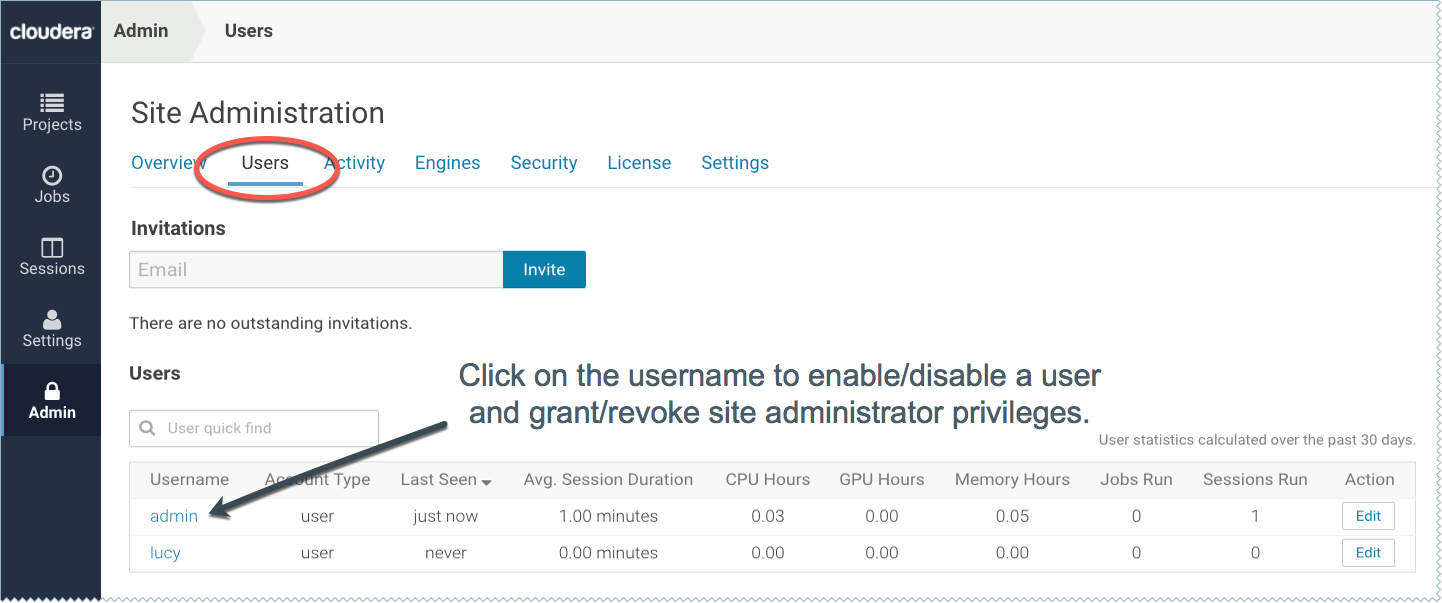
To invite new users, navigate to the tab. Under Invitations, enter the name or email ID of the person you want to invite and click Invite. This tab will show you a list of all outstanding invitations. Once an invitation has been accepted, the record will no longer show up on this page. The Users tab also displays a list of users of the application. Click on a username to see more details about the user.
If you want new users to join by invitation only, go to the tab and check the Require invitation to sign up checkbox to require invitation tokens for account creation. By default, invitations are sent from noreply@your-cdsw-domain. To modify this default, see Cloudera Data Science Workbench Email Notifications.
Assigning the Site Administrator role to an Existing User
- Sign in to Cloudera Data Science Workbench as a site administrator.
- Click Admin.
- Click the Users tab.
- Click on the username of the user who you want to make a site administrator.
- Select the Site Administrator checkbox.
- Click Update.
Disabling User Accounts
Use the following instructions to disable user accounts. Note that disabled users cannot login and do not count towards named users for licensing.
- Sign in to Cloudera Data Science Workbench as a site administrator.
- Click Admin.
- Click the Users tab.
- Click on the username of the user who you want to disable.
- Select the Disabled checkbox.
- Click Update.
Monitoring Users
The Users tab on the admin dashboard displays the complete list of users. You can see which users are currently active, and when a user last logged in to the Cloudera Data Science Workbench. To modify a user's username, email or permissions, click the Edit button under the Action column.
