Model Training and Deployment - Iris Dataset
This topic uses Cloudera Data Science Workbench's built-in Python template project to walk you through an end-to-end example where we use experiments to develop and train a model, and then deploy it using Cloudera Data Science Workbench.
This example uses the canonical Iris dataset from Fisher and Anderson to build a model that predicts the width of a flower’s petal based on the petal's length.
Create a Project
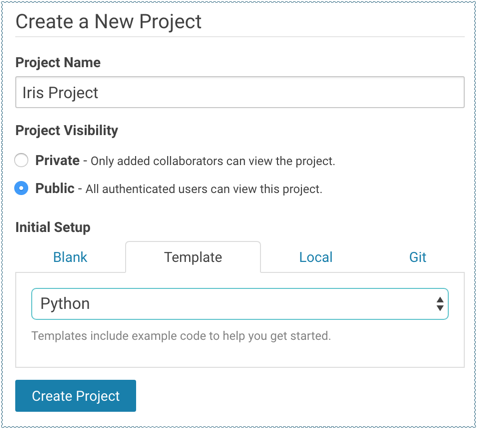
The scripts for this example are available in the Python template project that ships with Cloudera Data Science Workbench. First, create a new project from the Python template:
-
cdsw-build.sh - A custom build script used for models and experiments. Pip installs our dependencies, primarily the scikit-learn library.
-
fit.py - A model training example to be run as an experiment. Generates the model.pkl file that contains the fitted parameters of our model.
-
predict.py - A sample function to be deployed as a model. Uses model.pkl produced by fit.py to make predictions about petal width.
Train the Model
Run experiments using fit.py to develop a model. The fit.py script tracks metrics, mean squared error (MSE) and R2, to help compare the results of different experiments. It also writes the fitted model to a model.pkl file.
-
Navigate to the Iris project's page.
-
Click Run Experiment.
-
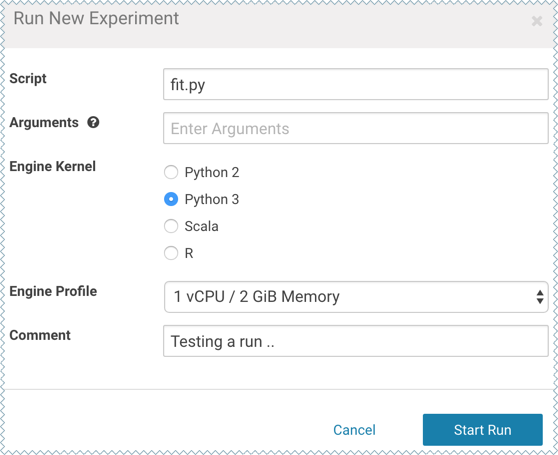
Fill out the form as follows and click Start Run. Make sure you use the Python 3 kernel.
-
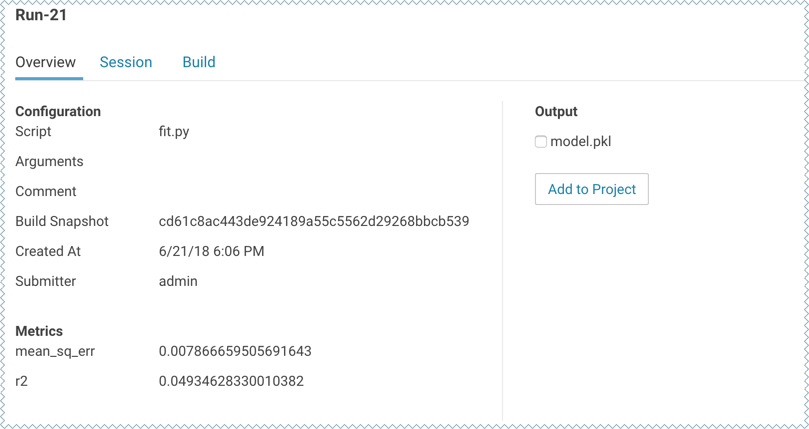
The new experiment should now show up on the Experiments table. Click on the Run ID to go to the experiment's Overview page. The Build and Session tabs display realtime progress as the experiment builds and executes.
-
Once the experiment has completed successfully, go back to its Overview page. The tracked metrics show us that our test set had an MSE of ~0.0078 and an R2 of ~0.0493. For the purpose of this demo, let's consider this an accurate enough model to deploy and use for predictions.
-
Once you have finished training and comparing metrics from different experiments, go to the experiment that generated the best model. From the experiment's Overview page, select the model.pkl file and click Add to Project.
This saves the model to the project filesystem, available on the project's Files page. We will now deploy this model as a REST API that can serve predictions.
Deploy the Model
To deploy the model we use the predict.py script from the Python template project. This script contains the predict function that accepts petal length as input and uses the model built in the previous step to predict petal width.
-
Navigate to the Iris project's page.
-
Click New Model and fill out the fields. Make sure you use the Python 3 kernel. For example:
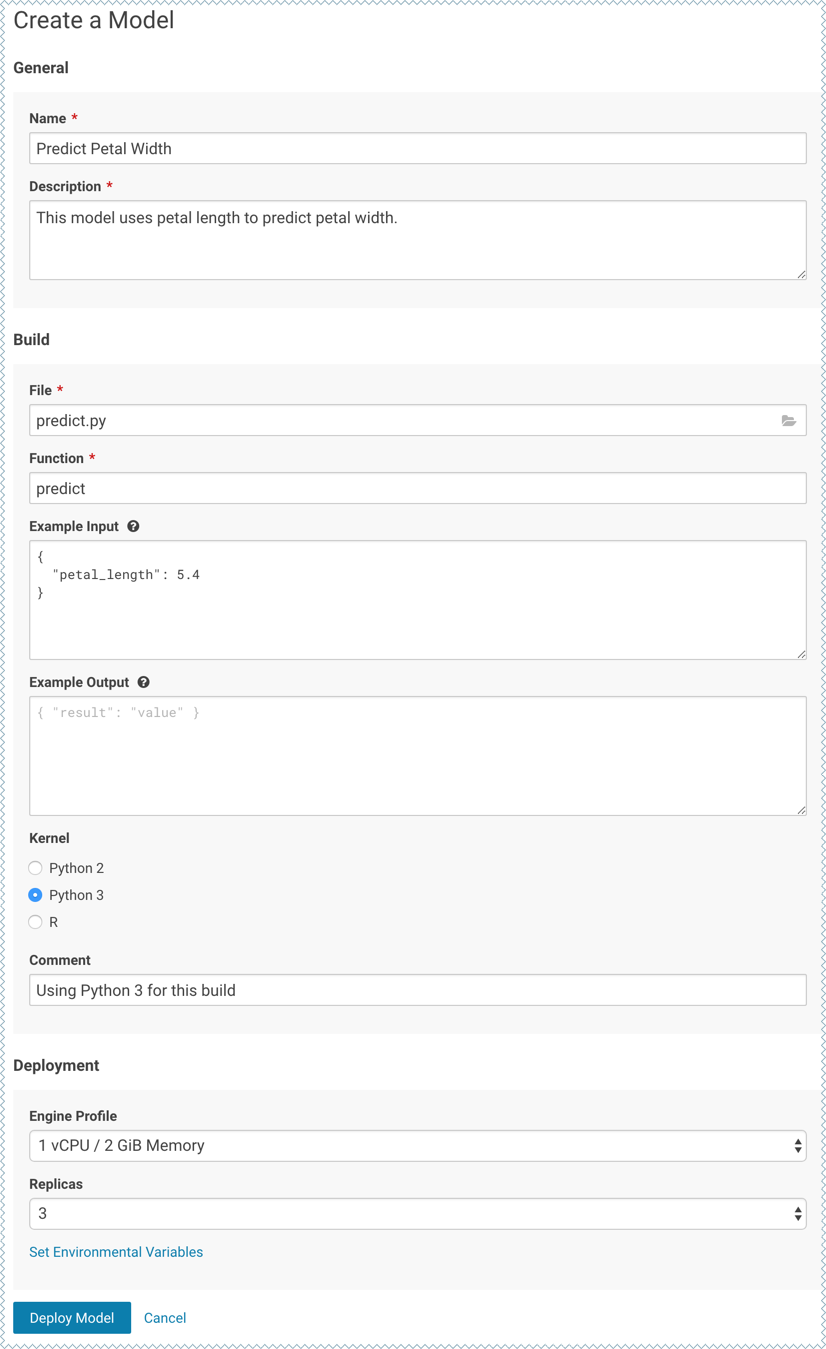
- Deploy the model.
-
Click on the model to go to its Overview page. As the model builds you can track progress on the Build page. Once deployed, you can see the replicas deployed on the Monitoring page.
-
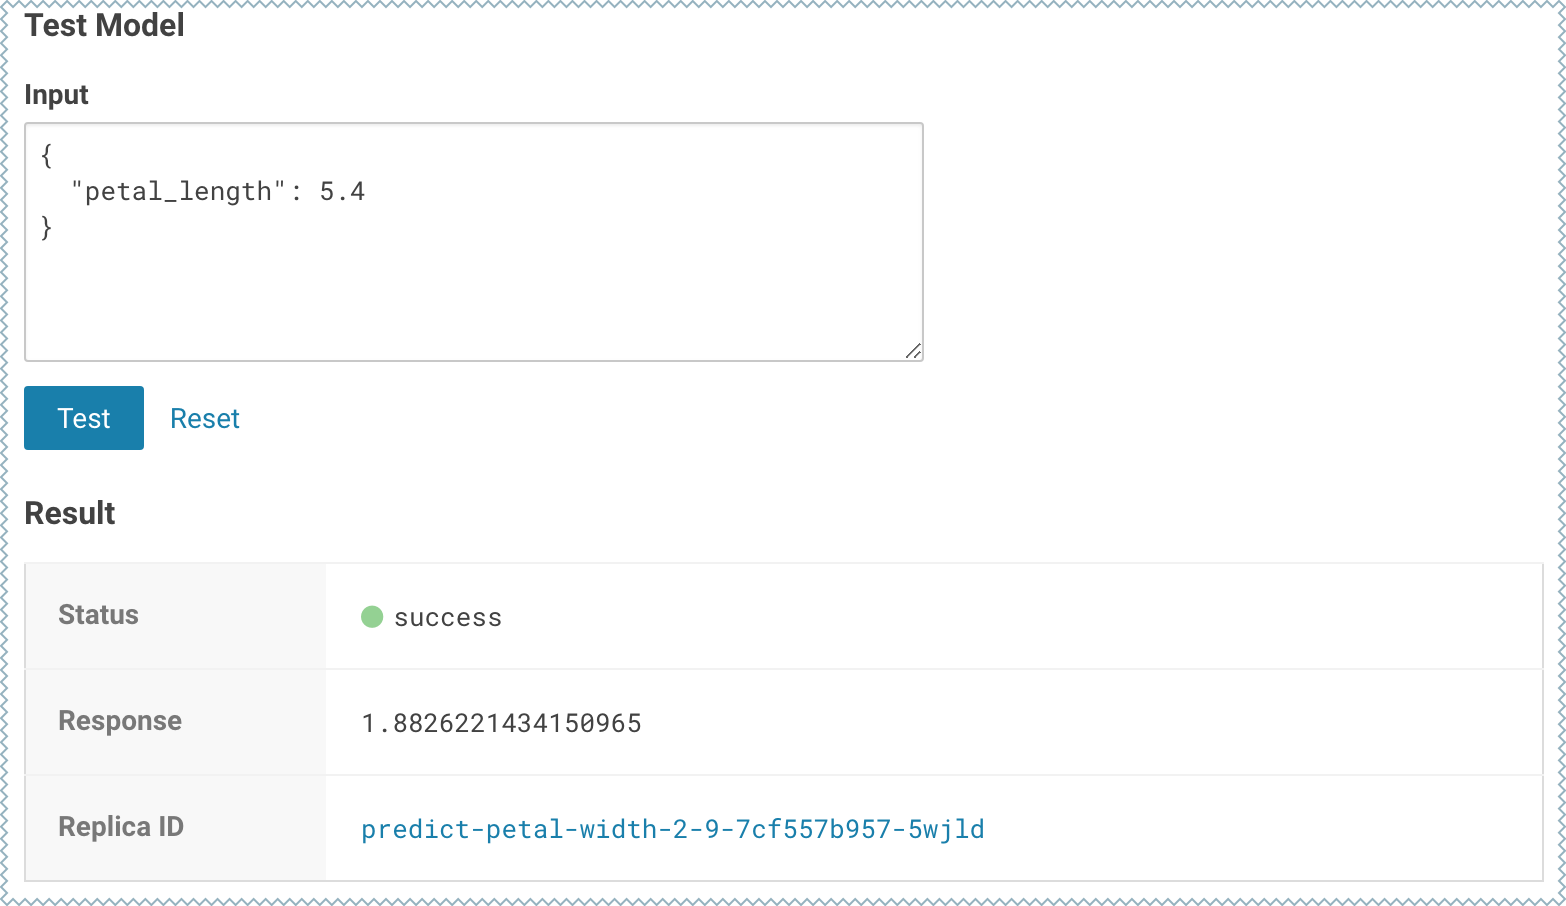
To test the model, use the Test Model widget on the model's Overview page.