Setting Up Navigator Audit Server
The steps below show you how to add the Navigator Audit Server role to an existing Cloudera Manager cluster.
The Navigator Audit Server role runs on the Cloudera Management Service. By default, the installation process installs both Navigator Audit Server and Navigator Metadata Server roles on the same Cloudera Management Service instance, but that may not be optimal, especially for very large clusters.
Adding the Navigator Audit Server Role
Cloudera Manager Required Role: Navigator Administrator (or Full Administrator)
The steps below assume that an external database is running and available to be used with the Navigator Audit Server role. Before adding this role, gather the configuration details about the external database instance so you can enter them when needed during this process.
- Log in to the Cloudera Manager Admin Console.
- From the menu, select .
- Click theInstances tab.
- Click Add Role Instances. The Customize Role Assignments page displays and lists the nodes available to support additional roles, assuming the cluster has available resources. Reassign and customize role instances as needed.
- Select the Navigator Audit Server role and assign it to appropriate host for your cluster.
- When finished, click Continue. The Database Setup page displays.
- Click Use Custom Database.
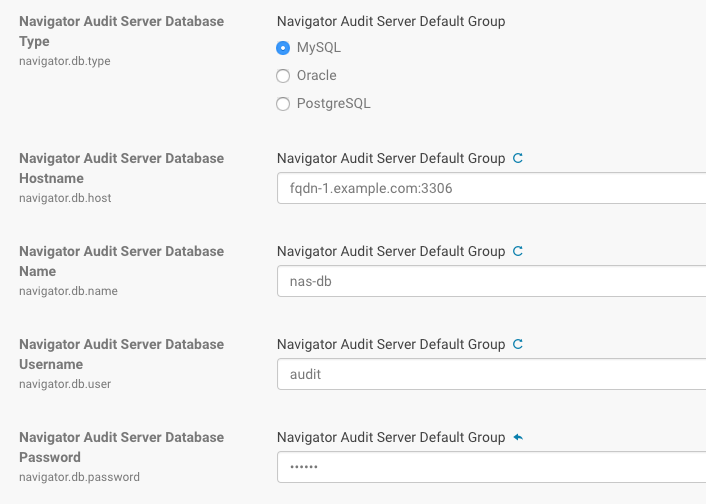
- In the Navigator Audit Server section, enter the details of your database instance:
- Database host name
- Database type
- Database name
- Username
- Password
- Click Test Connection to verify the communication between the cluster and the external database. If the test fails, check the database settings and try again. If you selected embedded database, a message displays regarding database creation.
- Click Continue.
- The Cluster Setup Review Changes page displays.
- Click Finish.
Starting, Stopping, and Restarting the Navigator Audit Server
- Log in to the Cloudera Manager Admin Console.
- From the menu, select .
- Click the Instances tab.
- Click the link for the Navigator Audit Server from the Role Type list. The Actions for Selected button activates and displays (1) for the selected role.
- From the Actions for Selected (1) menu, select the Action you want to perform on
this role instance:
- Start
- Stop
- Restart
- Enter Maintenance Mode
- Exit Maintenance Mode
- Delete
- Click Cancel to abandon the process, or click Action to execute the action.
Configuring the Navigator Audit Server Data Expiration Period
- Log in to the Cloudera Manager Admin Console.
- From the menu, select .
- Click the Configuration tab.
- Select Navigator Audit Server from the Scope filter.
- For the Navigator Audit Server Data Expiration Period, enter the number of days or hours or audit events that should be retained in the database before purging and select either day(s) or hour(s) from the drop-down to label the value accordingly.
- Restart the Navigator Audit Server role.
Setting the Navigator Audit Server Java Heap Size
Cloudera Manager Required Role: Navigator Administrator (or Full Administrator)
The Navigator Audit Server performance is typically bound by the performance of the database. With that in mind, consider increasing the Navigator Audit Server Java heap to as much as 4 GB; increasing heap beyond this point is unlikely to change the server performance. The default Java heap is set to 1.5 GiB.
- Log in to the Cloudera Manager Admin Console.
- Select .
- Click the Configuration tab.
- Select .
- For Filter Category, click Resource Management to display the Java Heap Size property.

- Use the drop-down selector to change the unit scale to B (Bytes), KiB, MiB, or GiB and set your preferred heap size.
- Click Save Changes.
The setting takes effect only after restarting the role. Restart the Navigator Metadata Server role now or make other configuration changes and restart after you are finished with all changes.
- Restart the role.
Configuring the Navigator Audit Server Log Directory
/var/log/cloudera-scm-navigator
- Log in to the Cloudera Manager Admin Console.
- From the menu, select .
- Click the Configuration tab.
- Select .
- Enter the path for the Navigator Audit Server Log Directory property.
- Restart the Navigator Audit Server role.
